Category Archives: Technique

Be the Family Photographer

Jessica and Emma. Olympus OMD1 Mark II, 12-100mm, f/5.6, 1/320, 400 ISO.

Over Thanksgiving weekend, my husband and I drove to Los Angeles for a few days to celebrate our one-year-old granddaughters’ birthday and to sit by the beach. At the birthday party, I brought my camera and Jessica, my stepdaughter was pleased. The person designated to bring something other than an iPhone forgot so I became the photographer. Not only was I pleased to take on the task, I was given the honor to be front and center in every activity! I captured candid photos, details of the cupcakes, and a few family portraits. It was a great opportunity to give them memories from the day.

Emma’s 1st Birthday! Olympus OMD1 Mark II, 12-100mm, f/5.6, 1/320, 400 ISO.

One-year-old Emma doesn’t sit still for long so I had to be quick! Using aperture priority at f/5.6 and my 12-100mm Olympus lens, I was mobile and could zoom in and out as needed. Once the party was over, I took a few minutes to download a few of my favorite photos from my camera to my phone. Then, I airdropped them to Jessica before we left the party! When I returned home from the trip, I took a closer look at all of the photos and sent them about 40 images through Dropbox. That was the best gift giving ever.

Emma and Grandpa. Olympus OMD1 Mark II, 12-100mm, f/5.6, 1/320, 400 ISO.

Family Photo. Olympus OMD1 Mark II, 12-100mm, f/5.6, 1/320, 400 ISO.

Cupcakes! Olympus OMD1 Mark II, 12-100mm, f/5.6, 1/320, 400 ISO.

Why Focus Stack

focus stack of fordite

Cropped version of final Focus Stack. Olympus OM-D E-M1 Mark II, 60mm + 26mm extension tubes, ISO 400, f/4, 1/50 sec.

Not all macro subjects are captured sharp in a single image, that makes a great reason to focus stack. In preparing for a camera club presentation, I decided to focus stack a new object. I chose a piece of fordite from Cadillac Ranch. If you aren’t familiar with fordite, just think – layers of paint. The first image (image A) is a close-up image of the piece of fordite that measures 2” x 1”. I used my 12-100mm lens and got as close as I could to capture the image. Then, with my macro lens and extension tubes, I captured image B. A small sliver of the subject is sharp, but not the whole piece of fordite. In order to have sharpness throughout the entire frame, I would need to focus stack.


At first, I tried a stack of 50 images. My Olympus camera has a focus bracketing mode so all I do is focus on the closest part of the fordite and program the camera for 50 images at a small increment of focus bracketing. The camera then captures 50 raw images changing the focus with small increments from front to back. After looking at image 50, the farthest part of the fordite was still blurry, so I needed more photos in my stack. I tried again, this time with 125 focus bracketing images. When I reviewed the photos, at image 118, I had the sharpness I needed. Next step was to focus stack the 118 images in Helicon Focus. Helicon is amazingly easy to use. After selecting the images in Lightroom, I export to Helicon and press the render button. Helicon does the rest. The last image is the final image of 118 focus stacked images.

A few tips on focus stacking:

  • Mark the start of a focus stack by capturing a single image of your hand, or other random subject otherwise if you capture several stacks, it will be hard to identify the start and stop of the stack otherwise.
  • Use a tripod and shutter release to minimize camera shake. Photoshop CC offers focus stacking but it is more complicated than Helicon Focus.

Water Drop Collisions

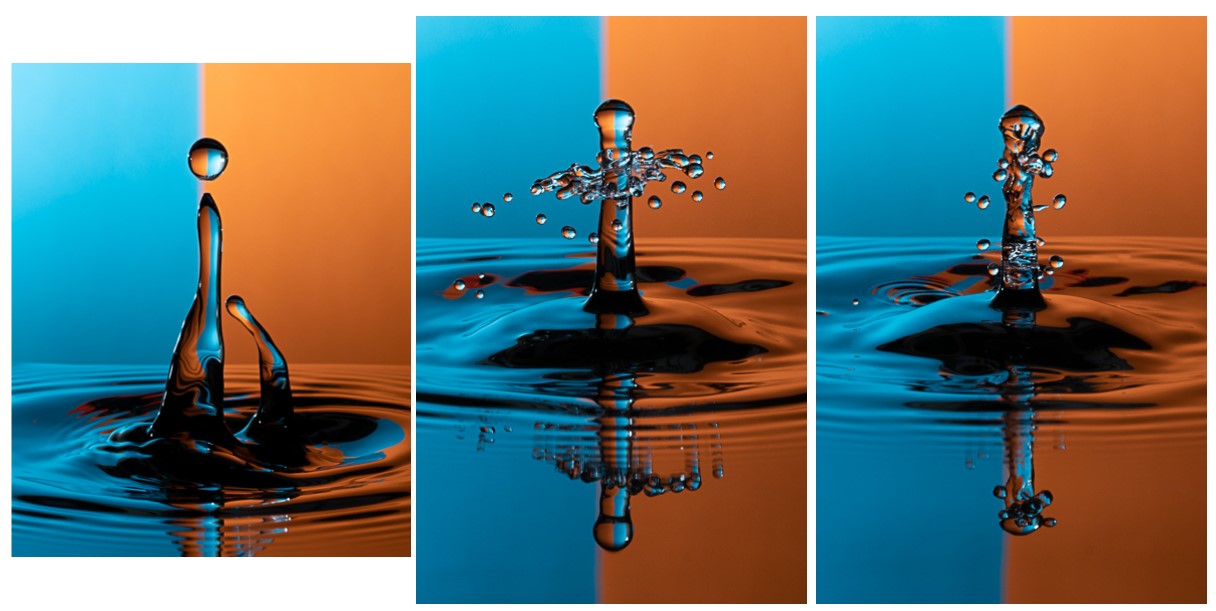
Creating water drop collisions keeps me entertained for hours. For the last year, I have been very busy completing and publishing the book, The Art of Macro Photography and my drip kit was neglected. So, I blocked a few hours and went to work in my make shift studio (spare bedroom). I kept the setup simple and started with single drops of water. I didn’t use any additives, just wanted to practice making drops and fine tune the timing of the flashes. After a successful single drop, I added the second drop.

Olympus OM-D E-M1 Mark II, 60mm, ISO 400, f/16, .5 sec.

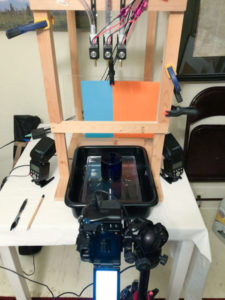
In all the time I have been shooting water drop collisions, I’ve never seen the second drop hit next to the original drop as you can see in the image to the right. After several minutes problem solving, I tapped the valve and all subsequent drops collided. Why does this entertain me for hours? I love the challenge of focusing sharp and the varied final images. With a small change on timing of the flashes, I can achieve several different looks. The last image is of my setup for this series.

Stay tuned for more images next week!


Michigan, Week 2

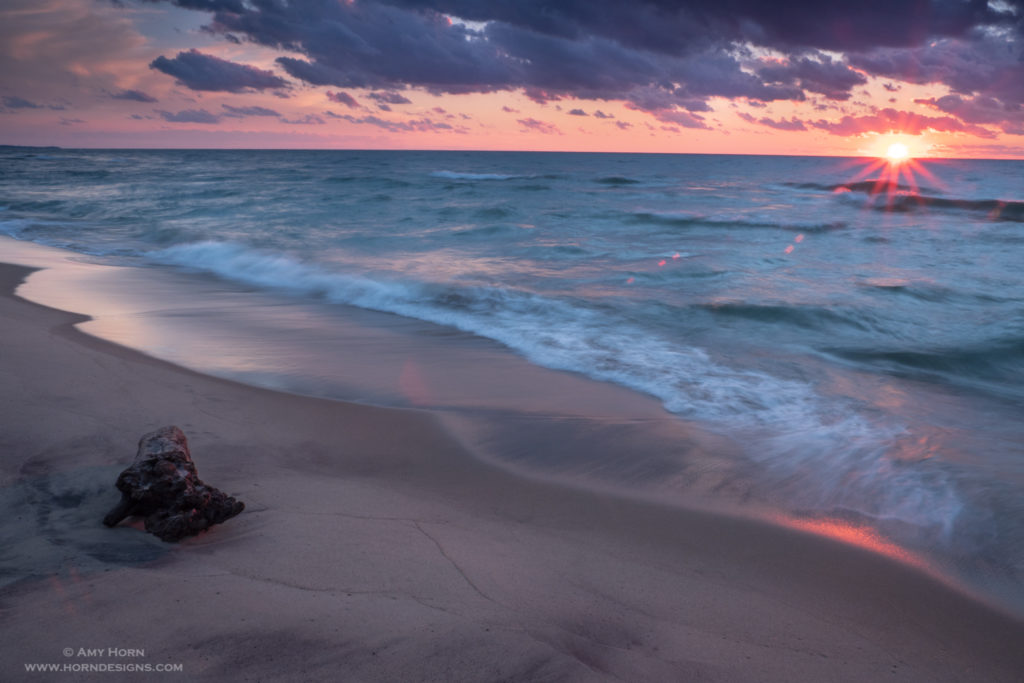
Manistee Beach

Manistee Beach. Olympus OM-D E-M1 Mark II, 12-100mm, ISO 200, f/22, .5 sec., Singh-Ray 3-stop GND filter.

I’ll be honest, my trip to Michigan didn’t go exactly as planned. At the last minute, Rod had to cancel and I was ill prepared for a 2-week solo trip. You would think after a solo 10-week trip on the Pacific Coast, 2-weeks would be a cinch. It wasn’t. The Pacific Coast trip was planned out months in advance with extensive research and plotting of locations. For this trip, I scrambled to research all I could the night before each destination with limited phone service or Wi-Fi. After my first week in Munising photographing waterfalls and attending a workshop, I drove east to Grand Marais and then spent five days at a cabin in Manistee, Michigan. I learned to enjoy time alone and struggled a bit too.
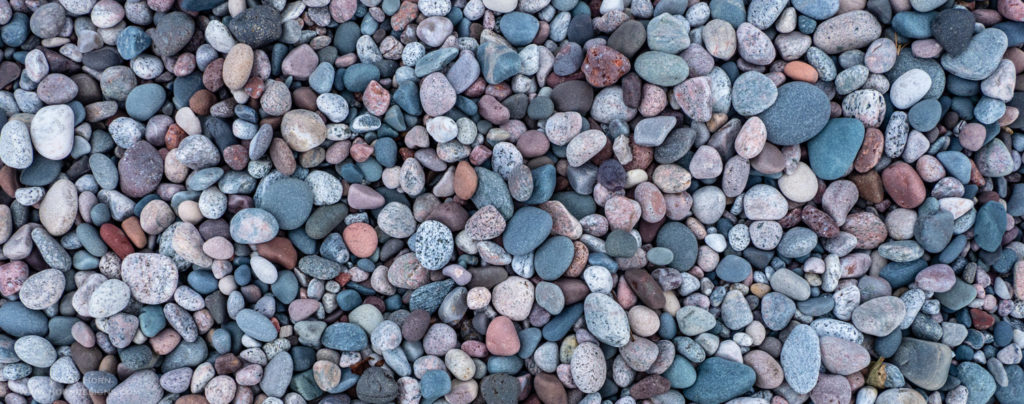
Agate Beach rocks.

Agate Beach. Olympus OM-D E-M1 Mark II, 12-100mm, ISO 400, f/8, 1/100 sec.

Grand Marais
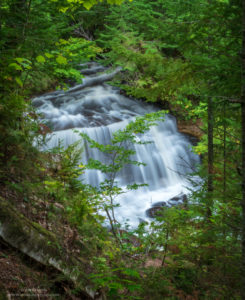
Sable Falls

Sable Falls. Olympus OM-D E-M1 Mark II, 12-100mm, ISO 400, f/22, 2.5 sec., Singh-Ray Bryan Hansel Waterfall Polarizer.

Grand Marais is a small community of about 400 residents and the only place to eat dinner after Labor Day was at the local Brewery. I dined on their famous whitefish dinner and chatted with a few locals. This Lake Superior town was cold, with a high in the 50’s and strong winds. I walked along Agate Beach looking for agates until my hands froze from the moist air and wind. With my pretty rocks, I returned to my B&B to research the next day’s photo destinations. In the morning, the B&B provided a family style breakfast with all the guests and I really enjoyed conversing with someone other than myself. I spent the morning photographing Sable Falls, Sable Dunes and hiking to a beach on Lake Superior before leaving the Grand Marais area for Manistee.

Manistee
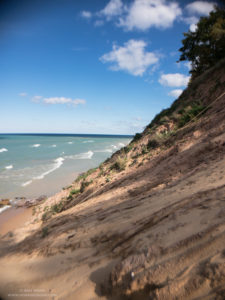
Sand dune

iPhone photo of the sand dunes 1/2 down.

Lucky for me, my cousin Andy has a cabin in Manistee overlooking Lake Michigan. The five days in this small community with beautiful beach views and a historic downtown was peaceful. The cabin is a 15-minute drive south of Manistee in a small neighborhood of mostly summer residences and is a bit secluded, so it took me a few days to feel comfortable returning after dark. The highlight of his cabin is the view of Lake Michigan. The lake is a 100-foot drop from the cabin down a steep sand dune. I attempted many times to get to his beach, but only made it ½ way. I feared I wouldn’t be able to make it back up and was afraid of being stuck down there. The view was great from halfway down too!

Vogue Theater

Manistee’s Vogue Theater. Olympus OM-D E-M1 Mark II, 12-100mm, ISO 200, f/14, 3.2 sec.

One evening the clouds broke so I drove to the 5th Avenue Beach to capture sunset. I barely made it. I ran along the beach with my tripod looking for foreground subjects. After sunset, I sat in the parking lot to watch the bi-monthly Mirrorless Minutes Podcast on YouTube. The host, Jamie MacDonald is entertaining and after spending a few days on his Meetup in Munising, MI, I enjoyed the image share of our workshop. After dark, I went downtown to photograph Manistee’s historic buildings including the Vogue Theatre. It was quiet and dark and I took joy in capturing the brilliant lights of the theatre.

Ludington
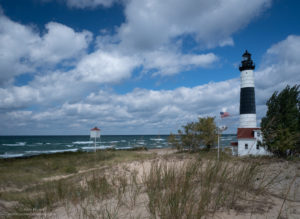
Ludington Lighthouse

Big Sable Lighthouse. Olympus OM-D E-M1 Mark II, 12-100mm, ISO 400, f7.1, 1/800 sec.

Ludington is a town south of Manistee with a large state park and Big Sable Point Lighthouse.  Getting to the lighthouse required a 4-mile round trip hike that was relatively flat until I climbed a sand dune to capture a better angle of the lighthouse. Before I returned to my car the winds picked up. So, I made my next stop Stearns Park in Ludington to photograph choppy waves hitting the pier and river light.
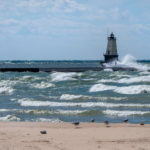
Crashing waves

Crashing Waves. Olympus OM-D E-M1 Mark II, 40-150mm, ISO 400, f8, 1/3200 sec.

It was easy to keep myself entertained during the day, but at night the woods around the cabin were dark and I felt very isolated. I spent more time than normal on the computer processing photos and reading a book I purchased in town. At the end of the 5 days, I headed south to South Haven to visit family.

South Haven
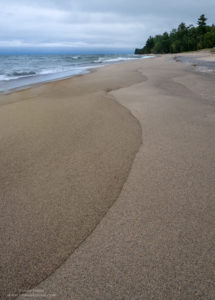
Lake Superior

Lake Superior. Olympus OM-D E-M1 Mark II, 12-100mm, ISO 400, f/10, 1/500 sec.

Several of my family members live in South Haven. Visiting this town where my parents went to high school has always been a special place. Now overrun by the tourism industry, it doesn’t hold the same memories for my parents, but I enjoy it nonetheless. Normally, I visit Sherman Dairy and Crane’s Orchard but I spent more time relaxing with my Aunt Lee instead. I did have the opportunity to visit Fenn Valley Vineyards with my cousins though! The only photos I captured in South Haven were for my aunt. She owns a rental cottage and needed a few new images. It was fun watching her straighten every crease in the curtains and fluff every pillow to capture the perfect image.
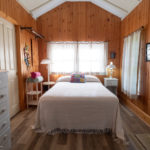
Olympus OM-D E-M1 Mark II, 12-100mm, ISO 800, f/8, 1/20 sec.

Before I left, we placed the new images in her brochure too. If you find yourself travelling to South Haven, check out The Retreat at Belvedere Beach!  https://www.retreatatbelvederebeach.com/

For the Photogs!
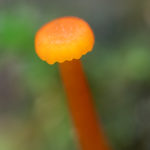
mushroom

Olympus OM-D E-M1 Mark II, 60mm, 16mm extension tubes, ISO 200, f/2.8, 1.6 sec.

Mushrooms are everywhere in the Upper Peninsula. I see some varieties in Flagstaff, but we don’t have the same moisture as Michigan, so there are far more mushrooms and fungi everywhere. While at Wagner Falls, I spotted this mushroom. I enjoyed photographing it so much, I went back on day two to perfect my composition. Here is an image of the shooting scenario and the finished image.
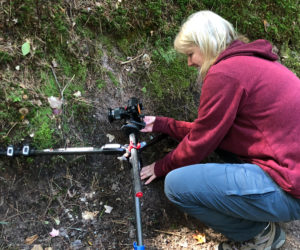
Me capturing the orange mushroom. PC: John Thomas

Waterfalls of Michigan

Munising Falls. Olympus OM-D E-M1 Mark II, 12-100mm, ISO 200, f/14, 6 sec., Singh Ray Bryan Hansell Waterfall Filter

Waterfalls of Michigan

Munising Falls. Olympus OM-D E-M1 Mark II, 12-100mm, ISO 200, f/14, 5 sec., Singh Ray Bryan Hansell Waterfall Filter

Three days into my Michigan trip, I received a FedEx package from a good friend with a Waterfalls of Michigan book. A guide to more than 130 waterfalls in the Great Lake State. Of these 130 waterfalls in the Upper Peninsula of Michigan there is only one in the lower peninsula, how will I photograph them all? Well, I am sure I won’t, but I will enjoy the ones I get to. For my two weeks in Michigan, I am spending a week in the Upper Peninsula, this is new territory for me and I love it. I rented a small AirBnB apartment in Munising and have six waterfalls within five miles! Originally, this trip was designed to be with my husband but last-minute changes didn’t allow it. So, I am off solo again travelling through the state where I was born in search of water images. I selected two waterfalls a day to

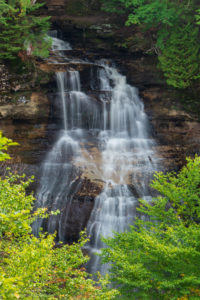
Chapel Falls. Olympus OM-D E-M1 Mark II, 12-100mm, ISO 200, f/11, .8 sec., Singh-Ray Waterfall Filter

photograph.

At Munising Falls yesterday, a sweet retired man said, “You look like a professional, can you help me? When I view my photos, how do I delete one?” Not that he really needs a professional photographer to answer that question, but I helped him with that and a few more questions on his digital camera. Then, I hiked 2.5 miles round trip to Chapel Falls. I think I stopped every 50 yards to photograph all forms of fungi. My macro lens got a great workout. Even other hikers stopped me and said, “I saw you photographing fungi on the way to the falls. Did you see these yellow mushrooms?” Michiganders are such nice people! He directed me to the yellow mushrooms and I spent 30-minutes capturing images with my tripod up as low to the ground as possible.

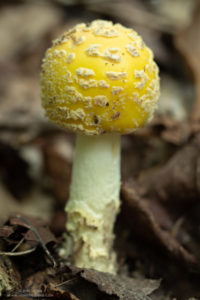
Yellow Mushroom. Olympus OM-D E-M1 Mark II, 60mm, ISO 200, f/2.8, 1/3 sec.

Today I drove to Wagner Falls, two miles from my apartment. There was one car when I arrived and they left soon thereafter. I scooted under the deck to get a few images from the rivers edge as well. Although it was raining, it is more on the misty spectrum than pouring; much preferred for photography. Tomorrow, I start a meetup through Olympus Mirrorless Adventures and we will photograph six more waterfalls in the area. I can’t wait!

iPhone capture of my setup.

For the Photogs:

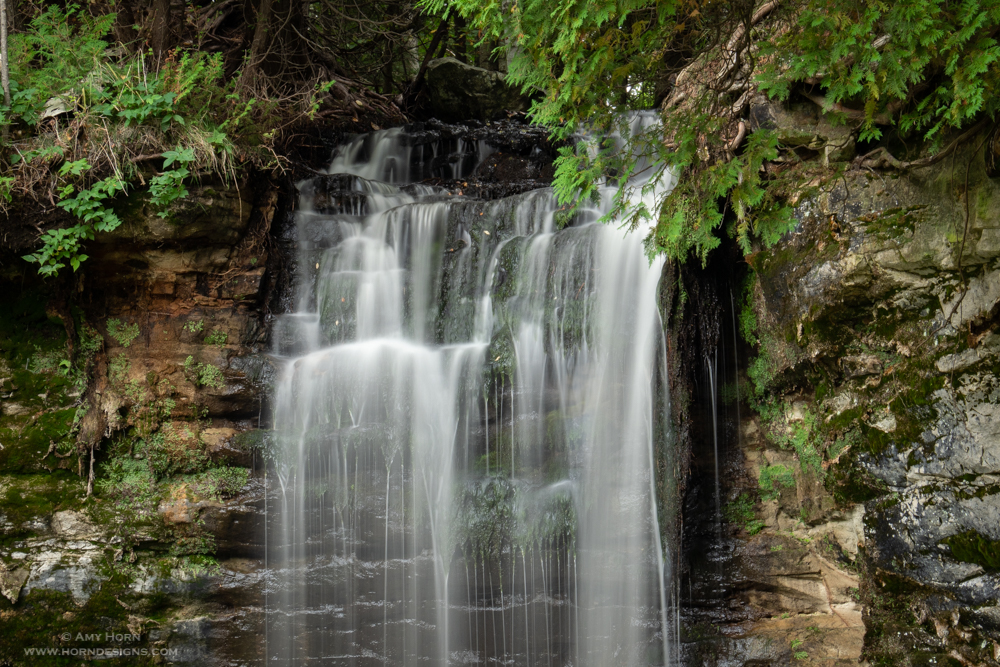
So, what does it take to capture a “milky water” waterfall photo? Here are a few pointers:

  1. Do your research. Find out the direction the waterfall faces. If it is in direct sunlight, go early or late in the day so the sun won’t be on the waterfall. In Northern Michigan, the sky is graced with clouds frequently, so sun is not an issue.

    Chapel Falls. Olympus OM-D E-M1 Mark II, 12-100mm, ISO 200, f/6.3, 1 sec., Singh-Ray Waterfall Filter.

  2. Gear. In addition to your camera and len(s), don’t forget a tripod. The milky water is captured by using slow shutter speeds and a sturdy tripod is a must. Last, bring a circular polarizing filter and neutral density filter or get a Singh-Ray Bryan Hansel Waterfall Polarizer (combines polarization with neutral density in one filter).
  3. Try all angles. Some waterfalls have viewing decks, others are best viewed at the river’s edge. Regardless, look at all the angles. When I went to Munising Falls, there was the main accessible path then two paths that branched off. The path to the left stepped up 30 stairs and only 1/3 of the viewers when up to see that angle. The path to the right stepped up 100 stairs and had the best view of all! I had this view to myself for a long time, most visitors did not climb these stairs. Be careful if you are on a viewing deck any foot traffic on the deck will result in vibrations that move your camera.
  4. Take your time. When other visitors are at waterfalls also, I make a point of setting up my camera, tripod and filters in the background. When the crowd thins down, I step forward, reframe my shot and capture several images at different focal lengths and different orientations (horizontal & vertical). Then I step back again and review. I make sure all the other visitors have a chance at a good image too. I often take a moment and think to myself on what else I can do to make a better image. Then do that something different. I just keep shooting. That is the advantage of travelling alone.

Spokane

Spokane Falls

Spokane Falls. Olympus OM-D E-M1 Mark II, 12-100mm, ISO 200, f/18, .4 sec., Singh-Ray Waterfall Filter.

Clock tower at Riverfront Park

Clock tower at Riverfront Park. Olympus OM-D E-M1 Mark II, 12-100mm, ISO 200, f/16, 25 sec.

Spokane is a city I visit often, after all, my sister lives here. I arrived a few days early from my big trip in need of people to talk to, a place to call home and to cheer her on in her 1.2 mile open water swim at Coeur d’Alene Lake. The first three days in Spokane were relaxing as I caught up on photos, played ukulele with my nephew (him on guitar) and became addicted to Handmaid’s Tale on Hulu. I guess I should binge all the seasons before I go home since I don’t have Hulu?

Back to Work
Spokane Falls

Spokane Falls. Olympus OM-D E-M1 Mark II, 40-150mm, ISO 200, f/11, .4 sec., Singh-Ray Waterfall Polarizer.

When the weekday rolled around and everyone went to work, so did I. I spent hours photographing this beautiful river city. I went hiking in Coeur d’Alene with a friend from my days as a high school teacher but the smoke from summer fires around the state made landscape photography difficult. Most of my photographs so far are from the downtown area including Riverfront Park, Spokane Falls and downtown neon lights.

When my sister went downtown with me to photograph neon, I was in the middle of the street to capture an image of the street lights. She told me the road was closed to traffic. Well, when the bus came around the corner at me I realized she was wrong! I got the shot then cleared out of his path quickly.

Spokane's Thomas Hammer Coffee Roasters sign

Thomas Hammer Coffee Roasters neon sign. Olympus OM-D E-M1 Mark II, 12-100mm, ISO 200, f/13, 2 sec.
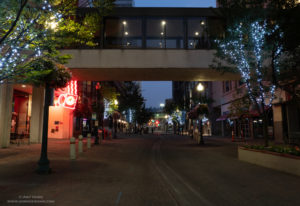
Even though I have been to Spokane before, I haven’t always photographed it. So, I went to Google like I do in most cities. My sister drove me around to areas she thought would be strong subjects and then I added a few from my Internet searching. These scouting times are easily done in midday sun. I have one last morning to capture images and I can’t wait to go to High Bridge Park and Manito Gardens.
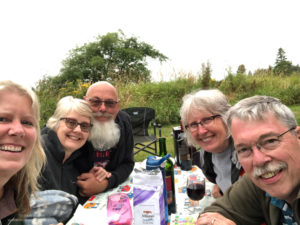
Downtown lights

Downtown Spokane Lights. Olympus OM-D E-M1 Mark II, 12-100mm, ISO 200, f/9, 2 sec.

For the Photogs!
Spokane Falls

Upper Spokane Falls. Olympus OM-D E-M1 Mark II, 40-150mm, ISO 200, f/11, .6 sec., Singh-Ray Waterfall Polarizer.

When I am out taking photos, I love to look for textures and colors. That is what prompted this photo. Part of Spokane’s Upper Falls this riffle stood out to me from the opposing textures and color. I was on a bridge looking down at the water and used my 40-150mm lens. If you take photos off a bridge, watch for other pedestrians or runners. Every time one would cross the bridge, the bridge would shake. I waited until they cleared the bridge and stood very still myself when I took the shot. Like all my water images recently, I also used the Singh-Ray Waterfall Polarizer, Olympus OM-D E-M1 Mark II, 40-150mm, ISO 200, f/11, .6 sec.

Back to the Beach

Stacks in the fog

View from Indian Beach, Ecola State Park. Olympus OM-D EM-1 Mark II, 40-150 mm, ISO 200, f/16 @ 1/20 sec.

photo of Amy

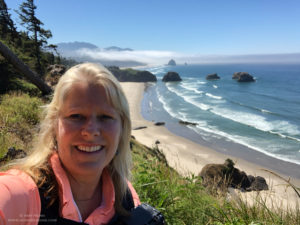
On my hike to Crescent Beach.

As soon as I arrived in the Cannon Beach area, I went to Ecola State Park. It was a gorgeous day, wind was blowing and the sun was just breaking through the marine layer. Ecola offers many hiking trails, so I chose the one to Crescent Beach. This 4-mile round trip hike took me through an old-growth forest and to a beautiful beach only accessible by hiking. I returned to this park several times for early morning mist, paddle boarders and low tide. I also visited Hug Point Wayside. Hug Pont was quiet and calm even during the weekday. First light guaranteed minimal people on the beach so that’s when I went. The beach is full of many monoliths similar to the image above from Indian Beach. At low tide I was entranced with lines in the sand instead of the sea stars.

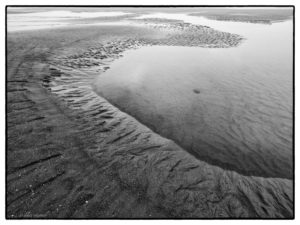
Lines in sand

Lines in Sand. Olympus OM-D EM-1 Mark II, 7-14 mm, ISO 200, f14 @ 1/25 sec., processed in Nik Silver Efex Pro.

Walking along the beach, I spotted a sand dollar. This was quite a find because there have been so many broken ones along the beaches for the past 4 weeks, it was fun to find a complete one. The solitude of the beach and the time to relax has been unforgettable.

Not uncommon for this time of year is a lot of fog and mist. Midday the blue skies appear, but evenings and mornings are gray. This can be a little discouraging, but I knew this coming into the trip so I am making the most of each location. A real problem though: I wish I could overcome craving Mexican food. We eat a lot of Mexican food at home and I’m not sure restaurants in the Pacific Northwest will prepare the best chili relleno.

Campground

Between Seaside and Cannon Beach is Circle Creek RV park, I checked in to spot #10 and parked. I don’t want to brag, but this was my best parking job yet and the trailer was straight too. As I got out of the car I saw #9 on the post. I parked in the wrong spot! Will I ever get this right? So, I moved to my spot and within minutes my neighbors arrived in spot #9. I met Spud in this campground too. Spud is a cat with a harness on a leash. The owners trained him starting at 4 weeks old to wear a harness and he sits by the back door waiting for a harness to go out. He loved being outside with the family at the campground. It sure looked funny though.

Zoo
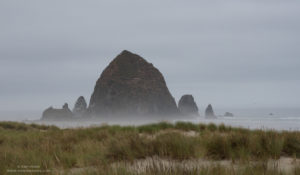
Haystack Rock

Haystack Rock. Olympus OM-D EM-1 Mark II, 12-100 mm, ISO 400, f/10 @ 1/400 sec.

Did I say zoo? Well, that is synonymous to Seaside. I couldn’t be in the area and not check out the town, so I went on a week day (thankfully), parked, walked to the beach and then left. Seaside is otherwise known as a tourist trap. The downtown area is full of arcades, ice cream shops and the like. Not my kind of place. I checked out Cannon Beach, a cute little town that was nice to walk through early morning before the Corgi Festival started. There were easily 100 Corgi’s on the beach! The crowds, people and Corgi’s don’t inspire me but I did capture my obligatory Haystack Rock photo and then returned to camp to join my neighbors for dinner.

The two “rigs” next to me were travelling together from Seattle. John & Lu, Joe & Cindy welcomed me and we hit it off instantly. Lu and John know how to cook corn on the cob! I spent two evenings eating dinner with them at the campground and it felt like family. Reminded me how much I miss my family. We had a great time chatting, drinking wine and sharing our adventures. They are finishing a 19 day trip and I have 2 weeks remaining on mine but after talking to them about the remainder of my trip, I decided to visit them outside Seattle and then see Snoqualmie Falls. (And possibly another glass of wine…)

Tomorrow I head up to Fort Stevens for my last days in Oregon.

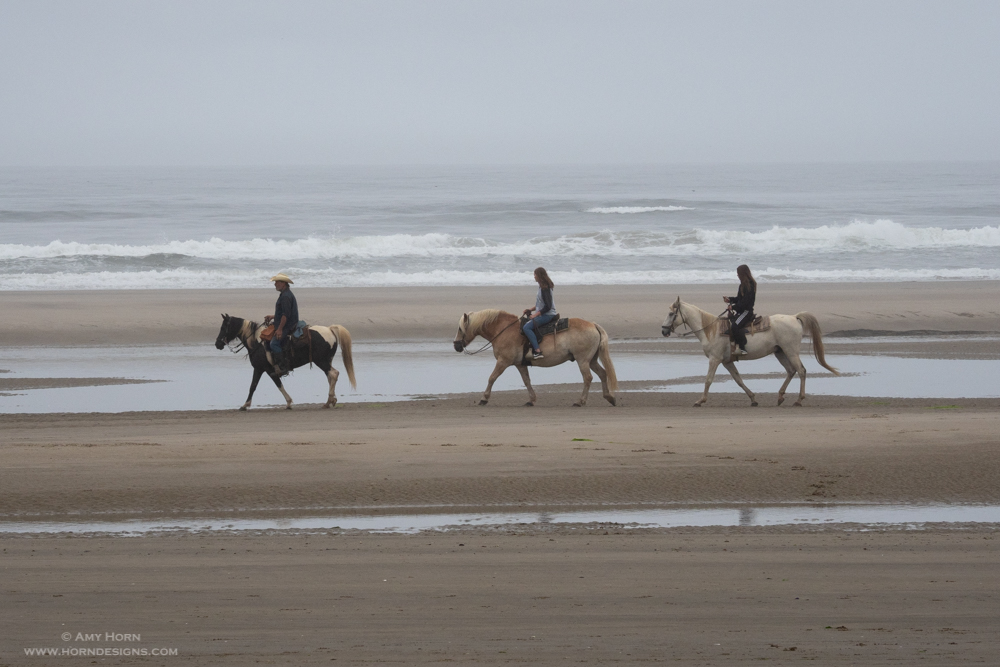
Riders on horseback

Horseback riders on Cannon Beach. Olympus OM-D EM-1 Mark II, 12-100 mm, ISO 400, f/10 @ 1/640 sec.

Locked In

I almost forgot, leaving Barton Park in Portland several days ago I got stuck in the shower. These showers were one-person rooms with a deadbolt on the inside. When I finished showering, I flipped the lever to unlock and the door would not open. It wasn’t the door handle, it was the deadbolt. I tried again and again. Then I started to get nervous. This was one time I didn’t have my phone – after all, why would I need my phone in the shower? After several more attempts, I started beating the door and yelling. A person heard me, but it sounded like they were in another shower. I went back to the lock and slowly rotated the lever to lock it and after an ¼” turn, the door released. I yelled to the person in the other shower that I was free and reminded myself to always carry my phone. The next morning, I heard another person trying to get out of that same shower. I talked them through rotating the lock correctly and she reported the issue to the park hosts.

For the Photogs!
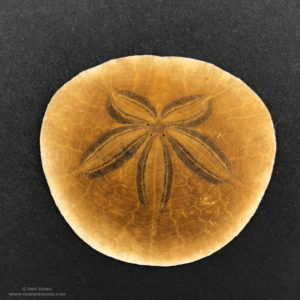
sand dollar

Sand Dollar from Indian Beach

When I returned to camp with my sand dollar, I placed it on mat board to capture the photo. I brought a 16×20 piece of two-sided (black/white) mat board for this occasion. Since it was cloudy, I set the board on my picnic table and started capturing images.

Columbia River Gorge

Tamanawas Falls

Tamanawas Falls. Olympus OM-D EM-1 Mark II, 12-100 mm, ISO 200, f/9 @ .6 sec., Bryan Hansel ND/CPL filter.

Columbia River Gorge
Teardrop blocks

Teardrop blocks

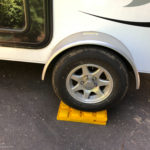
It doesn’t seem possible, but I am at the halfway point of my solo journey. Rod flew into Portland, so I drove inland and we spent four days in the Columbia River Gorge. Hauling the teardrop through the Portland Airport worked better than I expected and when we made it to the campground, I was anxious to show Rod how well I setup camp. Of course, this campsite was VERY unlevel so I enlisted his help to use the risers that were unused so far. Rod showed me the trailer had feet stabilizers on the back end too. Hmm… I did fine without them so far, I will probably continue without them.

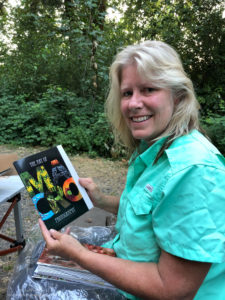
Art of Macro Photography book

Amy and the book sample

With camp settled we drove 30 miles to Hood River to meet a friend and fellow photog, Sharon, who graciously accepted delivery of the final bound pages of our Macro Book. The printer overnighted (from China) two sample books for us to confirm the page order. Mail is not easy to receive when on the road, so Sharon agreed to sign for it and we met her in town to get the box. Book looks great and is in binding now ready to put on a boat August 7th. Our mid-September distribution is still on target. If you want to reserve your autographed copy for the first shipment, order it here: https://www.horndesigns.com/Books

Waterfall Alley…or Not
Tamanawas Falls trail

Cold Creek. Olympus OM-D EM-1 Mark II, 12-100 mm, ISO 200, f11 @ 4 sec., CPL filter.

What should have been waterfall alley, wasn’t.  Don’t get me wrong, we found many waterfalls, but since the Eagle fire last summer, most of the gorge is off limits. Including 2 feet outside our campground. We had to pass security every time we drove to our campsite. I know it was for safety, but this communication was lacking on the website or I would have booked a different campsite.

Our first morning in the Gorge, we drove an hour to Tamanawas Falls near Mt Hood, Oregon to capture images before the sun beat down on the creek and waterfall. The two-mile hike was beautiful and we stopped several times on our way to the falls. At the second stop along the creek, I realized I forgot something.

Rod and Amy by waterfall

Rod and Amy in front of Latourell Falls

Luckily, Rod was up for a run and he ran back to the car to get my new filter adding an extra 1.5-2 miles to his hike. In the past few weeks, I discovered the Bryan Hansel Waterfall Polarizer filter by Singh-Ray Filters. It shipped to the house and Rod brought it but I forgot to put it in my camera bag that morning. This filter combines a polarizer and a solid ND filter giving 3 to 5 stops of neutral density with a polarizing benefit too. I love it. We stopped many times on the two-mile trail capturing images along the way. When we arrived at the falls, there were only 3 other people there so capturing images was pleasant. I enjoy having a nimble non-photographer with me (Rod) because he helps me get to places I might not carry my gear by myself. When we headed out, the crowds came. It really pays off to wake up early for the best light and avoid people in your landscape image. We had a lovely dinner in White Salmon at Sharon’s house with wood fired pizza and wine. It was great swapping stories with her and Steve and enjoyed their beautiful view.

Crown Point State Scenic Corridor in the Gorge was open to vehicles, so we spent a day checking out those waterfalls and short hikes. I didn’t worry about getting images, just enjoyed my time with Rod. After all our hiking, we had lunch at White House Gorge Winery where Rod sampled ciders and I sampled wines. Very relaxing, but hot with temperatures in the mid 90’s.

Starvation Creek falls

Starvation Creek Falls. Olympus OM-D EM-1 Mark II, 12-100 mm, ISO 200, f/10 @ 1 sec., Bryan Hansel ND/CPL filter.

Umbrella Creek Falls

Umbrella Falls. Olympus OM-D EM-1 Mark II, 12-100 mm, ISO 400, f14 @ .4 sec., Bryan Hansel Filter

We spent another day hiking around Umbrella falls and Starvation Creek Falls. We thought we were hiking 2 miles to Umbrella Falls, but somehow, it was only .25 miles which gave us plenty of time to view both. Umbrella falls were very exposed to sunlight, so I concentrated on small trickles of water instead of the big falls. Starvation Creek was a great location: large falls, small falls and most of it in the shade. Of course, I am still waiting to see if the poison oak I brushed against breaks out on my skin! I could spend more time in the gorge capturing images of waterfalls, but I would prefer to go in the spring when it isn’t so hot.

Margaritas & Ukuleles
Rod with his ukelele

Rod on our last night

Rod brought his ukulele so each evening, we had a ukulele jam session! During the past weeks, I would practice during the day after my camping neighbors checked out and less people were around. But with Rod, it was more fun and I wasn’t so worried about what the neighbors thought (probably because he plays much better than me!) We ate Tillamook cheese, local smoked salmon and drank 24oz margarita cans! It doesn’t get much better than that. Although I am enjoying my solo trip, it is much more fun sharing it with others. Before he flew out, we spent the day in Portland at the Japanese Gardens and Powell’s Bookstore. Now, back to the ocean!

For the Photogs!

When photographing waterfalls, keep the lens cap handy and a dry lens cloth. In between shots, wipe the lens and put the cover back on to minimize spray.

If you are curious about the difference in what filters can do for a waterfall image, here are four examples. I kept the aperture and ISO the same in each photo, notice the difference in shutter speeds and the reflection on the leaves.

Gorge Filter Samples


Sweet

Olympus OM-D EM-1 Mark II, 12-100 mm, ISO 200, f/22.0 @ 4 sec., with circular polarizing filter.

Olympus OM-D EM-1 Mark II, 12-100 mm, ISO 200, f/13 @ 2.5 sec., with circular polarizing filter.

The whole reason I chose the next campground because it was located near Florence, OR. Last summer, Rod and I hiked Sweet Creek Falls and I wanted to go back. I did have my camera and tripod with me last summer, but we arrived after the sun was hitting the creek, so the images were not what I wanted. So, I planned a trip back. And not just one, but two. I went both mornings while camped outside of Florence. It was a 45-minute drive to the creek and I was the first one there, I had the place to myself for at least an hour. Once the sun hit the trees above, the reflections hit the water below and it was magic. This hike has many different waterfalls, some larger and some smaller. All exquisite!

Jessie M Honeyman State Park campground was much busier than any other I stayed in. Sand dunes are attached to the campground and many families were there with the four-wheeled sand vehicles making it much busier and louder. I was happy to spend more time at Sweek Creek Falls!

Olympus OM-D EM-1 Mark II, 12-100 mm, ISO 400, f/8 @ 1/5 sec.

Olympus OM-D EM-1 Mark II, 12-100 mm, ISO 400, f/18 @ 2.5 sec., with circular polarizing filter.

Olympus OM-D EM-1 Mark II, 12-100 mm, ISO 400, f/16 @ 4 sec., with circular polarizing filter.

Florence is a nice little town along the river and I continued my taste testing of clam chowder soup here as well. This time I went to Mo’s – the Oregon favorite. It was good, better than any so far.

Photo Scouting

Scouting for a Photo Trip?

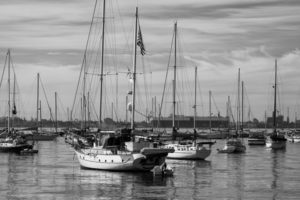
San Diego Harbor

Recently I spent several days in San Diego scouting for a future Women’s Retreat photo workshop. As many of you are making summer plans, I thought you might like to know how I scout and prepare for a trip.

First is research. Using websites like Facebook, Instagram, Google images and Pinterest is a great start. I often search general locations like, La Jolla to see imagery from the area. By clicking on a specific image and reading the metadata, I learn times of day (sunrise or sunset) and exact locations (Hospital Reef). Now I can search on even more specific locations. Local resources are even better than searching online. If you know someone or reach out to a Facebook group in the area it’s great to get the local perspective. When I was in San Diego, I contacted a few of my students from the area. They told me of a few areas I had not discovered. Throughout the day, I talk to many locals and ask them about their favorite spots to view a sunrise or sunset. If they have lived there a long time, their information is valuable.

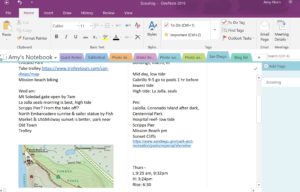
One Note screen shot

One Note allows me to gather all my scouting information.

Once I gather the information, I need to put it all in one spot, so I use Microsoft Note. Microsoft Note is a great application on a computer and mobile device to compile this information. Tabs organize your notes so links, images, and text can be added to each location tab. It saves instantly and is always at my fingertips. A few other apps that are crucial to my scouting include the following.

Scouting Applications

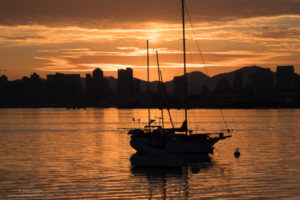
Shelter Island Sunrise from scouting

Shelter Island Sunrise

Photo Pills is a mobile app with endless options. I use this app mostly for planning trips and viewing the direction of sun at different times of year. Sunrise, sunset, moonrise, and moonset times are listed and with the augmented reality mode, you can raise the phone in the sky and see the path the sun or moon will take. Locations are saved for planning purposes for a later date. For example, in the middle of the day, I visited Shelter Island. I loved the view across the bay with boats in the foreground. I pulled up PhotoPills and identified the direction the sun would rise the next morning. When the next morning came, I was ready for the sunrise photo.

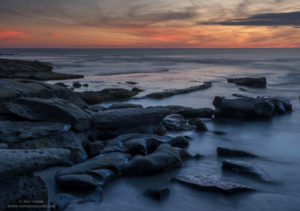
Scouting at Hospital Reef

Hospital Reef, La Jolla, CA

Tides mobile application is great for knowing high and low tides. This app is a necessity if traveling near the ocean. The application identifies the time of day when tide is highest and lowest and to what significance. For instance, a negative tide is best when viewing tide pools, so in this app you can pick the day and time for the best negative tide. The app includes temperatures, cloud cover and wind speeds and direction. I used this app to time a low tide at Hospital Reef in La Jolla.

So, next time you are heading on a trip for photography, spend a little time scouting. Your images will thank you!