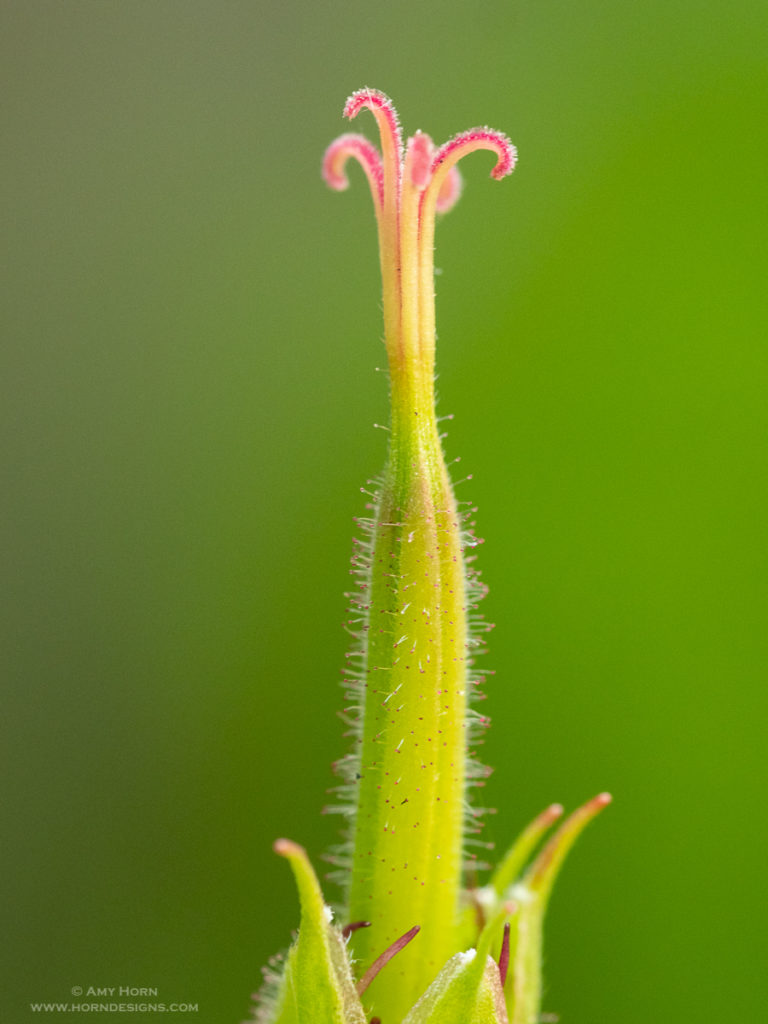
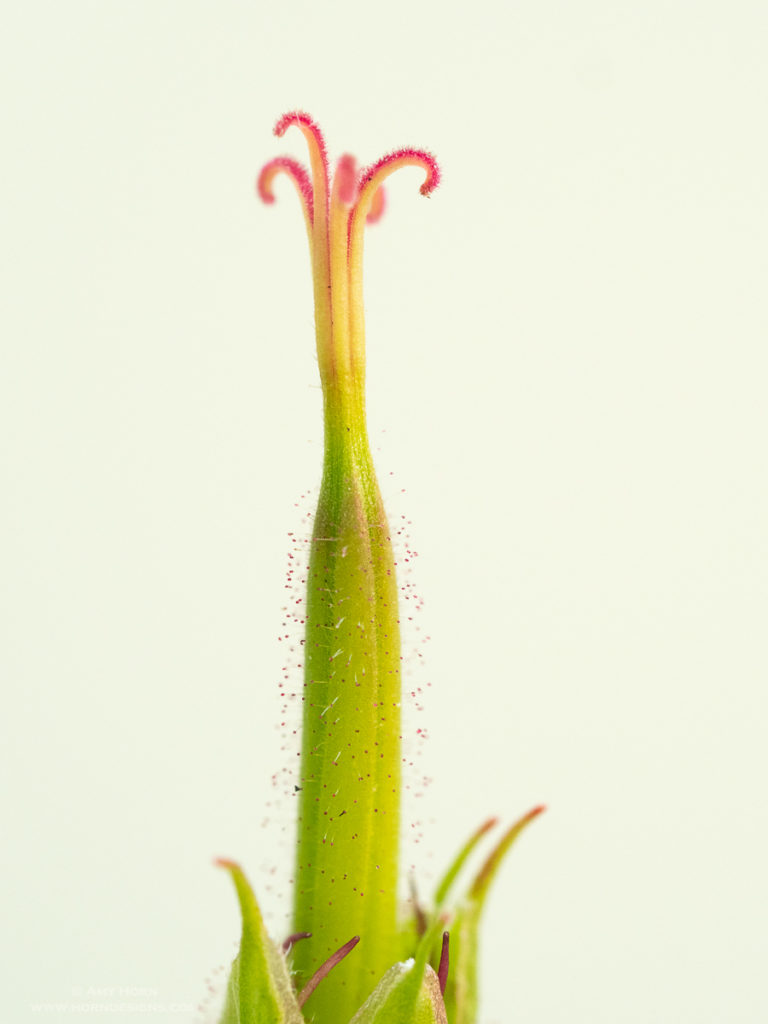
A clean background can make or break an image. While walking near a waterfall outside of Ouray, CO, I spotted a Richardson’s Geranium with buds just beginning to open. So, I set up my tripod and grabbed my macro lens. After capturing the image on the left with the natural green background, I placed my diffuser behind the bud to block the wind. Then I noticed I could capture an image with a white background as well. Both backgrounds are clean and simple, but express the buds differently.
The image on the left has noticeable backlight on the buds but the image on the right highlights the red balls on the hair of the stem. Which do you prefer? The Olympus OM-D EM-1 Mark II, 60mm macro lens and settings: Left image: f/4.5, 1/180 sec, ISO 1600. Right image: f/4.5, 1/60 sec, ISO 1600 (notice the faster shutter speed due to the white background.)
Olympus OMD1 Mark II, 60mm macro, 15-image focus stack. F/4.5, 1/80 sec, ISO 1600, Manfrotto tripod.
Olympus OMD1 Mark II, 60mm macro, 15-image focus stack. F/4.5, 1/160 sec, ISO 1600, Manfrotto tripod.
My first time in Florida was 35 years ago and that trip was
centered around visiting family and going to the newly opened Epcot Center. This
year, I returned to the area with my husband and the trip was full of beaches,
wildlife and seafood. Our 10-day trip was relaxing and I thought I would share
some of the highlights here.
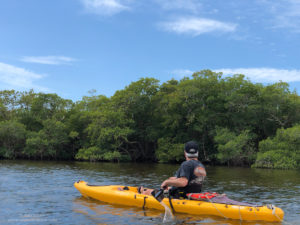
Matlacha
iPhone photo of Rod kayaking along the mangrove trees.
When we planned our trip, our goals were to see Sanibel Island and the Everglades. We didn’t want too much planned and chose to make up the itinerary as we went. As a result, we booked flights into Fort Myers and found a small Airbnb in Matlacha with kayaks. Matlacha is a small island between Cape Coral and Big Pine Island and an inexpensive alternative to Sanibel Island. During our first day, we recovered from jet lag by taking out the kayaks. It was as easy as walking out the back door. With the protection of Big Pine Island, paddling was a cinch and we investigated the mangrove trees up close. In addition, dinner was a short walk from the house where we ate fresh gulf shrimp on the waterfront and enjoyed local brews.
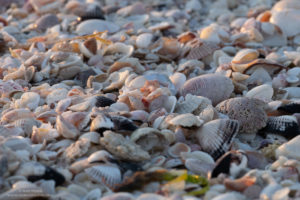
Sanibel Island
Shells on Sanibel Island
Our interest in Sanibel Island came from Rod’s research
before our trip. He read about great shelling on the island and his research
was right. We spent hours at several beaches on Sanibel Island in search of the
best seashells and I grabbed a few photos of waterfowl too. We spent another
morning at the Ding Darling Wildlife Refuge capturing photos of egrets, osprey,
herons, pelicans, ibis, and cardinals. I spent so much time photographing
birds, Rod got a little bored and took a nap in the car.
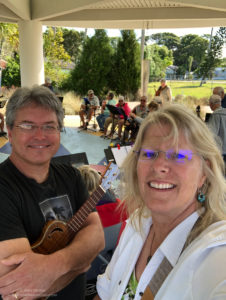
Englewood
Rod and I at the Cowboy Chord Club ready to jam on our Ukes.
We visited Englewood, FL to participate in the Cowboy Chord Club, an acoustic jam group. I’m sure it seems kinda funny that we went on a vacation with our ukuleles and crashed a Meetup group, but we had fun! The group took song suggestions so Rod and I were able to rqeuest a few of our favorites to play. Afterward, we talked to the locals and were encouraged to check out their beach; so, we did. We found a waterfront restaurant with fresh fish and live music before we headed to the sun filled beach. As a result of low tide, many shells were visible and we shelled for a few hours before driving back to Matlacha. On our drive back, we found an alligator in a pond in front of a church. We made a quick U-turn to capture photos.
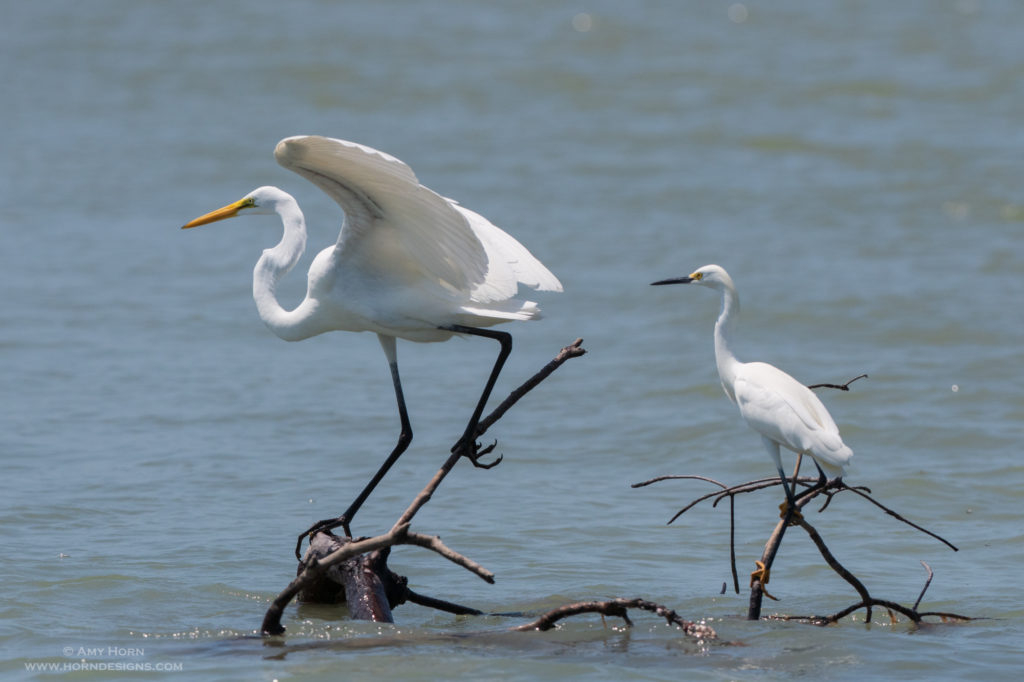
Marco Island and 10,000 Islands Boat Tour
Great Egrets captured from a moving boat. Olympus OMD1 Mark II, 300mm, F/5, 1/5000 sec, ISO 400.
The tour on Marco Island named “10,000 Islands Boat Tour” was the only thing we scheduled before our trip besides the Airbnb, flight, and rental car. As It turns out, we were the only passengers on the boat, so I guess we didn’t need to schedule it so early. The tour was okay, we opted for a longer tour and later realized we didn’t get all that we were promised, however, we did see a lot of wildlife and get to visit one of the 10,000 islands that receives very few visitors. For example, we saw egrets, dolphin, osprey, heron, pelicans, a tern and spent more time shelling (our favorite past time). Capturing the birds from a moving boat was a new challenge and much harder the photographing birds in flight. (See “For the Photogs” below for details on photographing birds.)
Cape Coral
Olympus OMD1 Mark II, 300mm with 1.4x teleconverter, F/5.6, 1/800 sec, ISO 250, FotoPro x-go plus tripod.
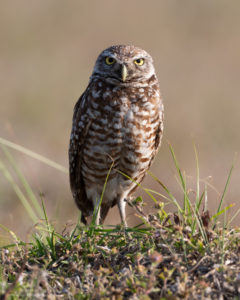
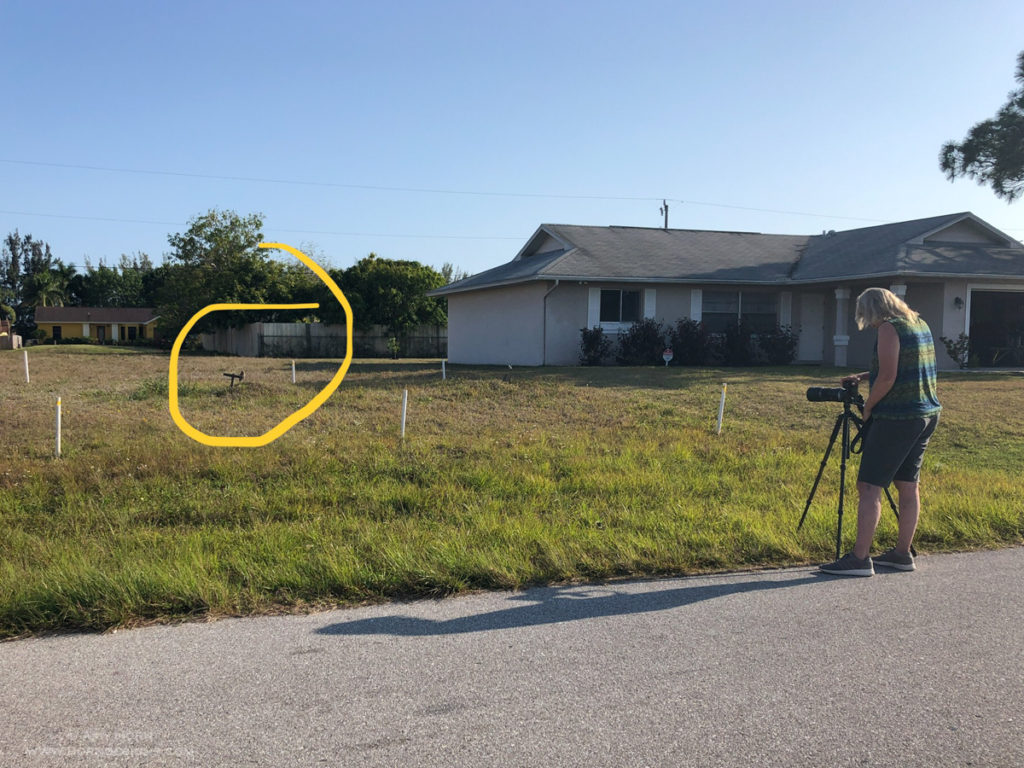
Before leaving Matlacha for the Everglades, we were told about burrowing owls in the Cape Coral area and went out to find them. It turns out we had driven past them for days! Since they are protected, stakes are places around their perch to protect the area. The more we drove, the more we saw them in empty fields, front yards, along busy roads…everywhere. I photographed them in many of these areas but preferred the empty fields. The front yards with groomed grass didn’t give the photo a natural feel. Read about how I used my tripod capturing these images, in my blog titled: Benefit of Using a Tripod. Stay tuned for the next post – Florida: Gators and Vultures.
For the Photogs:
To photograph flying birds, a minimum of 1/2000 shutter speed is used to stop the movement of the bird wings. However, when photographing stationary birds, the shutter speed can be slower. In addition, when I was on the boat, I shot at 1/5000 sec. shutter speed and the captain slowed down the boat too. It was still a tough shooting situation. Even though the captain slowed down the boat, the waves were unpredictable and always hit the boat when I was ready to press the shutter. For maximum success, used continuous focus, continuous shooting mode (burst), and image stabilization when photographing birds. As you would expect, it takes lots of practice and timing to capture strong images of wildlife. Good luck!
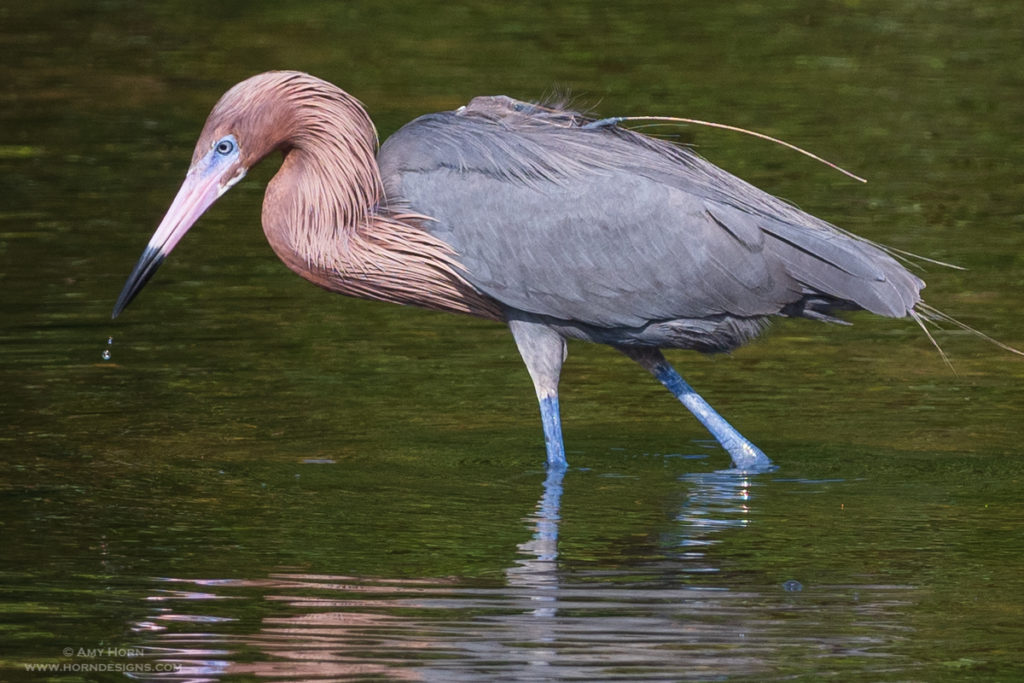
Reddish Egret. Olympus OMD1 Mark II, 300mm, F/4, 1/1250 sec, ISO 200, FotoPro X-Go Plus tripod.
Olympus OMD1 Mark II, 300mm, F/5.6, 1/80 sec, ISO 1600, tripod
Do you dislike using a tripod? After teaching photo
workshops for several years, I recognize it is not a popular piece of gear for
new photographers. Tripods can be clunky, unstable, awkward, and temperamental.
The “unstable” can be solved by purchasing a quality tripod from the start.
Many photographers start with an inexpensive tripod and then realize why it was
inexpensive…it doesn’t support their camera or is not built well. Save yourself
some time and money and buy a good tripod from the start. The clunky, awkward,
and temperamental can be overcome by using it.
I often hear participants state they only need a tripod when
photographing landscapes, low light, or macro subjects, well, that is not true.
A tripod in any shooting situation will improve the quality of your photos. Here
is an example when I used a tripod in full sun to improve my photos.
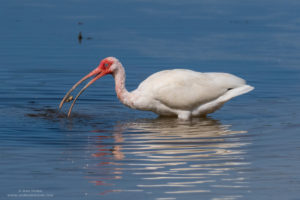
Ibis with a crab. Olympus OMD1 Mark II, 300mm, F/6.3, 1/4000 sec, ISO 400.
While in Florida on vacation, I photographed birds, from egrets to owls and they entertained me for hours. But holding a long lens for hours was not a solution for sharp photos, so I used my tripod. I started with my Olympus 40-150mm lens (80-300mm FF equivalent) and handheld many images, but since I use live view at 3-5x to verify sharp focus on the eyes of my subject, holding the camera still at this magnification was impossible. Even more so when I switched to my Olympus 300mm lens (600mm FF equivalent). As a result, I grabbed my tripod. Not only were my images sharper, but at the end of the day, my arm wasn’t sore from carrying the weight of the long lens.
Burrowing Owls
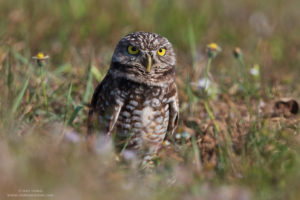
Burrowing Owl. Olympus OMD1 Mark II, 300mm with 1.4x teleconverter, F/5.6, 1/1250 sec, ISO 250.
One afternoon in Cape Coral, Florida, I spent hours photographing burrowing owls. These small owls are only 7-10 inches tall and like all wildlife, a photographer should keep a good distance to not disturb them. Therefore, I chose to use my Olympus 300mm lens and 1.4x teleconverter giving me a focal length of 820mm (full frame equivalency). With such long focal lengths, a tripod was a must. We drove to several neighborhoods in Cape Coral to photograph these owls with different backgrounds.
I recently purchased a Fotopro X-Go Plus carbon fiber tripod
for airplane travel since it is smaller, lighter and fits in my suitcase. If
you purchase a tripod for travel, be sure to check the weight of your gear with
your heaviest lens and make sure that is below the max load of the tripod you
are considering. With my lightweight Olympus system, my max load is less than
most DSLR’s.
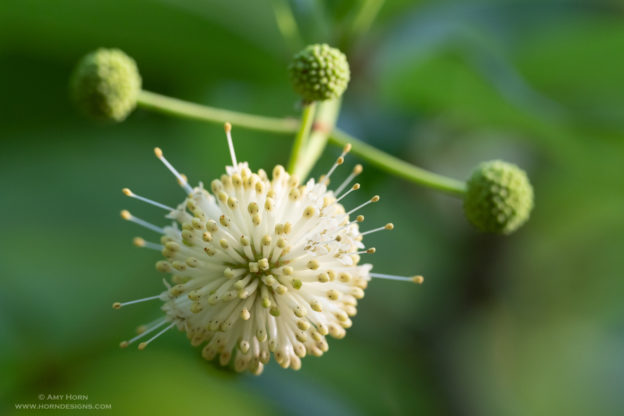
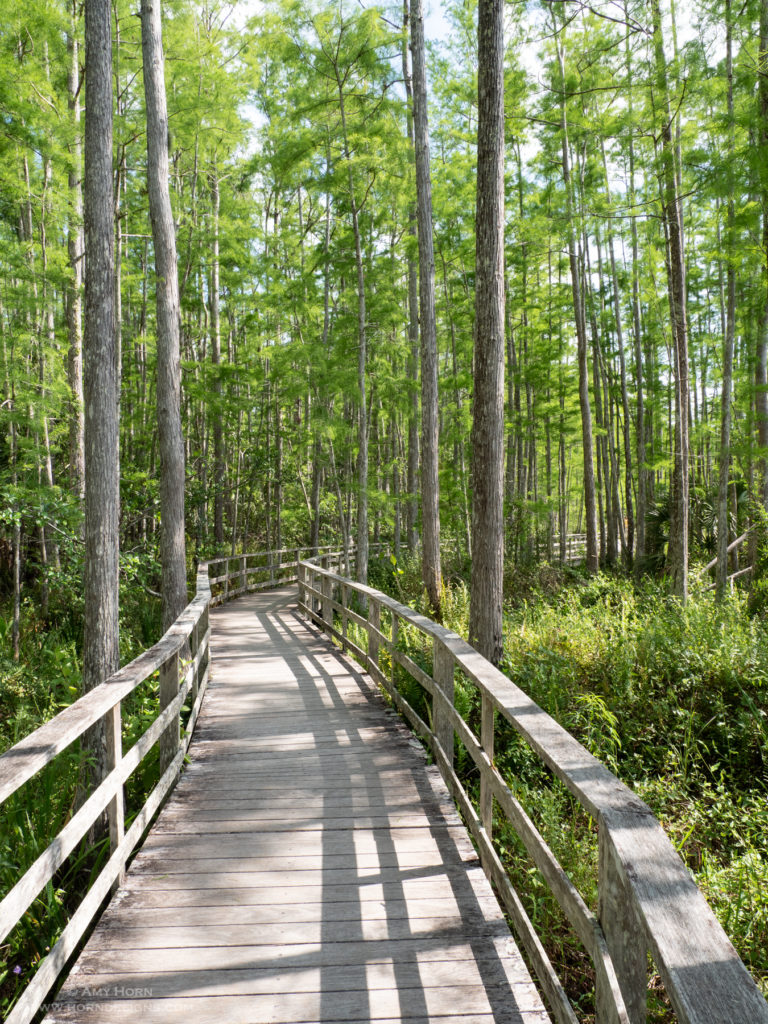
When we saw the “Corkscrew Swamp Sanctuary” on our Google search, we knew it was a must visit location. The name is almost as good as the Great Dismal Swamp (we’ve been there too!) It is located in Southwestern Florida and is known for alligators, waterfowl and other swampy visitors. We arrived shortly after they opened to capture wildlife in soft light. What we didn’t expect to see was a buttonbush shrub (Cephalanthus occidentalis). Resembling a Dr. Seuss tree, this unique bush caught our attention quickly. I used my 300mm lens (it was attached) and focused on the button closest to me. Although I had my macro lens, I really like how the buttons fill the frame from using the 300mm lens. Buttonbush plants are found from Mexico to the Artic and mostly in wetland areas.
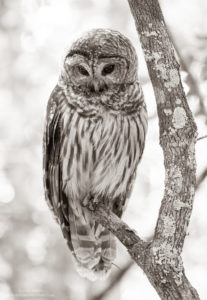
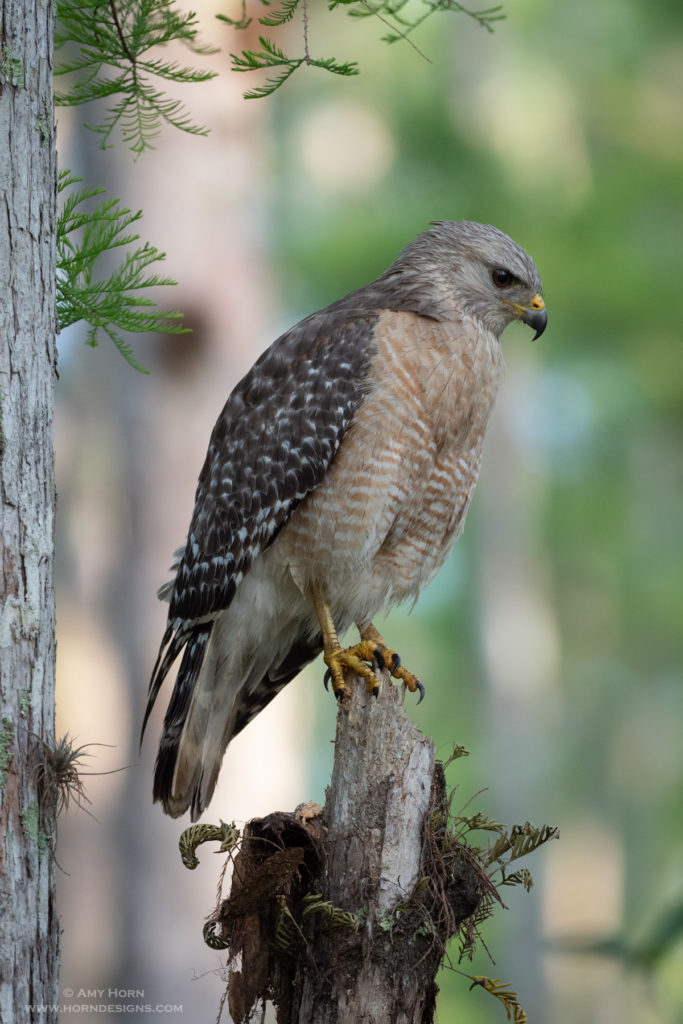
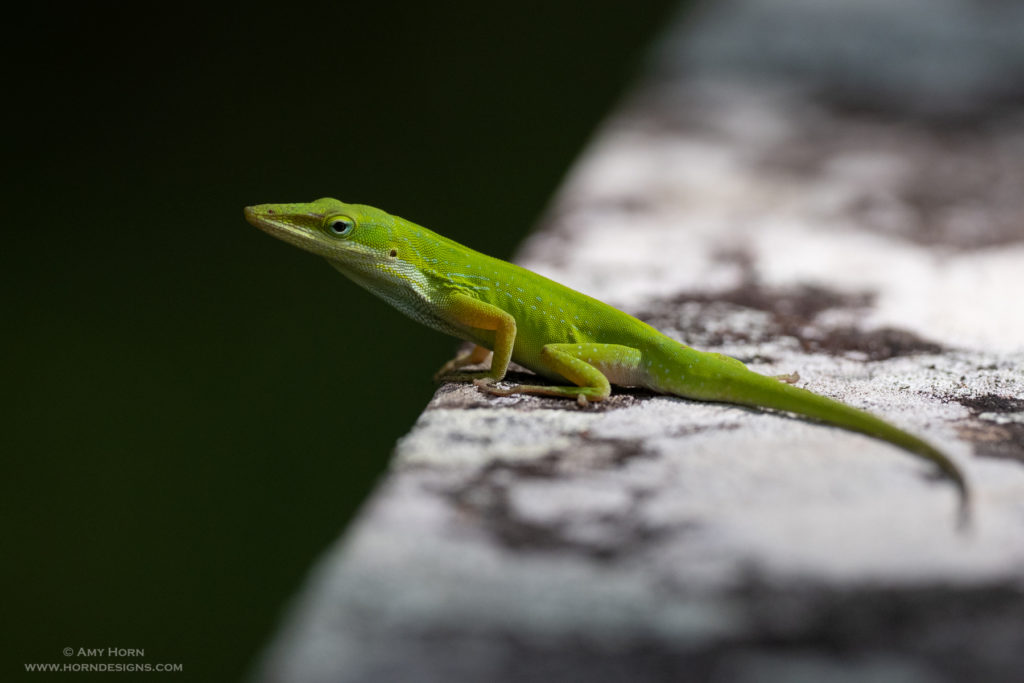
The Corkscrew Swamp Sanctuary didn’t disappoint. In addition to the buttonbush, we saw a red-shouldered hawk, barred owl, woodpeckers, and a green anole. Next time you are in Southwestern Florida stop in to the swamp!
Olympus OMD1 Mark II, 300mm, F/4, 1/400 sec, ISO 800
Olympus OMD1 Mark II, 300mm, F/4, 1/400 sec, ISO 800, tripod
Olympus OMD1 Mark II, 300mm, F/5.6, 1/80 sec, ISO 1600, tripod
Olympus OMD1 Mark II, 300mm, F/4, 1/4000 sec, ISO 800, tripod
Boardwalk at Corkscrew Swamp Sanctuary
Olympus OMD1 Mark II, 300mm, F/5.6, 1/500 sec, ISO 250, tripod
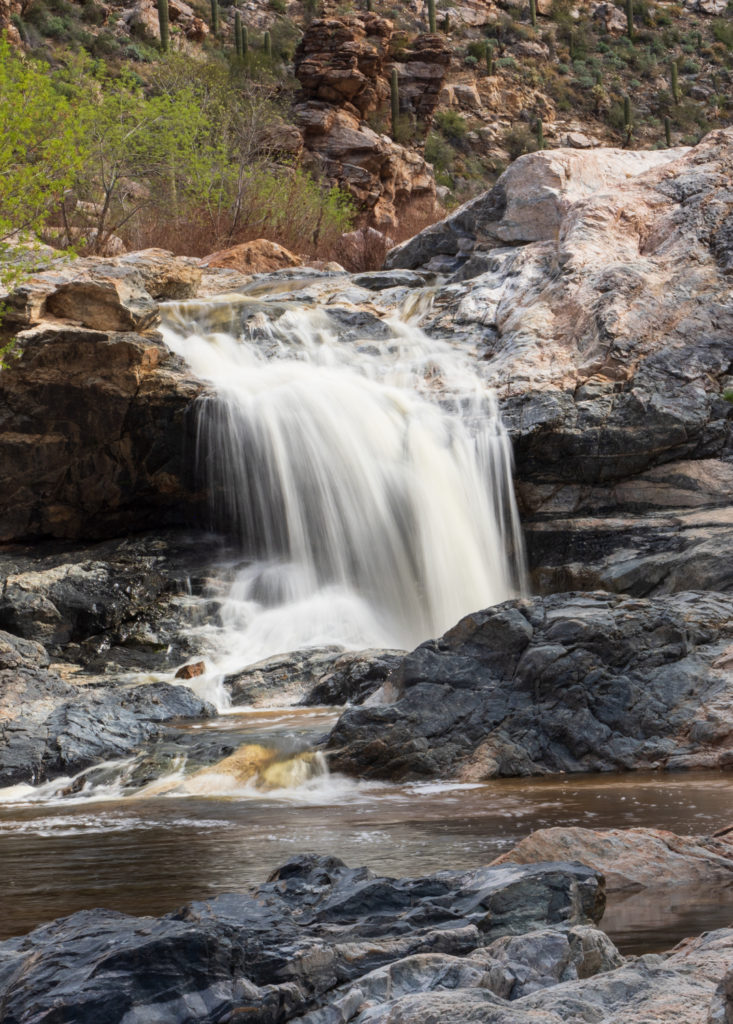
My college years were spent in Tucson studying at the UofA. Now, many years later I returned for 1.5 weeks to take a workshop, teach a workshop and enjoy all Tucson has to offer. Now, I’m a hiker so I discovered many new places one of them being Tanque Verde Falls. Fortunately, another workshop attendee and local Tucsonan joined me for the morning. After a short hike and scrambling over boulders we arrived at the lower falls. Luckily, clouds were intermittent providing softer and more even light. We ran short on time, so we didn’t scramble to the upper falls but it sure was great scouting a new location. Notice in the images below the difference of cloud cover versus direct sunlight?
Tanque Verde Falls in cloud cover. Olympus OM-D EM-1 Mark II, 12-100mm, f/16, .5 sec, ISO 200, Singh-Ray Waterfall Polarizer.
Tanque Verde Falls in sunlight. Olympus OM-D EM-1 Mark II, 12-100mm, f/16, 1/4sec, ISO 200, Singh-Ray Waterfall Polarizer.
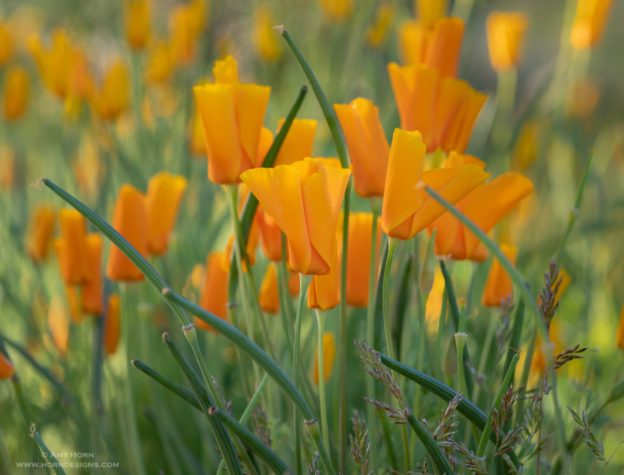
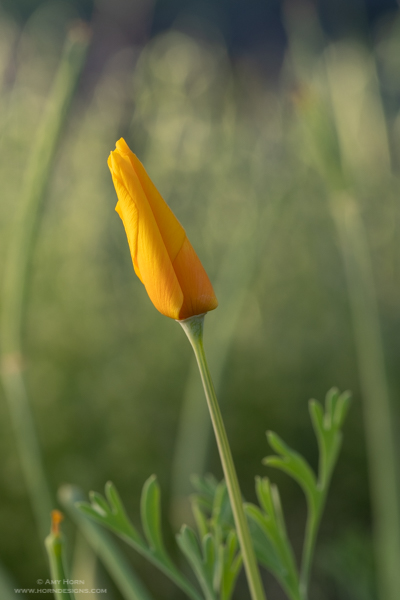
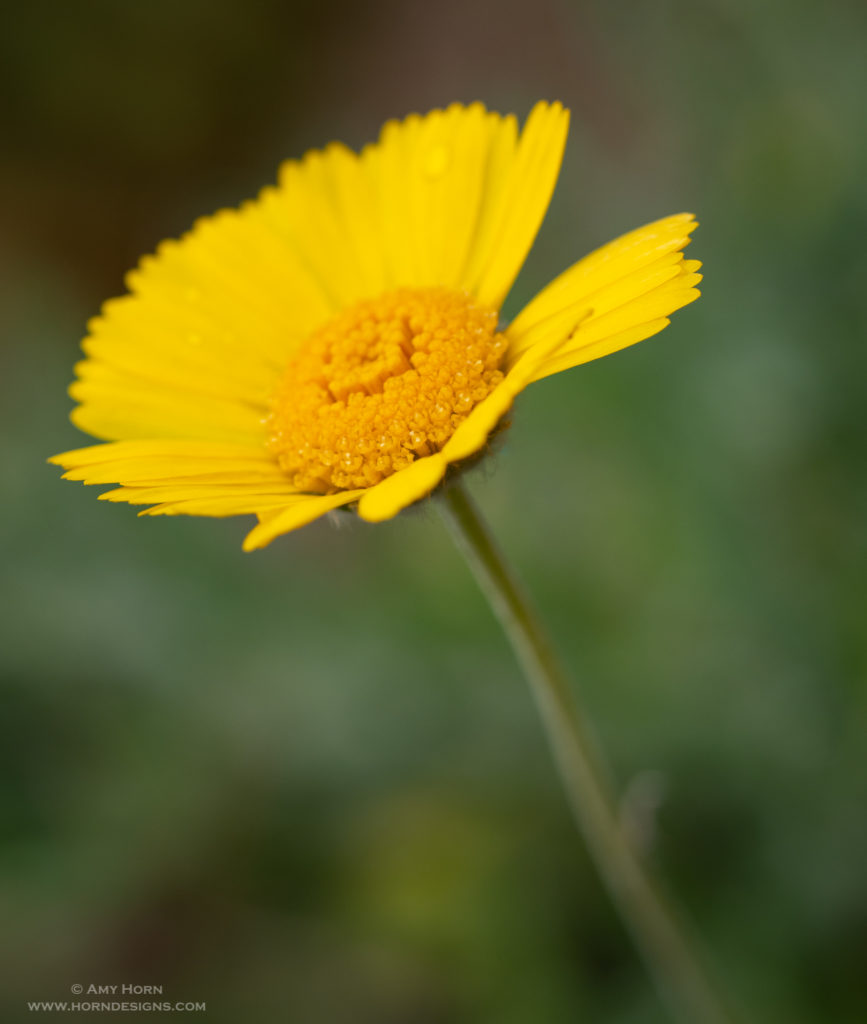
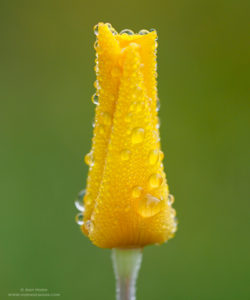
It is an amazing wildflower season in Arizona this spring. These five tips will improve your success in capturing macro wildflower images.
Light. Great photos have great light. Arrive at your destination before the sun comes up to catch the soft light. Scout the day before so you know where the great flowers are located otherwise you might miss the great light.
Tripod & shutter release. Use a tripod and shutter release to avoid camera shake. Macro photography requires sharp focus and the slightest movement from no tripod or pressing the shutter can result in a blurred image. If you don’t have a shutter release, place the camera on a 2-second timer to avoid touching the camera during the exposure.
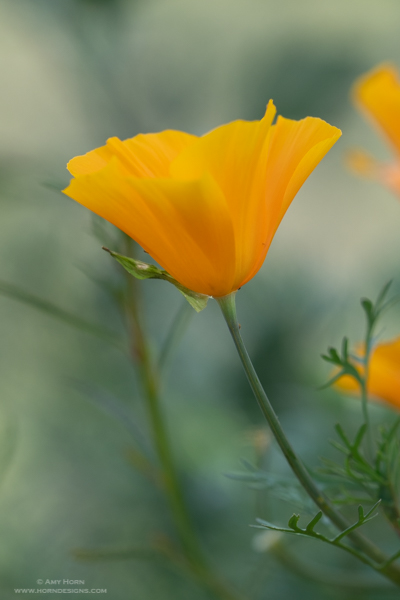
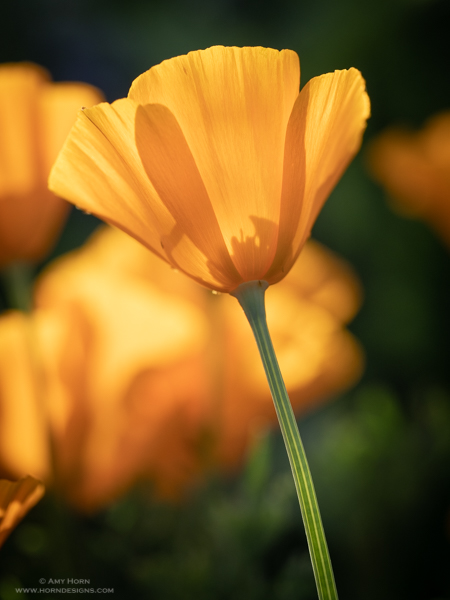
Blur the background. Open your aperture as much as your lens will allow (f/2.8 – f/5.6) to blur the background. Long focal length lenses (100+mm) have a similar effect. If you don’t own a macro lens then use the longest focal length lens you own and capture a “close-up” image. See the samples below.
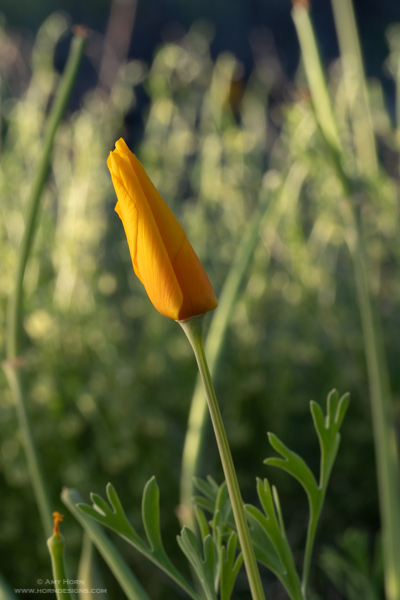
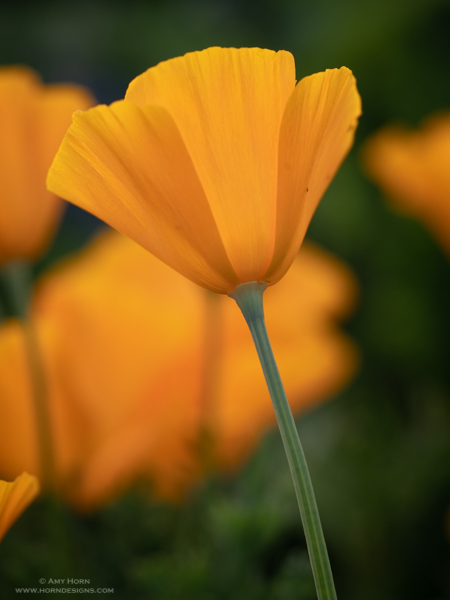
Diffuse the light. So, you like to sleep in and won’t photograph flowers until daylight. Then, take a diffuser or scrim (basically a sheet on a frame). Place the diffusion material between the sun and the flower to soften the light. See the samples below.
Have fun. If all this is too much for you, then go straight to step 5! After all, it is about being out in nature and having fun.
Captured with Olympus OM-D EM-1 Mark II, 40-150mm lens, f/3.5, 1/100 sec, ISO 200. This lens is equivalent to a 300mm on a full frame camera. Captured in shade.
Notice the distracting background from using aperture f/10
Notice the blurred background from using aperture f/4.5
Not diffused
Diffused
I hope you make use of these macro wildflower tips and enjoy this amazing season! It will be gone before we know it.
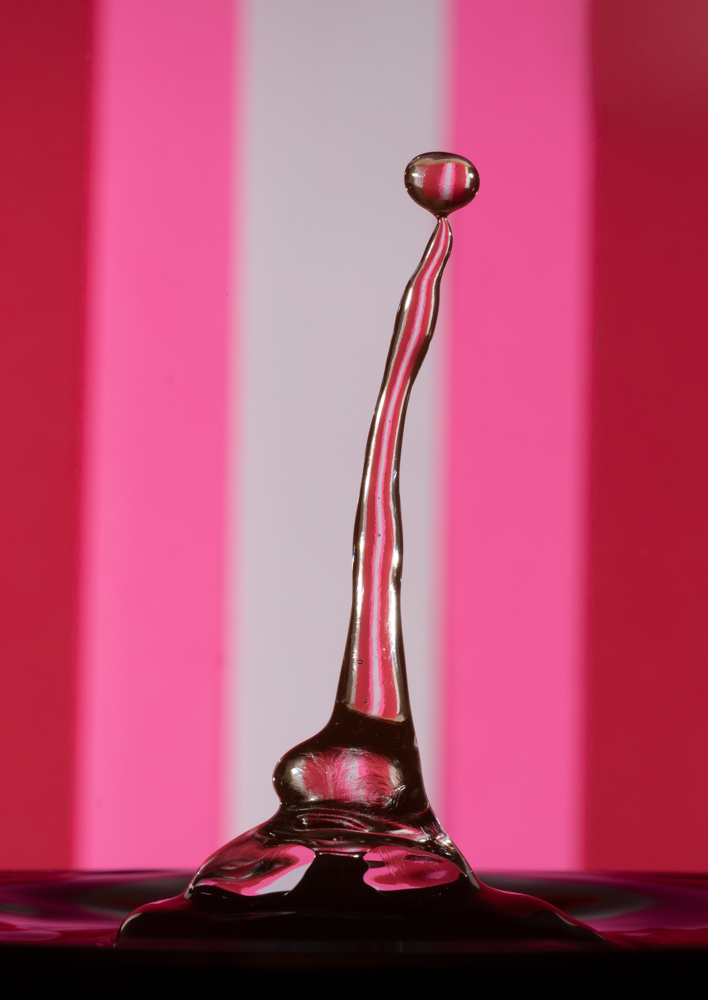
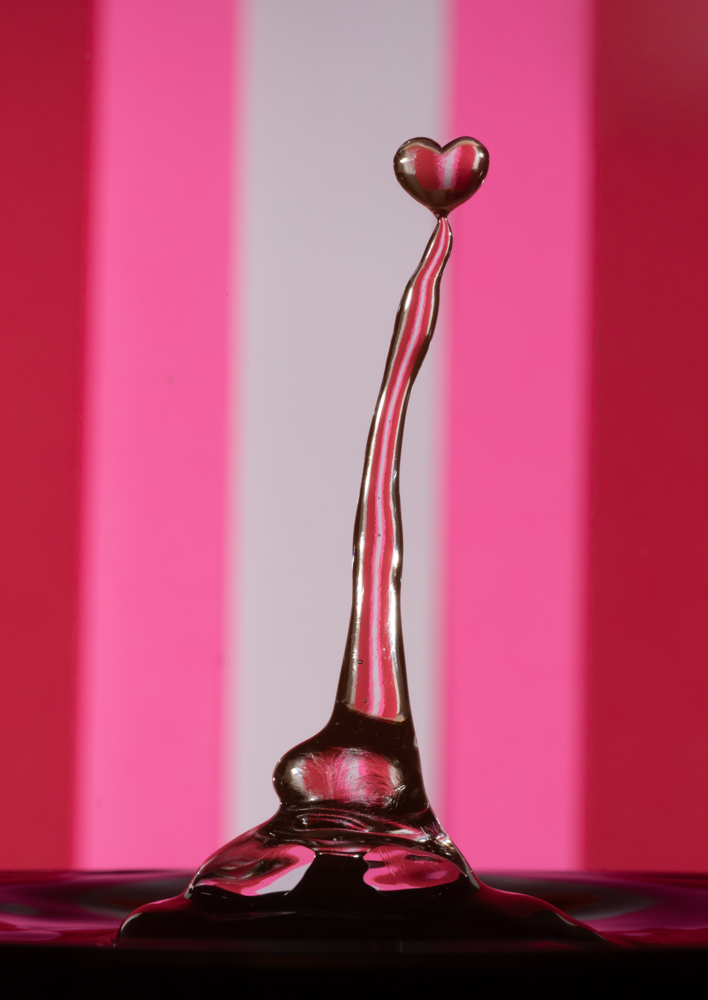
The first two images were used to create the composite on the right.
Photoshop is not for every image, but I like to use it for
compositing and making an impact. I decided to create a composite to celebrate
Valentine’s Day. Using my Cognisys StopShot Water Drip Kit, I captured several
drops and drop collisions. After reviewing the images, I noticed two that if
combined would make a fun composite. Since, viewers commented that it looks
like the character, “Tigger”.
Layers
Setting the camera on a tripod (a must with water drop collisions)
gave me several almost identical images, the only difference was in the actual
drops. To create the composite, I would need to utilized layers in Photoshop.
The “Tigger” image was my base image. Then I selected the “tail” from the second
image and brought the tail layer over to my base. Once the “tail” was in place,
I added a mask to erase the part I didn’t need to create a believable Tigger
tail. The final composite included two images and you may notice that I also
erased a few of the extra water drops. The spot healing brush is an easy tool
and blended the area nicely. This took me less than thirty minutes and I have fun
creating it.
Transform Tool
Original Water Drop
Transformed Heart Drop
On the next image, I envisioned a drop in the shape of a
heart. Well, that would never happen naturally, so I used Photoshop’s transform
Tool to create the heart. First step was to cutout the heart onto its own
layer. Then use transform (Ctrl +T, Cmd +T) to select it. With the transform
tool active, a right click will offer additional transforming options and I
chose warp. After dragging the sizing handles around, I designed a heart. The
last step was to blend this with the original drop. Again, I added a mask to
erase the top portion of the original drop and positioned the new heart shape
to blend properly.
Photoshop isn’t for everyone or every image, but it is fun
to use!
Olympus OM-D E-M1 Mark II, 60mm, ISO 200, f/3.5, 1/640 sec.
Before talking about how to keyword, I should discuss photography
workflow which is the process a photographer uses for their images from capture
to output. This includes culling, developing and posting images. Although there
are many differences from photog to photog, there are also many similarities. Many
photogs include keywording as part of their workflow, as do I. I am not always
the best at it, so I have spent the last month applying more discipline to
keywording.
Why keyword?
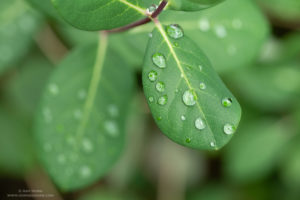
Potential keywords: leaf, raindrop, cloudy, green, etc.
When images have a keyword attached it becomes searchable.
Imagine searching your images by your child’s name, a color, location, or specific
lighting situation. If you take the time to add keywords, it is that easy. I use
Lightroom to catalog my images, so to search for a macro image, I type “macro” into
the search box and tada, all my macro photos appear. That is, if I added the keyword
to each image. If you have not been keywording, don’t fret, just start now.
Someday, you can go back and tackle past images but for now, start with today.
When to keyword?
A better question is “when not to keyword”! Don’t wait to
keyword! Adding keyworks when you download or very soon afterward helps you to
remember the details of the shoot. For
instance, I went to Boyce Thompson Arboretum in January after a rainstorm and
captured a few hundred images (many were focus stacked). When I downloaded, I
immediately added keywords that applied to all images such as: Arizona, Boyce
Thompson Arboretum, desert, raindrops, cloudy, etc. Then after culling my photos
and removing obvious images to delete, I added specific keywords such as: focus
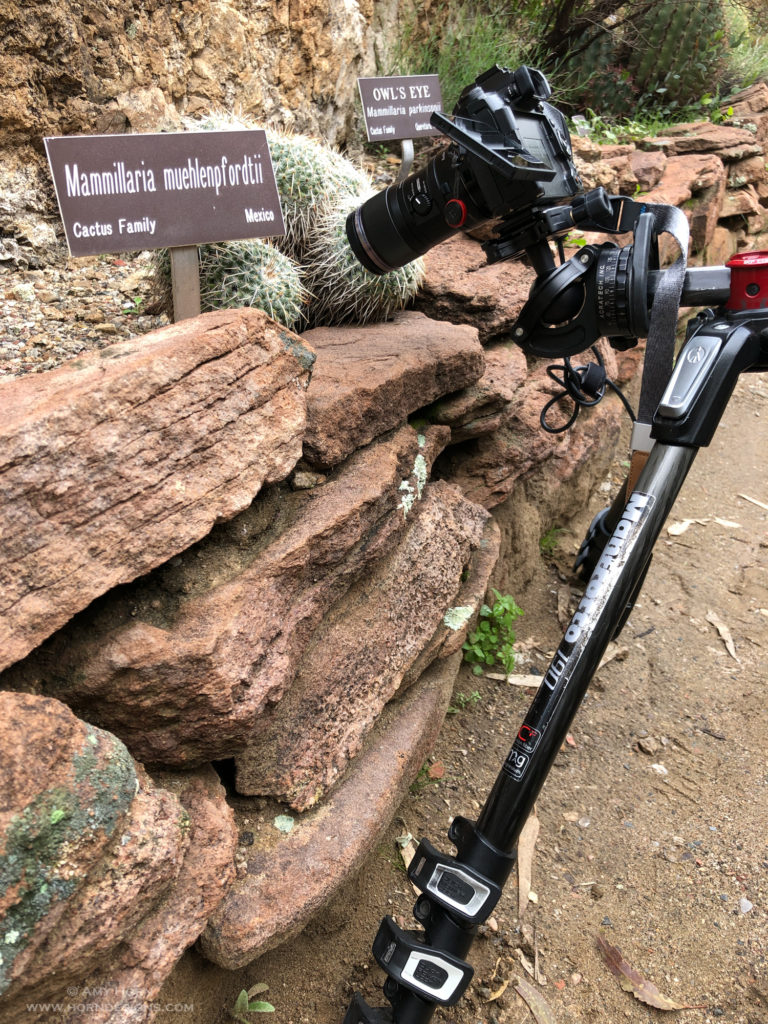
stacking, cactus, specific plant varieties, etc. To remember the plant
varieties, I take a reference photo on my iPhone of my setup with the plant label
so I can add the keyword later.
iPhone capture of my setup and the cactus label.
Olympus OM-D E-M1 Mark II, 60mm, 26mm extension, ISO 400, f/3.5, 1/50 sec., Olympus in-camera focus stacking.
How to keyword?
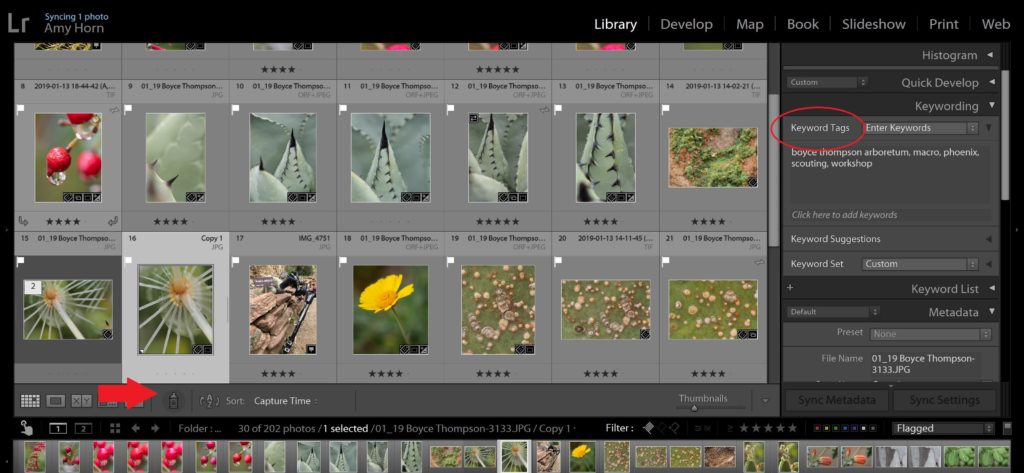
Adding keywords in Lightroom is very easy. Upon import,
scroll down the righthand bar to the keyword tab and start adding words to
describe your photos (separate with commas). Remember, these keywords will
apply to all images being imported, so start generic first. Then, to add
additional keywords once the images are imported, switch to grid view (G) and
locate the spray can on the tool bar at the bottom of the page. Once the spray
can is selected a text box becomes available to add keywords. Add several
keywords with commas in between and “spray” them on to the respective photos.
Change the keywords as needed and respray. When you are done, tap the spray can
back to its spot and you are finished.
Lightroom screen capture with spray can and keyword tags highlighted.
It really is that easy. The hardest part is taking the extra
few seconds/minutes to add the keywords. But for searching after the fact it is
a blessing in my opinion.
Olympus OM-D E-M1 Mark II, 60mm, ISO 400, f/3.5, 1/40 sec., Olympus in-camera focus stacking.
After my past workshop at Watson Lake, Prescott, Arizona, a participant asked me to explain the Olympus focus stacking process in a macro setting. Since I use the focus bracketing modes almost daily in my macro photos, it made sense. So, follow along to explore capturing focus bracketed images using an Olympus OMD1 Mark II.
First, Olympus offers two different focus bracketing modes –
focus stacking and focus bracketing. Focus
stacking is a capture of eight images at different focus depths stacked
into one JPG within the camera. The original RAW images write to the memory
card as well as the finished JPG stack. Focus
Bracketing is a capture of up to 999 images at different focus depths and
all RAW images write to the memory card for the photographer to stack using
other stacking software (Helicon, PhotoShop, etc). This article discusses focus
bracketing mode specifically. However, the focus stacking mode is almost
identical.
Capture
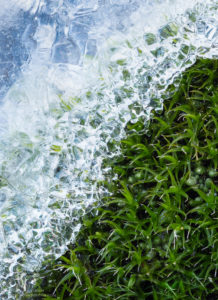
Ice and moss at Watson Lake. Olympus OM-D E-M1 Mark II, 60mm, ISO 400, f/5, 1/8 sec., 30-images focus stacked and circular polarizing filter.
With your camera on a tripod and a lens capable of focus stacking (Olympus 60mm, 12-100mm, etc) frame your shot. I prefer the 60mm and place it as close to the subject as possible. Next, toggle the 1:1 switch on the side of the macro lens and position the camera/tripod to achieve focus. Now, switch to manual focus and focus back and forth to find the part of the image that is closest to the lens. With live view and zooming, manually focus the nearest part of the image.
Olympus Menu
Now you are ready to activate the focus bracketing function. Using the menu, locate Camera 2> bracketing >on >focus bkt >on. At this point, you are given a choice between focus stacking or focus bracketing. With the focus stacking option set to off, set the number of shots and focus differential for focus bracketing. (With focus stacking ON, these other options are grayed out). In the images below, I demonstrate the difference of a focus stacked image (left) and a single image (right).
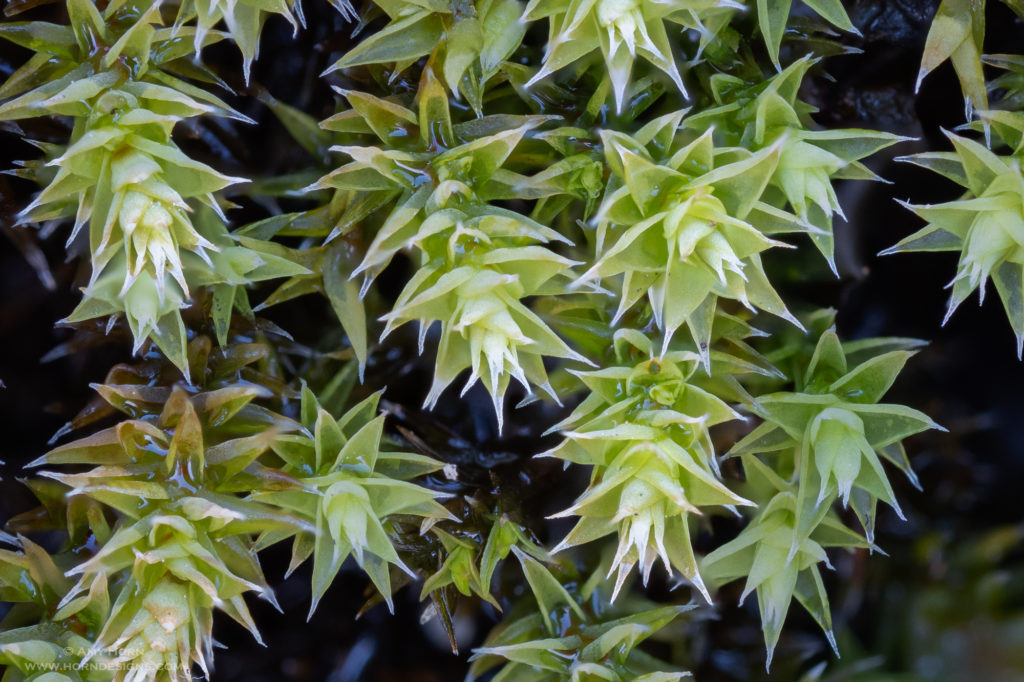
Olympus OM-D E-M1 Mark II, 60mm, ISO 400, f/5, 1/5 sec., focus stack of 30 images, circular polarizing filter.
Olympus OM-D E-M1 Mark II, 60mm, ISO 400, f/5, 1/5 sec., and circular polarizing filter.
Number of shots: I am often asked how to decide the number of images to capture in a stack. That is hard to describe. The more intricate and larger depth of field requires more images. Generally, I start with 50. If there are more than I need meaning some are out of focus because it went beyond my subject, I don’t use those images in post-processing.
Differential: The differential is the distance between each bracketed image and more complicated to calculate. I tend to use a small differential of 1-2 with my macro lens and extension tubes. With more practice you will see different results and learn to adjust according to your subject.
With focus bracketing activated, press the shutter using a cable release. A cable release is crucial to avoid camera movement from pressing the shutter with a finger. The camera captures the images using Silent sequential high-speed shutter and they are viewable on my LCD screen at the same time. If I watch closely, I can see the focus move from the front to the back of the frame. It really is that easy! Now, it is all up to post-processing. My preference is using Helicon Focus, but PhotoShop and other software can stack images as well.
View my camera setup in the video to the left. Notice the camera is upside down on the tripod to achieve the lowest perspective.
Tips
If you create more than one stack, you will want to capture
a random photo in between each stack. For example, I take a photo of my hand in
between each stack. Then when I download, I know where each stack starts and
stops.
To learn more about macro photography, check out our book, The Art of Macro Photography. Also available on Amazon.
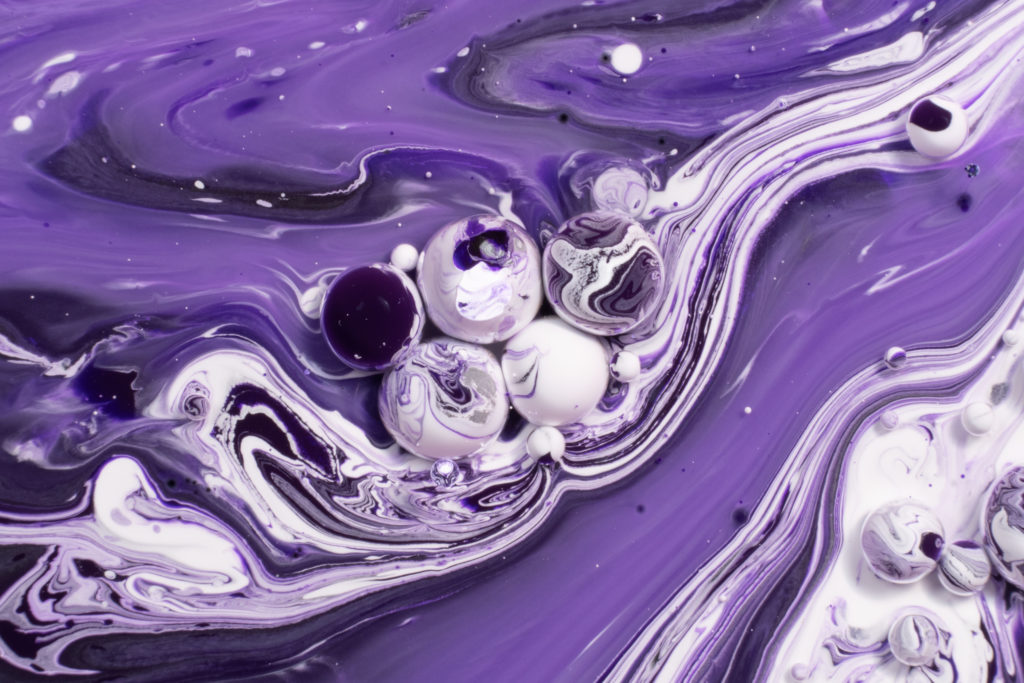
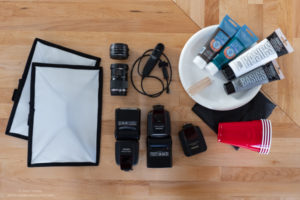
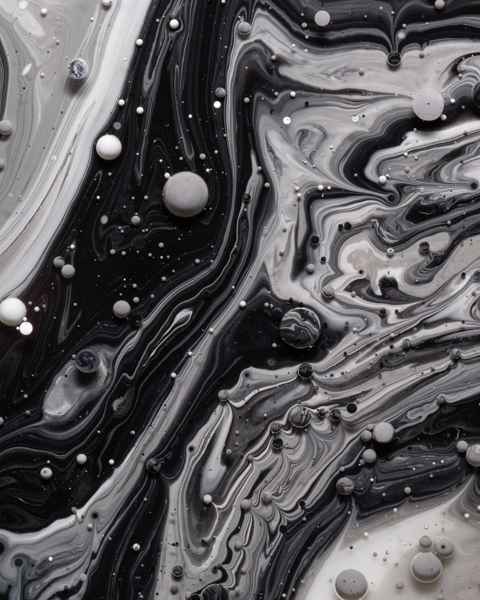
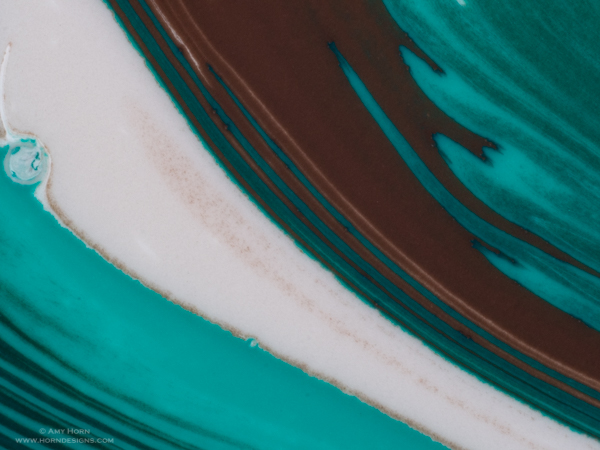
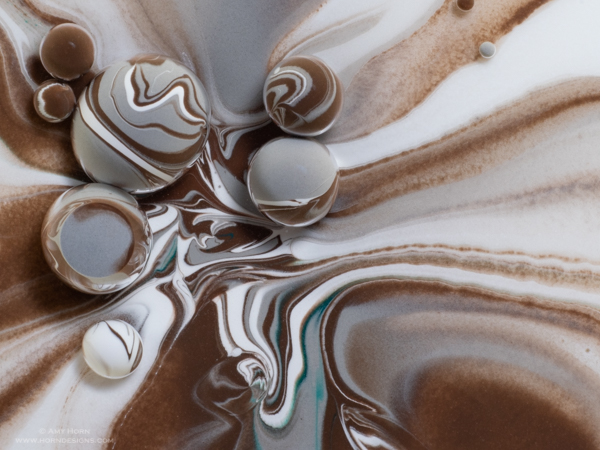
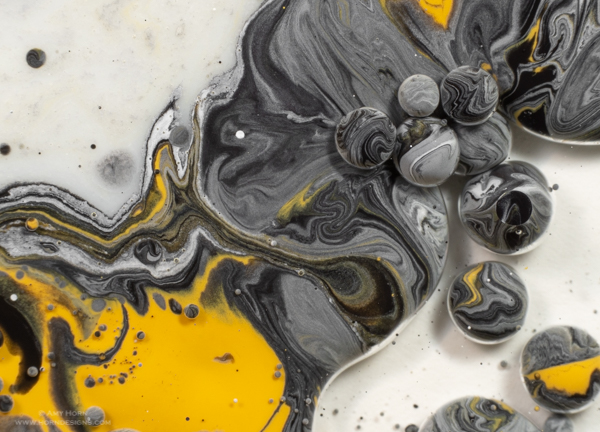
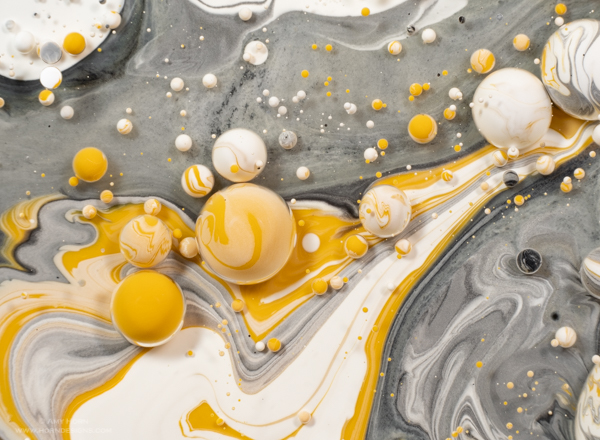
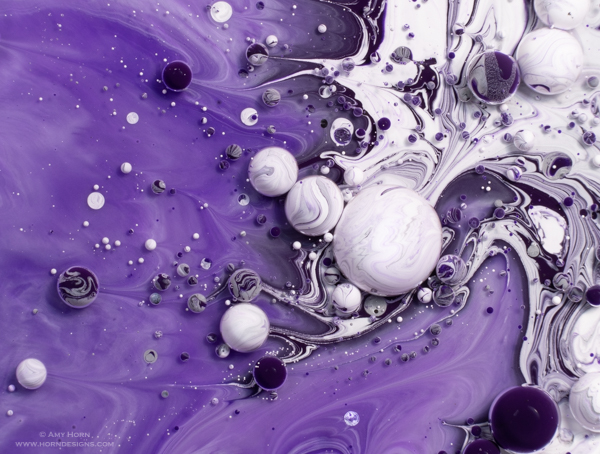
For the past two months I’ve captured studio images of liquids or liquid art. Instead of water drop collisions (I will do more soon) capturing macro images of paint, oil and milk are my new passion thanks to Jason Cummings. Jason shared his setup with me and I couldn’t wait to make it my own. Changing the liquid quantities and thicknesses create very diverse images. The above image followed the steps in this article and the gear used for this project is in the image to the right: two off-camera flash units with diffusers, shutter release cable, macro lens, extension tubes, plastic table cloth, solo cups, paint and a disposable plate. Not pictured: camera and tripod.
Gear used in liquid art photos
Make your own masterpiece
Step One: Water down acrylic paint. Using a disposable cup, water down cheap acrylic paint. The thicker the paint, the longer the paint balls stay intact.
Step Two: Pour milk, half and half, cream, etc into a water resistant or water proof plate/bowl. I prefer using disposable plates or Petri dishes.
Step Three: Pour oil in a new cup and add drops of paint. Use all the colors you want in your image.
Step Four: Pour oil and paint into milk substance. Pour fast, pour slow, make circles/squares, etc; these differences in technique add to the individuality of the final image.
Step Five: Capture images. When setting up your gear, be sure that the macro lens is parallel to the plate of liquid. I use a toothpick on the surface of the liquid to pre-focus. After pouring, I manual focus in live view, at 3x enlargement or more, to fine tune focus. Snap the shutter and rotate the plate for different compositions. The liquid will move on its own as the oil, milk and paint interact. If you have paint “balls” they will burst at some point, so shoot fast. Since the liquid mixture is moving, I recommend using a flash or other strong light source to create sharp images at a fast shutter speed. Here are a few examples from different paint colors. Give it a try, it is a lot of fun.