After our second annual trip to the Boundary Waters, I wanted to share how I kept my camera safe, dry and easy to access through canoeing and portaging. Boundary Waters Gear can be simple if you think through what you really need. If you aren’t familiar with the Boundary Waters, check out my previous post here.
On the Boundary Waters, we carry everything: food, tents, clothing, etc. Each day we packed up camp, paddled and portaged most of the day, then chose a new camp. During the week, we paddled and portaged about 50 miles. With this schedule, my gear needed to be light, accessible and water safe.
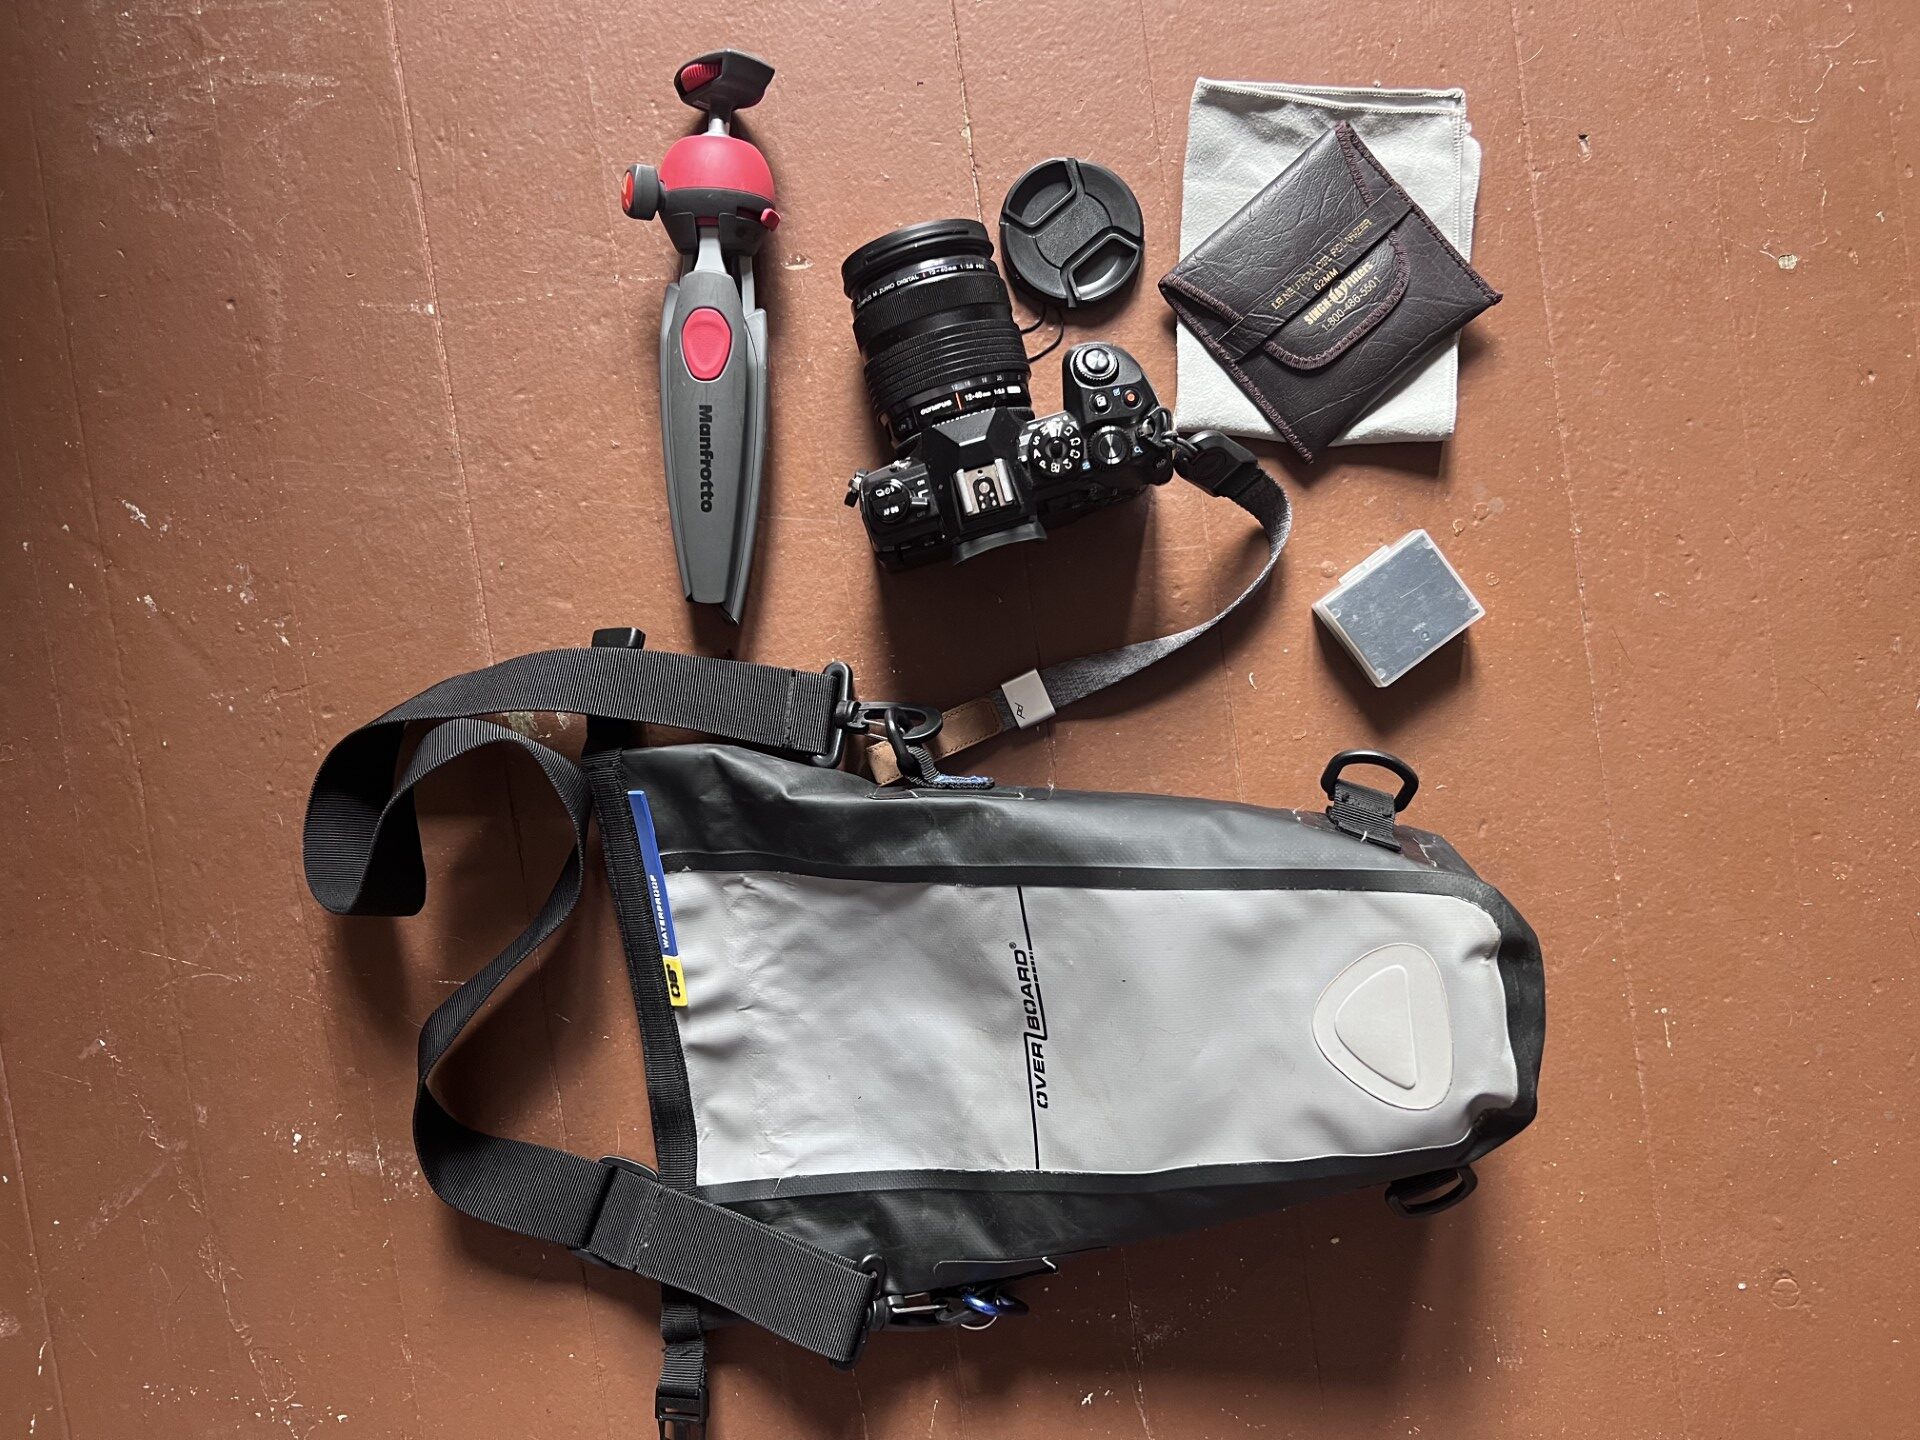
My camera was the Olympus OMD1MII with the 12-40 f/2.8 lens. I chose this lens because it was light and captures great close up (wide angle macro) images too. In addition, I purchased a lens cap leash – last year I dropped a lens cap and lost it in the water. A long lens would have been great for birding, but not worth the weight in my opinion.
Gear
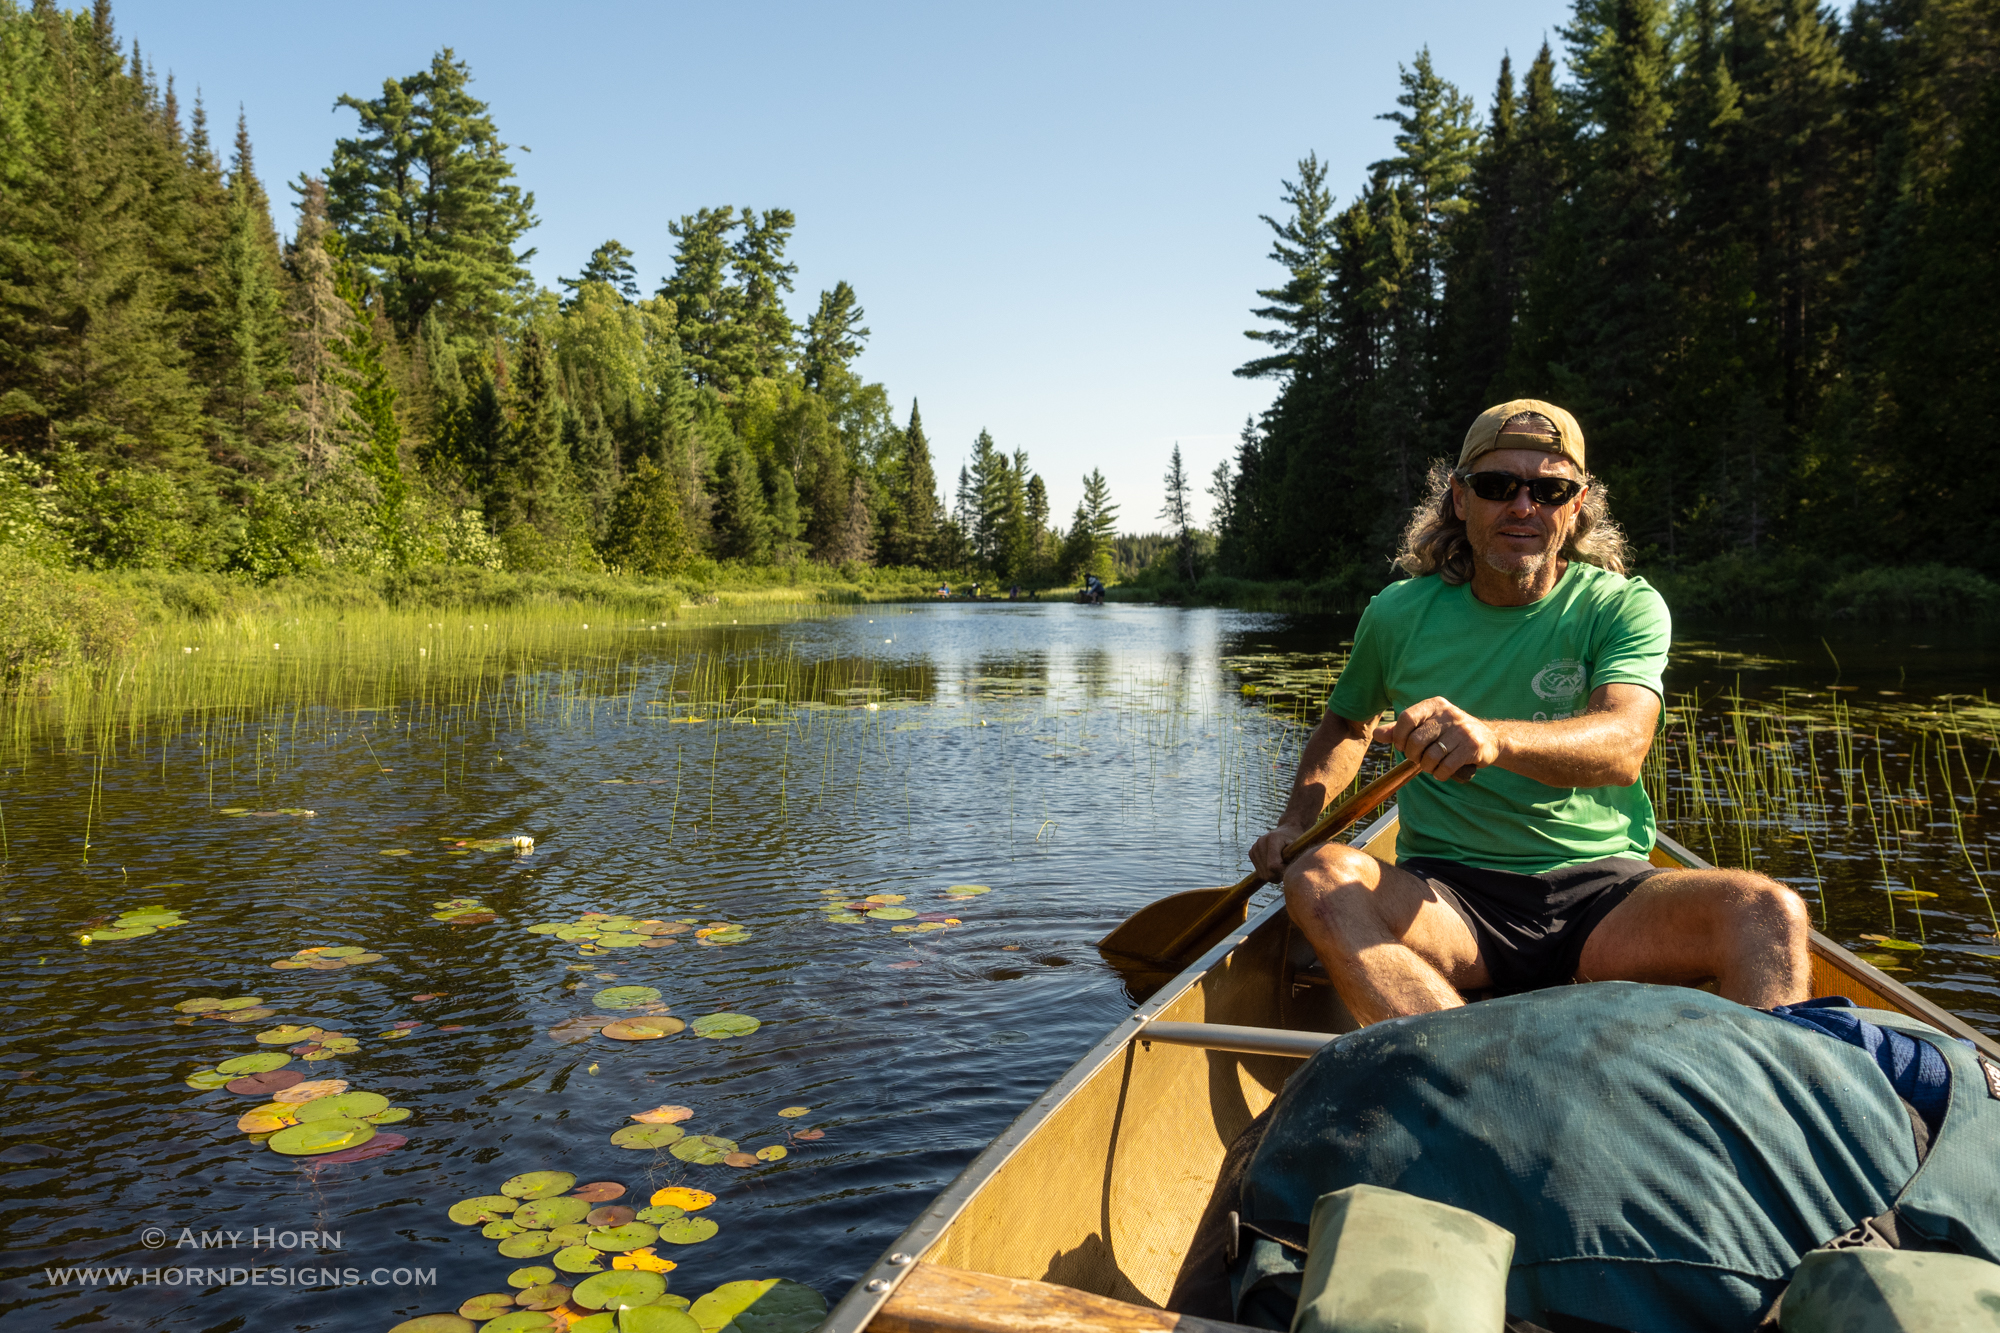
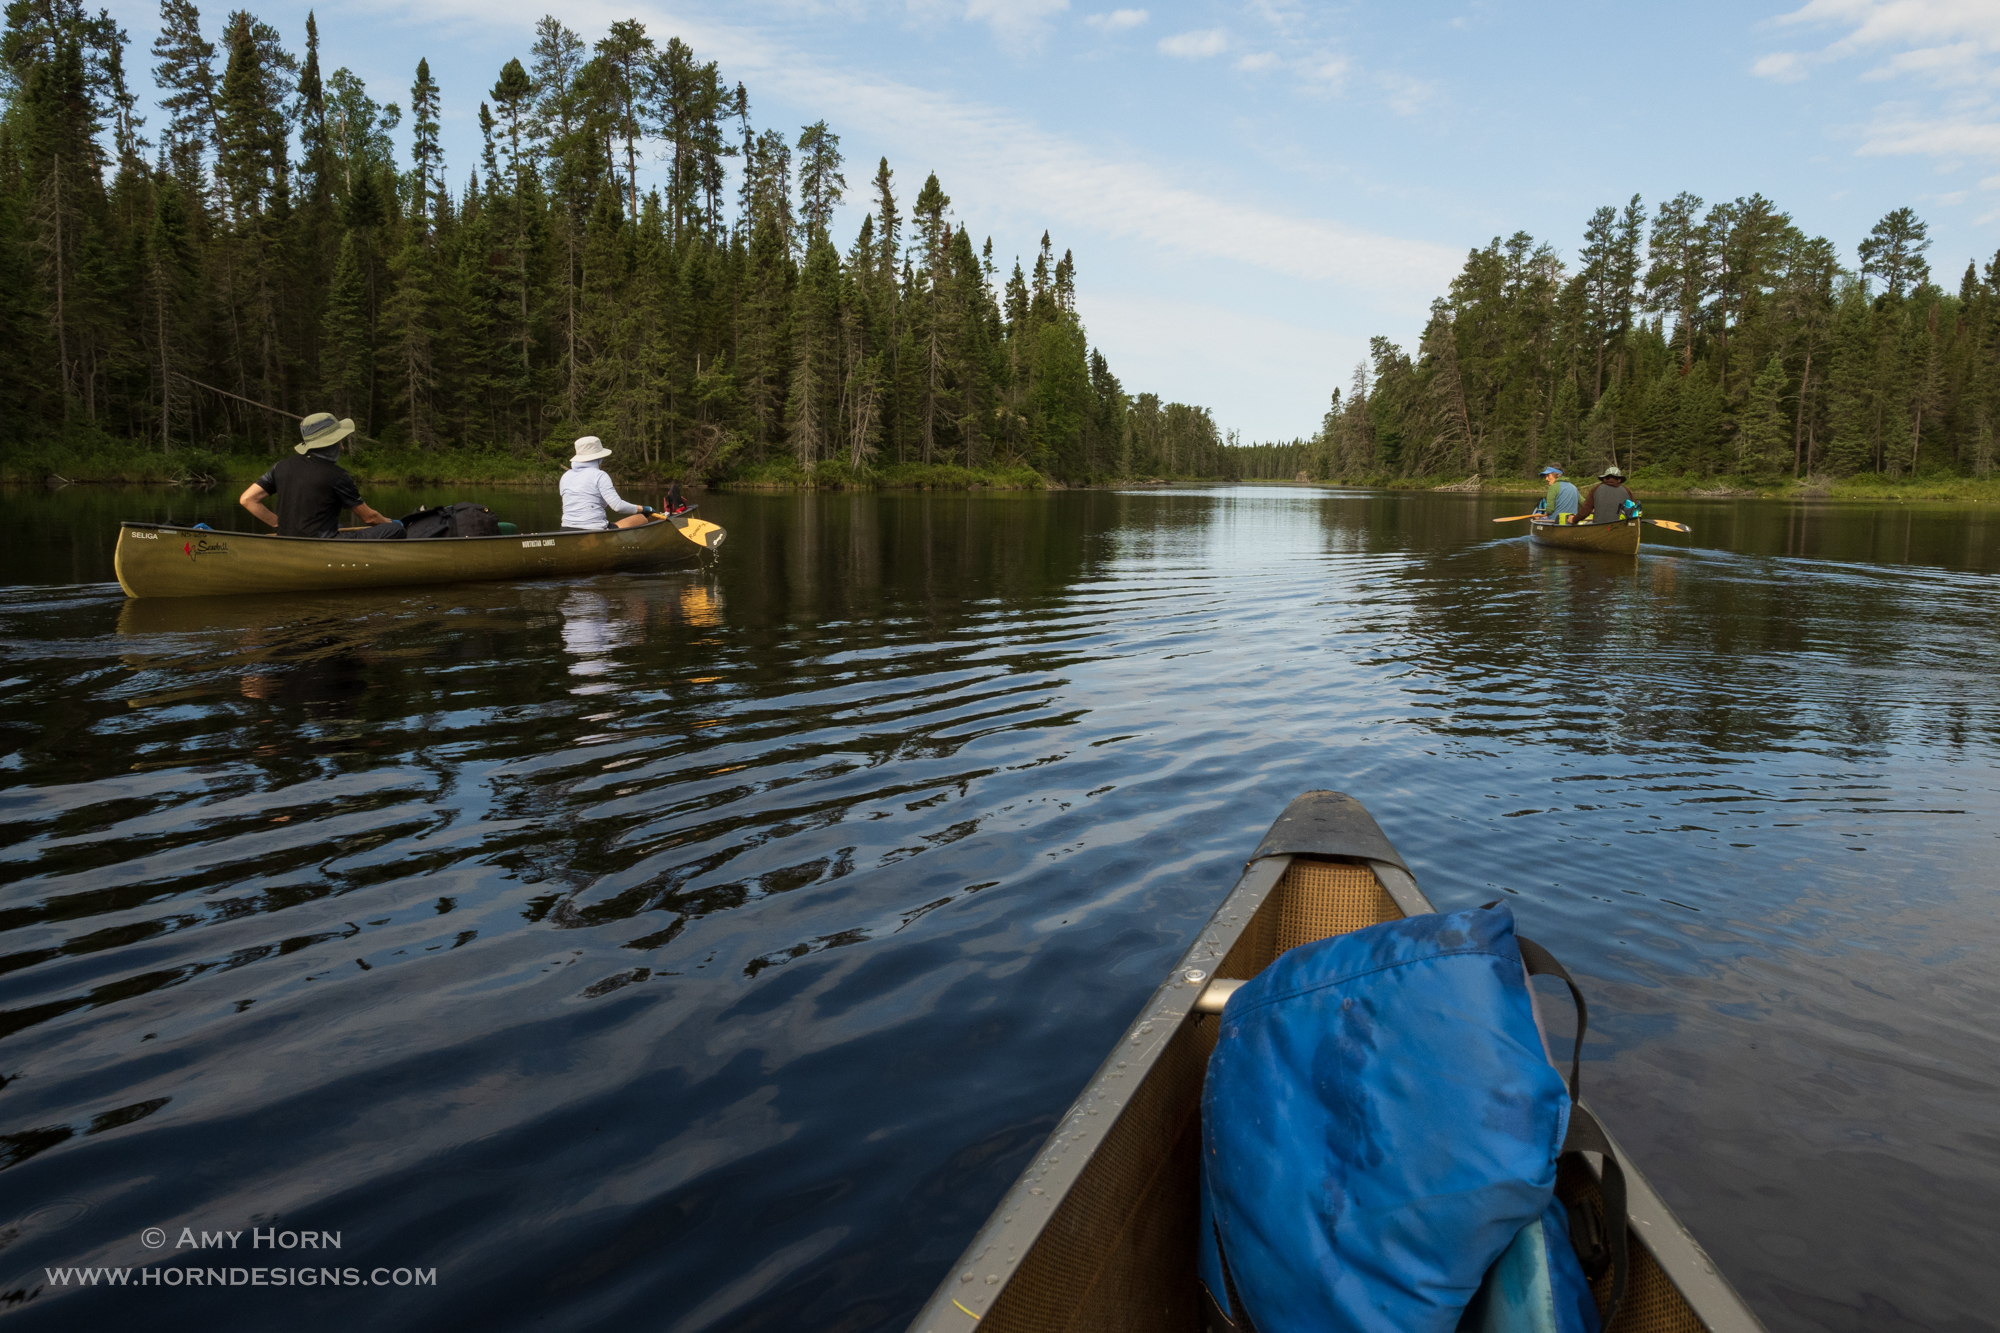
The Manfrotto mini tripod was perfect for sunrise and sunset shoots and a Singh-Ray Circular Polarizer completed the setup. Of course, I took an extra battery. All of this fit into my Overboard Camera Dry Bag (https://amzn.to/3qpLR5o). The shoulder strap on the dry bag made it easy to clip onto the boat or wear over my shoulder during portages. See the photo with my camera dry bag and the large 60 lb Duluth bag of gear and food? This was captured at the start of a portage. So, I could easily open the bag and grab photos whenever needed.
In places like the Boundary Waters, I don’t want the gear to take over from the fun of the trip, so I kept it simple. Below are a few more images captured on the trip.
The question asked most about our trip to Minnesota’s Boundary Waters was, “How were the mosquitos?” Well, I have to say, they enjoyed our visit! The mosquitos were thick at times, but we were prepared and dealt with them. I knew very little about the Boundary Waters, so this travel blog shares my new knowledge of the area and our back country adventure.
According to Paul Vincent, the Boundary Waters Canoe Area (BWCA) is one of America’s most remote and cherished wilderness areas accessible primarily by canoe. It extends 150 miles along the U.S.-Canada Border, with over 1,100 lakes and 1,500 miles of canoe routes. It was hard for me to imagine until I saw it firsthand. (Explore Minnesota) In the large lakes, the water is so clean, that it is drinkable without a filter.
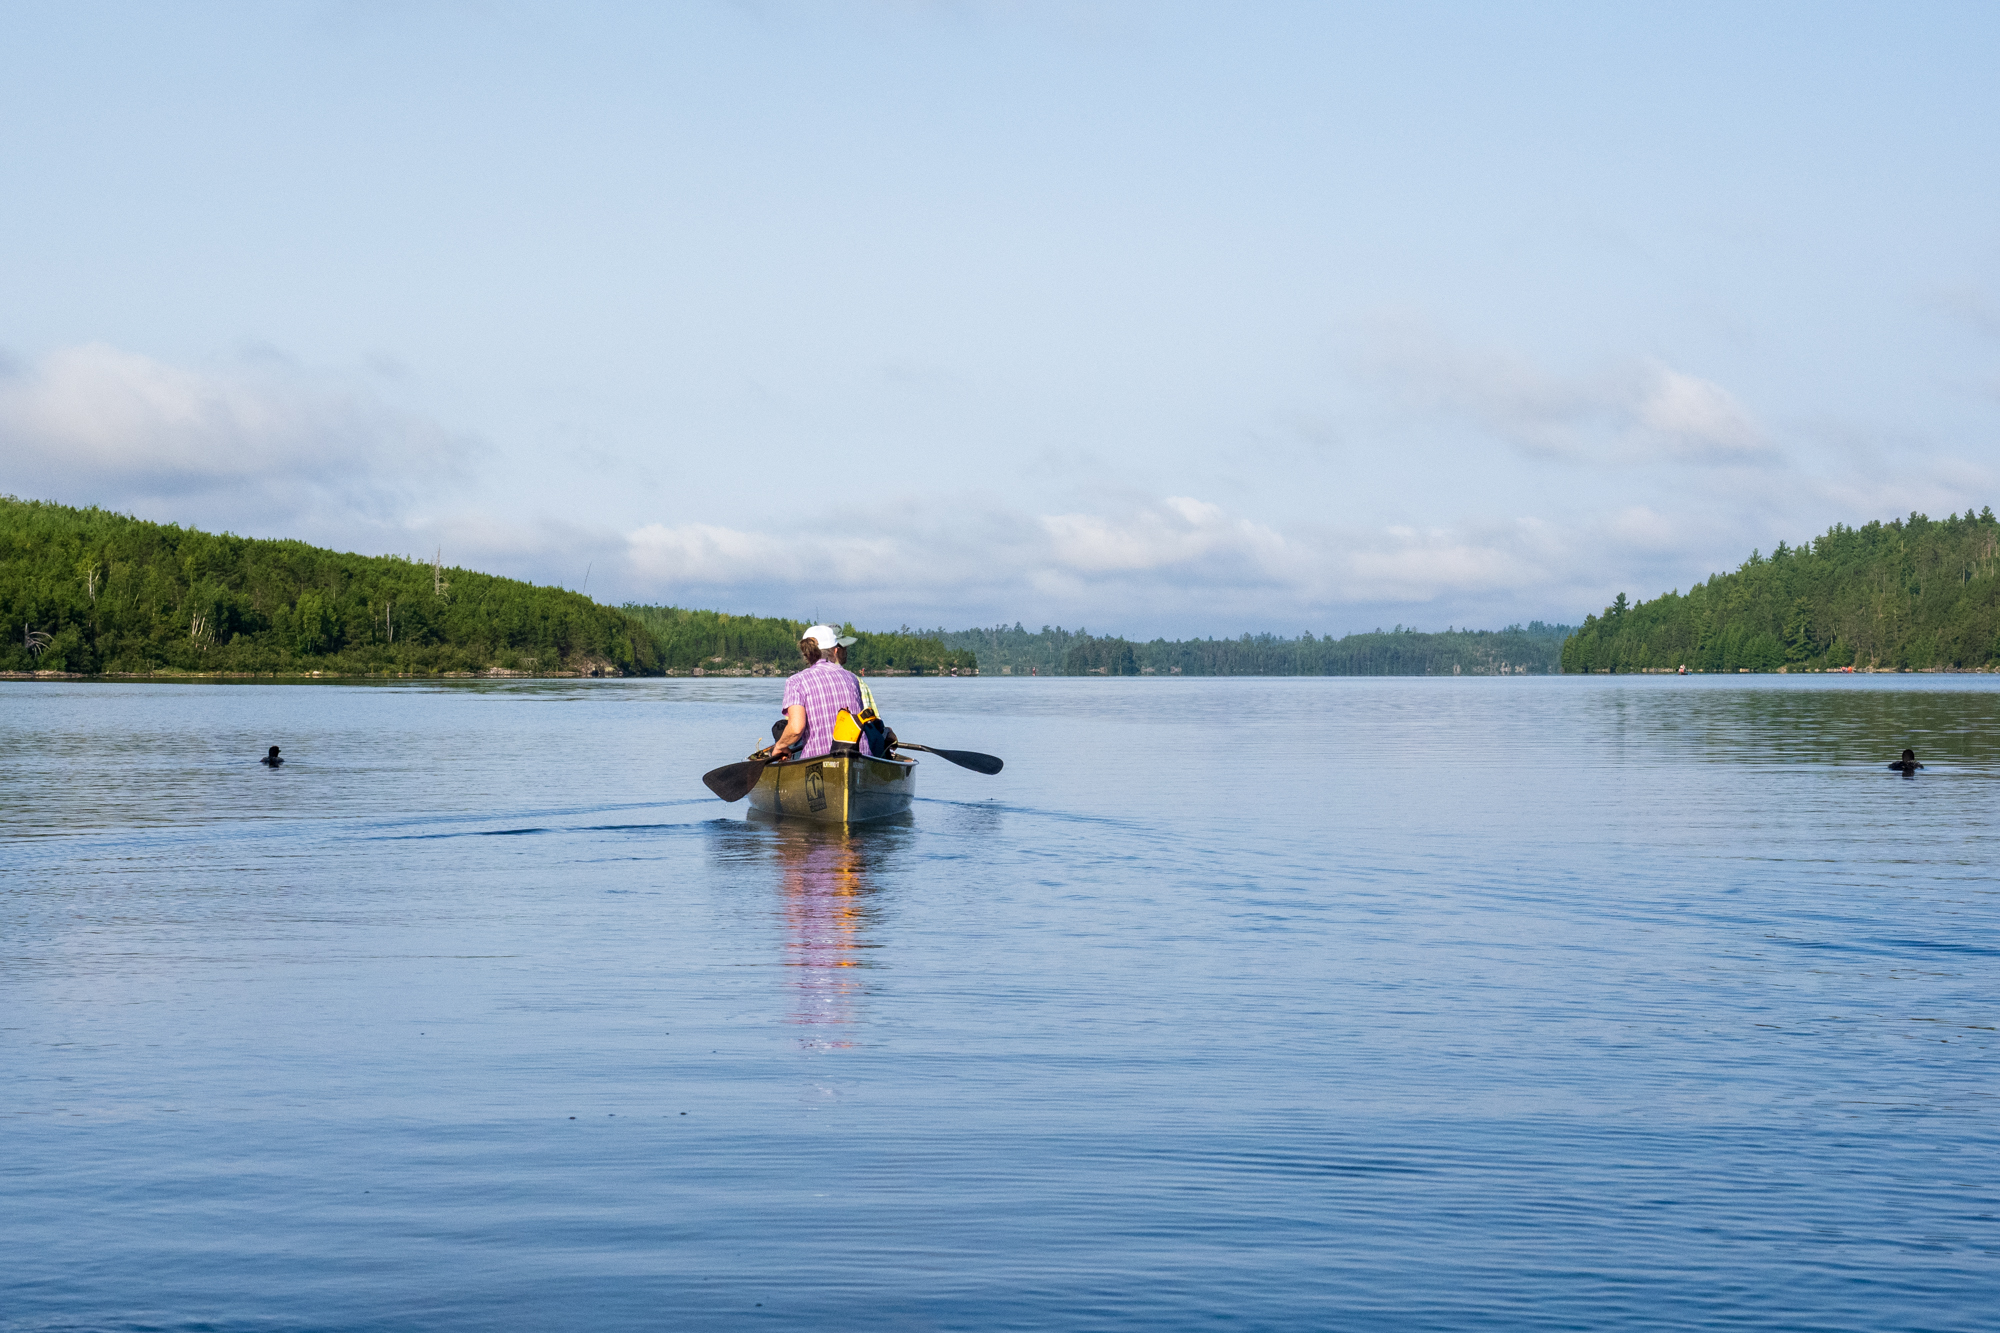
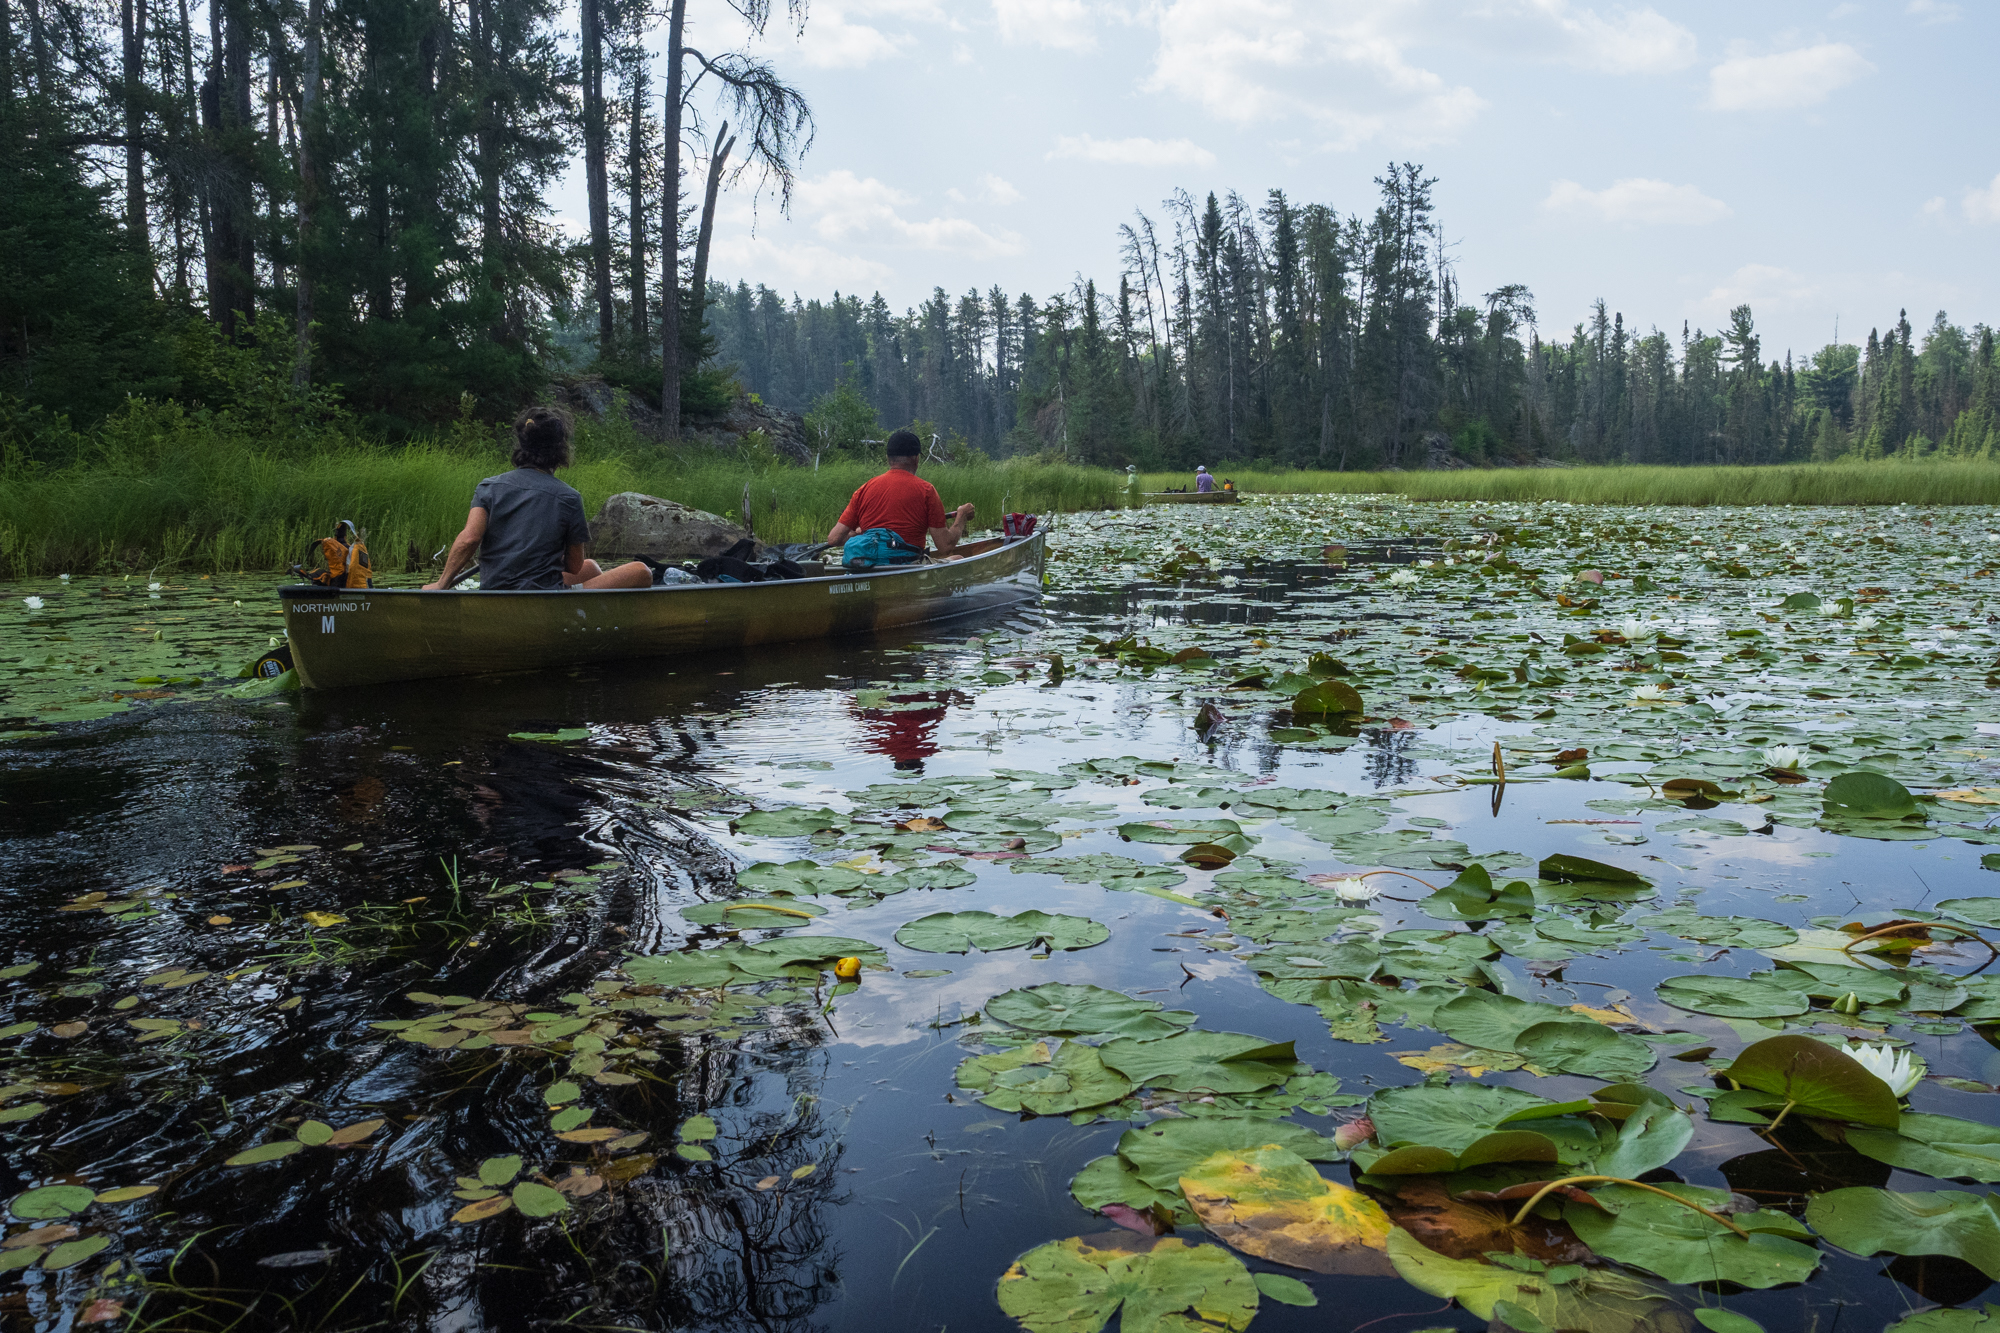
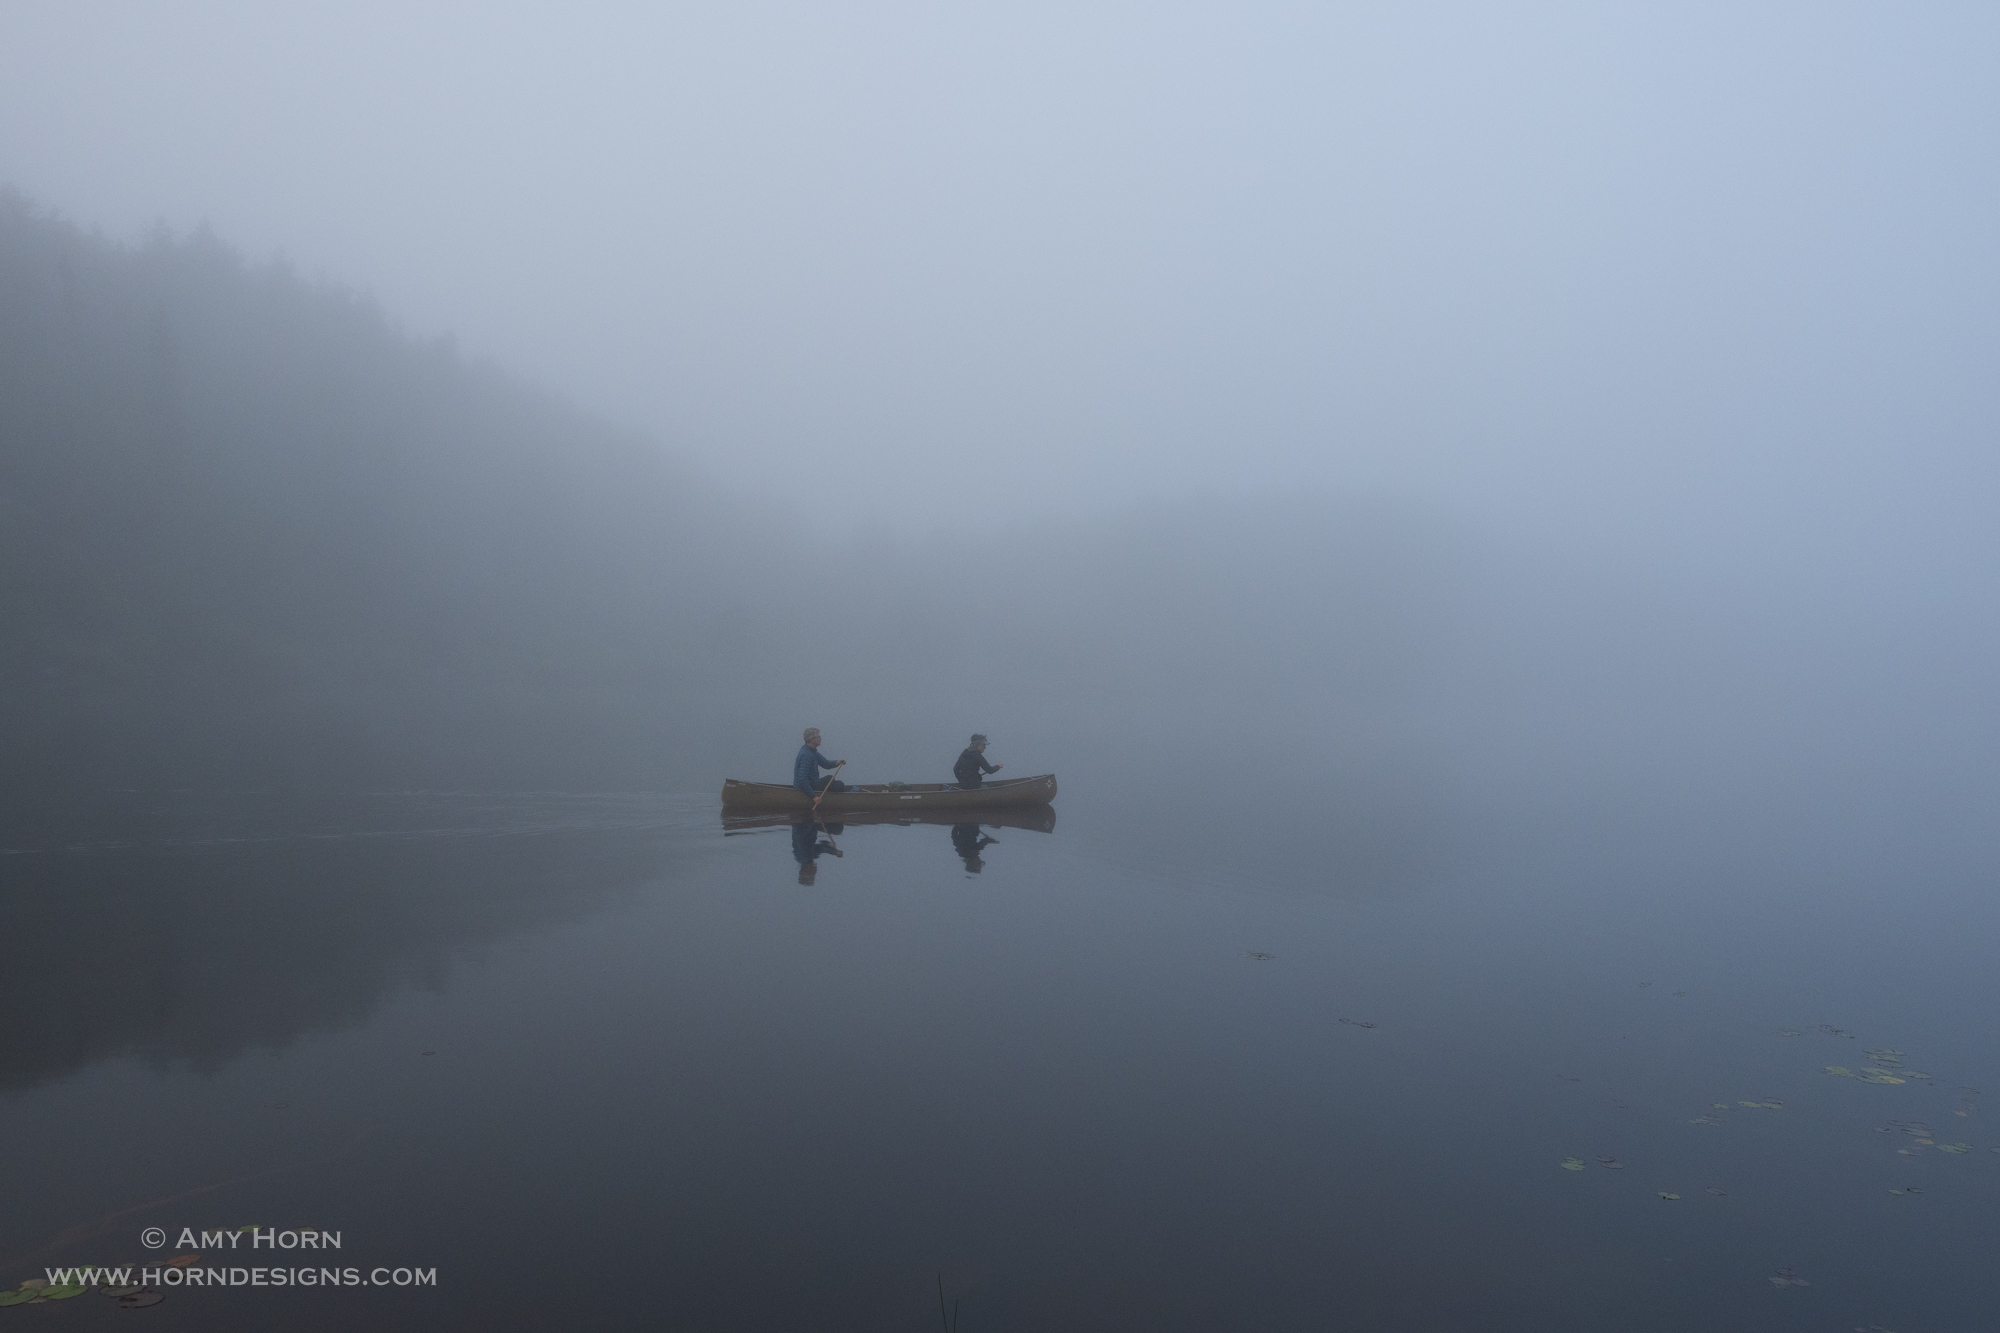
Rod and Amy Canoeing in the Boundary Waters
Preparation
Our good friends (Gretchen and Ron) have extensive knowledge and experience in the BWCA, so we followed all their gear recommendations. We brought one wet outfit and one dry outfit for the 6.5 days with additional waterproof gear/warm layers. The clothes were pretreated with Permethrin to discourage biting bugs and it worked well. We also acquired an ultra-lightweight tent, sleeping bags, and chairs to keep us comfy at camp. Of course, I brought a camera, so I bought a waterproof bag (OverBoard Waterproof SLR Bag) that clipped to the canoe or hung over my shoulder. The easy-to-access bag kept me shooting on land and water. Lastly, an outfitter provided us with canoes and packs.
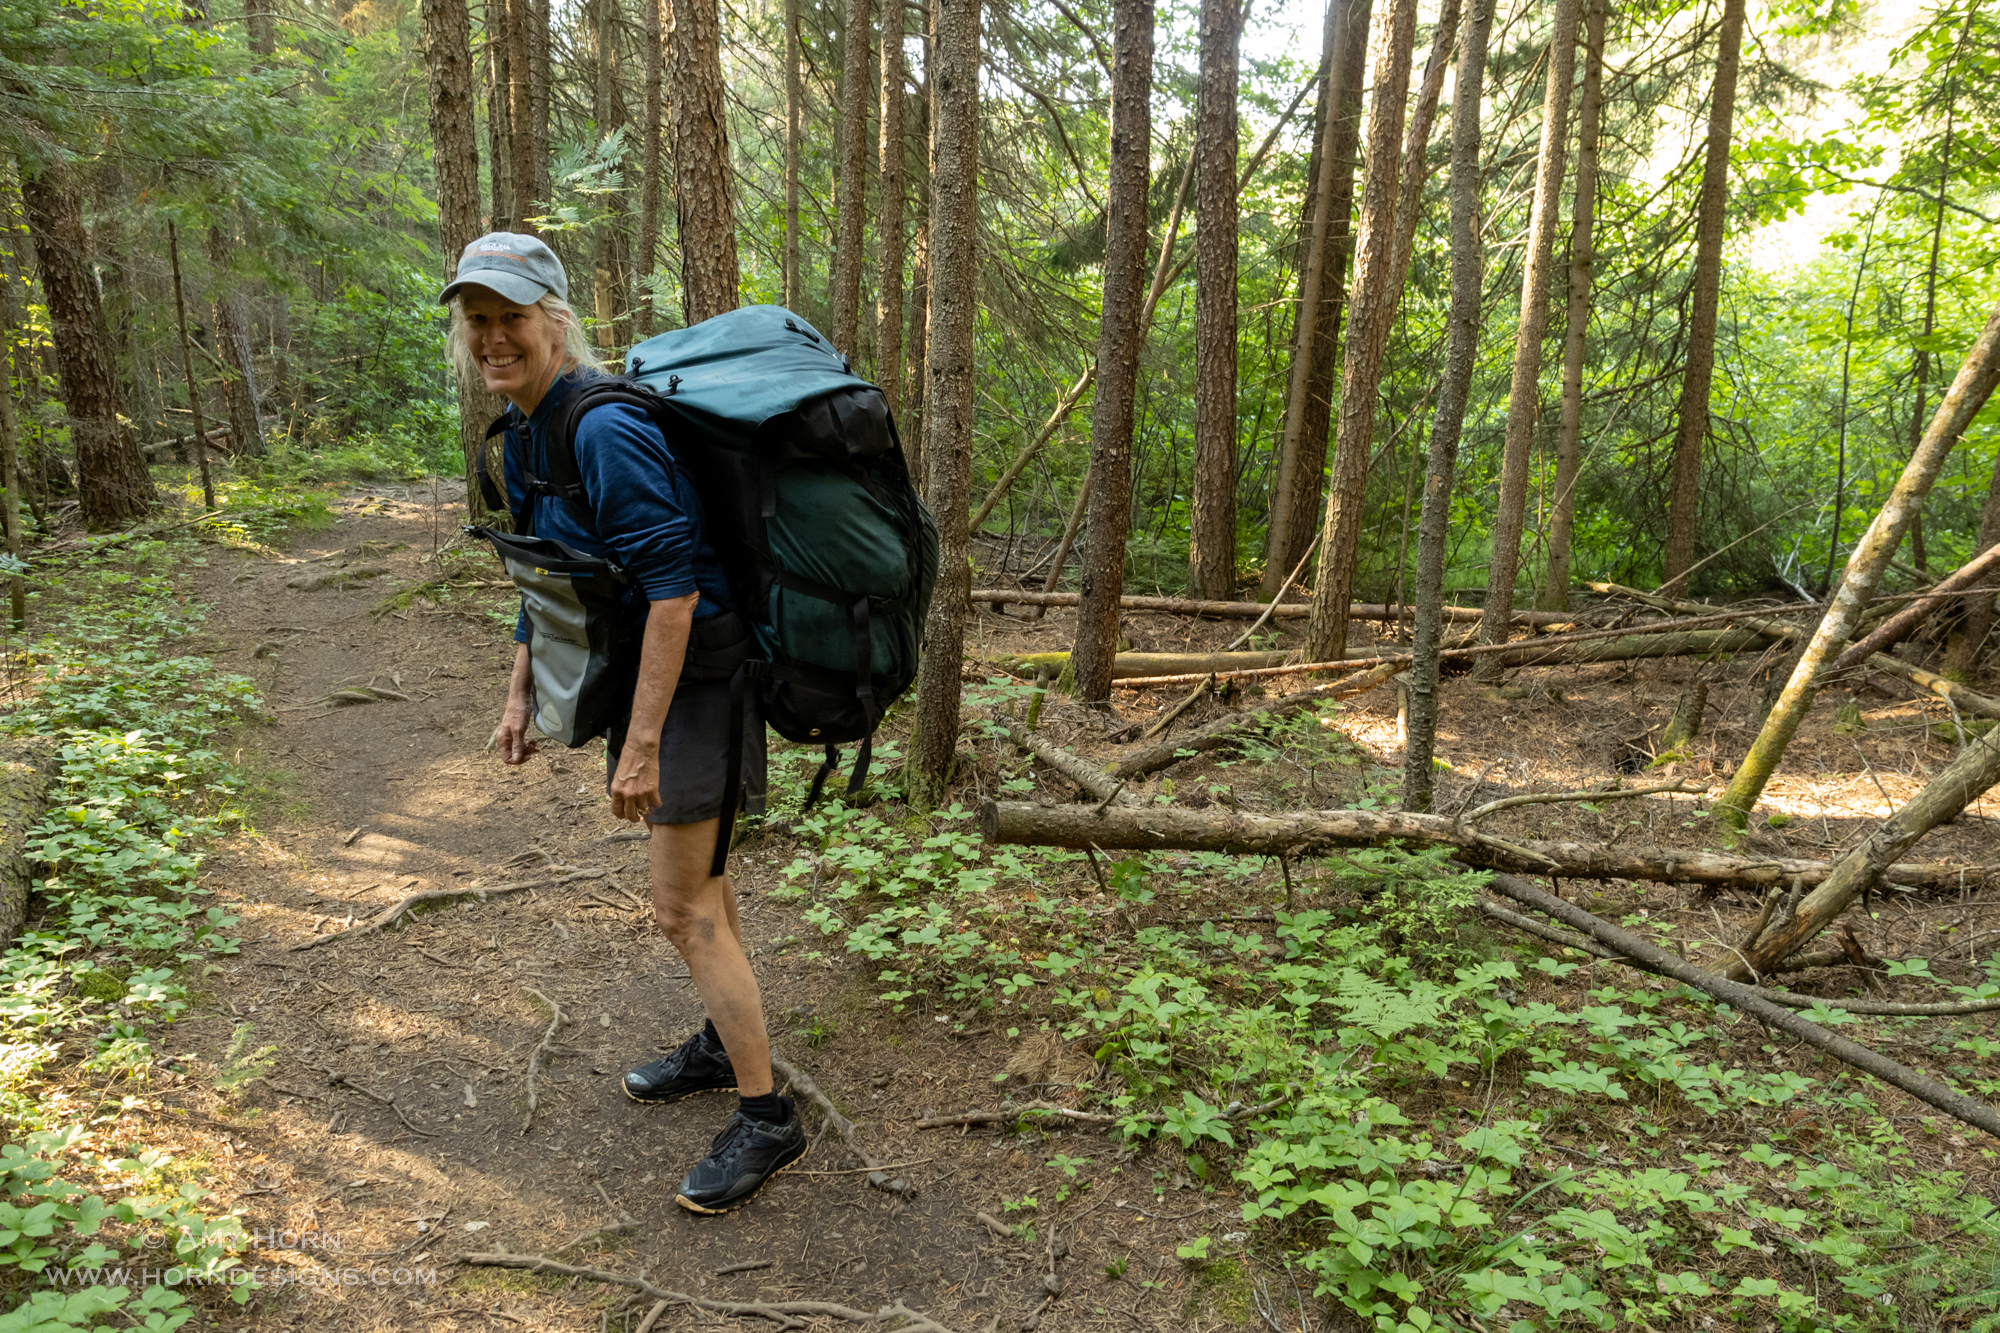
Our group included eight people with four canoes, and each canoe carried two people, with all their gear (personal gear, tent, sleeping bags) along with a portion of group gear (food, stoves, tarp, pans, etc). We carried food, a tarp, and the pancake griddle pans as our group gear. This made for a heavy pack. When I first put it on, I started falling backward. Rod caught me and expressed concern about whether I would be able to carry it all. We estimated the pack was 60 pounds. After cinching down the straps and leaning forward, I was ready to go.
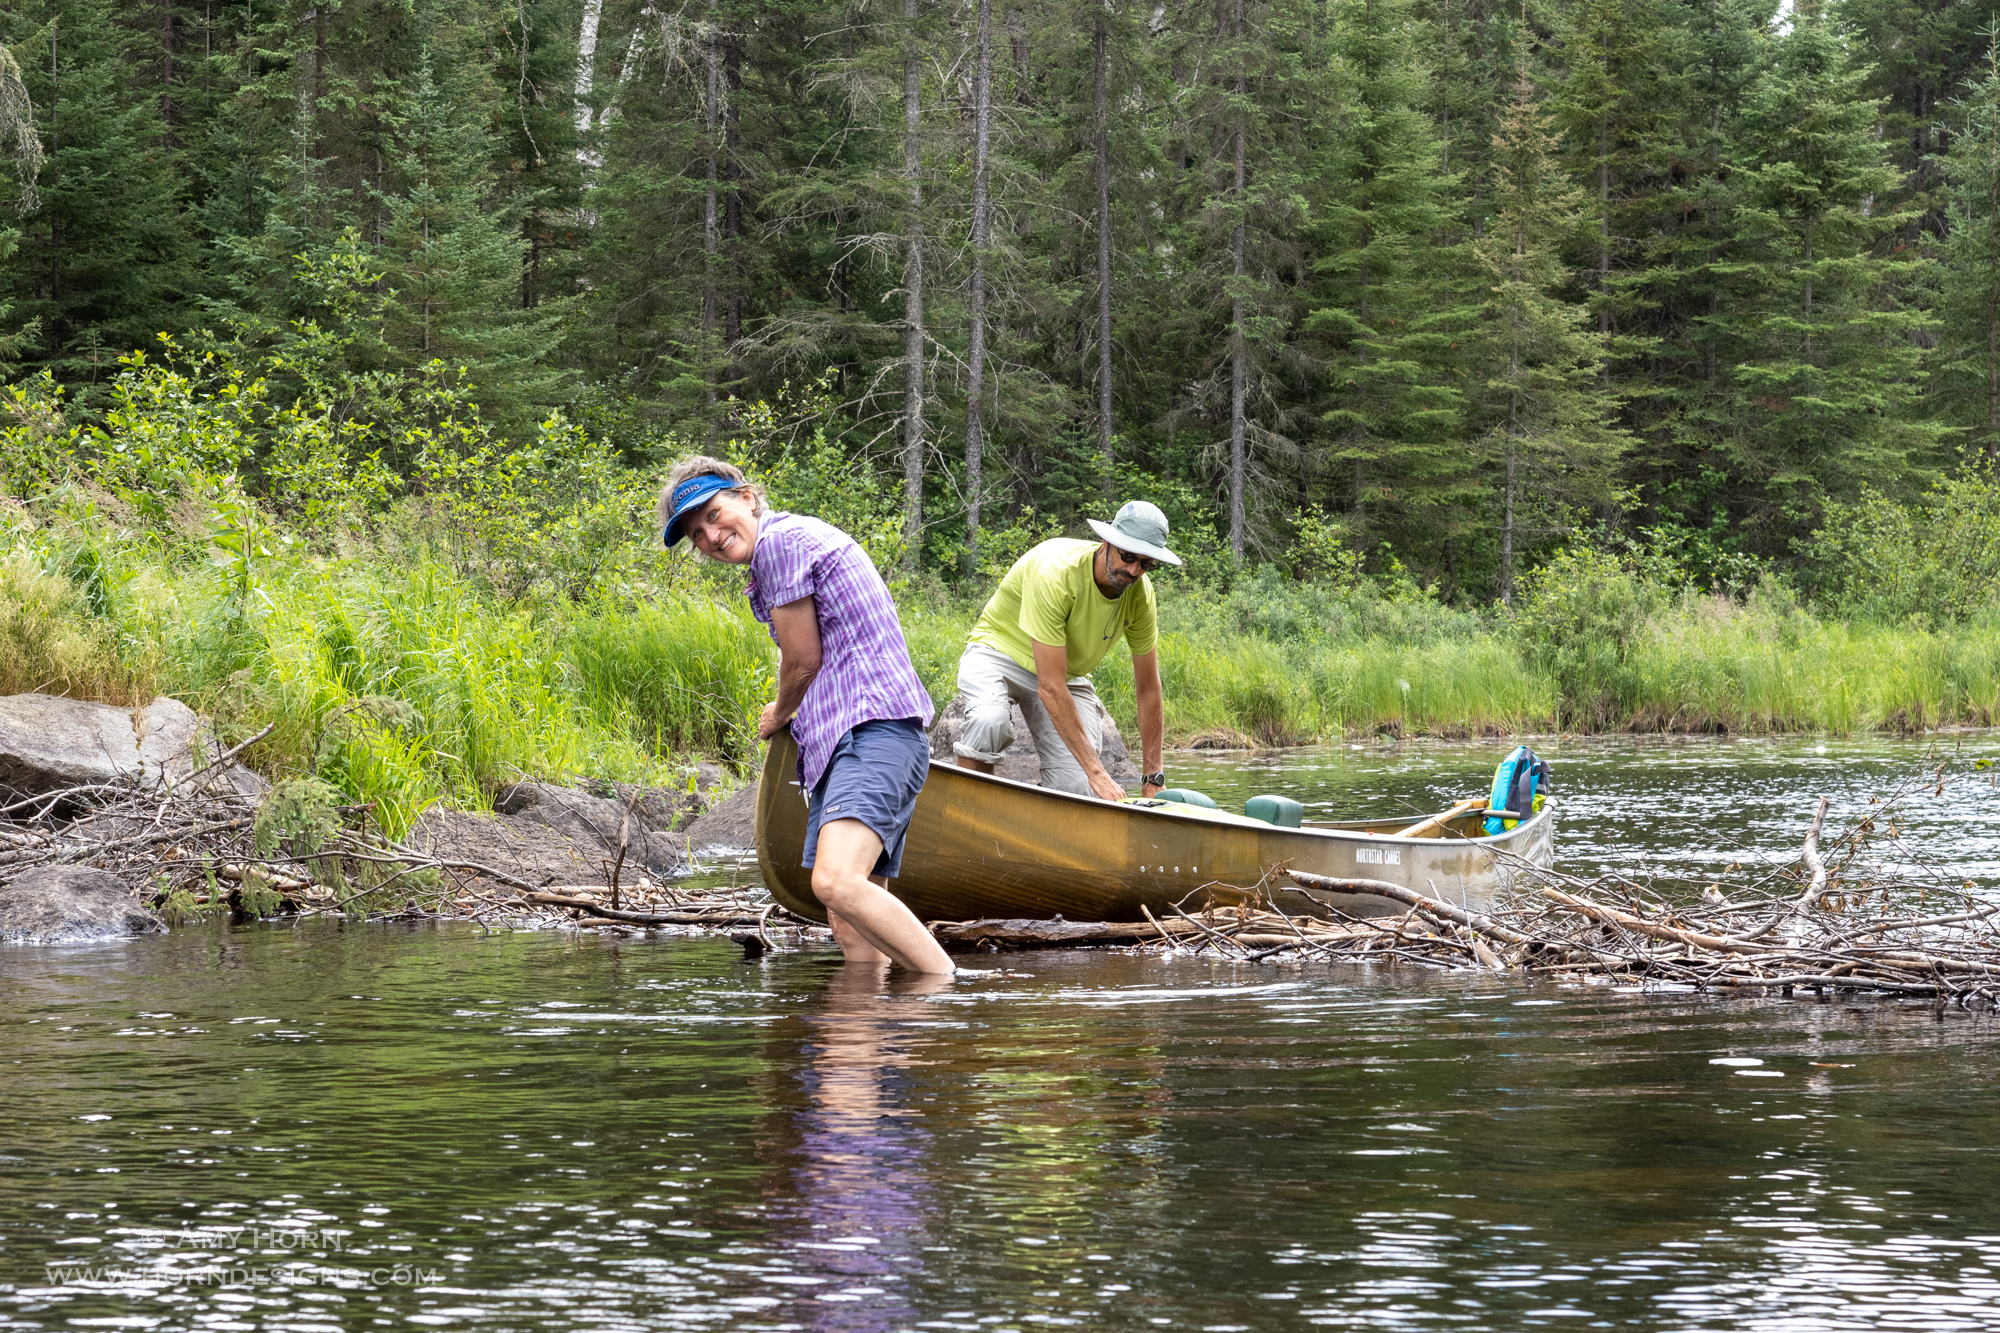
Rod steering the canoe.Gretchen & Ron passing over a beaver dam.
On the Water
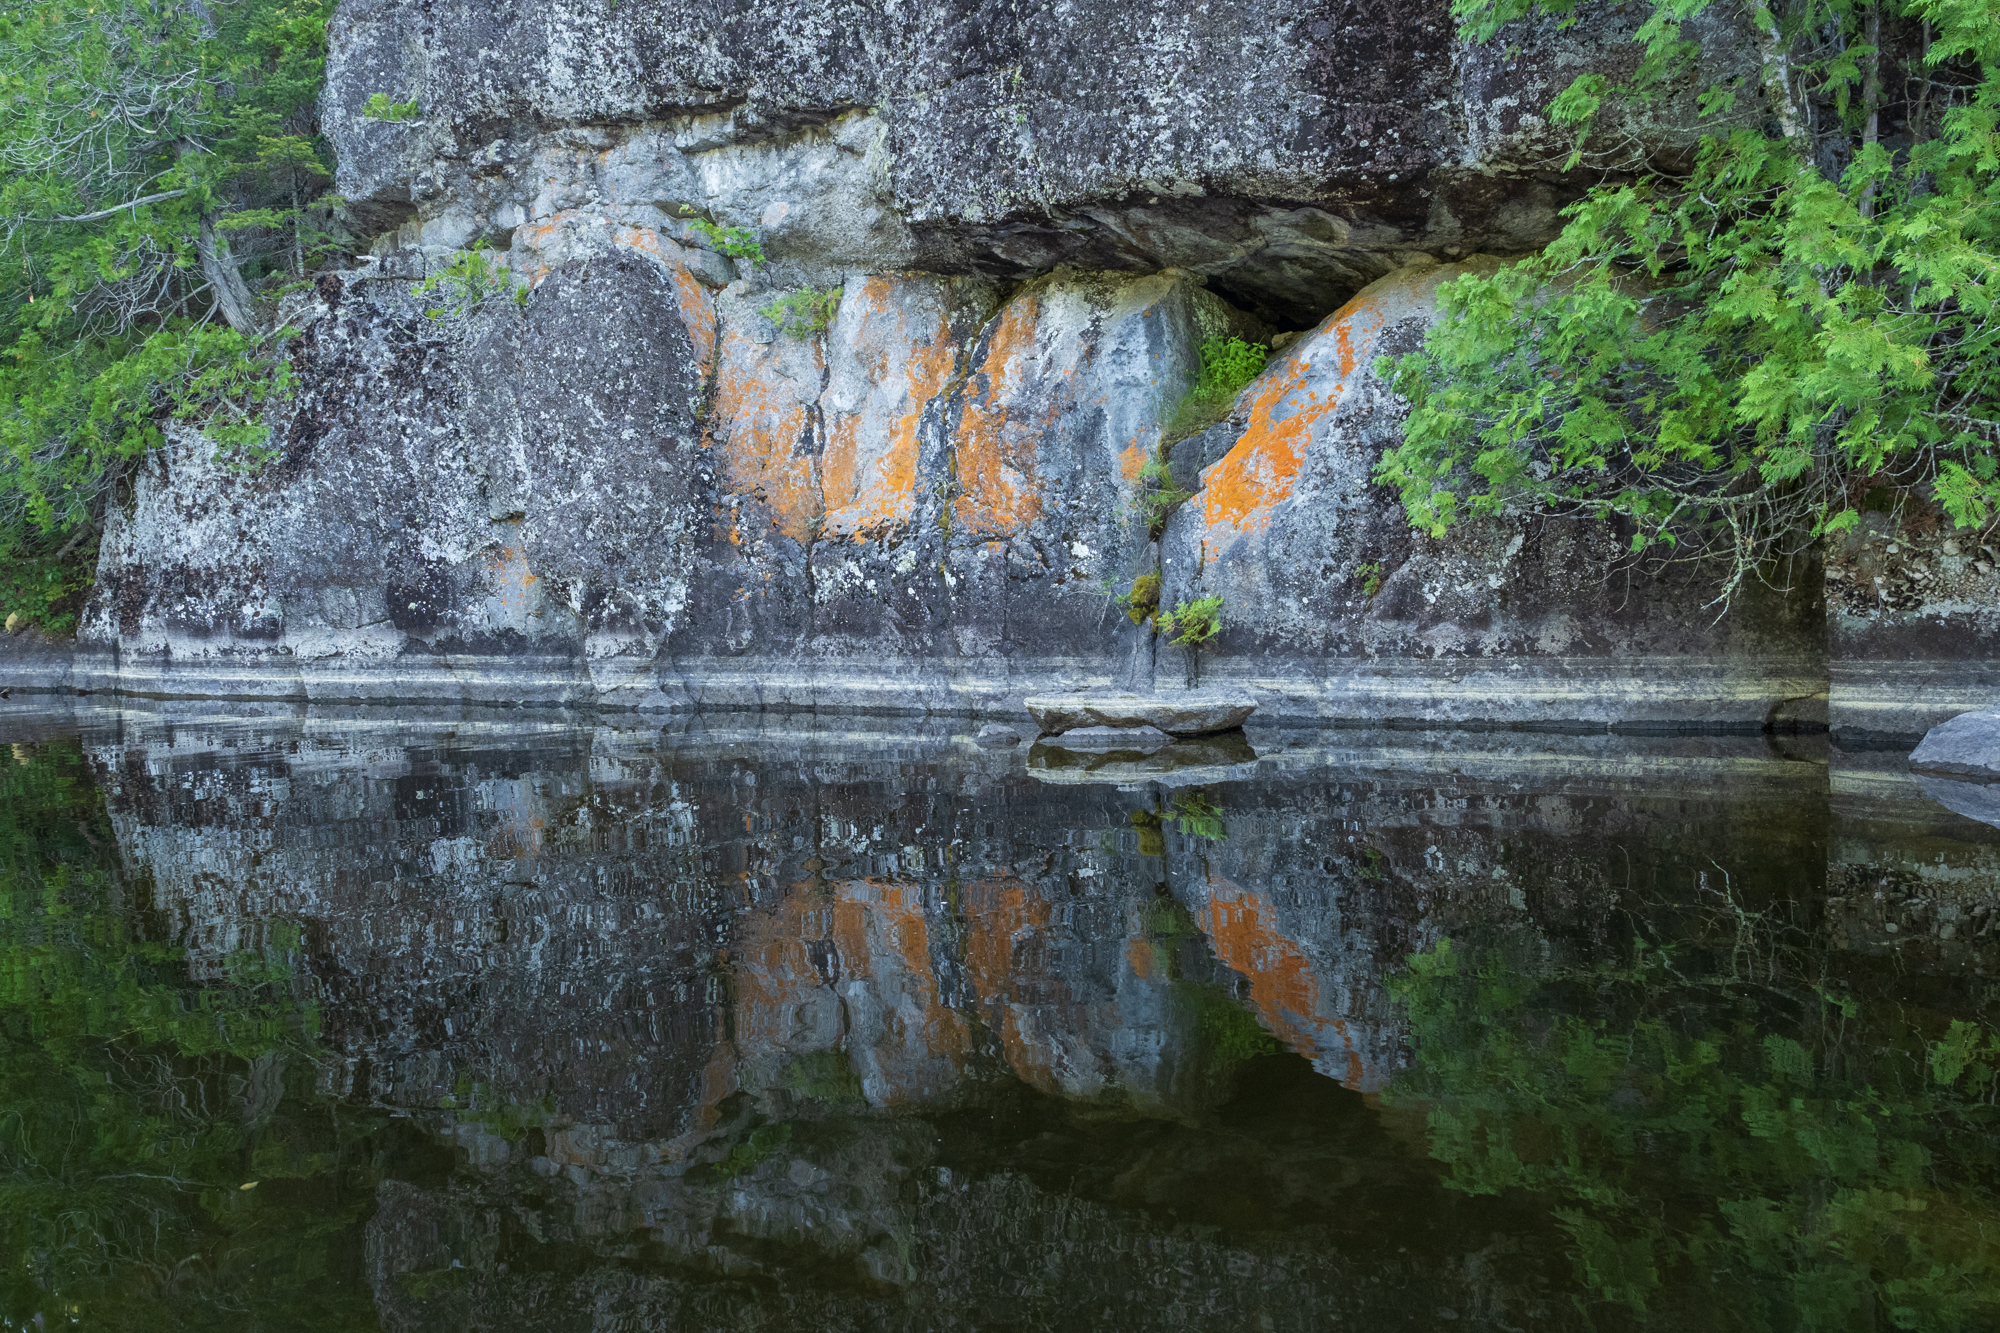
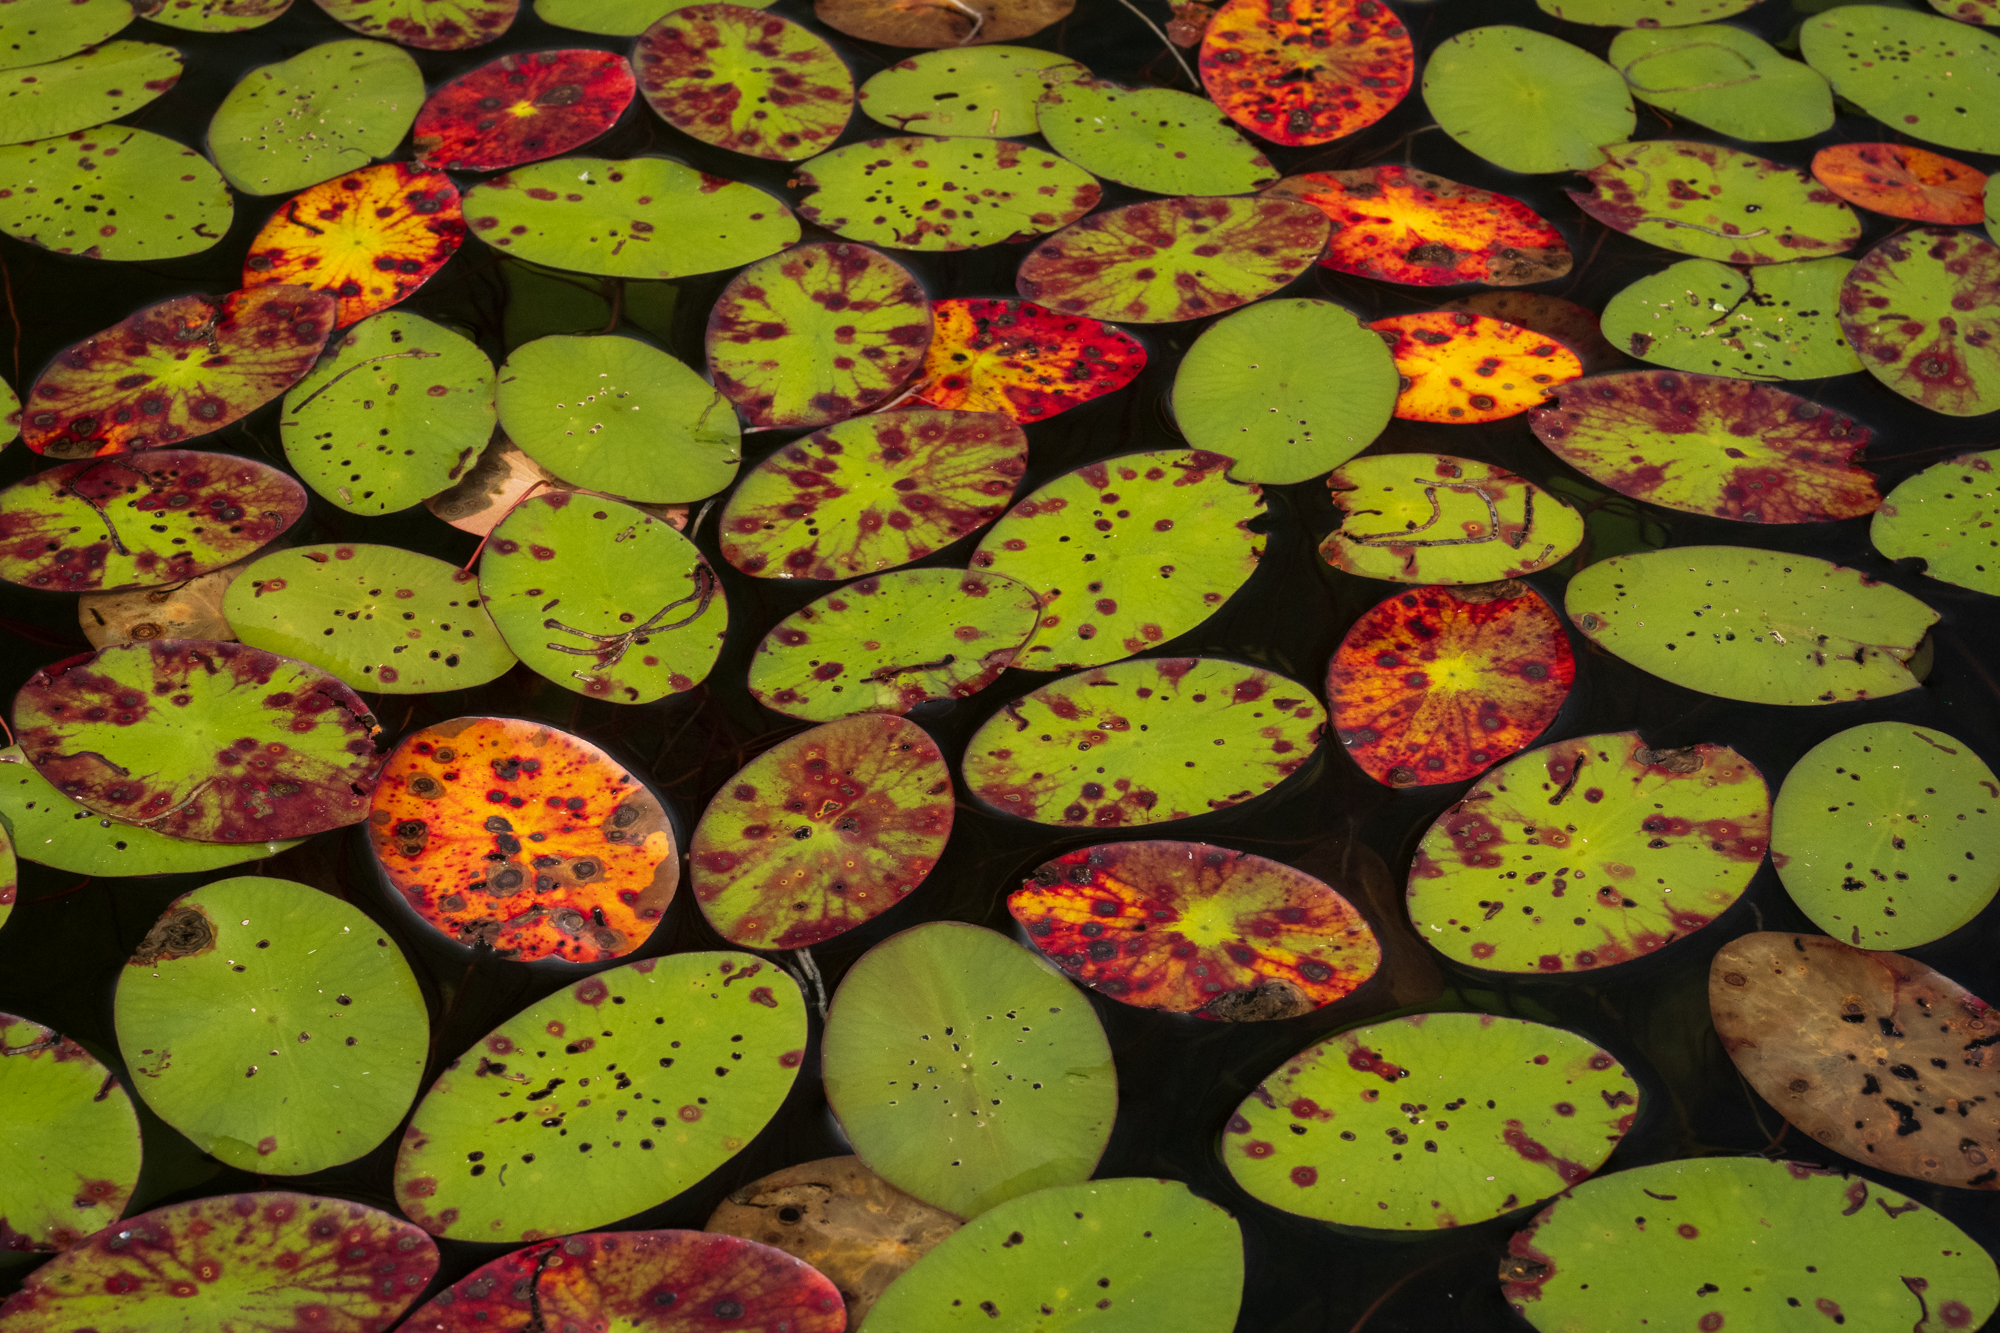
We put in at Baker Lake, a small quiet lake with lily pads, flowers, and towering trees along the shore. An amazing sight to see. After a mere 2000 feet of paddling, we got out of our canoes to portage. Portaging consists of carrying your gear (canoe too) across the land to get to the next lake or river. At this portage, we decided to walk the canoes through the stream and bypass the land portage. That put us on Peterson Lake.
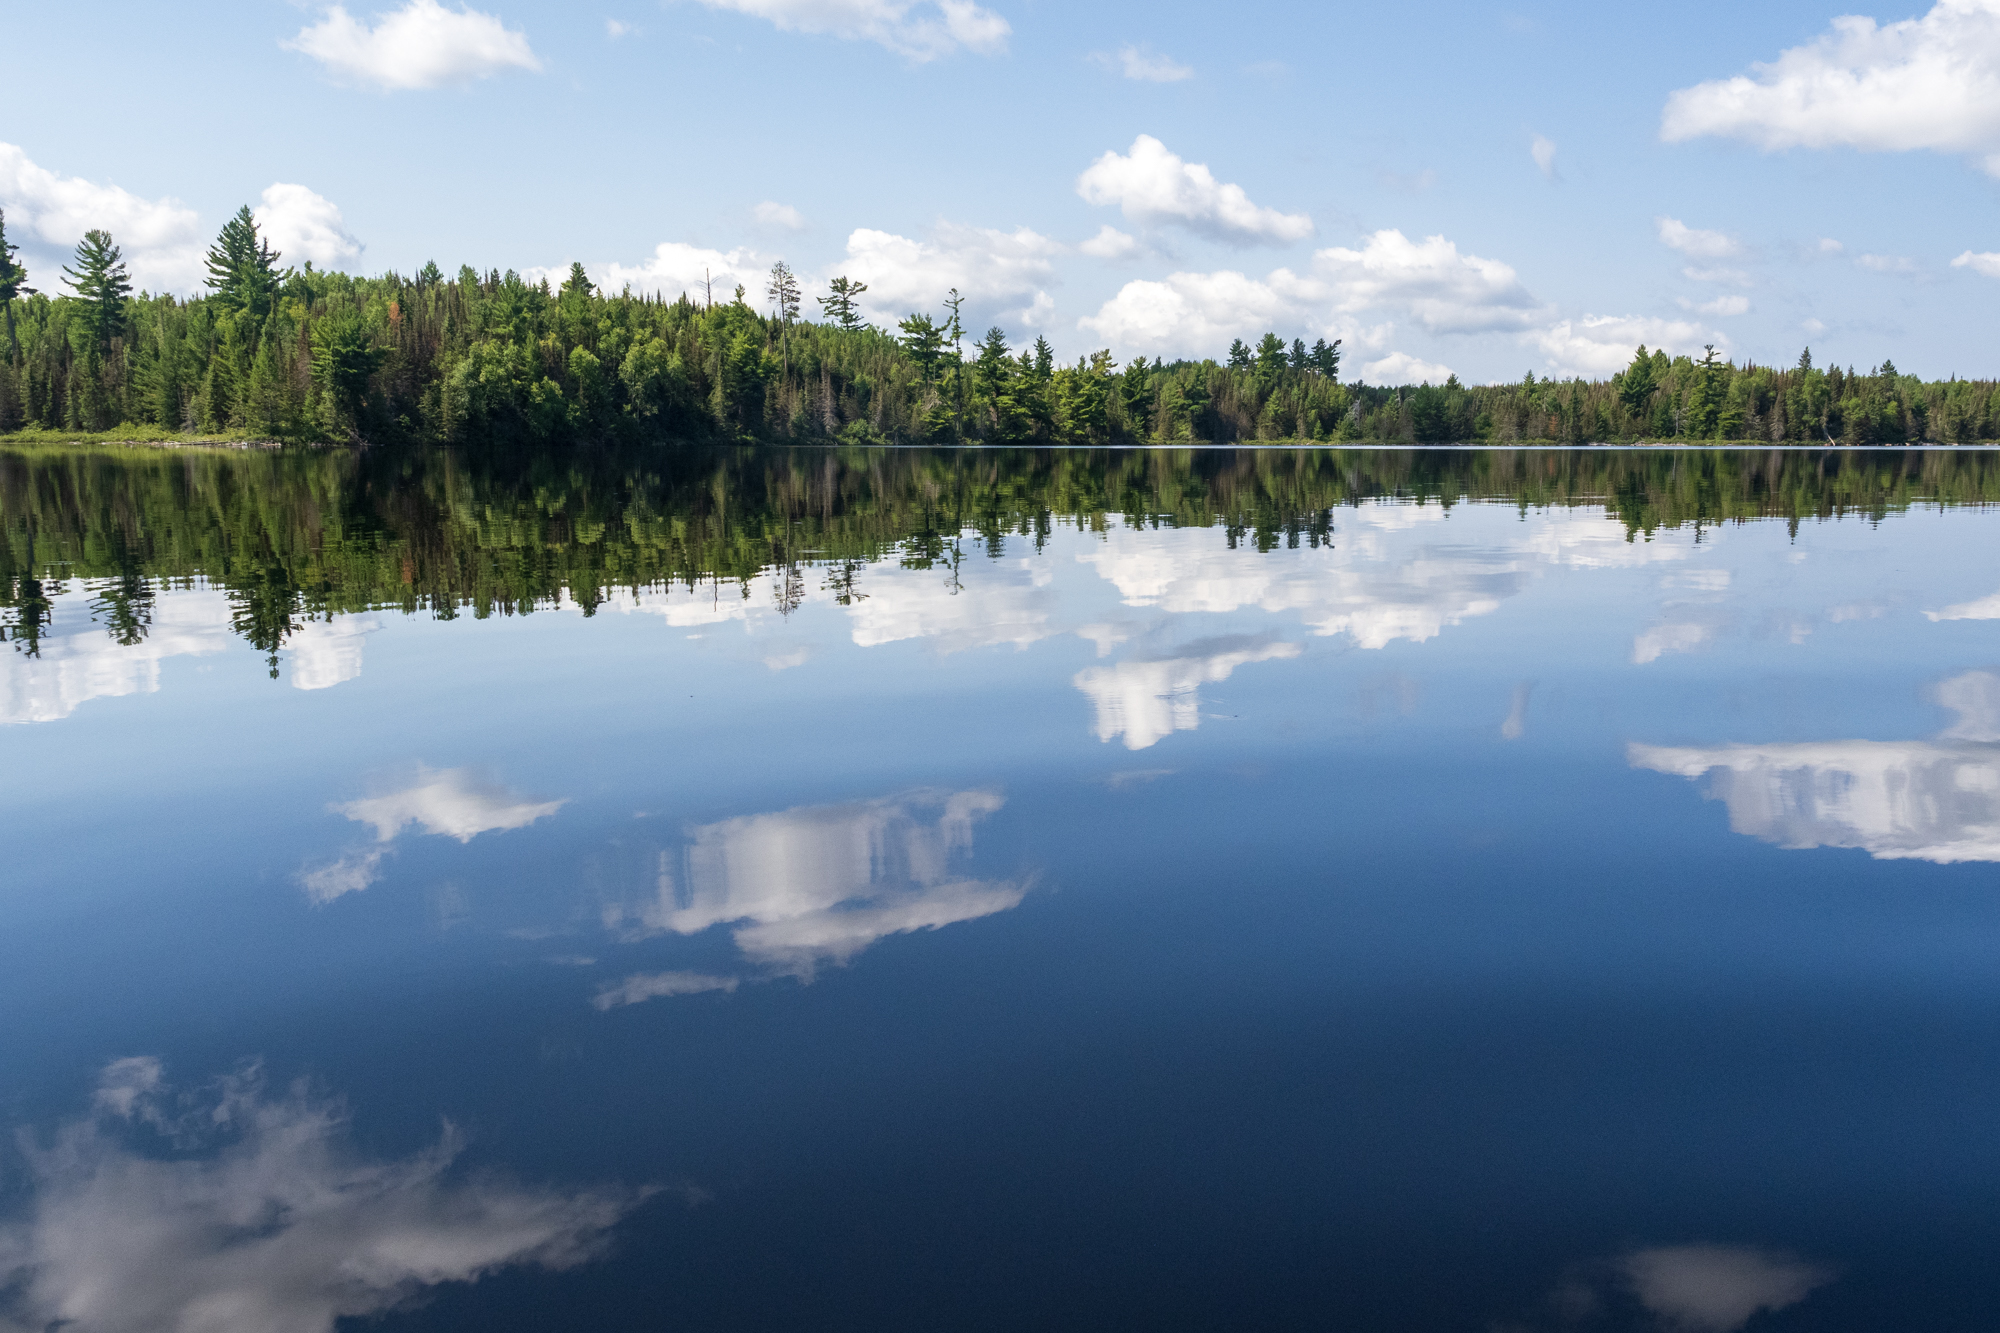
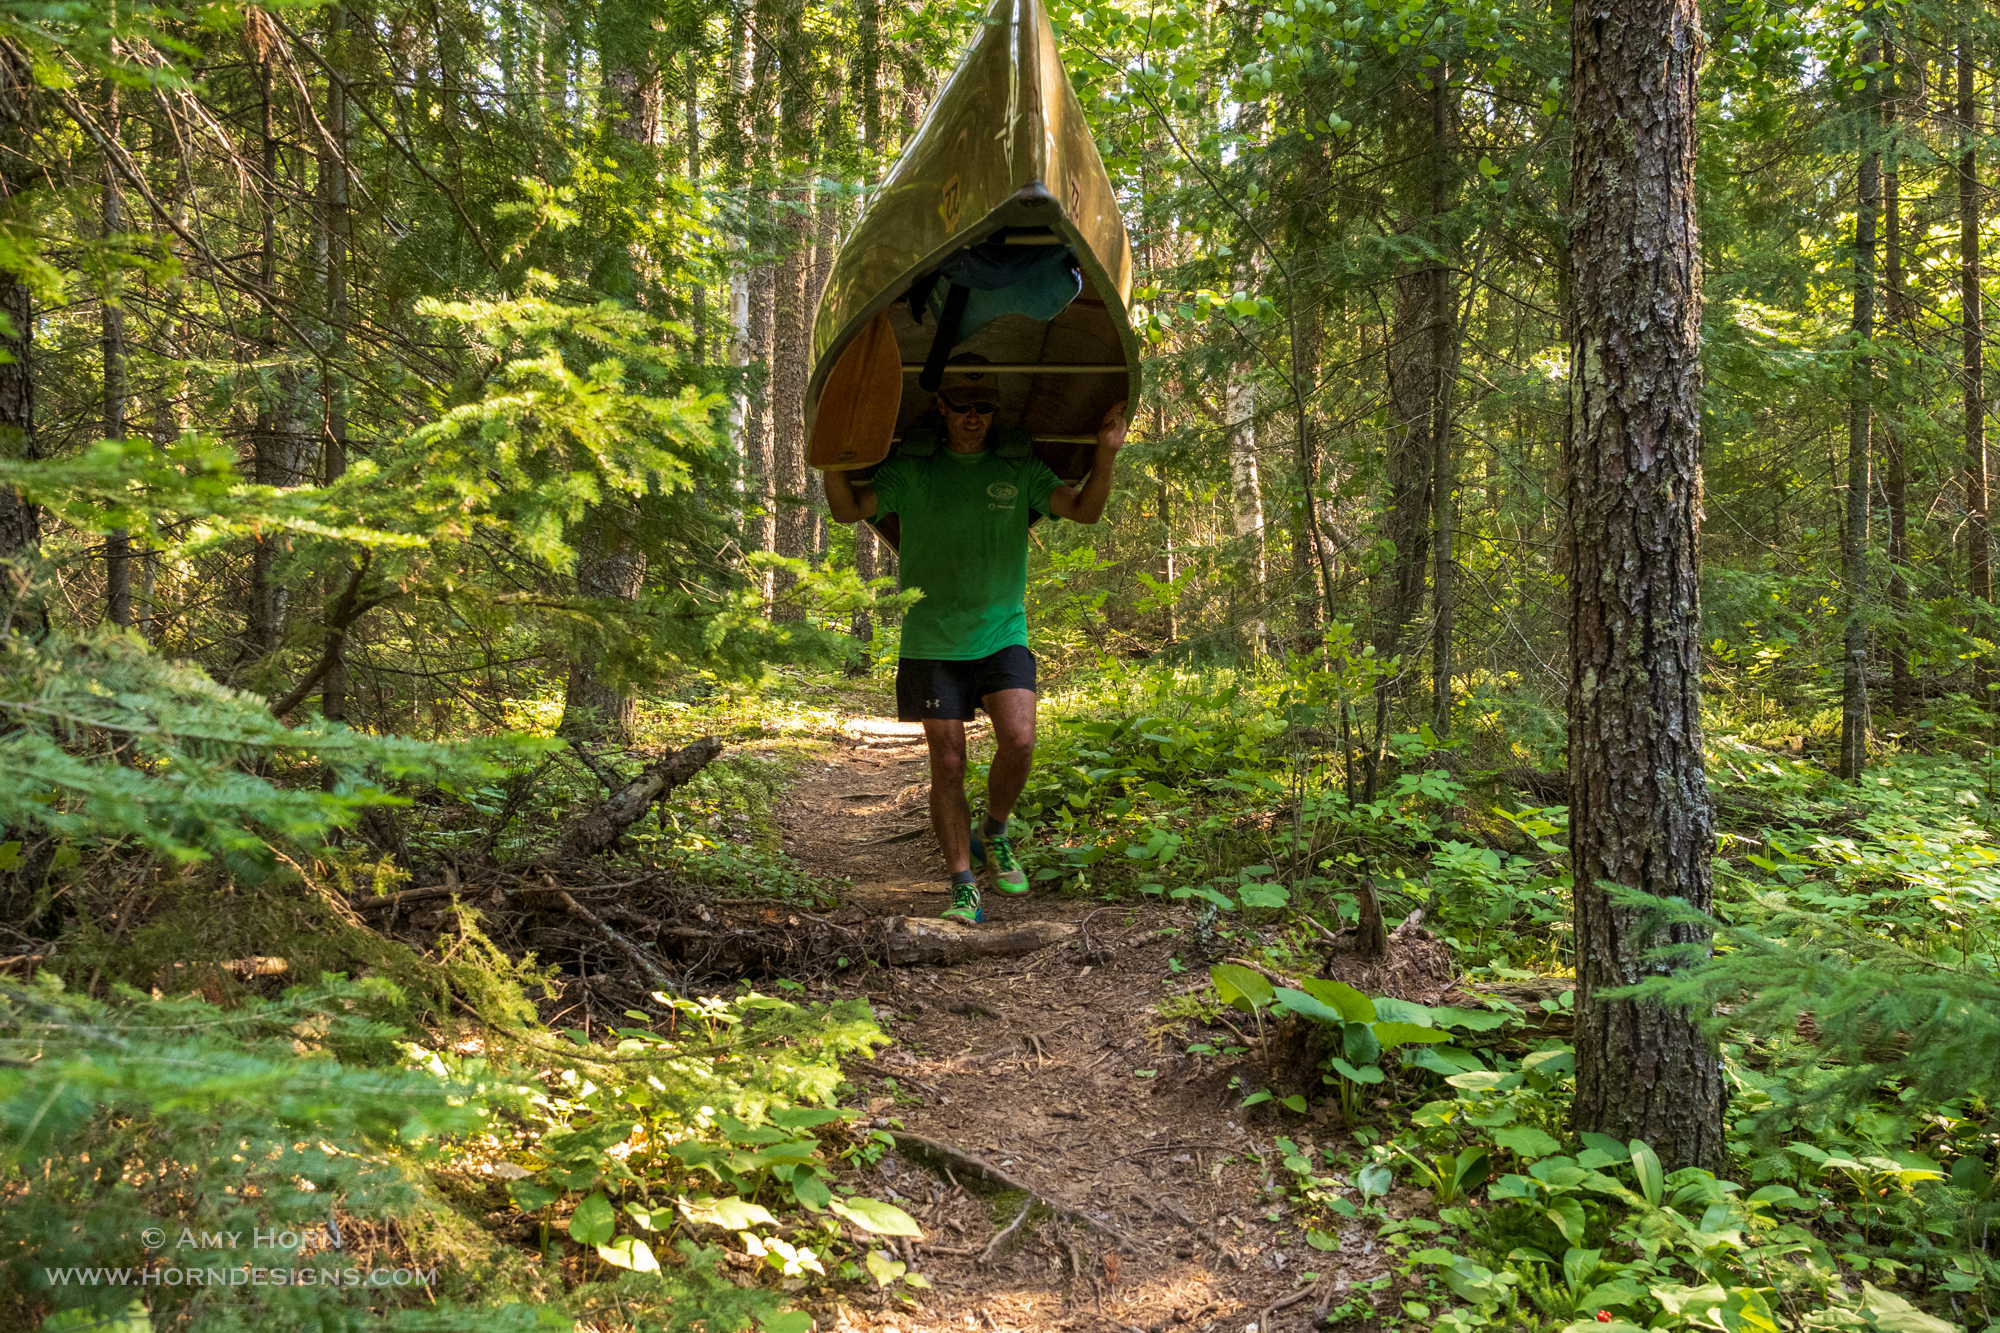
In such a short timeframe, we were immersed in nature where the only sounds came from loons, white-throated sparrows, eagles, paddles, and us. As we paddled, Gretchen and Ron taught us how to read the maps identifying approved campsites and portages. We floated past lily pads and dense forests, and occasionally, beaver dams caused us to exit the canoe. After two days, Rod and I were somewhat pros at portaging. He picked up the pack and put it on my back before we left the water. Then, he picked up the canoe, flipped it on his shoulders and we hiked to the other side. Our portages ranged from 25 feet to almost a mile and are measured in “rods” (unit of measurement). 320 rods equal a mile.
Amy’s heavy pack.Rod portaging.
Portaging
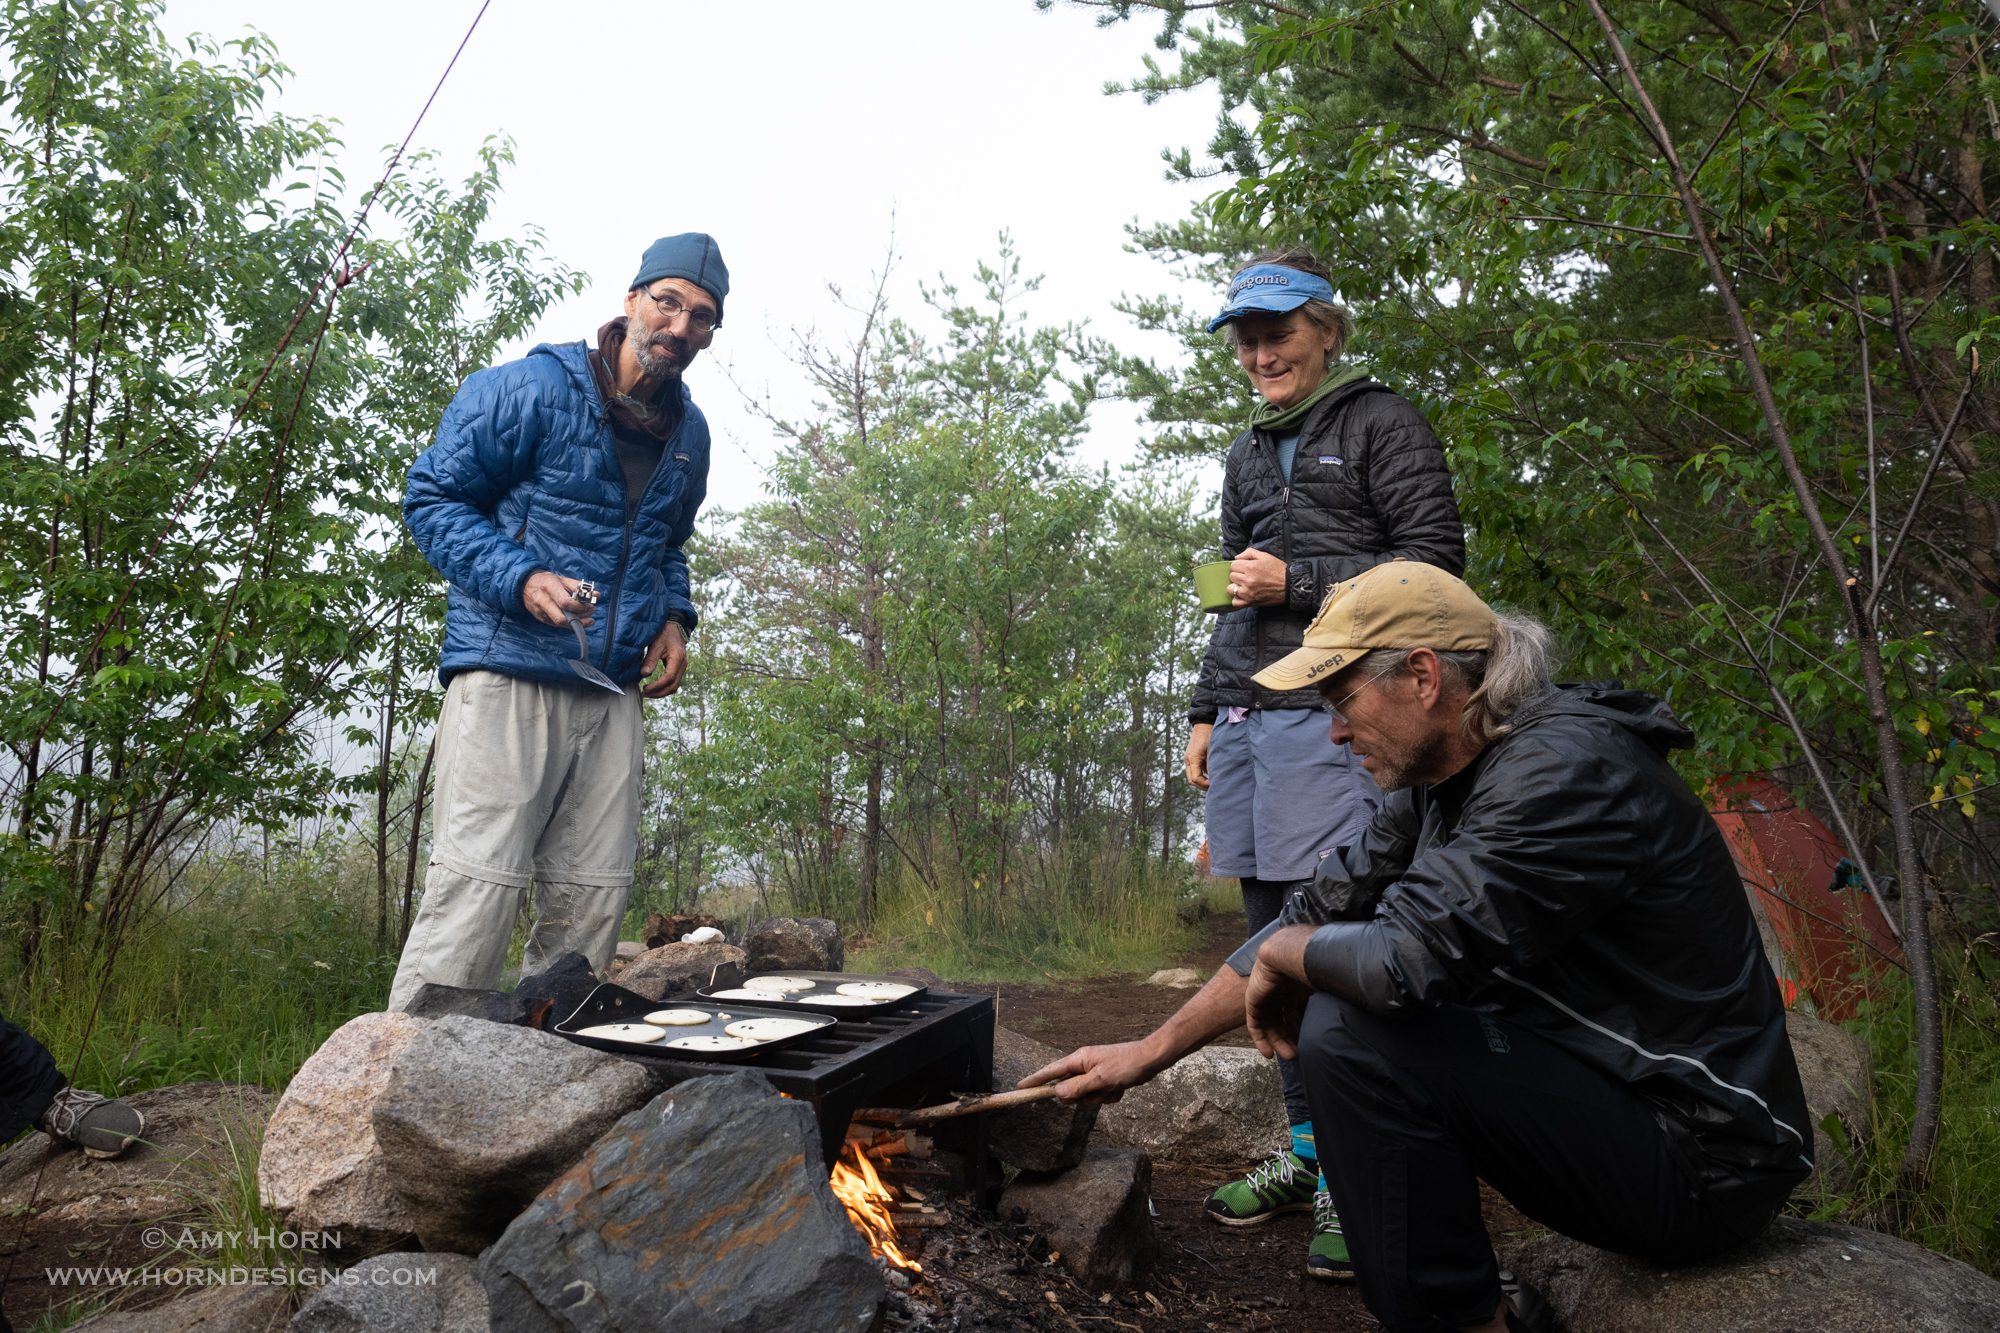
The best part of portaging was grabbing the wild blueberries, raspberries, and chanterelle mushrooms. On one portage, others in our group picked a bunch to use in our pancakes the next morning. We saw bear scat, moose footprints, leaches, swans, frogs, and turtles. On a few of the longer portages when I was hiking alone, I did sing out loud to avoid encountering any bear.
We paddled and portaged an average of 7 miles a day with a total of 40+ miles for the week. Although portaging got easier, I slipped once and fell on my back (pack). The pack was so awkward, I looked like a turtle and needed help getting up. Each day, we paddled to a campground for lunch. Sometimes we took a swim, then paddled more to a new campground to pitch our tents for the night. We passed some people on canoes, but most of the time it was just our group. We did encounter rain on several occasions, but we had the right gear, so it wasn’t problematic. It was all so relaxing.
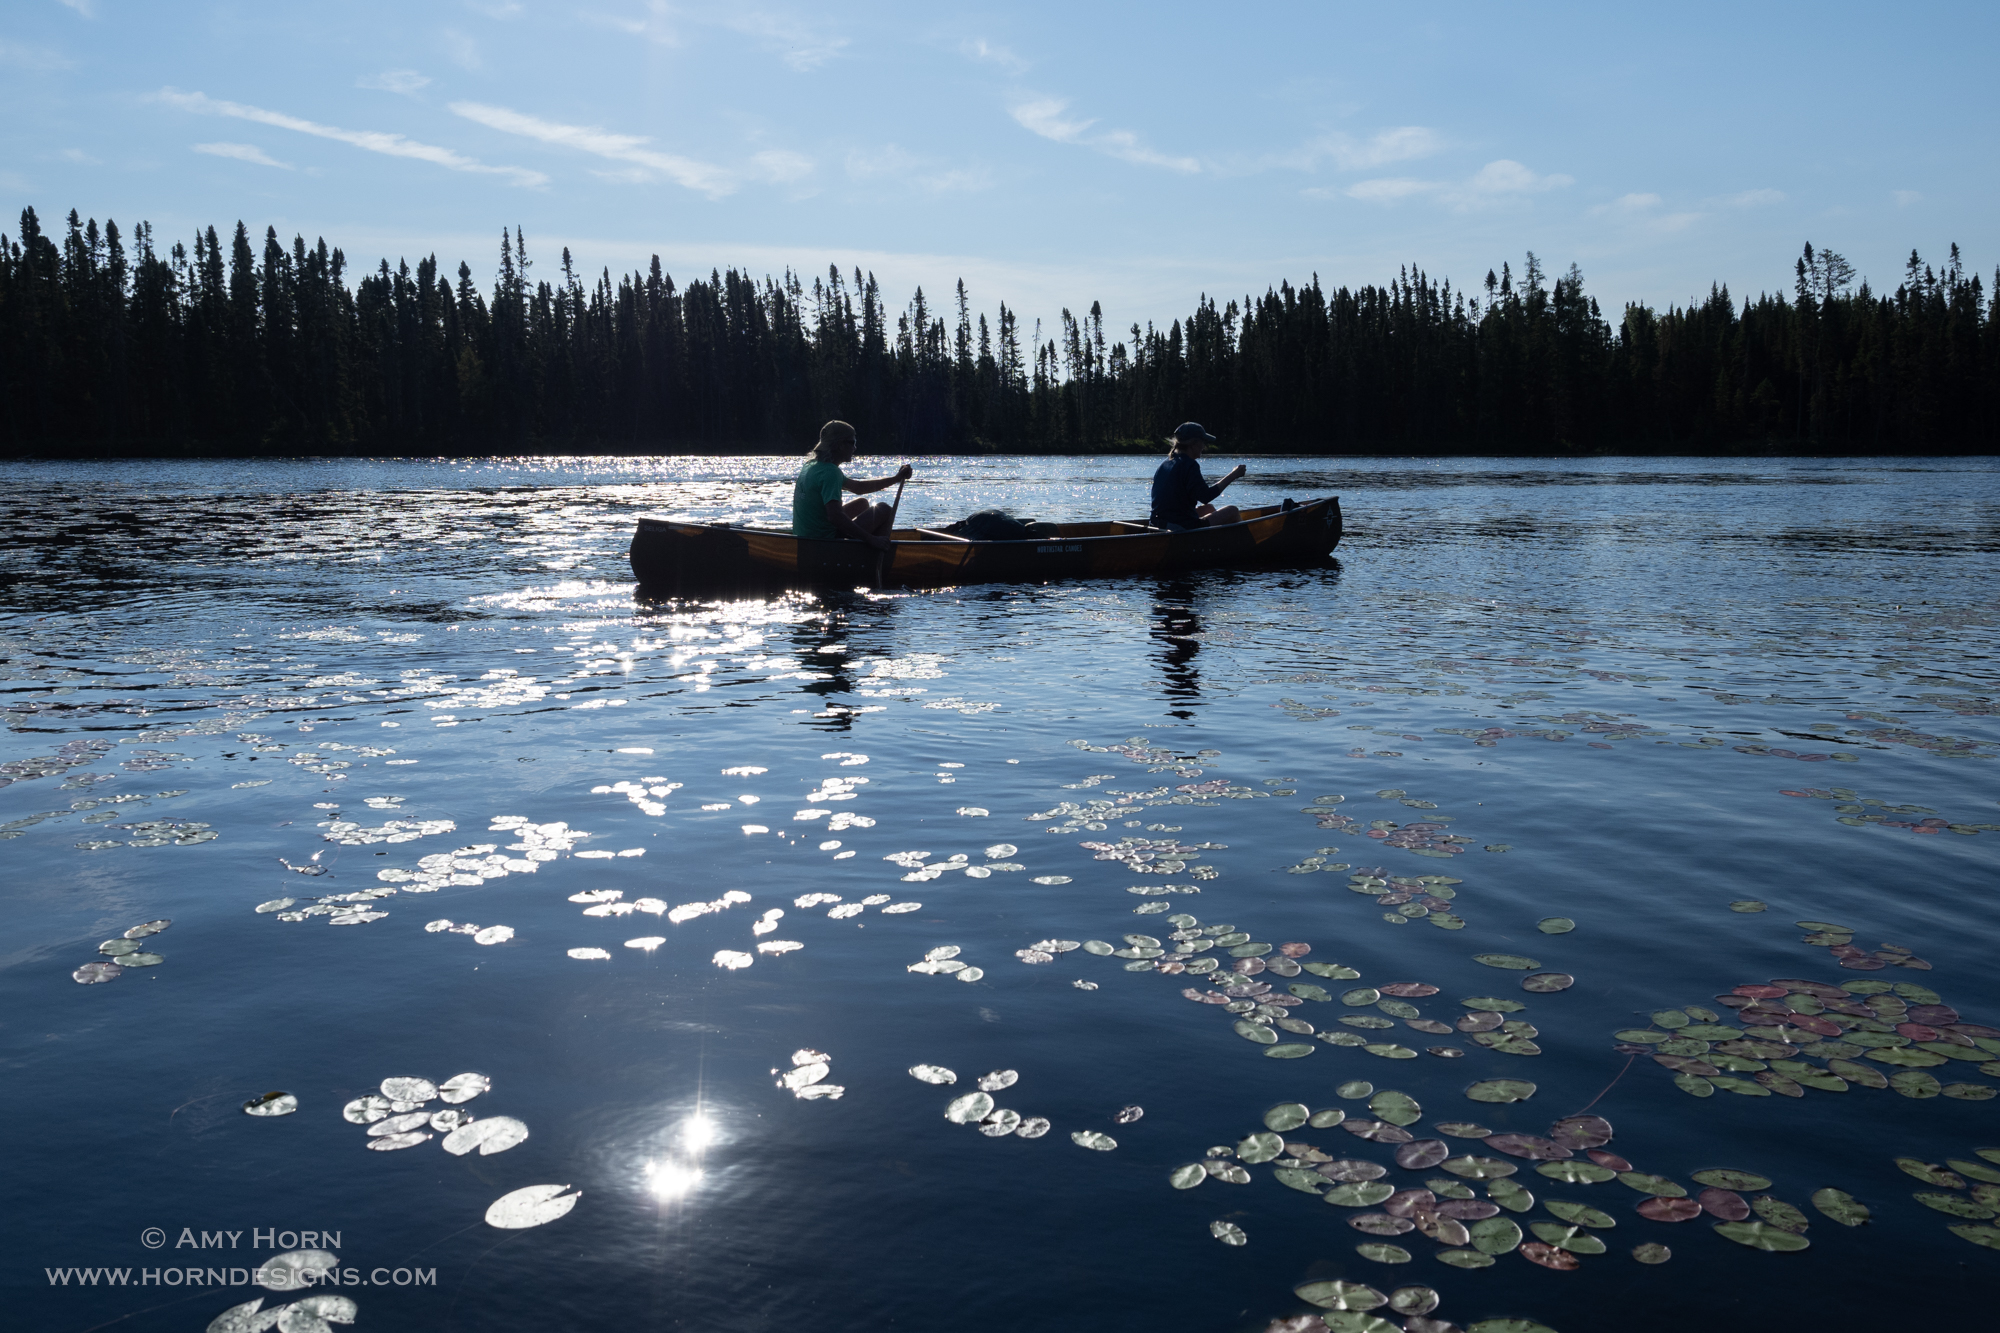
Paddling through the reeds.Quiet morningSelfie! Amy & Rod
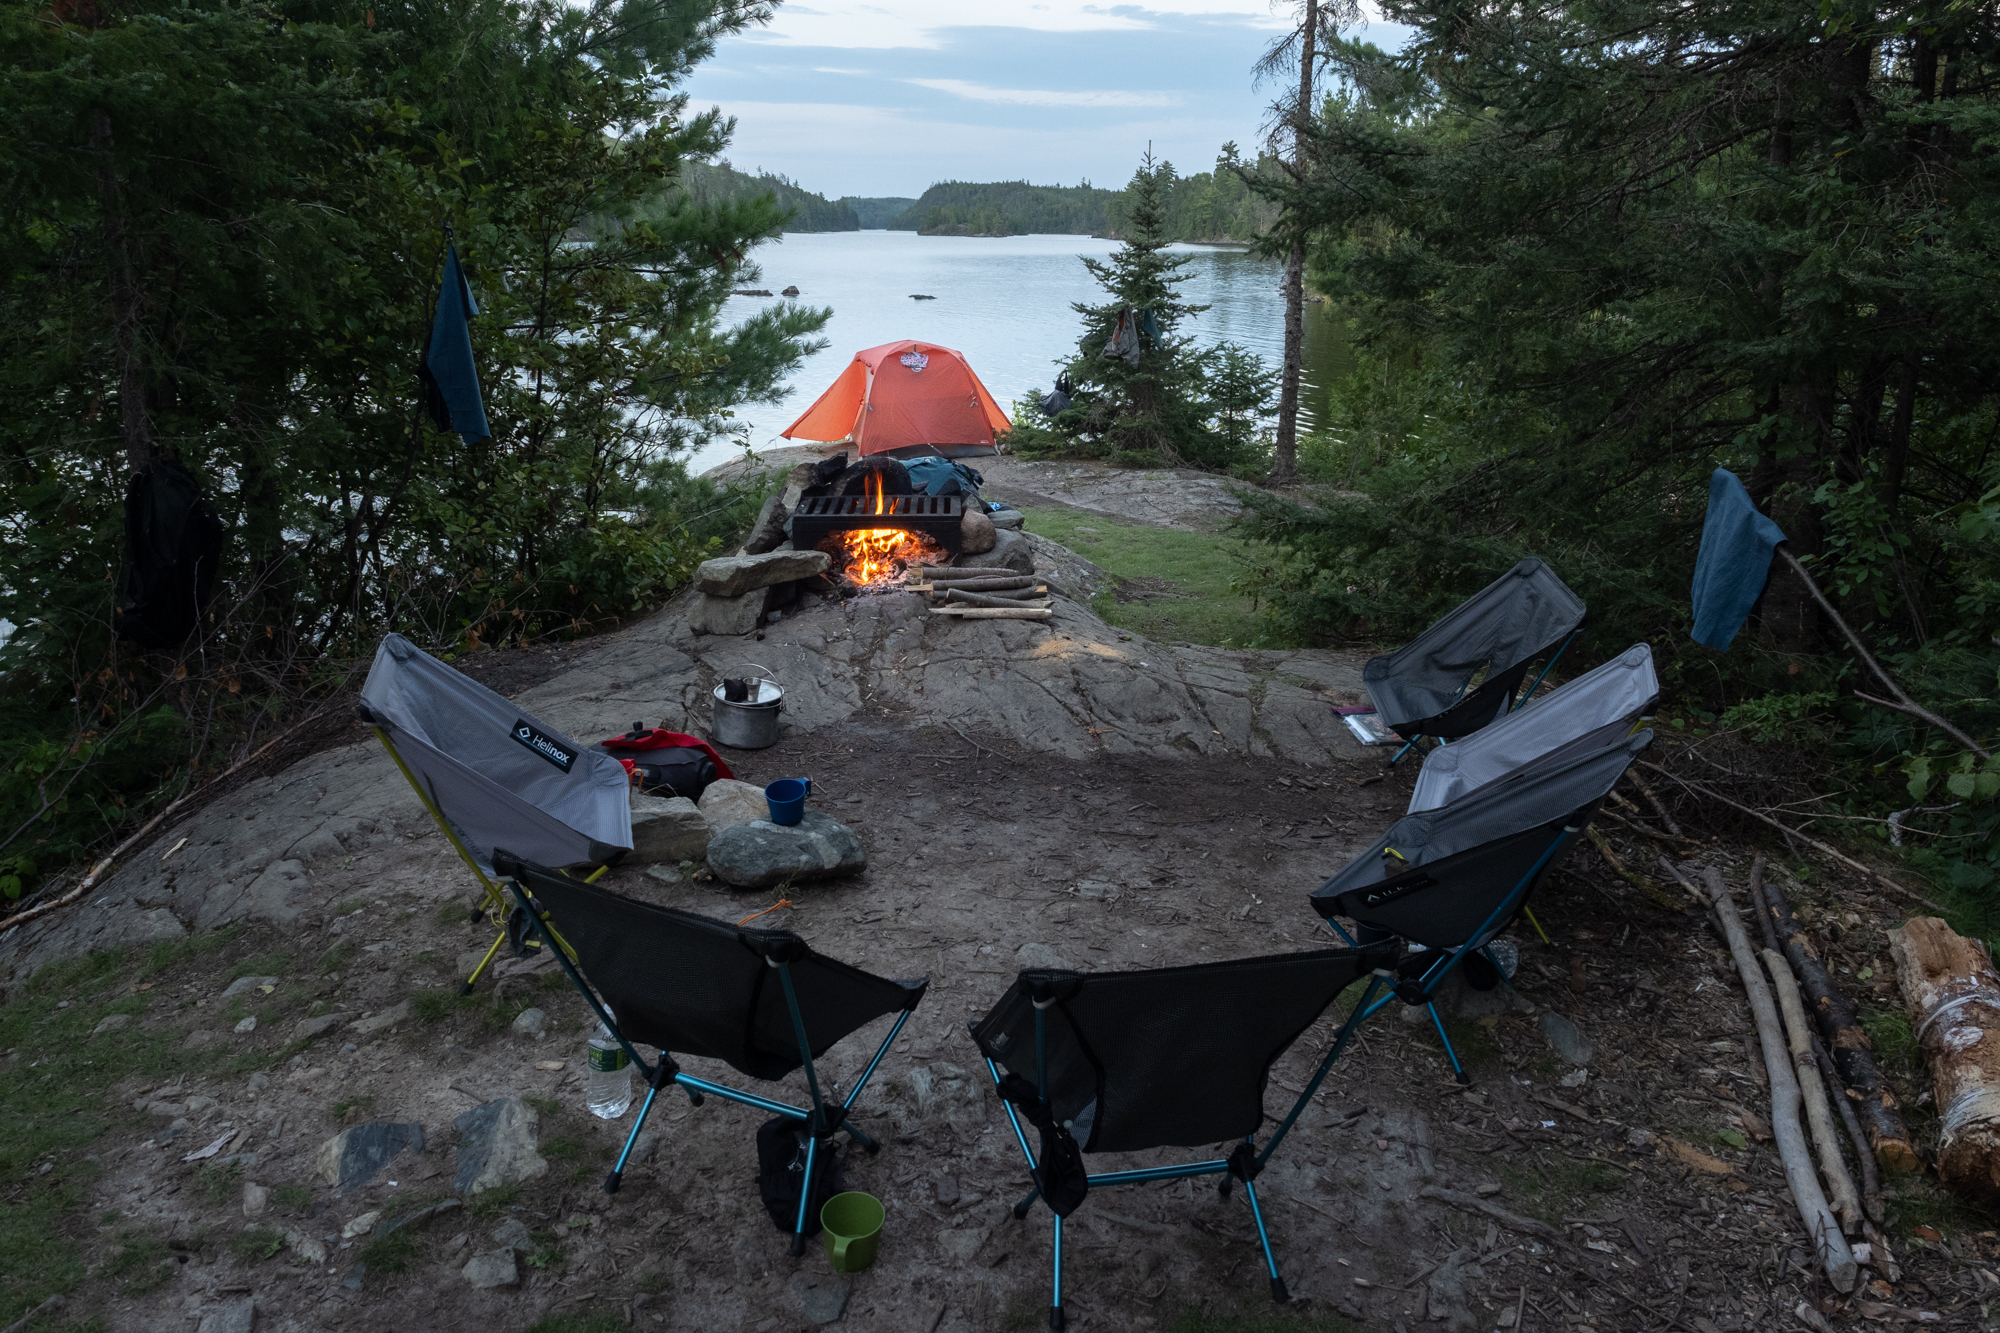
At Camp
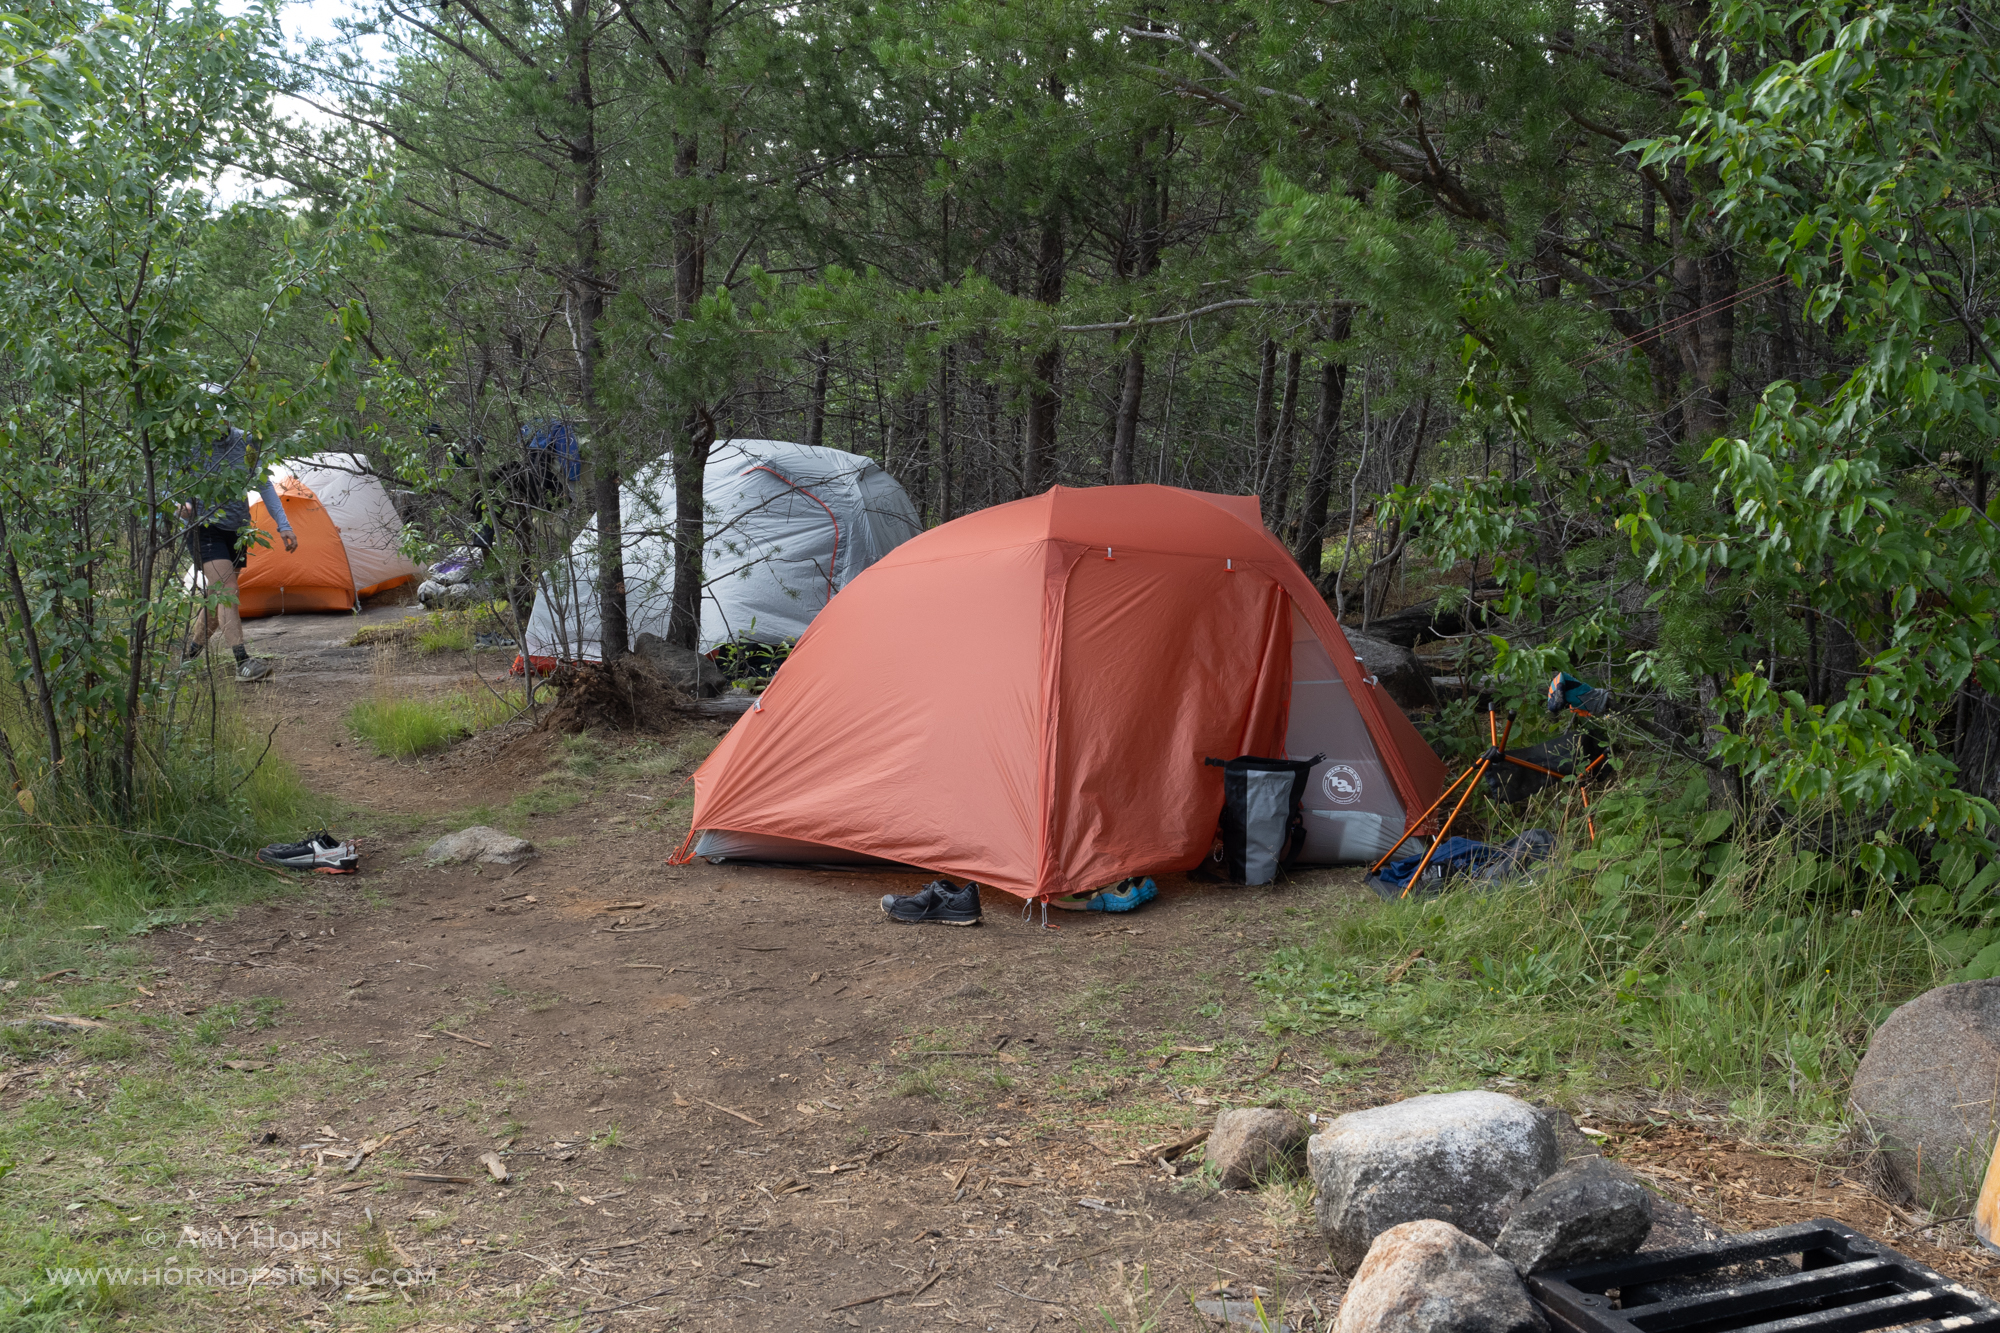
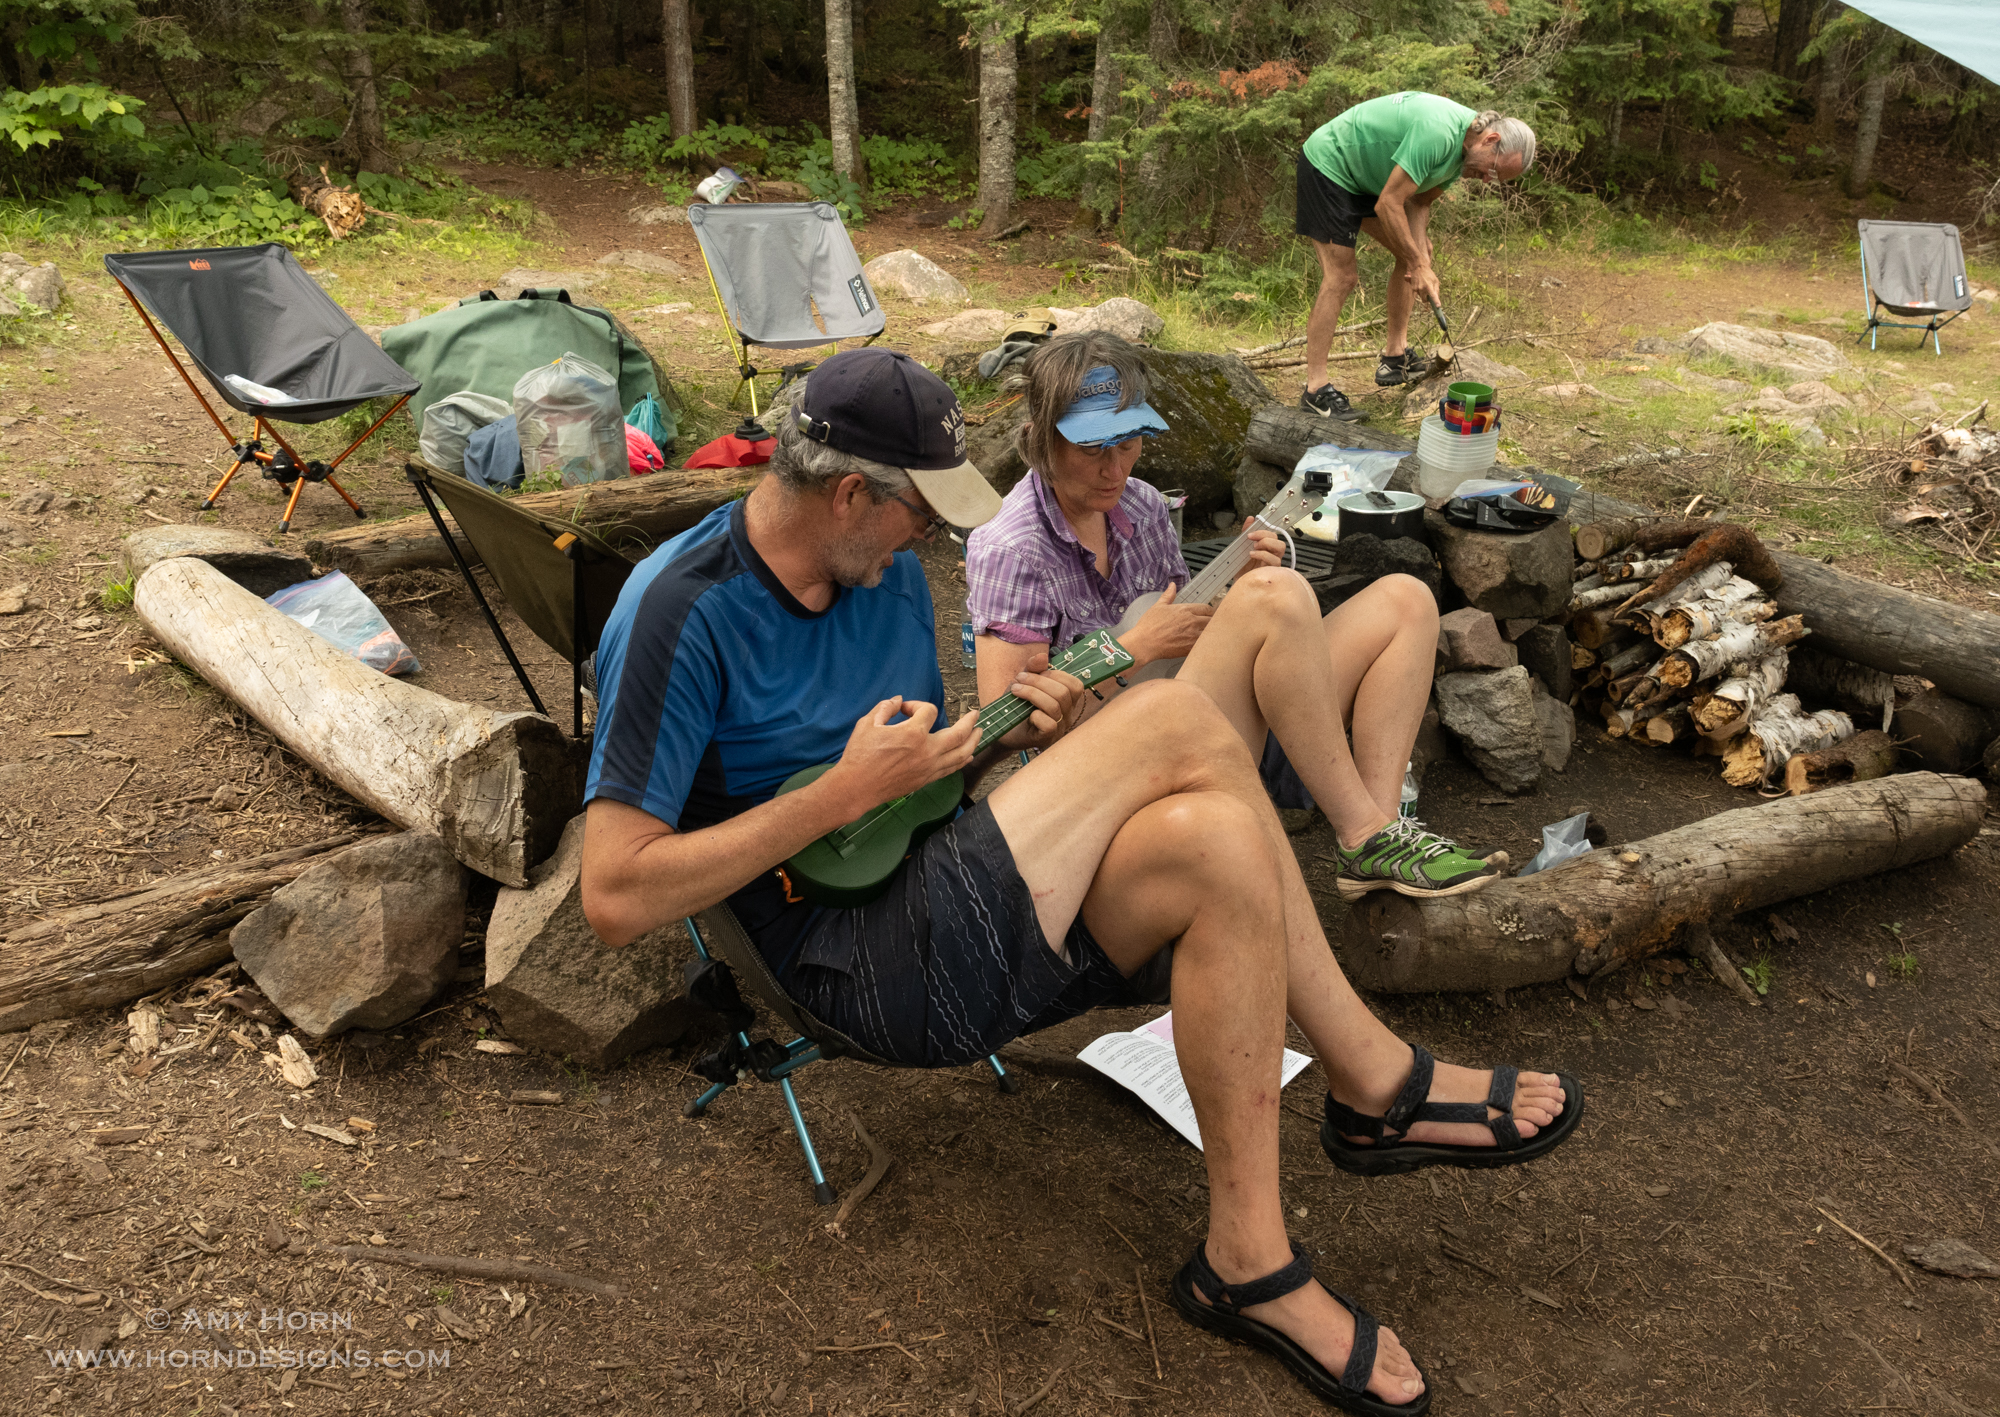
Each afternoon was an adventure to find a campsite. Camping is permitted at approved sites only and if you can’t find an open campsite on a lake, you portage until you find another site. Sometimes that meant you went to several different lakes because campsites are not found on all lakes. Once at camp, we pitched tents, set up the tarp, gathered wood, swam, played music, ate, and on our last night, we had a poetry slam. Gretchen challenged us to write a poem based on 5 given words. It was fun seeing the creativity put into each poem. We heard love poems, poems written from the perspective of a swan, from the mosquito perspective, a haiku, and my short and sweet poem sums up my week (bold words were required):
A canoe and paddle we did rent, to float the lake and pitch a tent. I hope that every son and daughter get to row on the beautiful Boundary Waters.
Amy Horn
Planning tomorrow’s route.Ready for rain.Cooking pancakes over the fire.Playing music.
Highlights
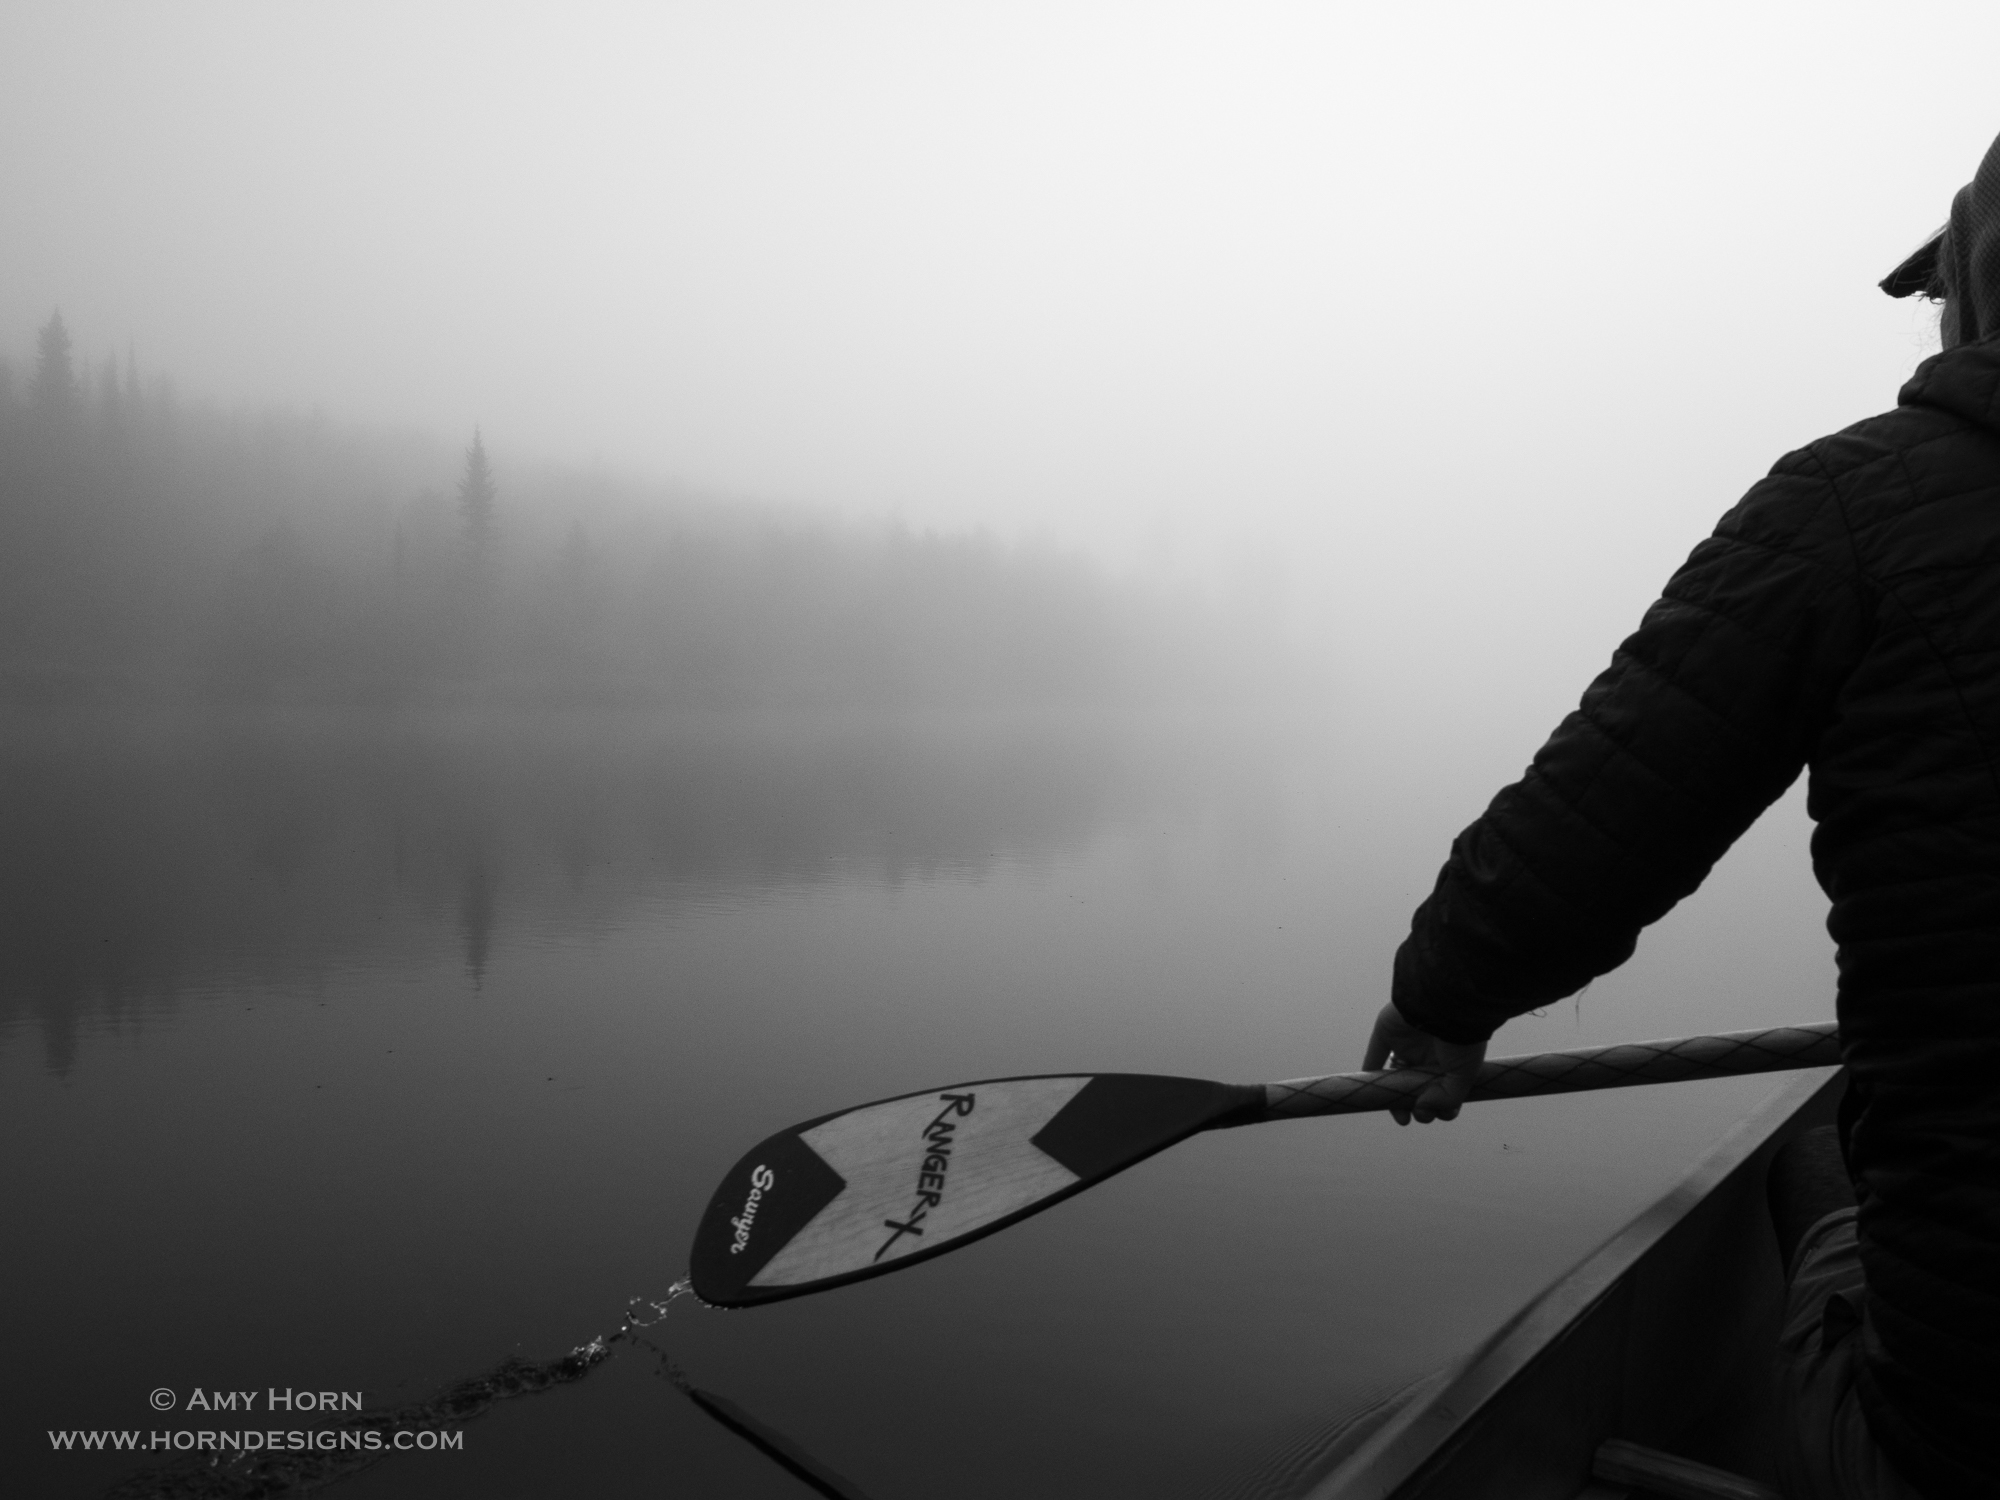
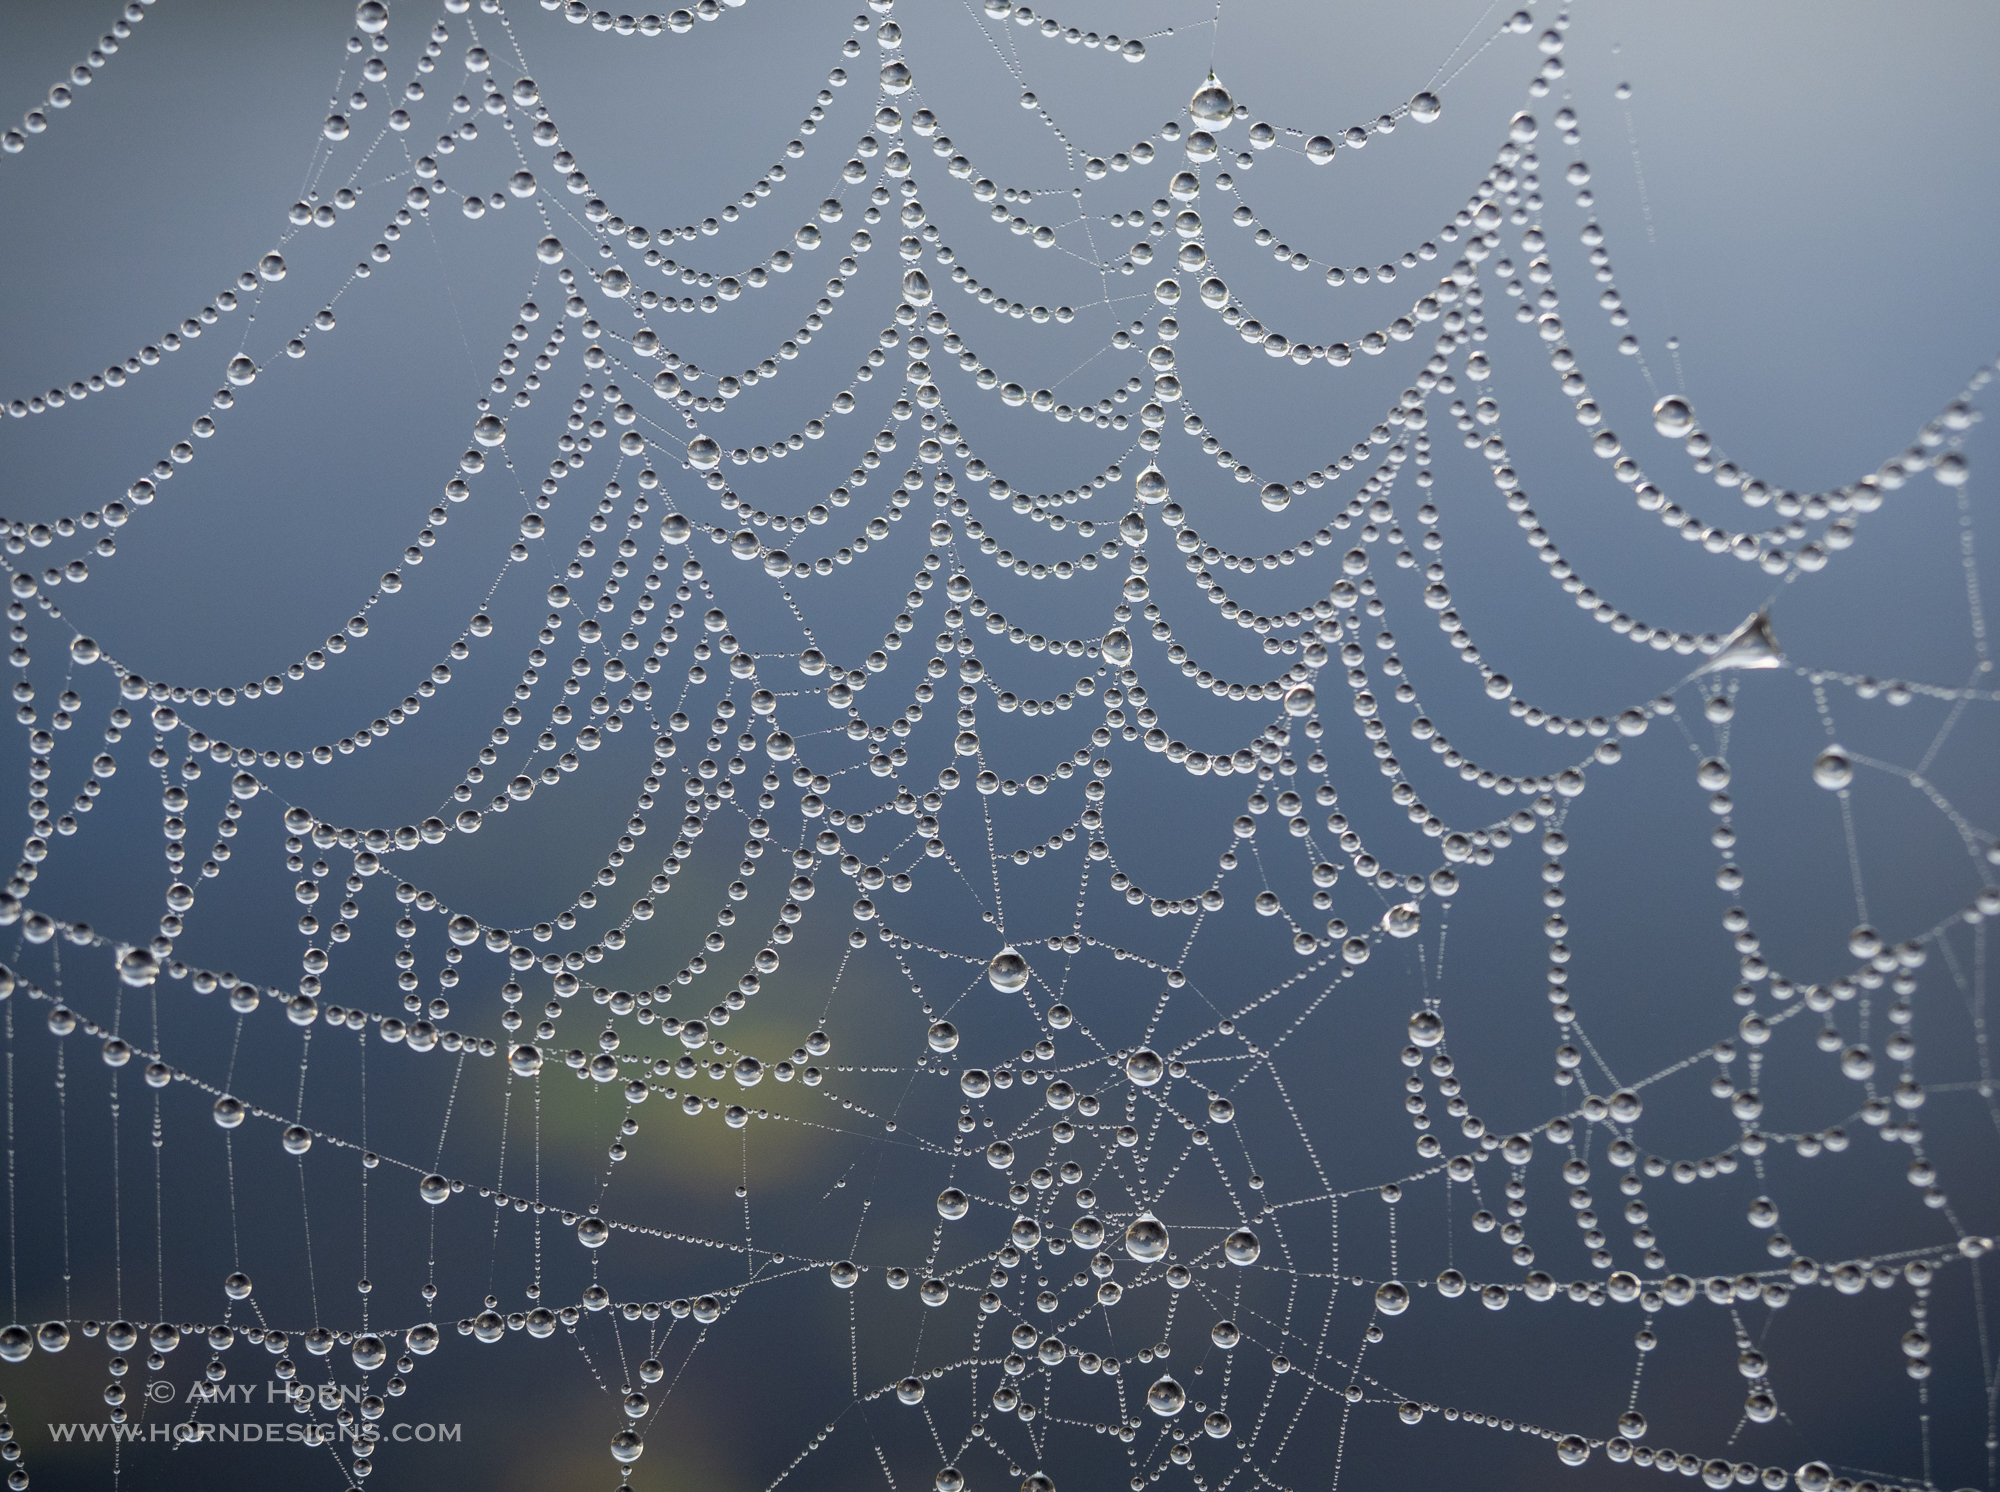
Besides the cool things mentioned above, my highlights of the week were many, but my favorite memory was the foggy morning. Before I could even ask anyone to get out in the water on the canoe, Neil and Gretchen offered. And then they had me “duff” (sit in the middle of the canoe) and took me out on the water. It was a magical morning – so quiet and still. When we returned to land, I photographed the dew on spider webs. I could have spent hours at this site.
It has been two weeks since we returned and all I do is think of returning. I didn’t think spending 6.5 days in nature without electronics would have such an impact on me. The BWCA is such a pristine area with fresh water so clean (big lakes only) you don’t need a filter to drink it. I didn’t know that was possible today. Let’s protect this area. The Boundary Waters is threatened by copper mining and if you would like to take action visit: https://www.savetheboundarywaters.org/.
Neil and Gretchen in the fogGretchen paddling through the fogFoggy morningTree snag and its reflection in the fogSpiderweb with dew drops
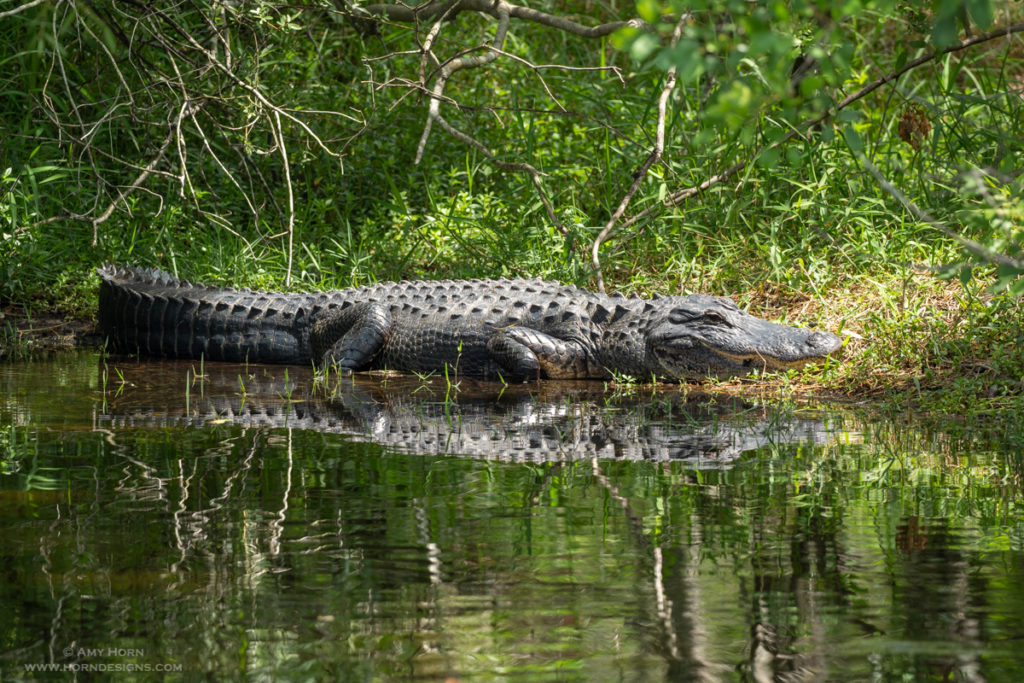
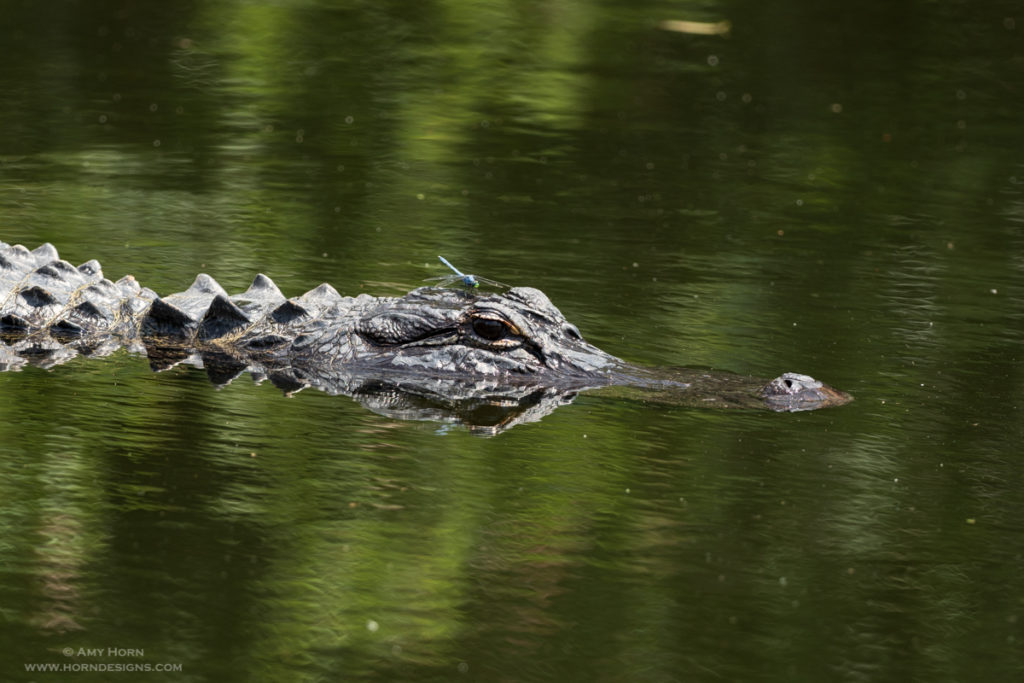
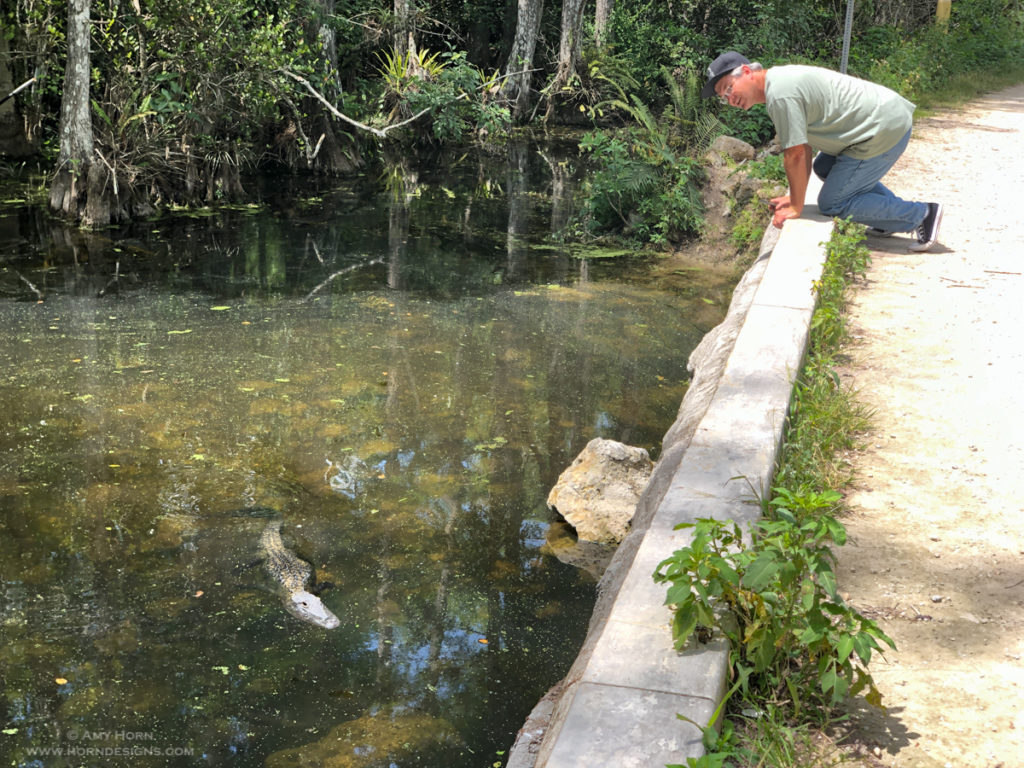
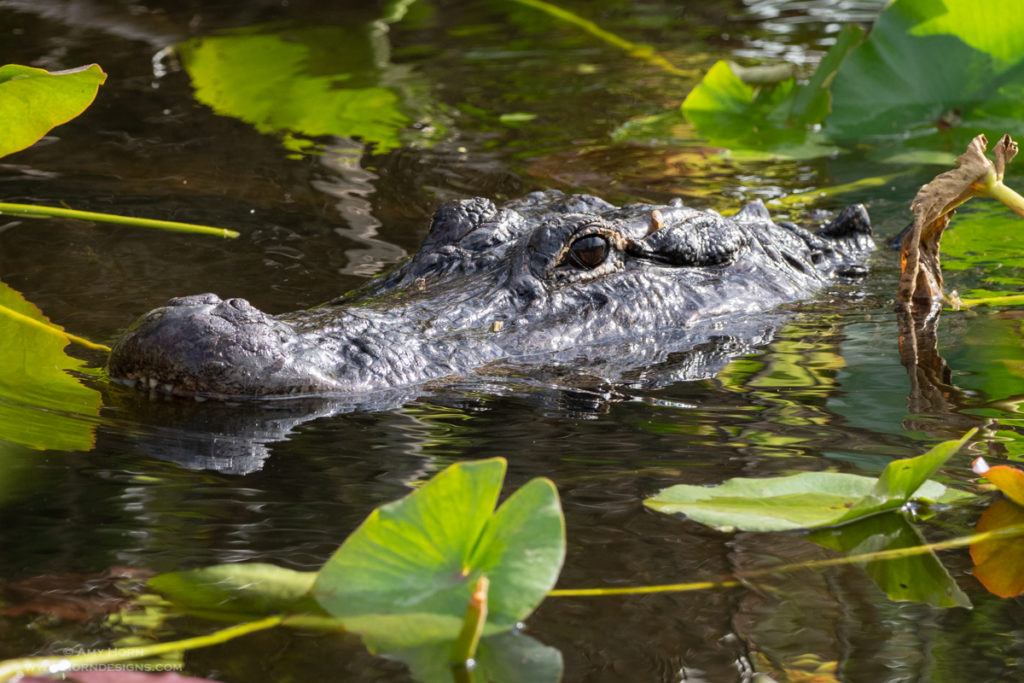
Alligator resting at the picnic pullout spot. Olympus OMD1 Mark II, 300mm, F/4, 1/400 sec, ISO 200, FotoPro X-Go Plus tripod.
This blog continues from last week about our Florida
vacation and the highlights of our trip. After spending a week in the Fort
Myers area, we headed east to find alligators. Our first stop was the Audubon’s
Corkscrew Swamp Sanctuary, known for alligators, waterfowl and other swampy
stuff. If this location sounds familiar, I mentioned this location in my
“Buttonbush” blog too. The loop trail is a series of boardwalks through the
swamp. A great location to see the swamp safely. Since we visited at the end of
the dry season, water levels were low and we did not come across any gators.
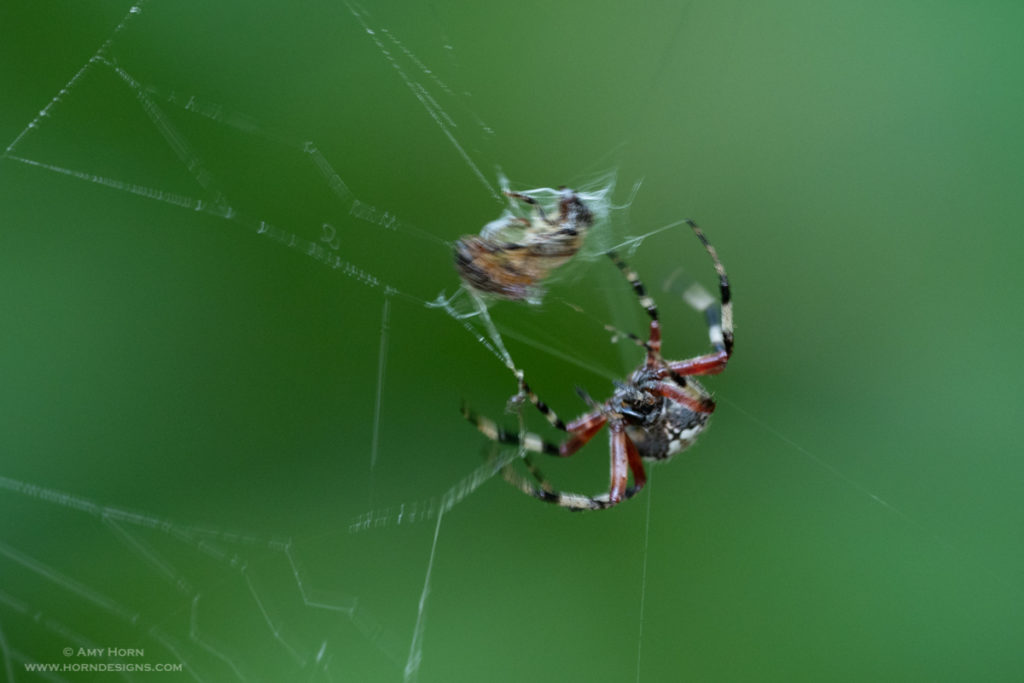
But we found an amazing number of fun things to photograph. For instance, a
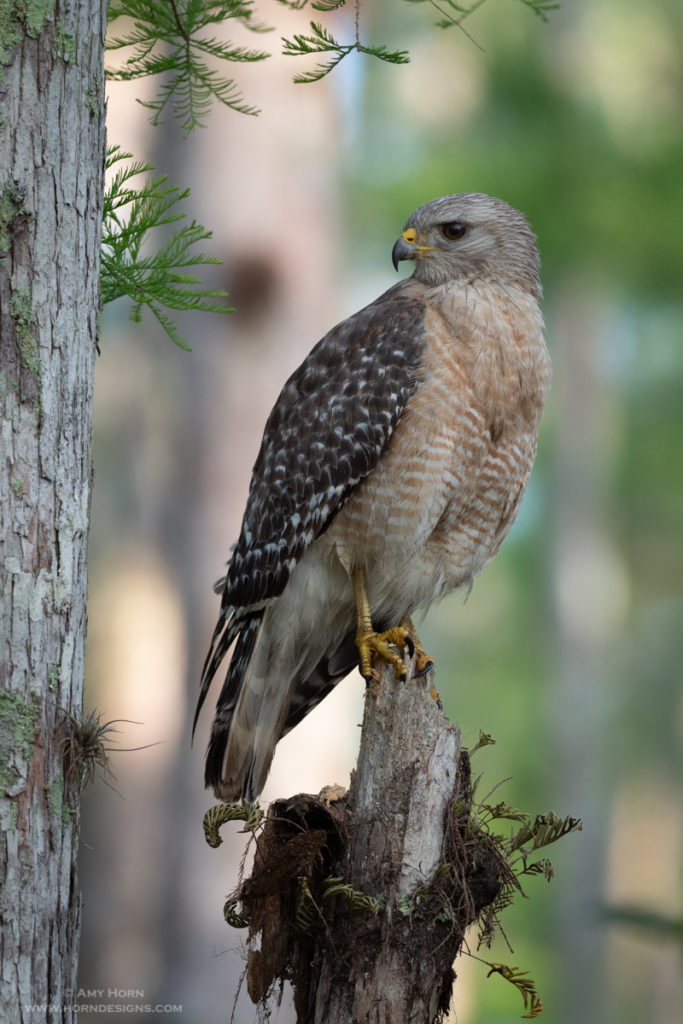
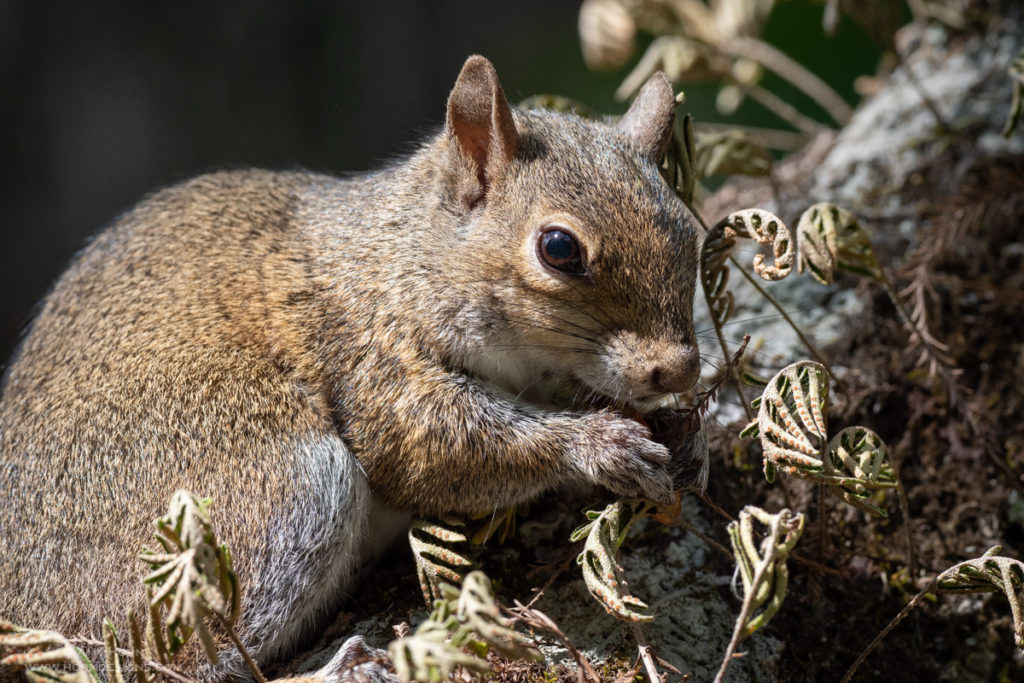
spider wrapping up its recent catch to a red shouldered hawk and even a common
squirrel. I carried my tripod and two cameras (12-100mm and 300mm telephoto
lenses) so I wouldn’t miss a thing.
Red-shouldered hawk
Spider with its prey
Squirrel
The loop drive was a 24-mile gravel road through mostly
cypress swamp areas. Frequently, the road crossed culverts and almost every
culvert had alligators basking in the sun. We saw so many “gators” we decided we
didn’t need to visit the Everglades; so we planned visiting the Florida Keys
the next day.
Big Cypress National Preserve
Olympus OMD1 Mark II, 300mm, F/4, 1/640 sec, ISO 200, FotoPro X-Go Plus tripod.
After the swamp, we drove south to catch the Tamiami Road
for our drive to Homestead, FL. We stopped at the Big Cypress National Preserve
visitor center to discuss their scenic drives and pullouts. I often stop at
visitor and tourist centers; the employees always have an opinion of the best
places and sometimes they are not on the published maps. The Ranger recommended
the Loop Road Scenic Drive and since it was on our way to Homestead, we took
it. But, before we got to the loop road, we encountered a picnic pullout spot
with a canal and many alligators. Watching these magnificent prehistoric
looking creatures was mesmerizing. They glided easily through the water and
stalked prey silently. We watched an alligator catch a turtle.
Homestead
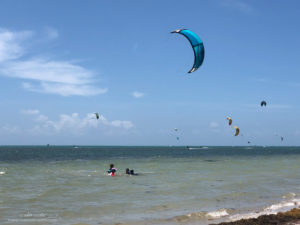
Curry Hammock State Park
We rented a room at an Airbnb in Homestead, FL from a lovely
couple very attentive to our needs. It felt like home. With limited time in
Homestead, we spent one day driving down to the Middle Keys just because we
wanted to experience it. We ended up at Curry Hammock State Park and sat on the
beach watching the kite surfers and played in the warm water. It was a long
drive for just a few hours at the beach, but we were both glad we did it. After
returning to Homestead, we ate dinner at Black Point Ocean Grill, a waterfront
restaurant with live music and enjoyed our grouper and fish and chips. The next
morning we took a detour to Everglades National Park before driving back to
Fort Myers. After all, we were so close, how could we not stop?
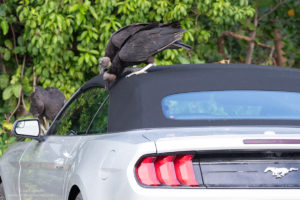
Turkey Vultures
Turkey vultures picking at rubber in Anhinga Trail parking lot, Everglades National Park.
We entered the Everglades National Park through the main Homestead
entrance and drove to the Anhinga Trail. This trail was recommended by my
friend, Beth Ruggiero-York from her book, Everglades
National Park: A Photographic Destination and it was easy to access. We tried
to visit the Nike Missile Site too, but it was only open on weekends. As soon
as we drove into the parking lot of the trail, we noticed a large number of
turkey vultures and a few vehicles. Some vehicles had blue tarps on them, some
vehicles had large numbers of vultures on them. We spoke to the park staff and they
recommended putting a tarp (supplied by them) on our car. Apparently, the
vultures love picking at the rubber on cars. We witnessed that love… some cars had
as many as ten vultures picking at the rubber. We were happy to find our car
untouched by the pesky vultures when we returned from our hike.
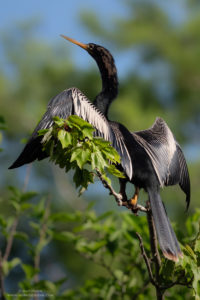
Anhinga. Olympus OMD1 Mark II, 300mm, F/4, 1/6400 sec, ISO 800, FotoPro X-Go Plus tripod.
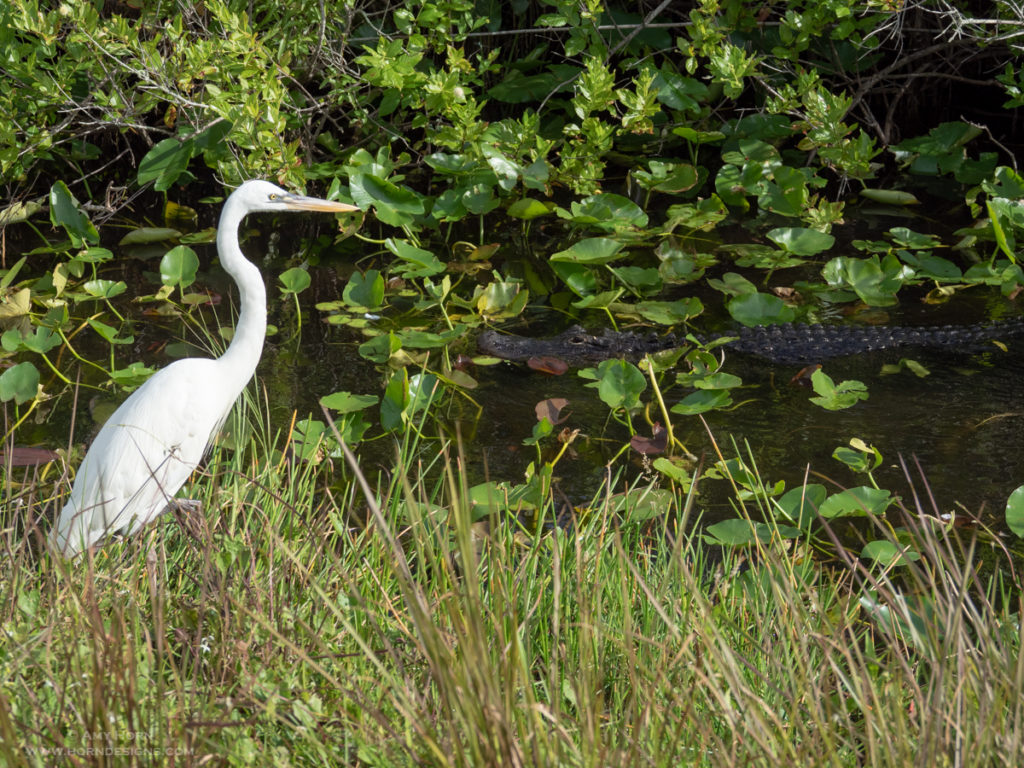
The Anhinga Trail is a short boardwalk trail through swampy
areas with many alligators. At one point, I photographed a great egret next to
the path and an alligator cruised past in the canal beside the egret. The egret
was so close to me I had to use my short lens (12-100mm) to get the shot. Notice
the photo below with the alligator slithering through the water. Otherwise, I
used my 300mm lens to photograph anhingas, gators, and egrets.
Do you see the alligator in the canal? Olympus OMD1 Mark II, 12-100mm, F/4.5, 1/1600 sec, ISO 320, FotoPro X-Go Plus tripod.
Heading Home
We felt accomplished. We fulfilled our mission to see alligators
and to visit the Everglades, so we headed out to drive back to Fort Myers. We
stopped one last time at our favorite alligator picnic spot and then drove to
our airport hotel. We ate an early dinner at the hotel to prepare for a 6am
flight heading west the next morning. Our Florida vacation was over and we
returned to Flagstaff rested and relaxed (except for the normal airport nonsense).
We are ready for summer in Flagstaff.
So many alligators! Olympus OMD1 Mark II, 300mm, F/5, 1/640 sec, ISO 400, FotoPro X-Go Plus tripod.
Olympus OM-D E-M1 Mark II, 12-100mm, ISO 200, f/14, .5 sec.., Circular Polarizing Filter.
Benefits of Photographing Alone
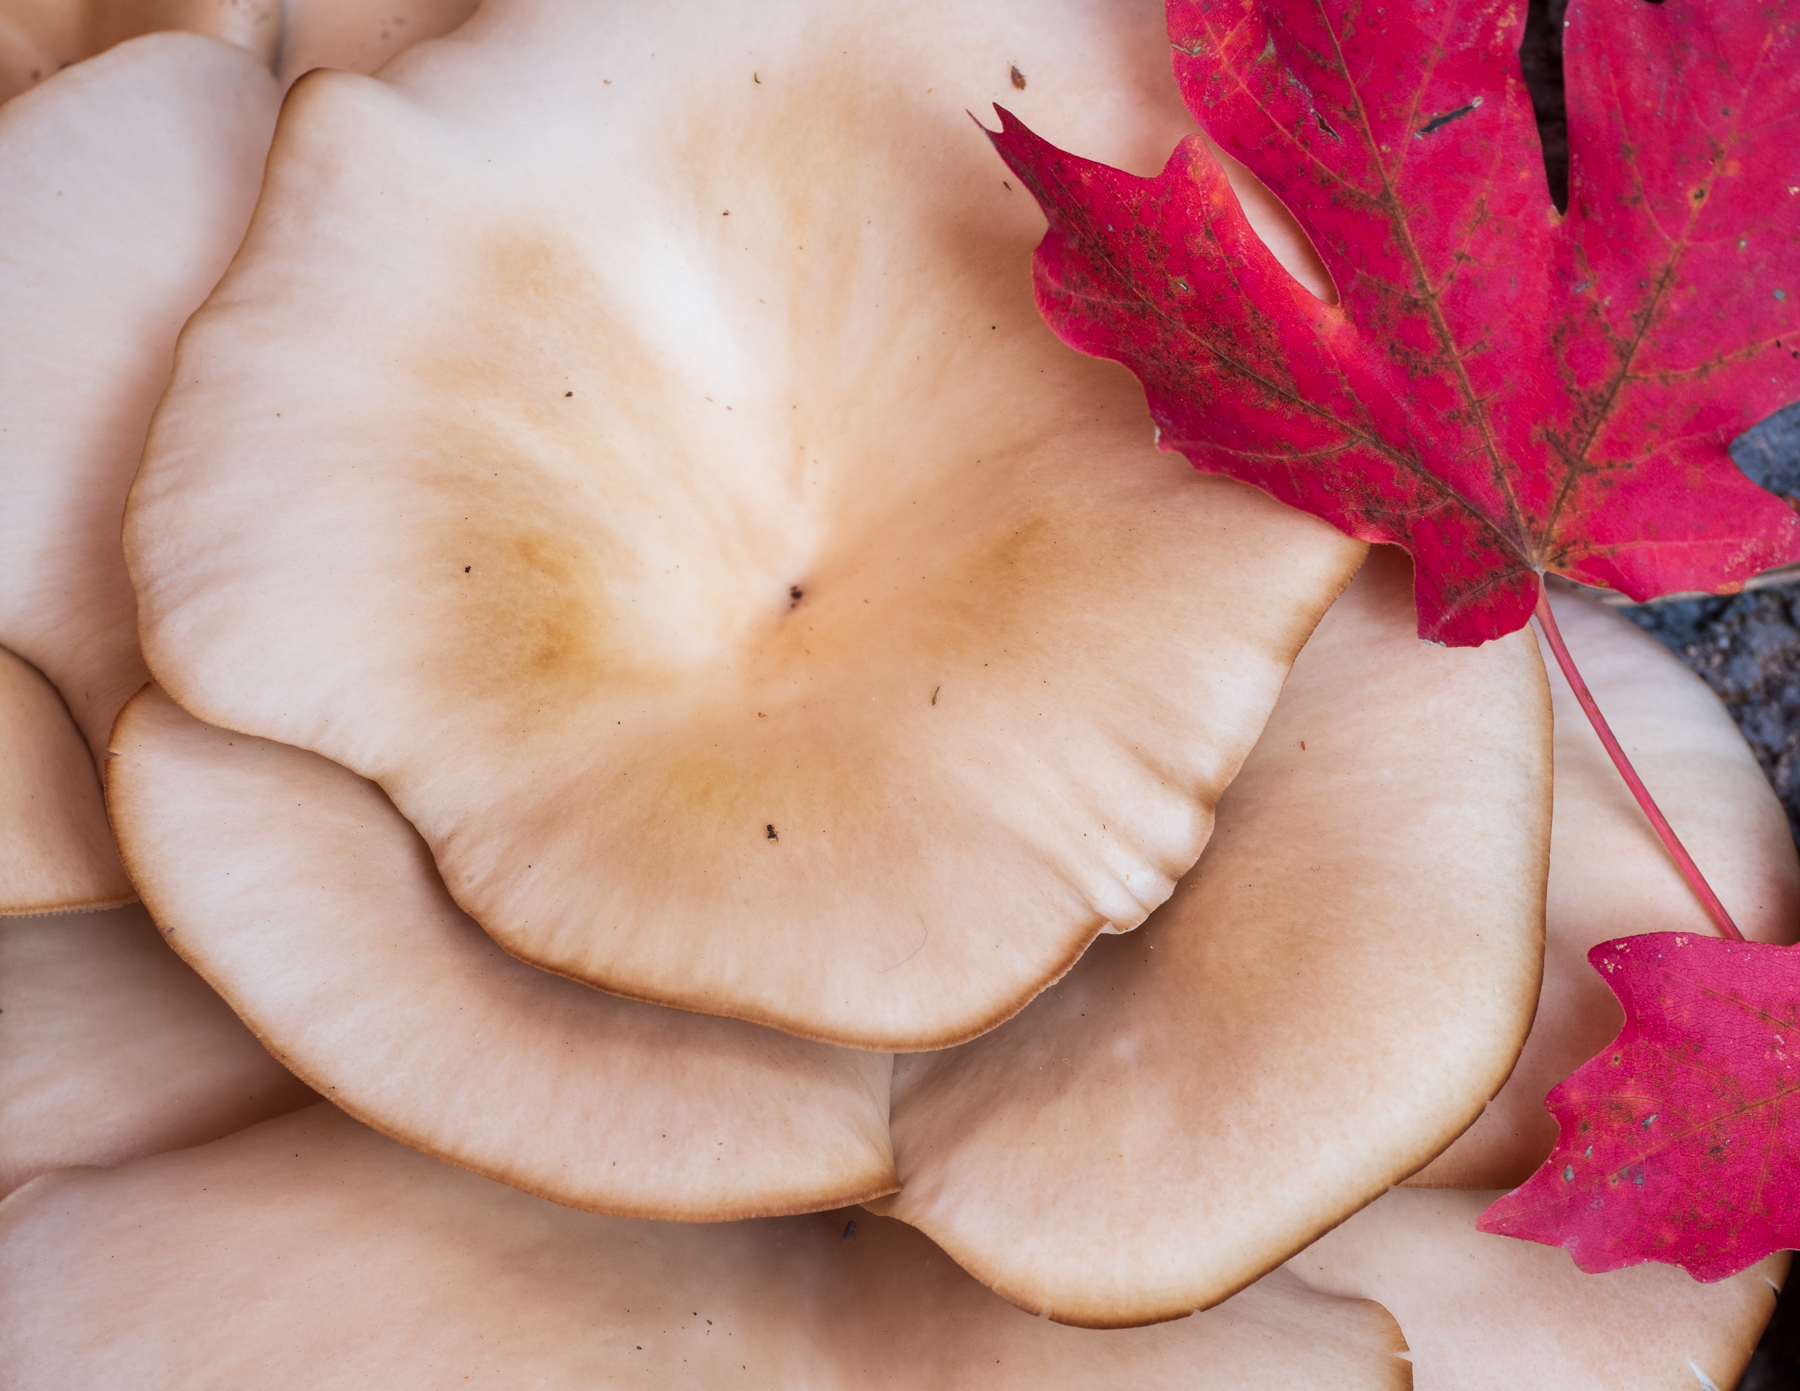
Olympus OM-D E-M1 Mark II, 12-100mm, ISO 100, f/4, 1/100., 8 image focus stack in-camera.
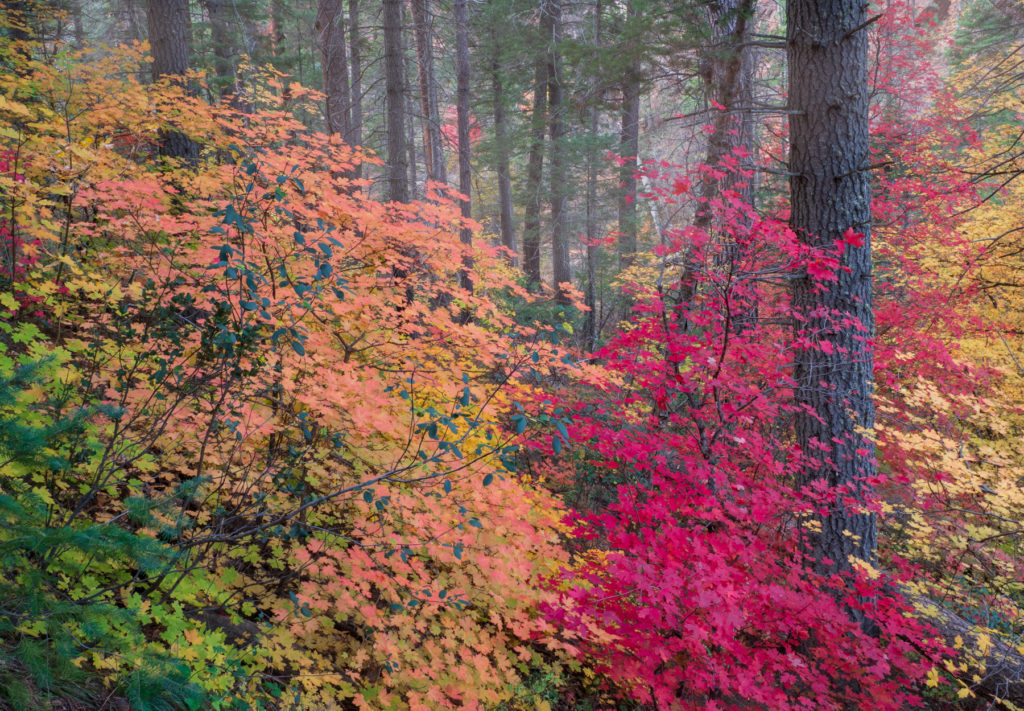
Not long ago, I spent a morning in Sedona photographing fall colors. Whenever I travel alone, I do check in with my husband at the start and end of my trip. Checking in with him is more for my benefit; knowing someone is aware of my location makes me feel better. My husband is very optimistic that I will be safe regardless. Photographing alone does require discipline, after all, hitting snooze on the early alarm is tempting, after all, no one is meeting up with me. But I stayed disciplined and left before dark to drive to Westfork in Oak Creek Canyon.
Olympus OM-D E-M1 Mark II, 12-100mm, ISO 200, f/8, 1/8 sec.., Circular Polarizing Filter.
When I find a scene that interests me, I love working the scene for a while. Constantly challenging myself and looking for better angles or compositions. If there were people around me, they would hear me talk to myself saying things like, “what if I used that rock as foreground…” And then adjust my composition. Walking along the quiet path was relaxing and I didn’t feel a pressure in the world. I worked each composition for as long as I wanted with no time restrictions of leaving. I hiked up the side of the canyon along a small trail with awesome fall colors and scrambled down low when I found mushrooms. It was a fun and rewarding day. Sometimes, creativity is sparked just by shooting alone.
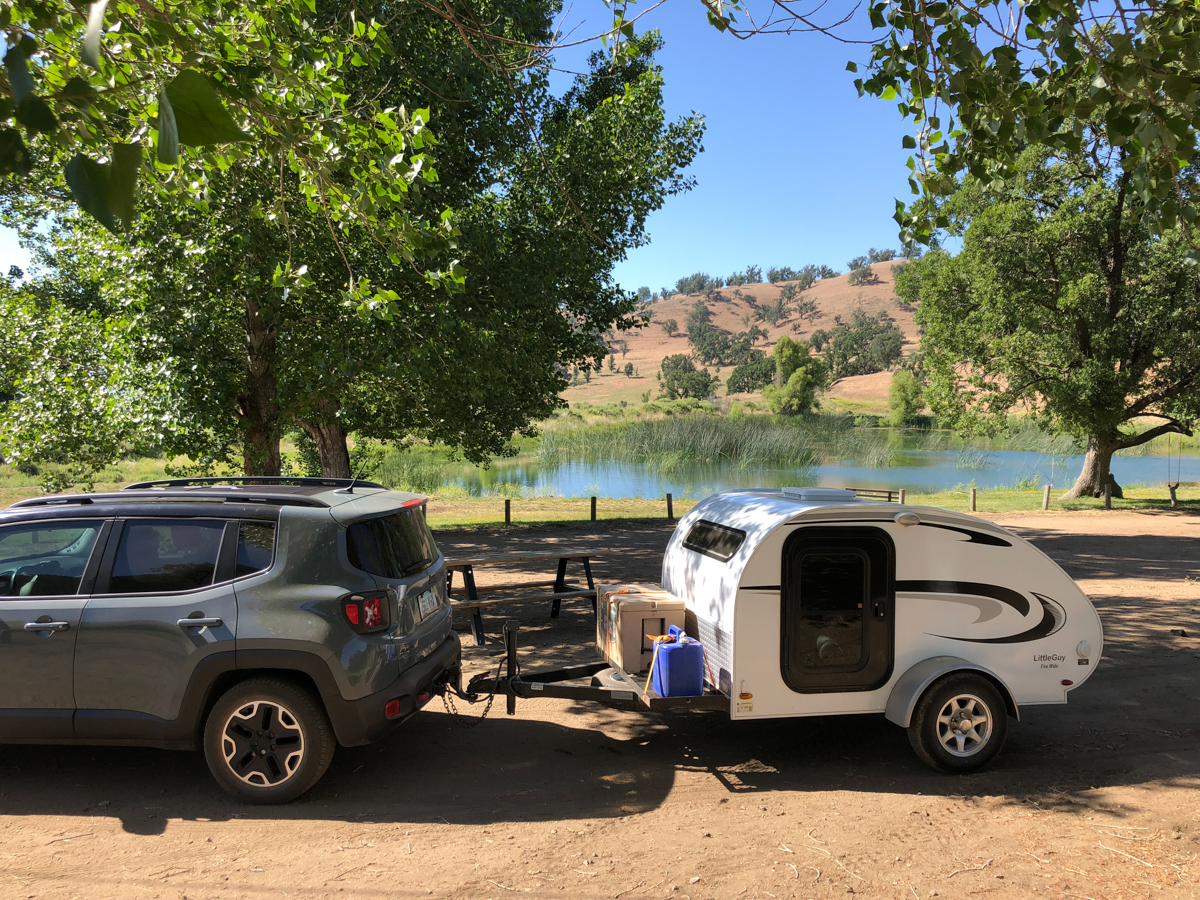
After much anticipation, I left my wonderful home, spouse and kids for a two-and-a-half-month road trip to photograph water as part of my sabbatical project. It was exciting and a little scary to leave the relaxation of my home and family this morning for such a long trip. As I drove today I reflected on many conversations from the past week regarding my trip. I got questions like, “Why take such a long trip away from your family? Aren’t you afraid to go alone?” My answer is simply, “I need to do this.” Don’t get my wrong, I would love it if they could join me, but, they have work and school, so I am traveling solo.
Answering the question “Aren’t you afraid to go alone?” is a harder question to answer. Twenty years ago, I would not have considered taking a trip like this alone. When I was sixteen years old, my mom and I were kidnapped at gunpoint from a Phoenix mall. The ordeal could have been much worse; we were lucky. As a result, I spent many years fearful of being alone whether it was hiking or traveling and allowed that ordeal to limit my life experiences. Since then, I found a new awareness of my surroundings and only in the past few years taken solo trips scouting for new photo workshops. So, back to my answer, “I need to do this.” This trip, I will experience it all while overcoming those fears that limited previous travels. Now if I can just master backing up the trailer.
Recently I spent several days in San Diego scouting for a future Women’s Retreat photo workshop. As many of you are making summer plans, I thought you might like to know how I scout and prepare for a trip.
First is research. Using websites like Facebook, Instagram, Google images and Pinterest is a great start. I often search general locations like, La Jolla to see imagery from the area. By clicking on a specific image and reading the metadata, I learn times of day (sunrise or sunset) and exact locations (Hospital Reef). Now I can search on even more specific locations. Local resources are even better than searching online. If you know someone or reach out to a Facebook group in the area it’s great to get the local perspective. When I was in San Diego, I contacted a few of my students from the area. They told me of a few areas I had not discovered. Throughout the day, I talk to many locals and ask them about their favorite spots to view a sunrise or sunset. If they have lived there a long time, their information is valuable.
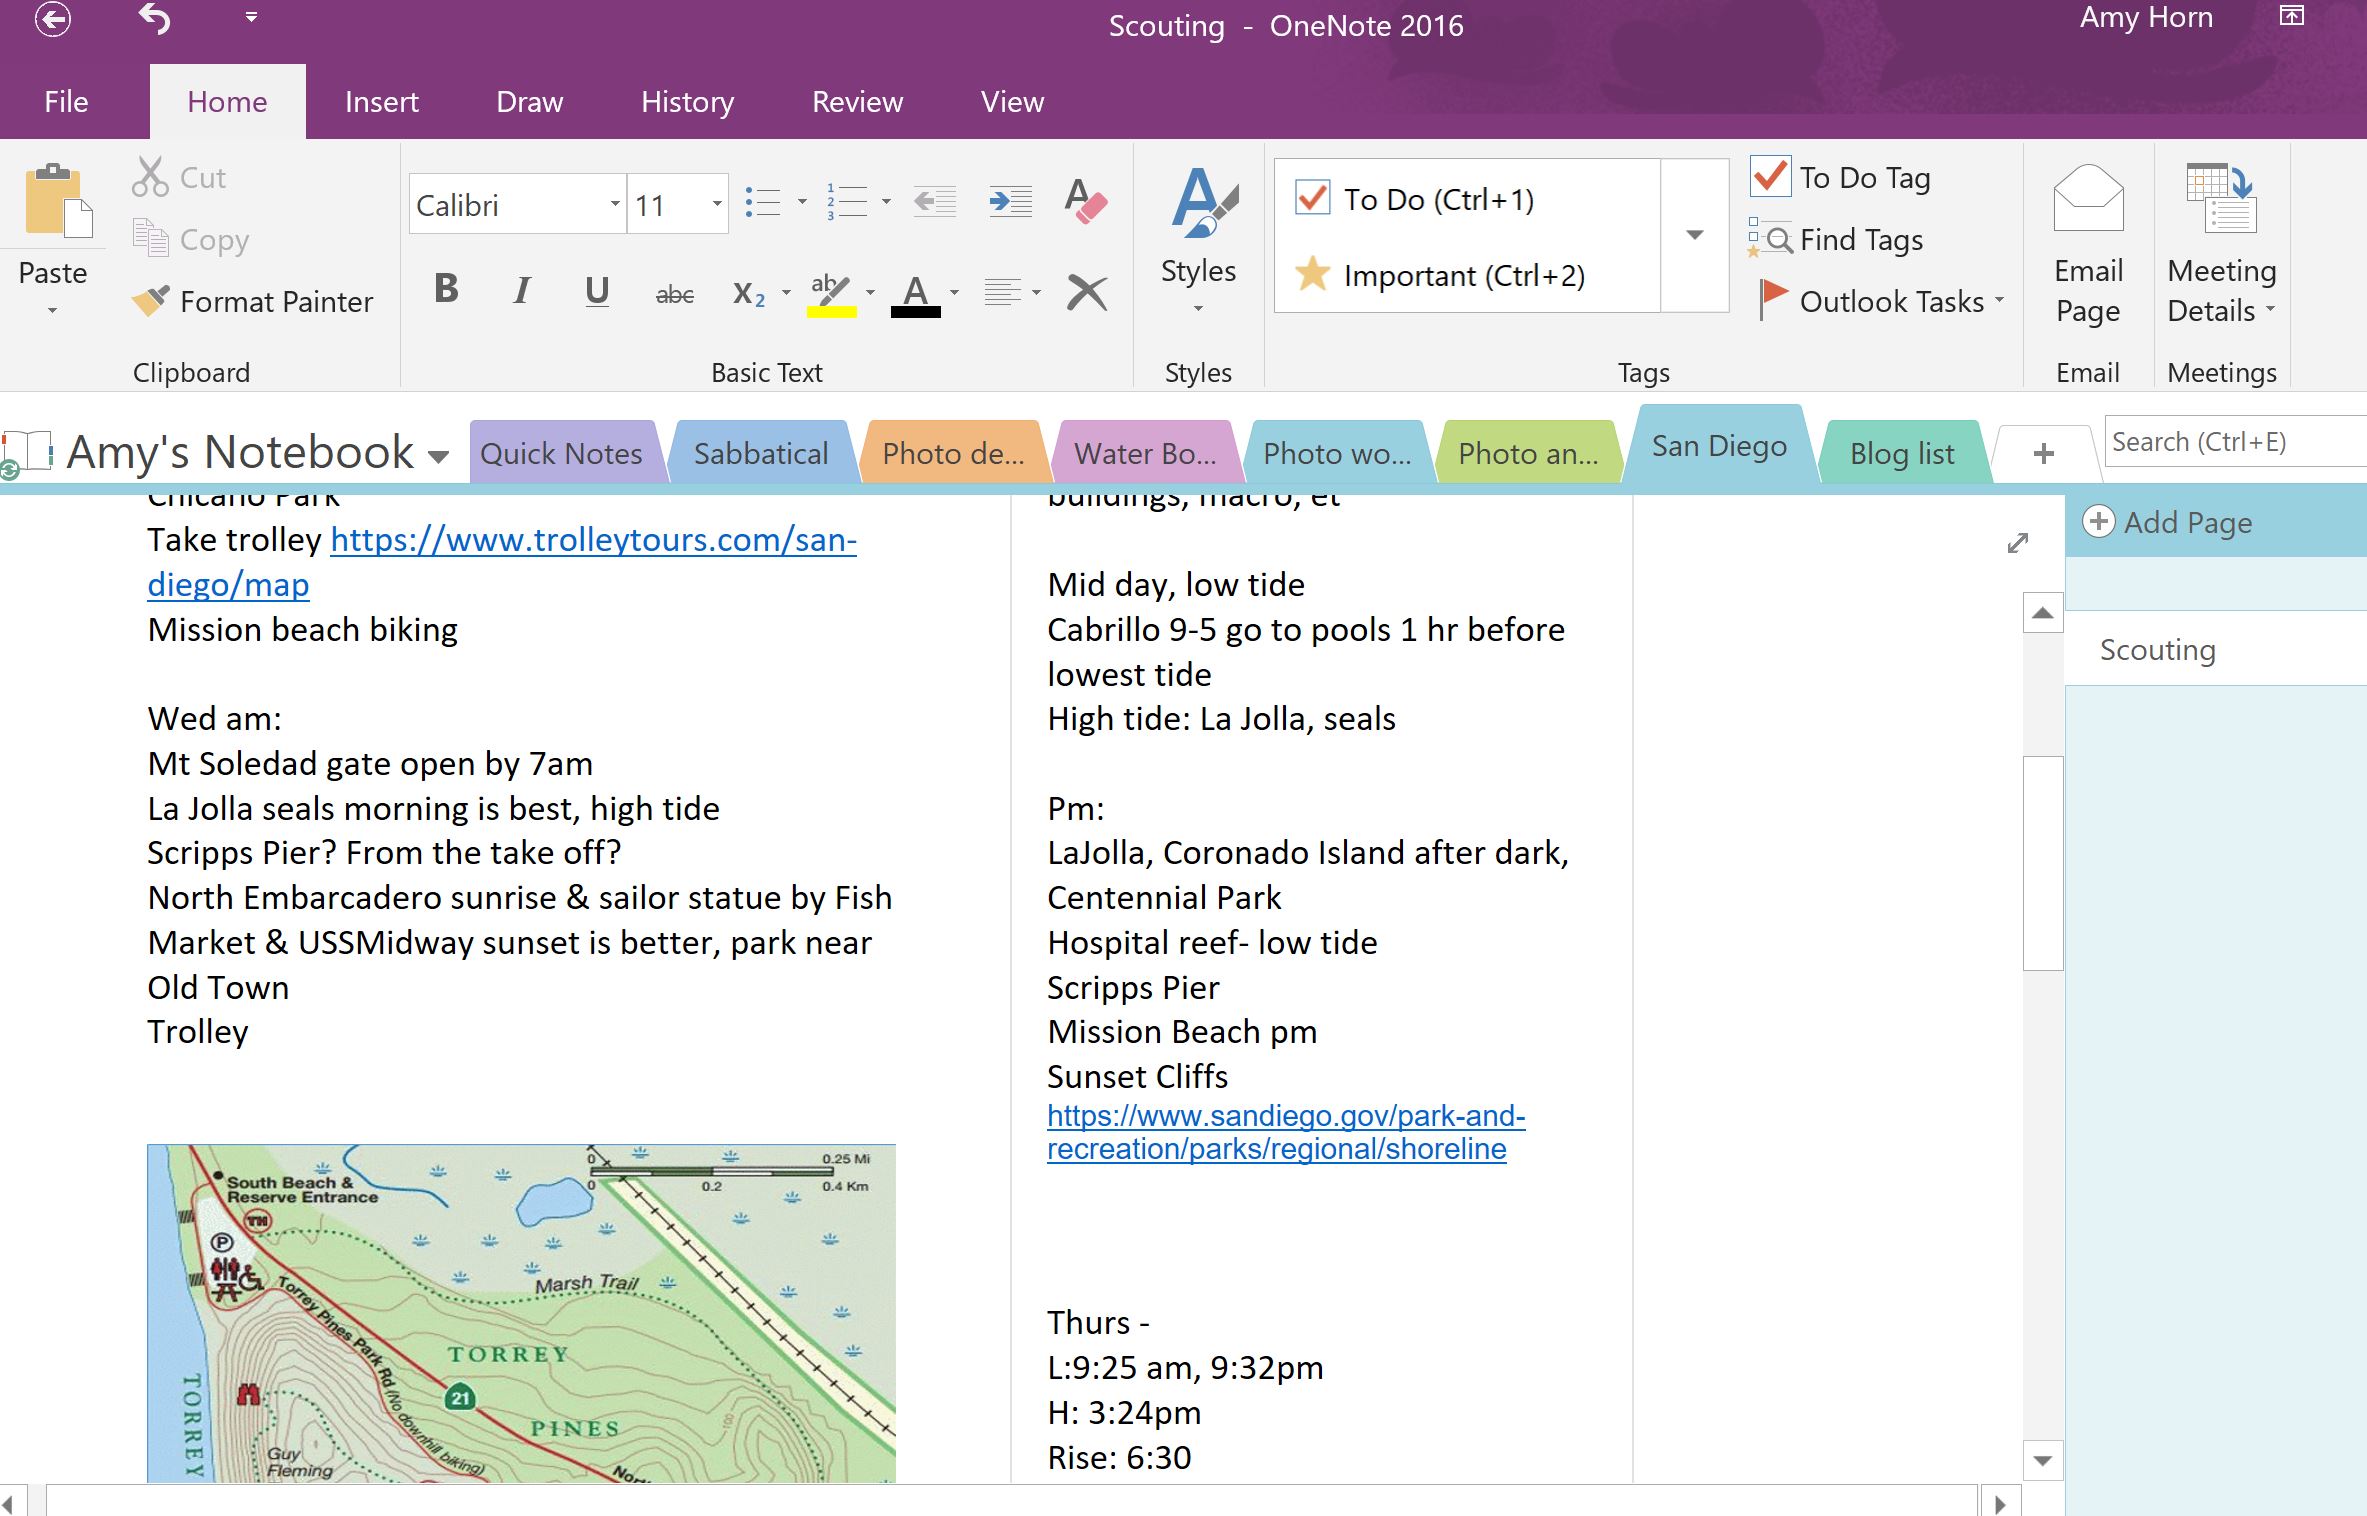
One Note allows me to gather all my scouting information.
Once I gather the information, I need to put it all in one spot, so I use Microsoft Note. Microsoft Note is a great application on a computer and mobile device to compile this information. Tabs organize your notes so links, images, and text can be added to each location tab. It saves instantly and is always at my fingertips. A few other apps that are crucial to my scouting include the following.
Scouting Applications
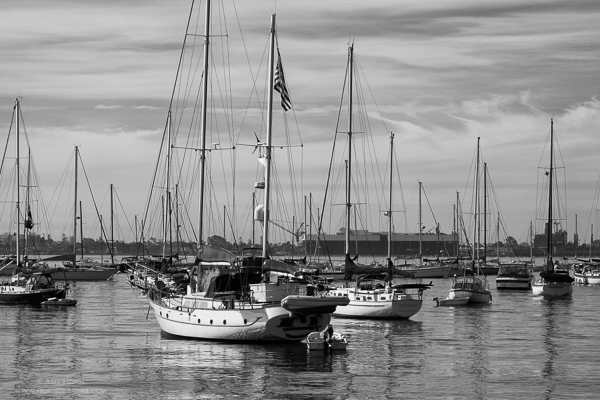
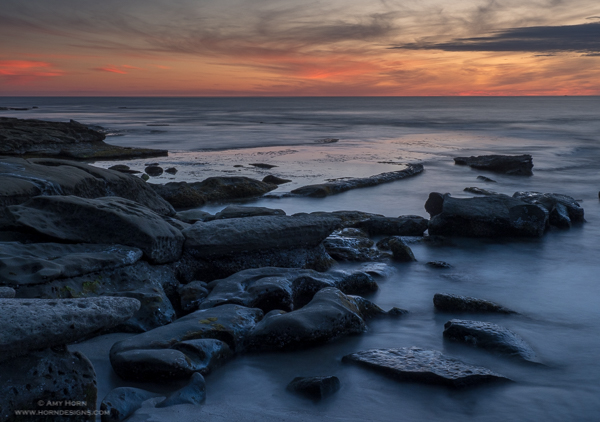
Shelter Island Sunrise
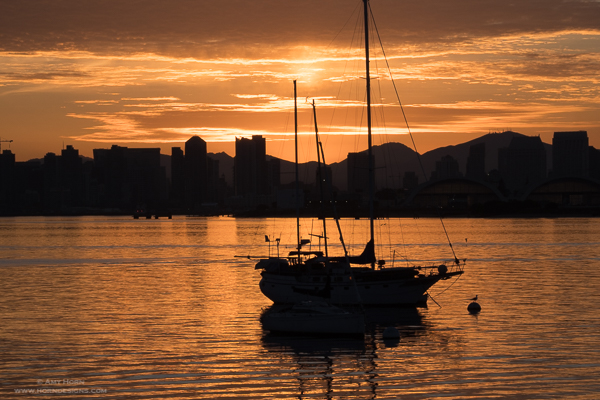
Photo Pills is a mobile app with endless options. I use this app mostly for planning trips and viewing the direction of sun at different times of year. Sunrise, sunset, moonrise, and moonset times are listed and with the augmented reality mode, you can raise the phone in the sky and see the path the sun or moon will take. Locations are saved for planning purposes for a later date. For example, in the middle of the day, I visited Shelter Island. I loved the view across the bay with boats in the foreground. I pulled up PhotoPills and identified the direction the sun would rise the next morning. When the next morning came, I was ready for the sunrise photo.
Hospital Reef, La Jolla, CA
Tides mobile application is great for knowing high and low tides. This app is a necessity if traveling near the ocean. The application identifies the time of day when tide is highest and lowest and to what significance. For instance, a negative tide is best when viewing tide pools, so in this app you can pick the day and time for the best negative tide. The app includes temperatures, cloud cover and wind speeds and direction. I used this app to time a low tide at Hospital Reef in La Jolla.
So, next time you are heading on a trip for photography, spend a little time scouting. Your images will thank you!
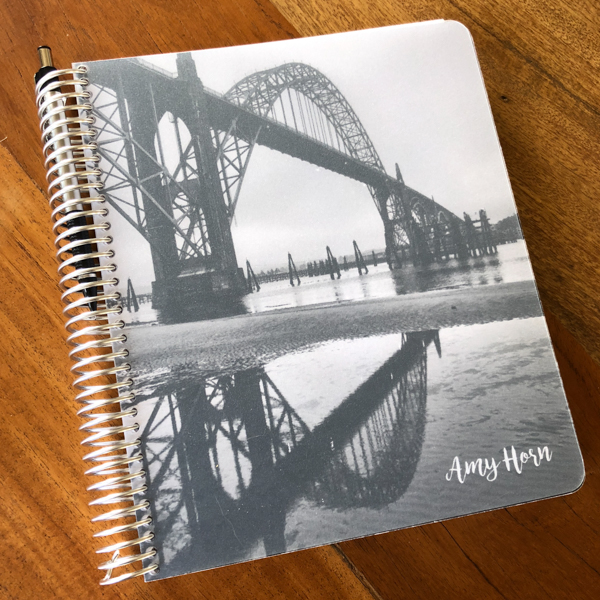
Being a smartphone user, I often find the “right” app to schedule, plan, list, or whatever the topic, as long as it keeps me organized. For the past month, I have been planning my year off sabbatical that starts in August, and again, I went to my phone to get organized. One app I appreciate is Microsoft’s “Notes” app. I can copy/paste websites, text, or whatever and it syncs with my computer and is easy to use. But a friend suggested another option: an analog planner. Analog meaning, old-fashioned, use a pen or pencil to write on the pages, type of planner. It took me a few days to concede and now I can’t believe I hesitated.
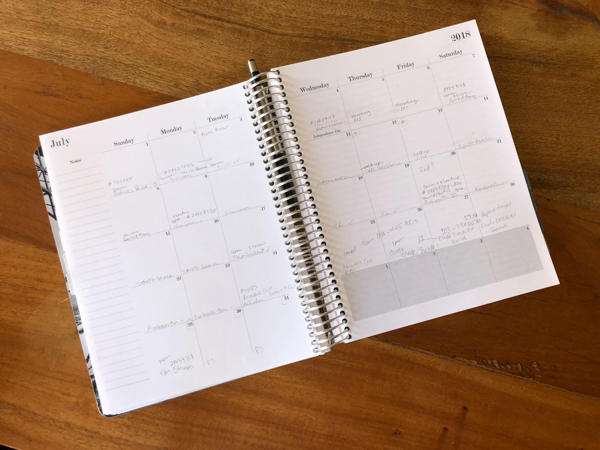
Planner from Practical Paper Company, monthly view.
From Flagstaff’s Practical Paper Company, https://practicalpaperco.com/, I made my planner. The planners come in two sizes (thicknesses) based on the contents chosen for your spiral bound notebook. Several styles (daily, weekly) and options (notes, lists, expenses, etc.) make every planner custom and unique. What really made this experience special was the option to use my own photo on the front and back covers. My planner brings joy to me whenever I open it, not just because of the trips I will take with it, but because I designed it. The planner holds reservation numbers, detailed shooting locations and many other details for my camping trip along the Pacific Coast from California to Washington. There is something satisfying with putting down the phone and writing too. I use a written “to-do” list and feel so accomplished when I complete a task and cross an item off the list. Far more accomplished than deleting an item from a digital list. On a final note, I won’t need to worry if I have cell coverage to find my reservation numbers. It will be at my fingertips in my planner. So, if you are looking to plan a trip, consider a planner, it has made my trip planning quick and easy.