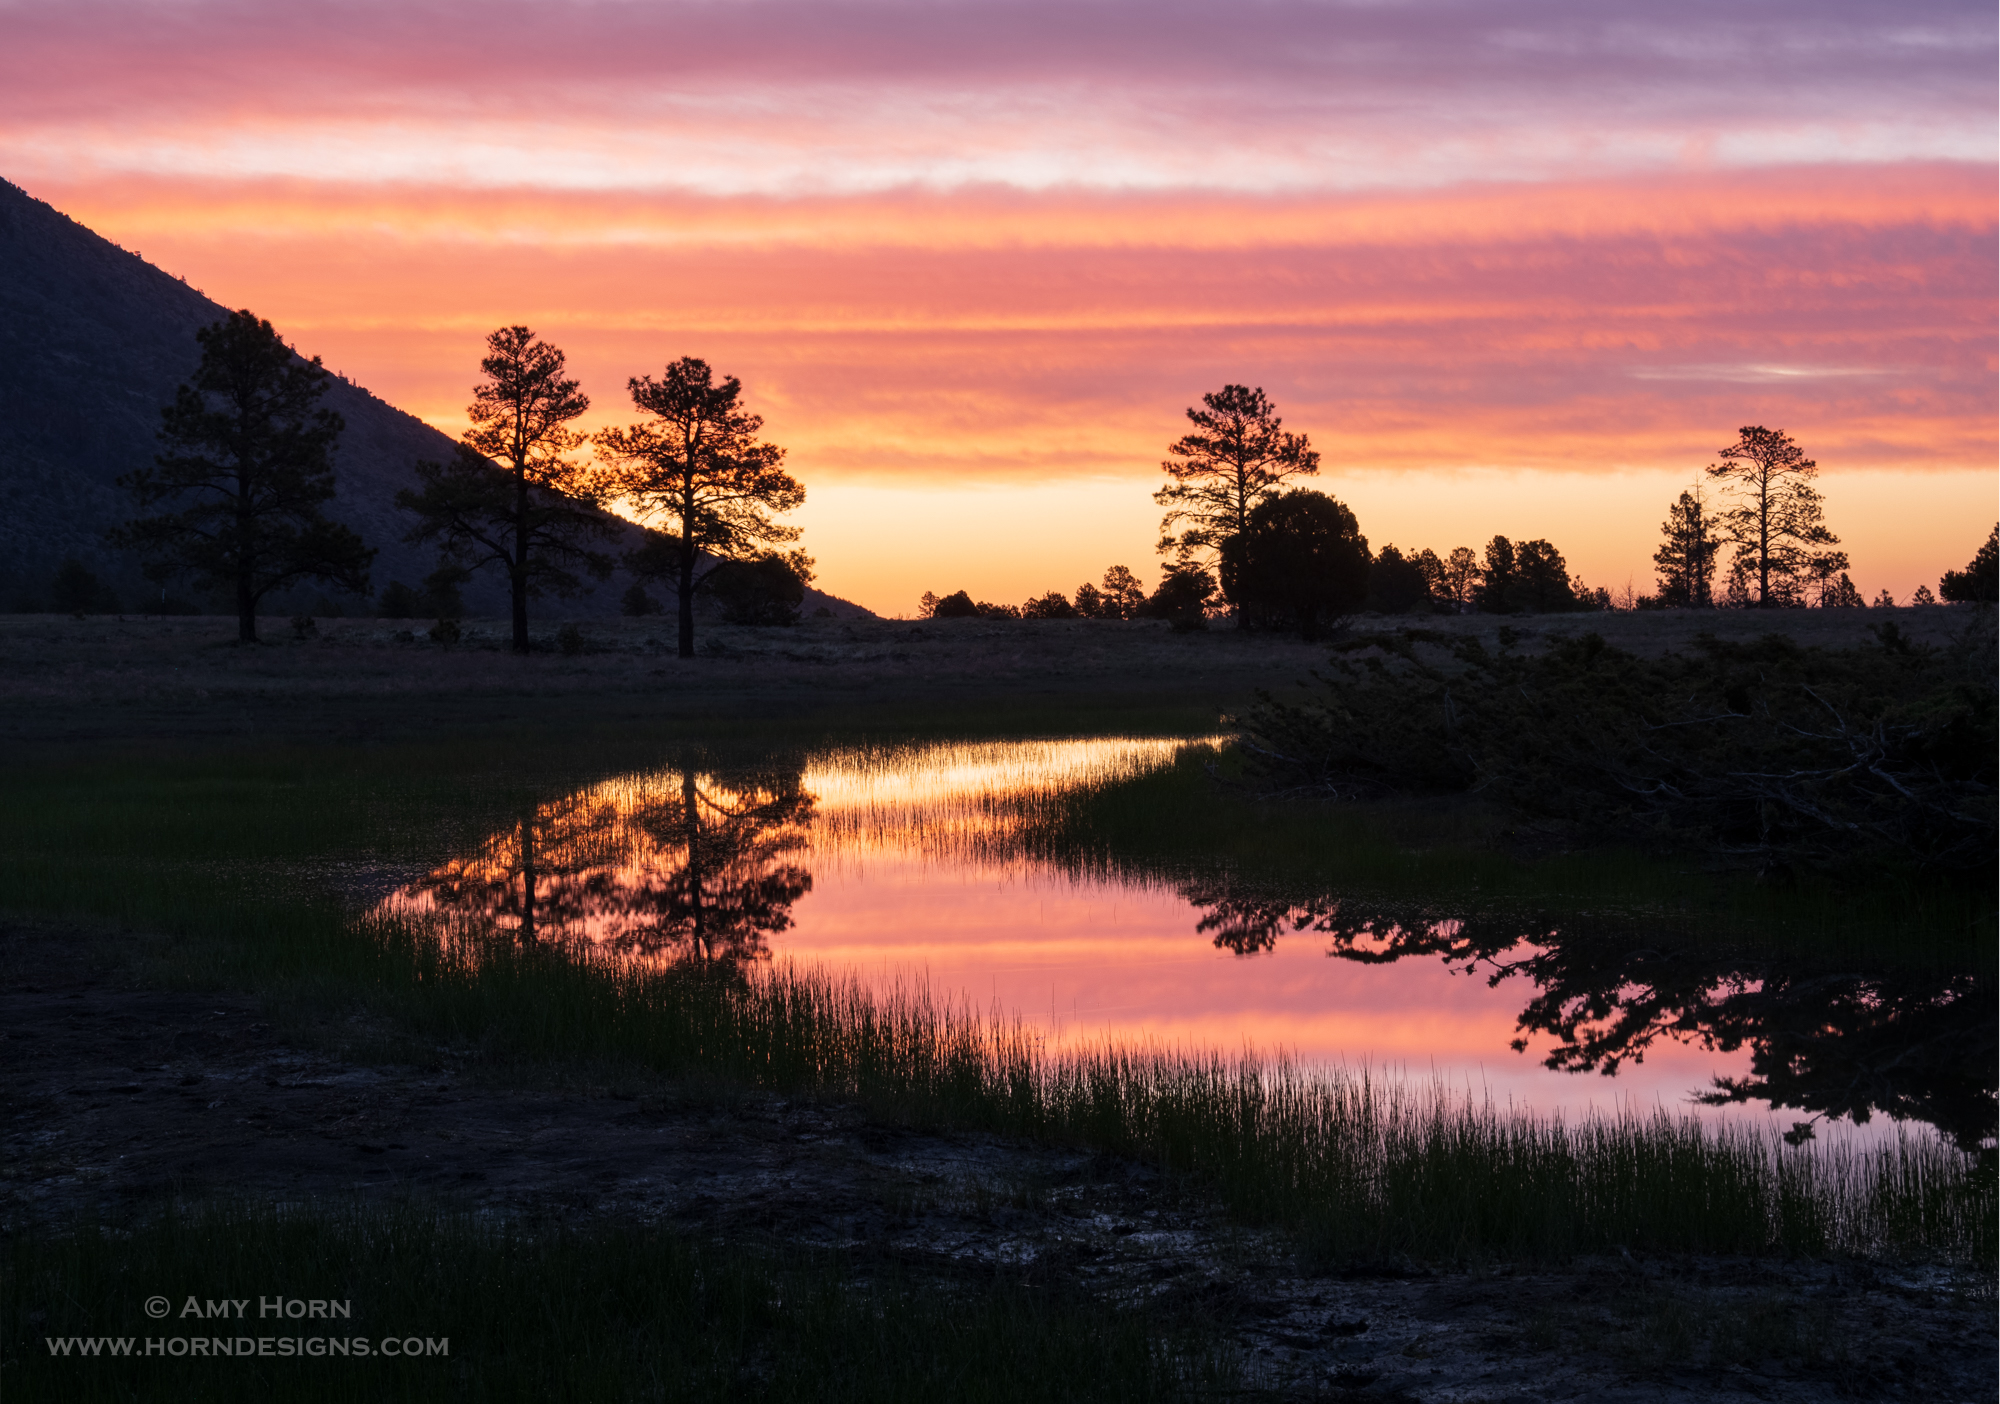
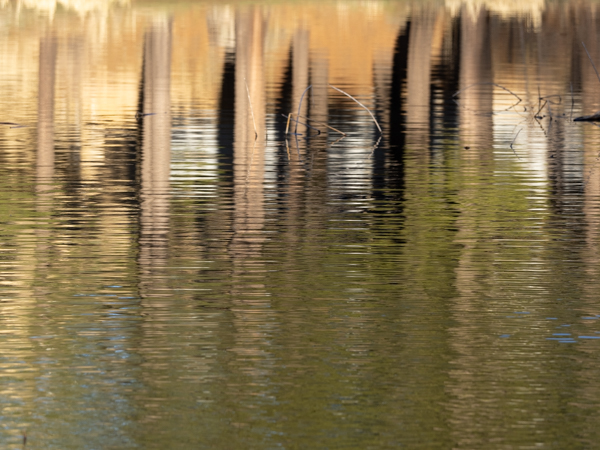
Do you have a personal project? My list of personal projects is longer than I care to admit and includes locations, techniques, gear-specific items, etc. One of my personal projects continues to be shooting water: from ice to oceans and everywhere in between. But the locations range from Flagstaff to International travel. In Flagstaff, one of my favorite “go-to” places to photograph is Buffalo Park. This park is in the middle of the city with great views of Mount Elden and Humphrey’s Peak. After our spring snow melt, the normally dry pond filled with water so I went out for a sunrise shoot. If I only have a little time, Buffalo Park is a great place. I’ve shot portraits, macro, sports, and of course, landscapes at this park. Do you have a “go-to” spot close to your home?
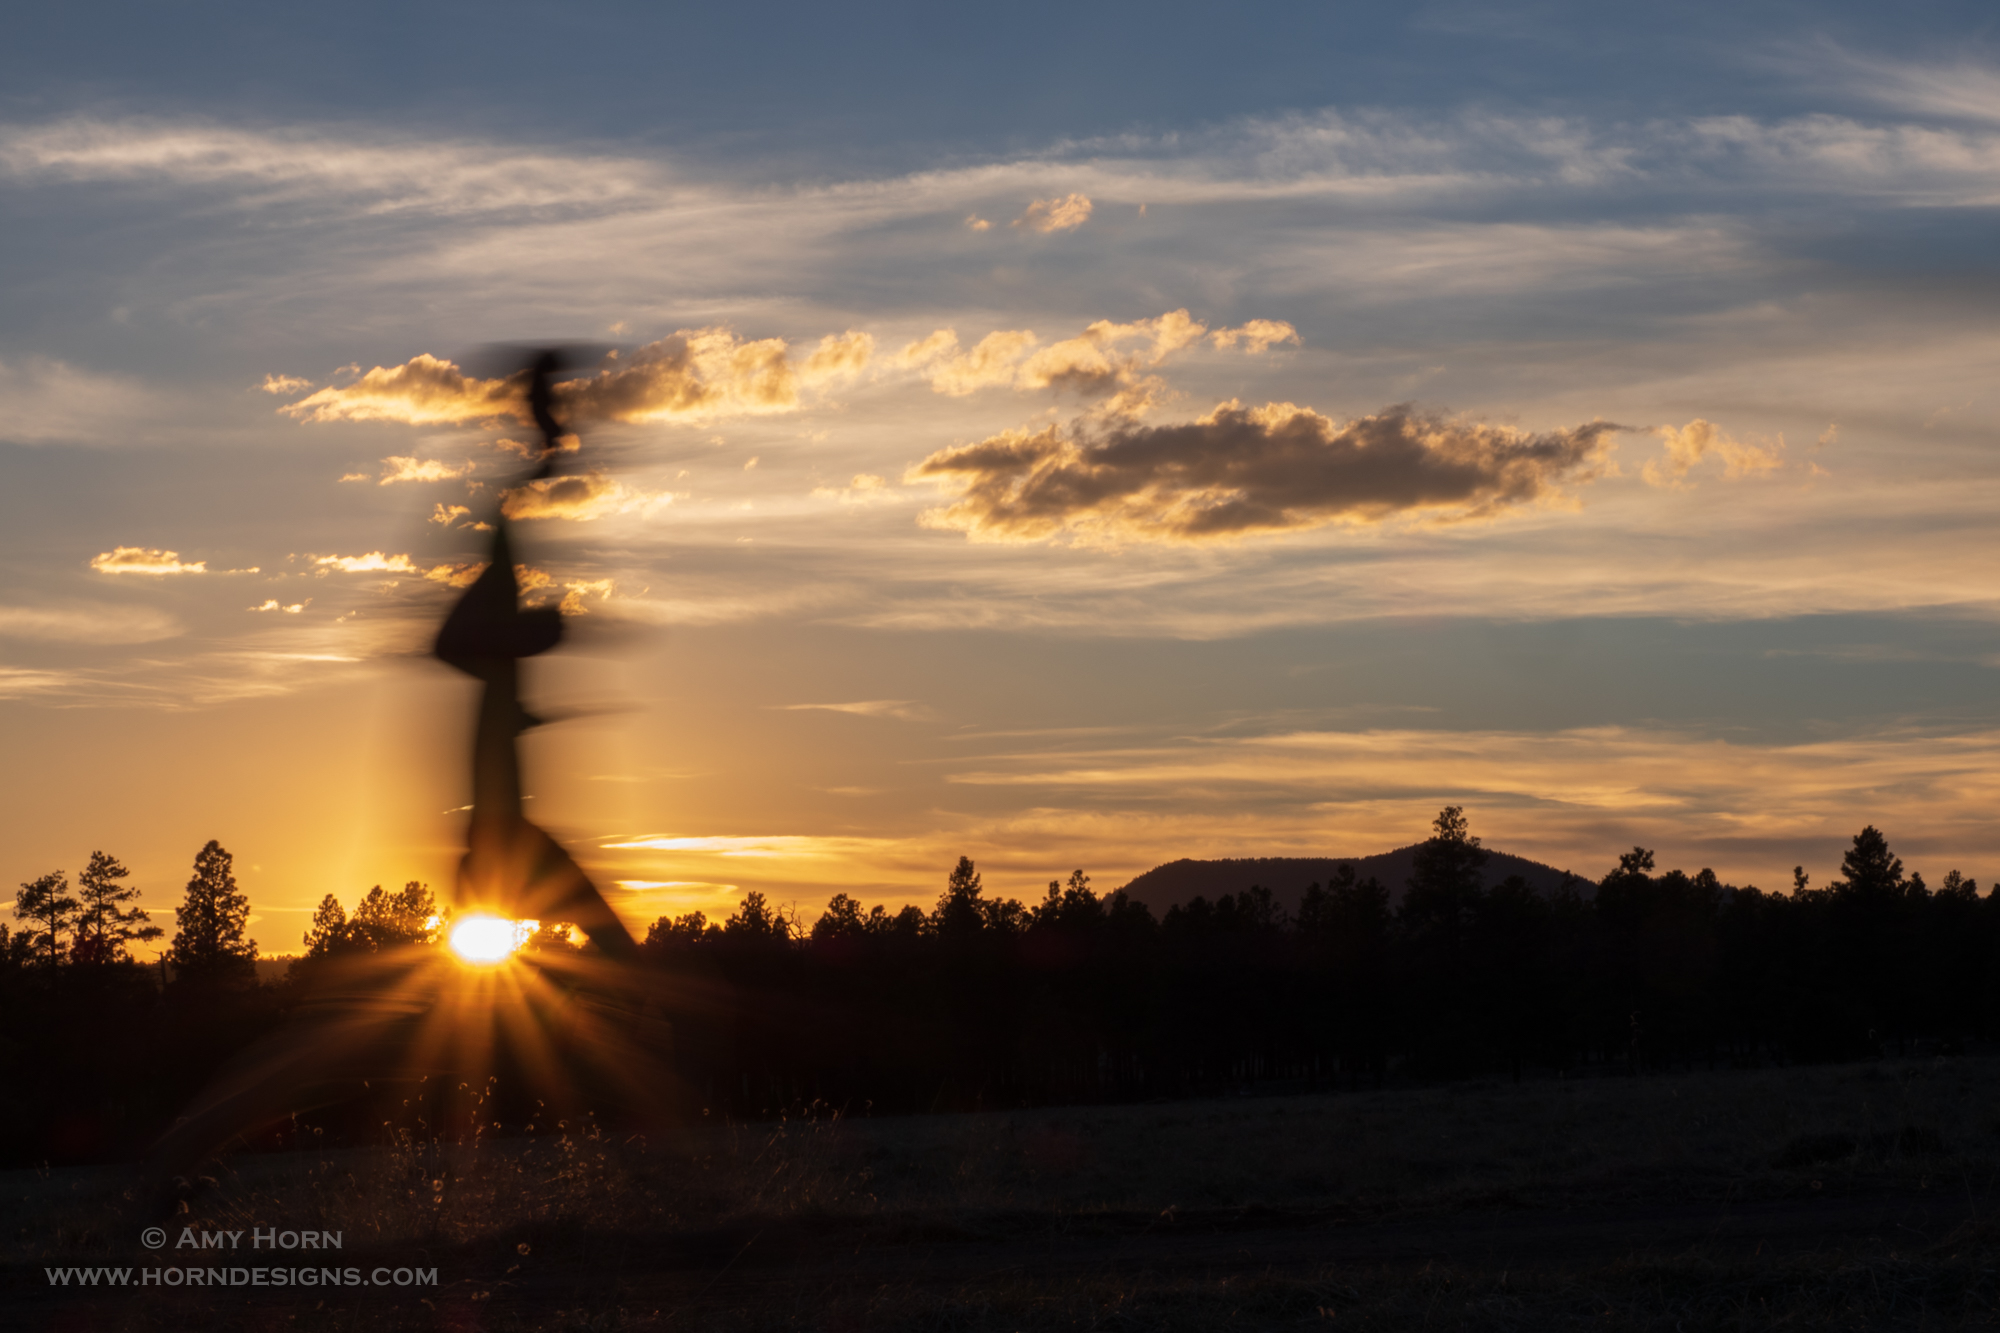
This next image was shot of my son running at sunset. I wanted a light burst, so I stopped down to f/22
Olympus OMD1M2, ISO 200, f/22, 1/20
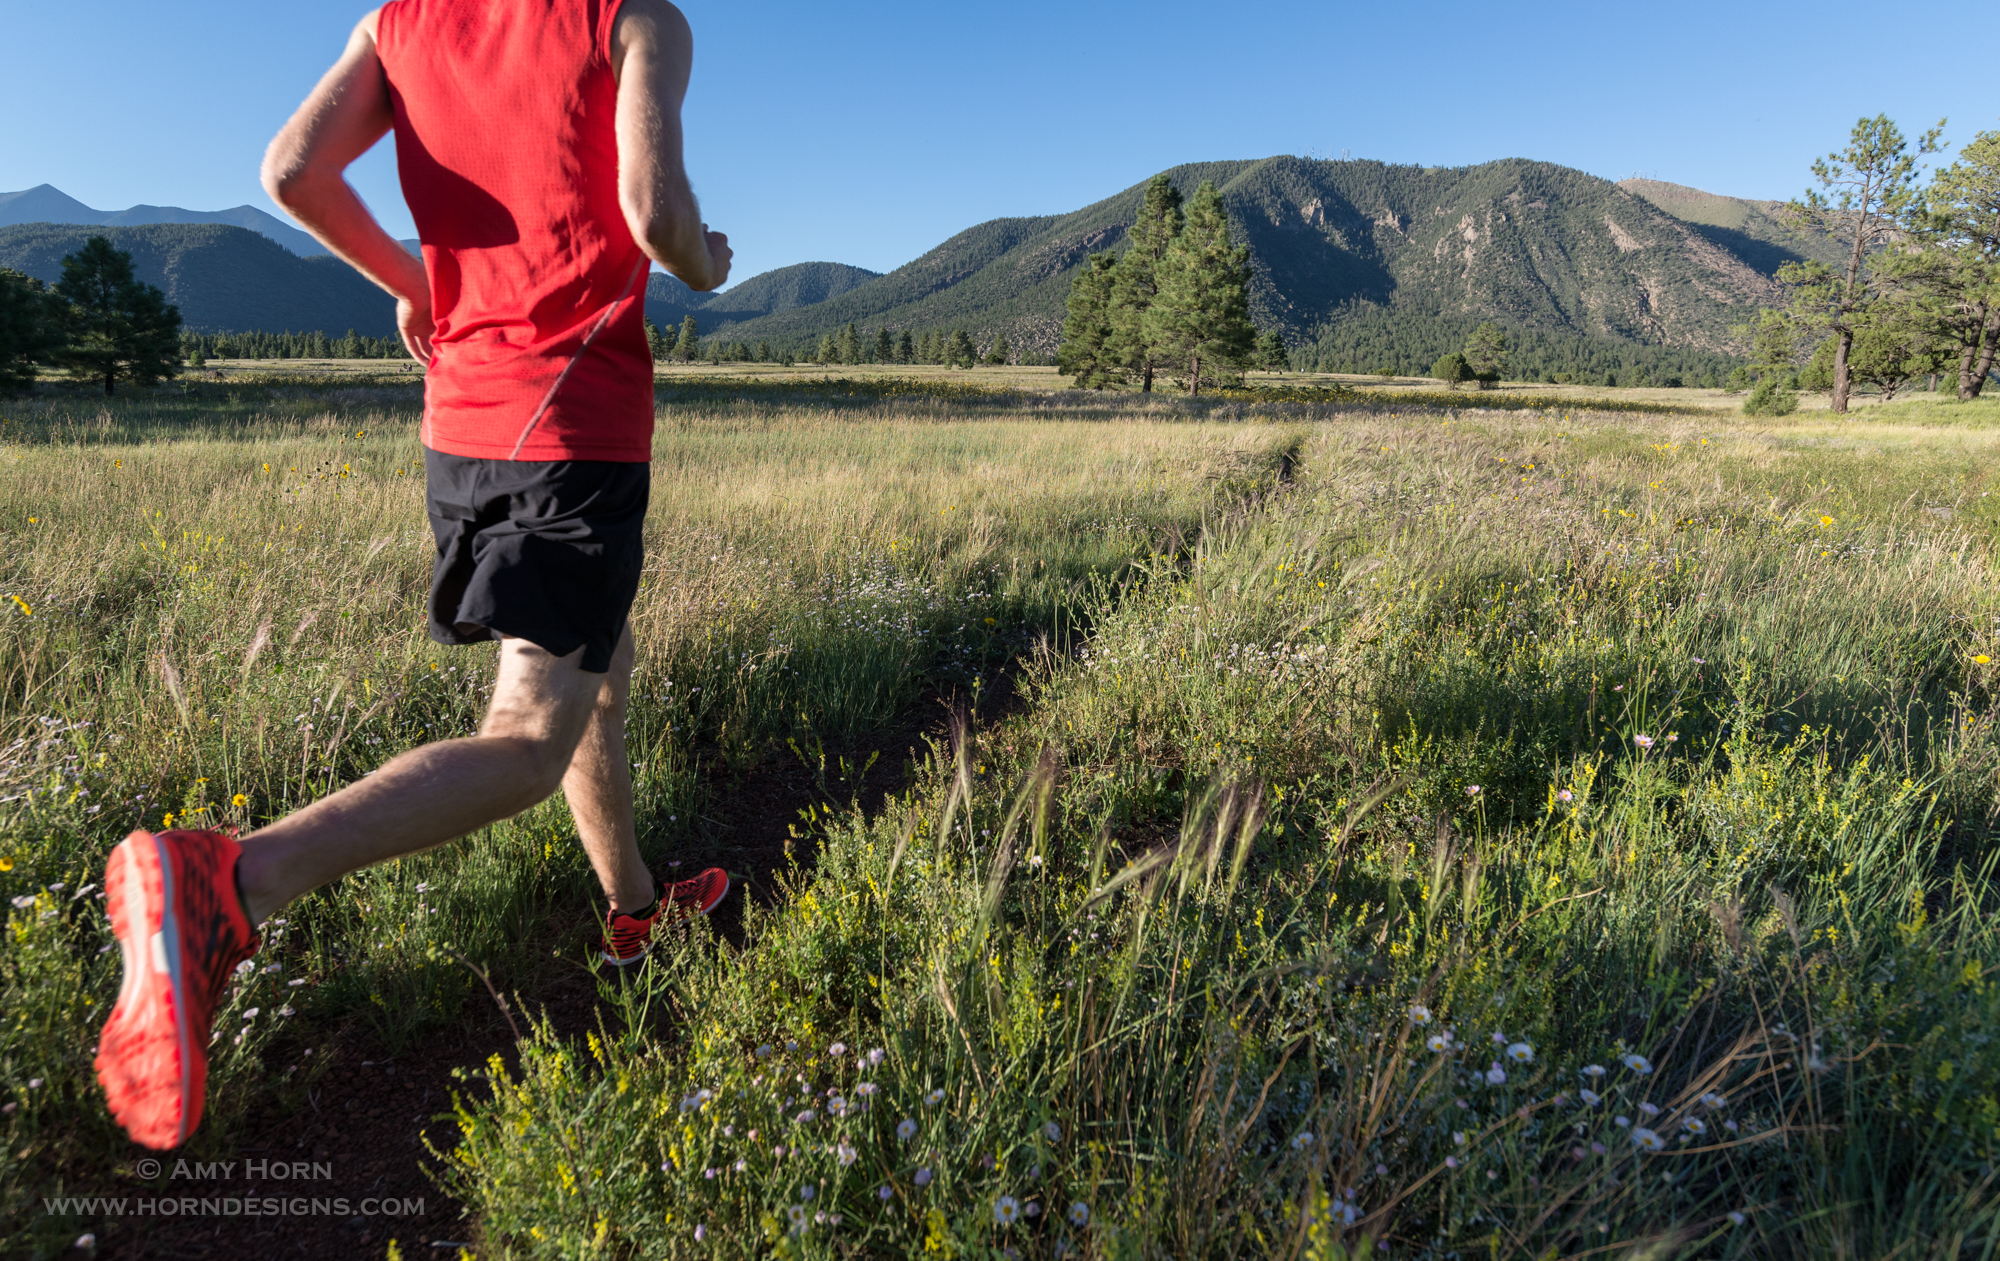
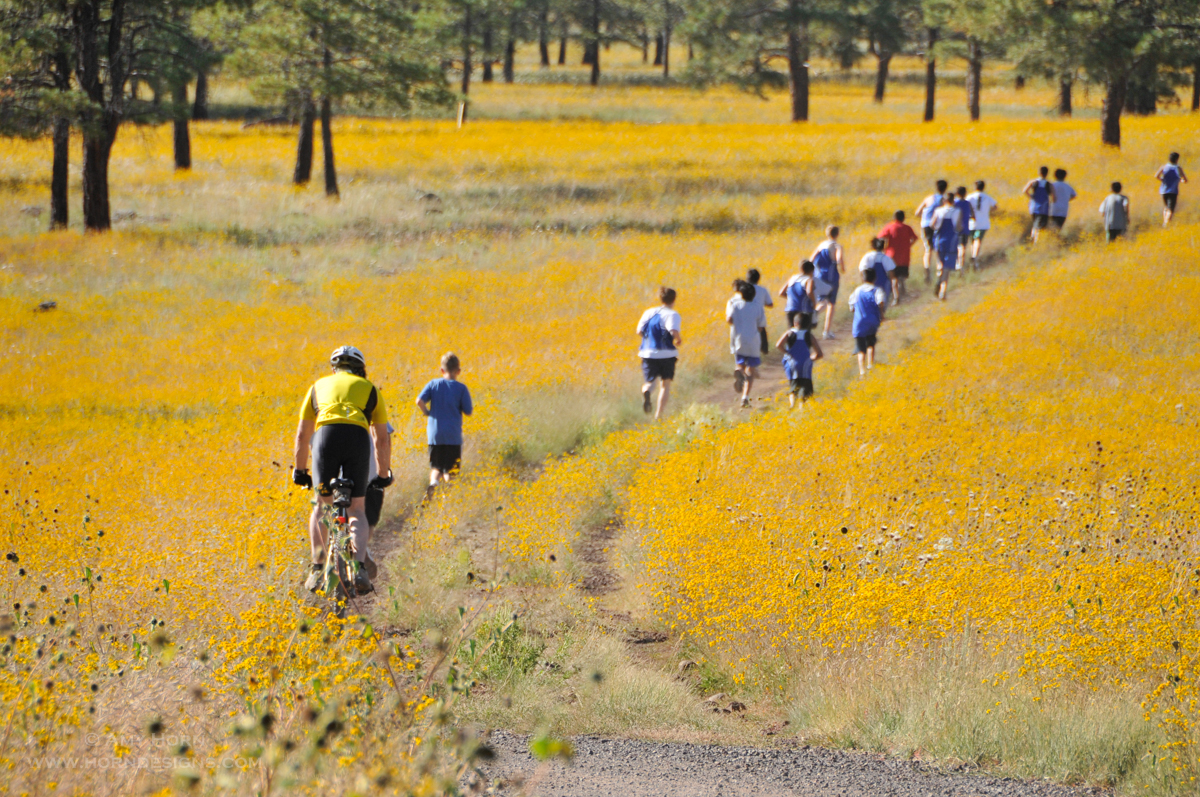
And another of him running during the day.
Nikon D600, ISO 400, f/5.6, 1/1000 sec
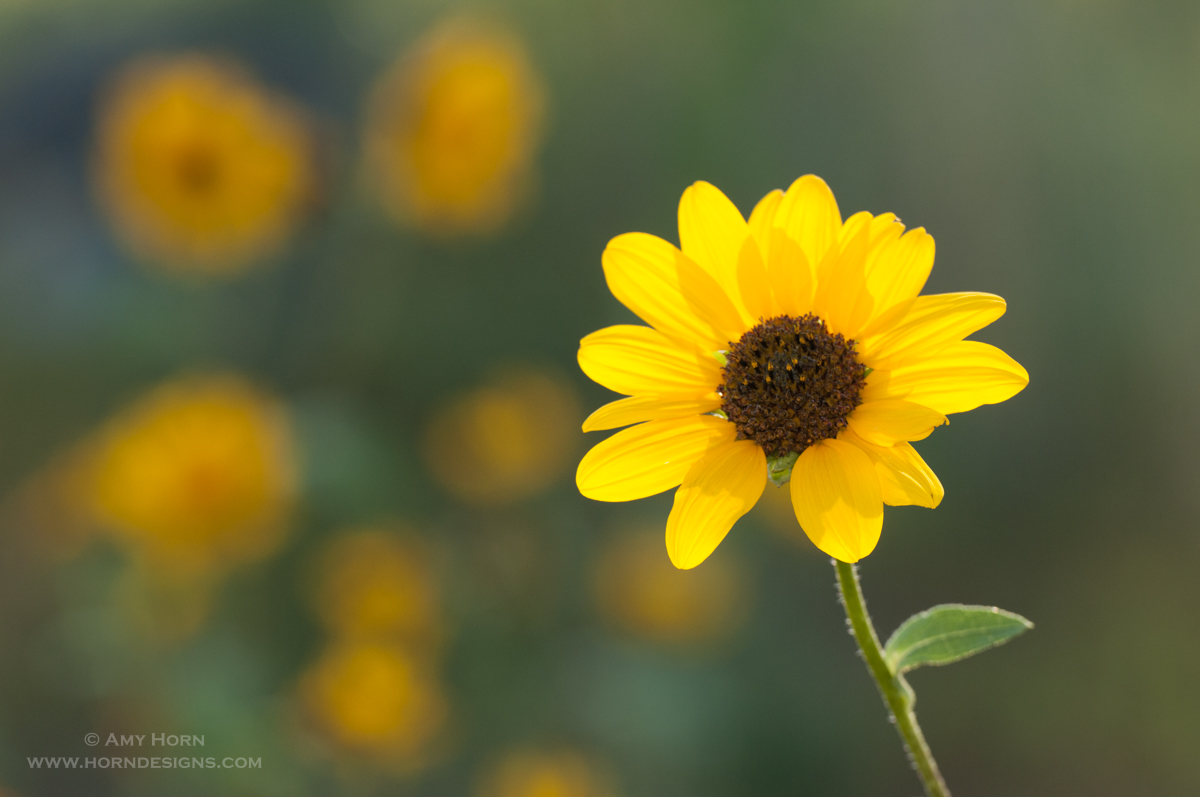
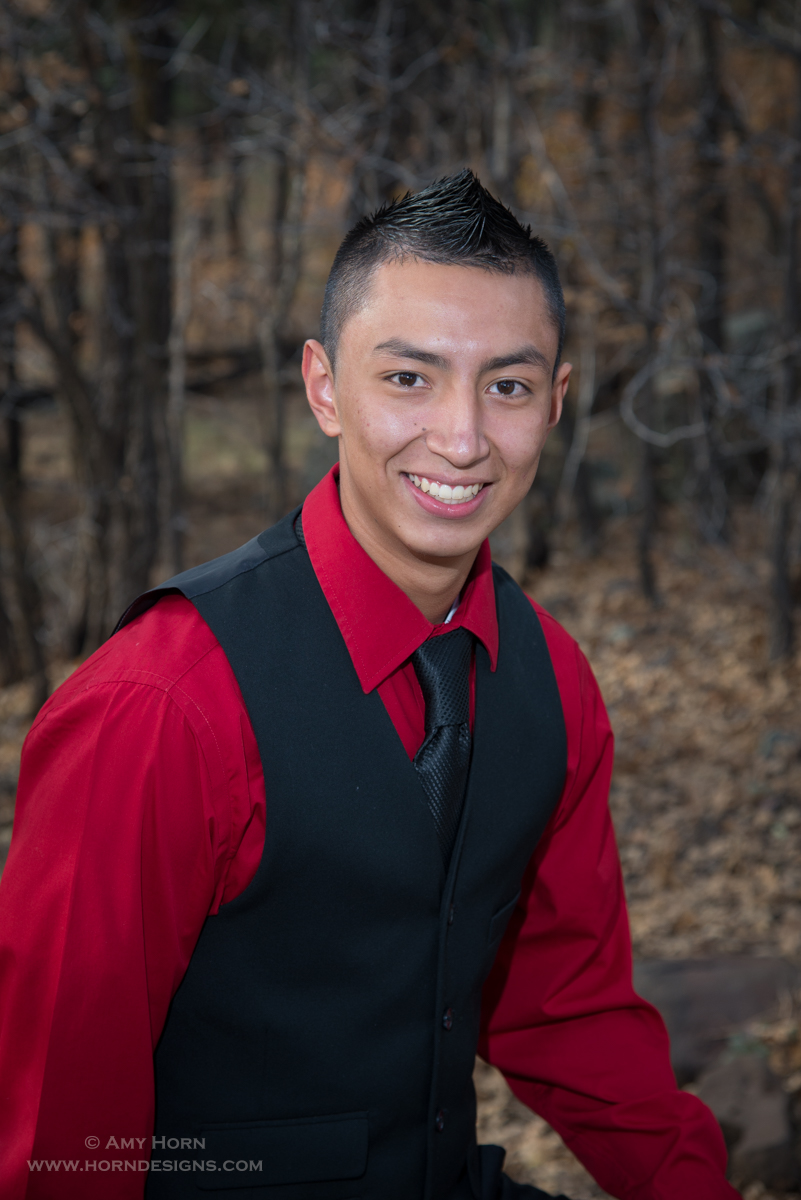
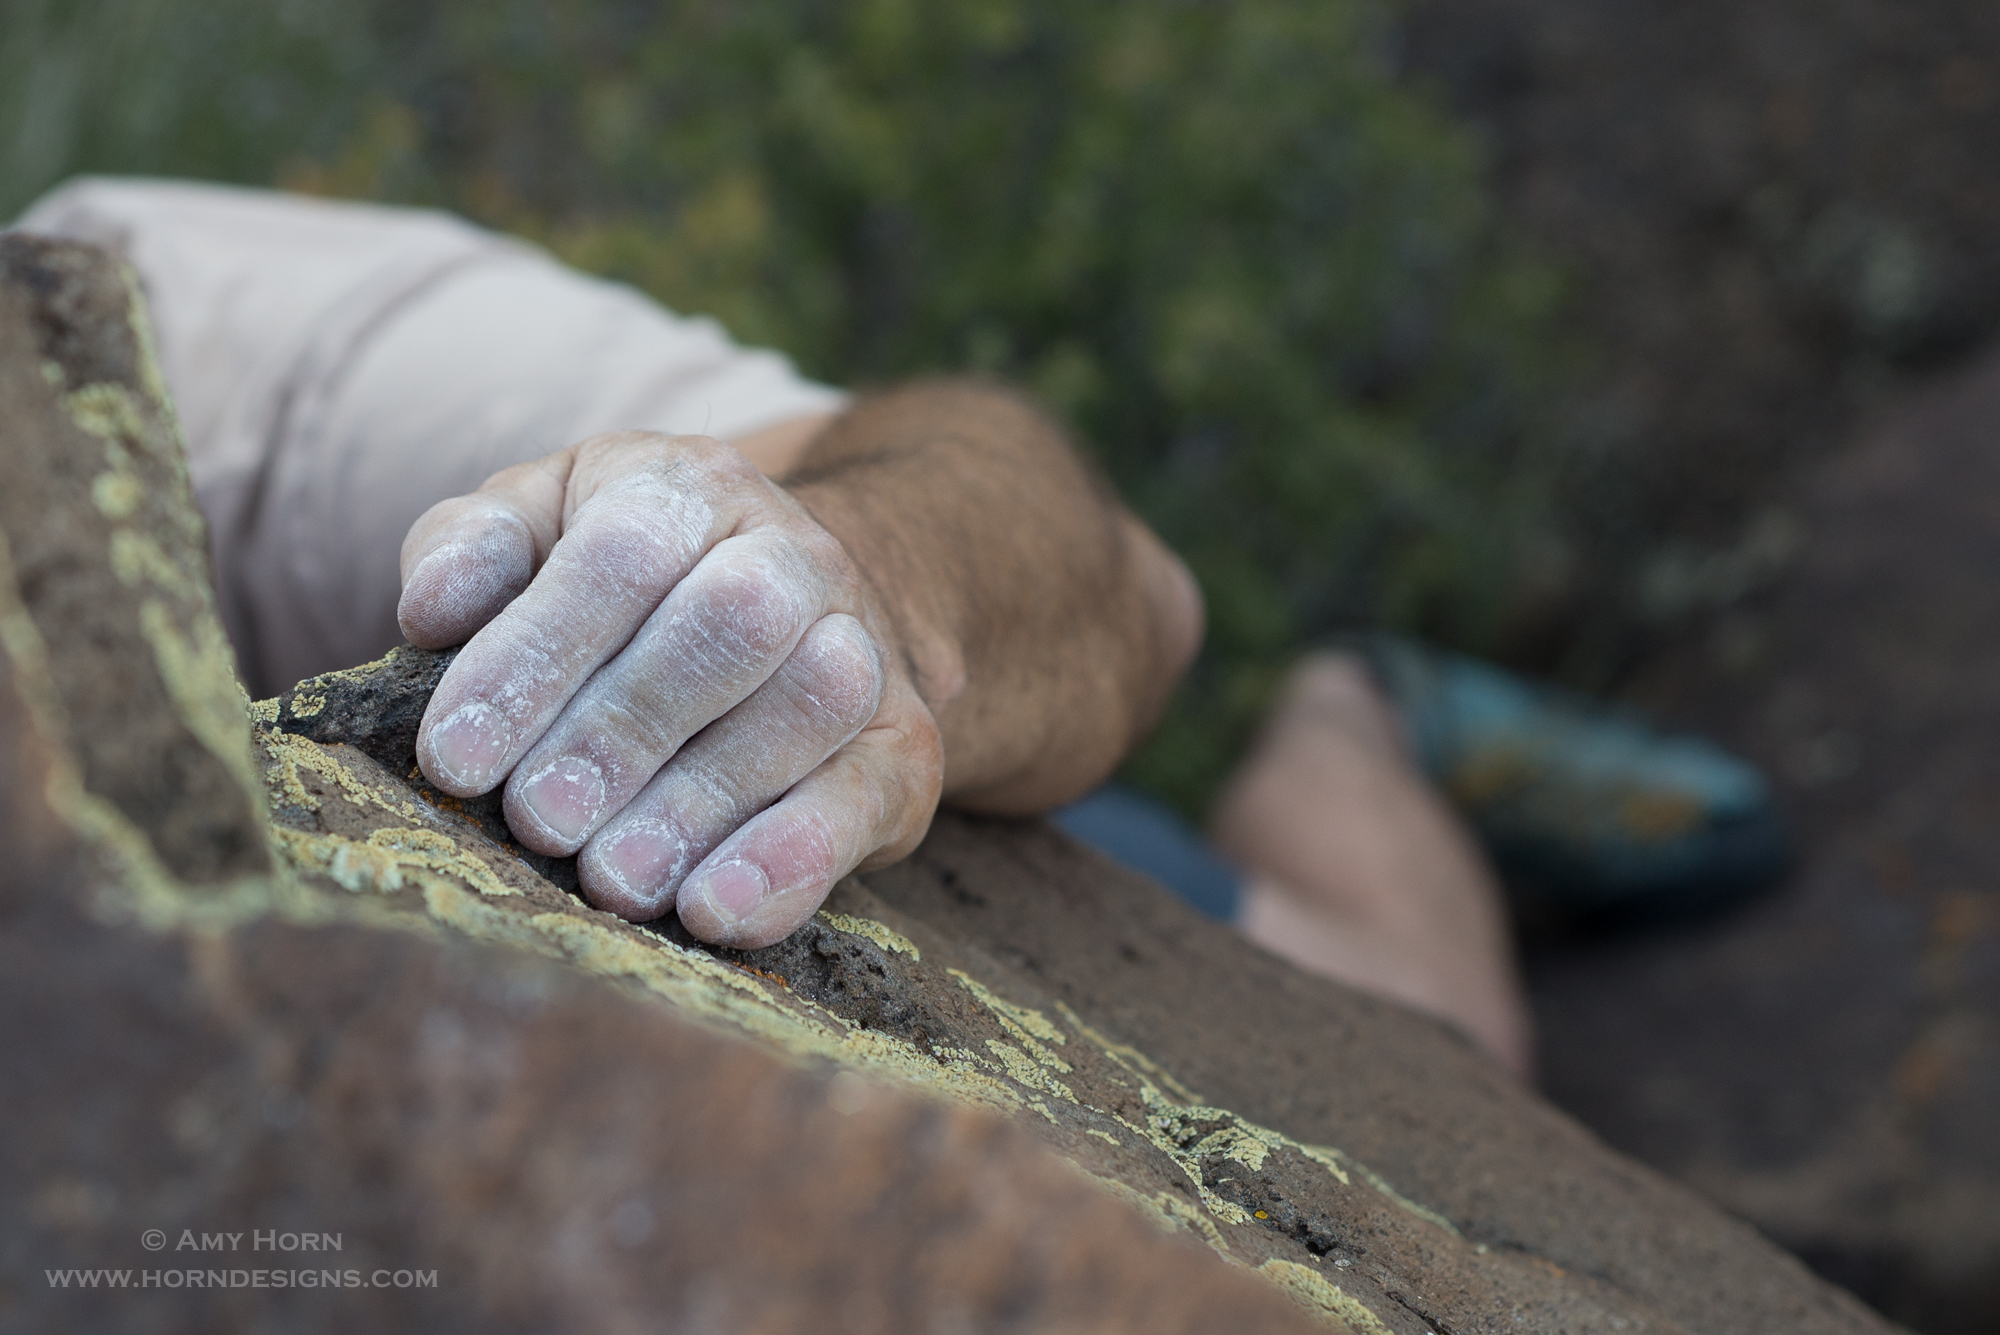
Below are several more images captured at Buffalo Park. From rock climbing to astrophotography, this location has a lot to offer. Challenge: find “your go-to” spot.
Nikon D300S, ISO 200, f/5, 1/400 secOlympus OMD1M2, ISO 1000, f/2.8, 20 secNikon D600, ISO 200, f/5, 1/160 secNikon D300S, ISO 400, f/6.3, 1/800secNikon D600, ISO 400, f/5.6, 1/320 sec
Have you ever tried narrowing your yearly images to your top 5? That is the theme here, my top images of 2022. I do this every year and it isn’t easy. Do I pick top images from different quarters? trips? genres? Well, this year, they are the top images that stood out based on light, composition, subject matter, and wow factor. I did get a little help from the family. I put the images in grid mode and starting with about a dozen images I kept asking them to remove two that weren’t as strong until I was down to these five.
Olympus OMD1 M3, 12-40mm, 1/640 sec, f/5, ISO 400.
Boundary Water Fog
I captured this image while canoeing in Minnesota’s Boundary Waters in August of 2022. We woke up to a thick fog and thought it had to be captured. So, Gretchen and her brother, Neil paddled and I “duffed” (sat in the middle) taking photos before the fog lifted. This image brings back that peaceful feeling from that morning on the water. Olympus OMD1 M3, 12-40mm, 1/640 sec, f/5, ISO 400.
Olympus OMD1 M3, 35mm, 1/25 sec, f/5.6, ISO 100.
Cape Perpetua Light
While driving along Highway 1 on the Oregon coast in September 2022, I was treated to a spectacular light show at Cape Perpetua. I turned a corner and saw this light coming through the fog on the pullout to a campground. My gut told me to stop, so I turned down the road, stopped and took the shot. Moments later, the fog was gone. My takeaway lesson – don’t ever think you will get the shot later – stop and capture the moment.
Nikon Z, 50mm, 1/00 sec, f/16, ISO 200.
Paper Project
Macro photography is my passion, so this project incorporates uniquely folded sheets of paper and off-camera gelled flashes. When I started this project, my husband decided to purchase a laser cutter so that we can cut our own paper perfectly. As a result, I plan on pursing more of these in 2023.
To celebrate our 30th wedding anniversary, Rod and I spend 10 days in Kauai. We hiked, ran, and photographed waterfalls. What an absolute joy. Getting to this position in the waterfall took some clever walking and handling of gear. Thankfully, Rod is always up to assist!
Olympus OMD1 M3, 12mm, .4 sec, f/10, ISO 200.
Ferguson’s Cafe
If you ever saw the movie “Benny & June,” then Ferguson’s Cafe might look familiar. In Spokane, Washington’s Garland District I walked up and down the street photographing the many neon signs at night. Ferguson’s was by far my favorite.
There you have it, my top five images of 2022. I’m thankful my family offered opinions on these images because sometimes I get stuck on my emotional attachment to the area instead of the quality of the photo. This is a great exercise in evaluating photos, if you haven’t tried it before, give it a try.
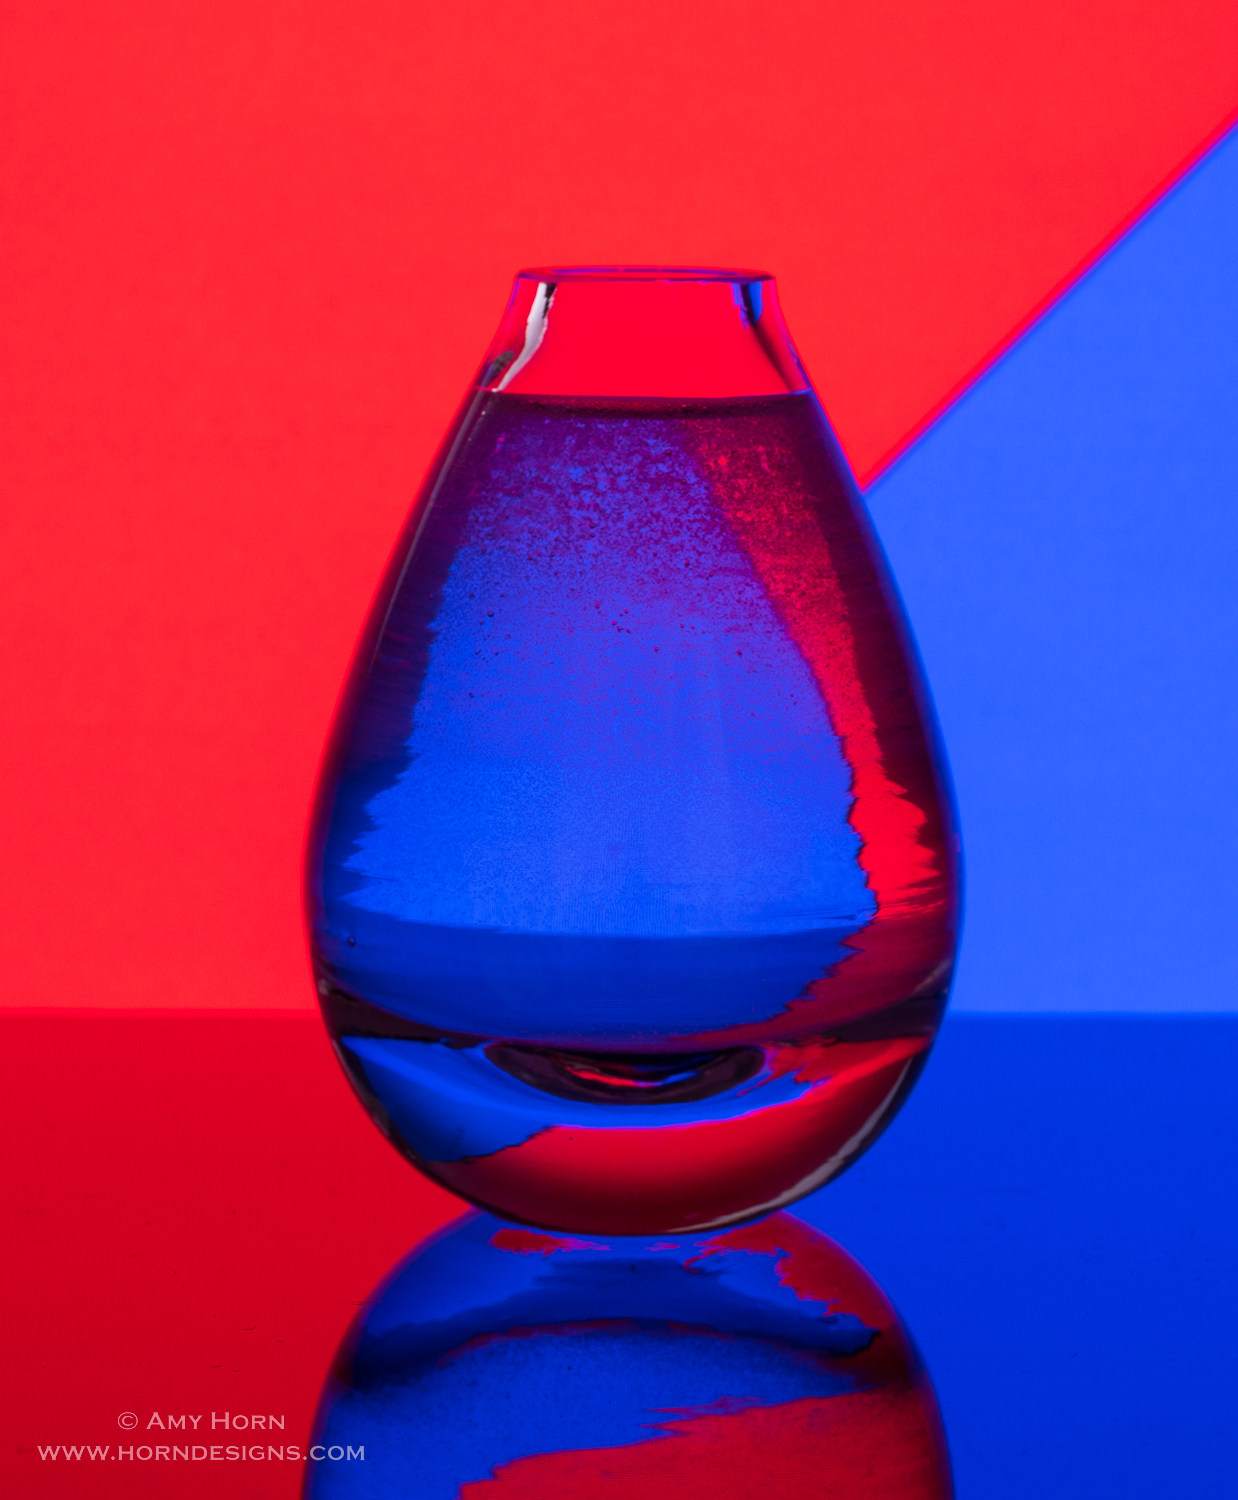
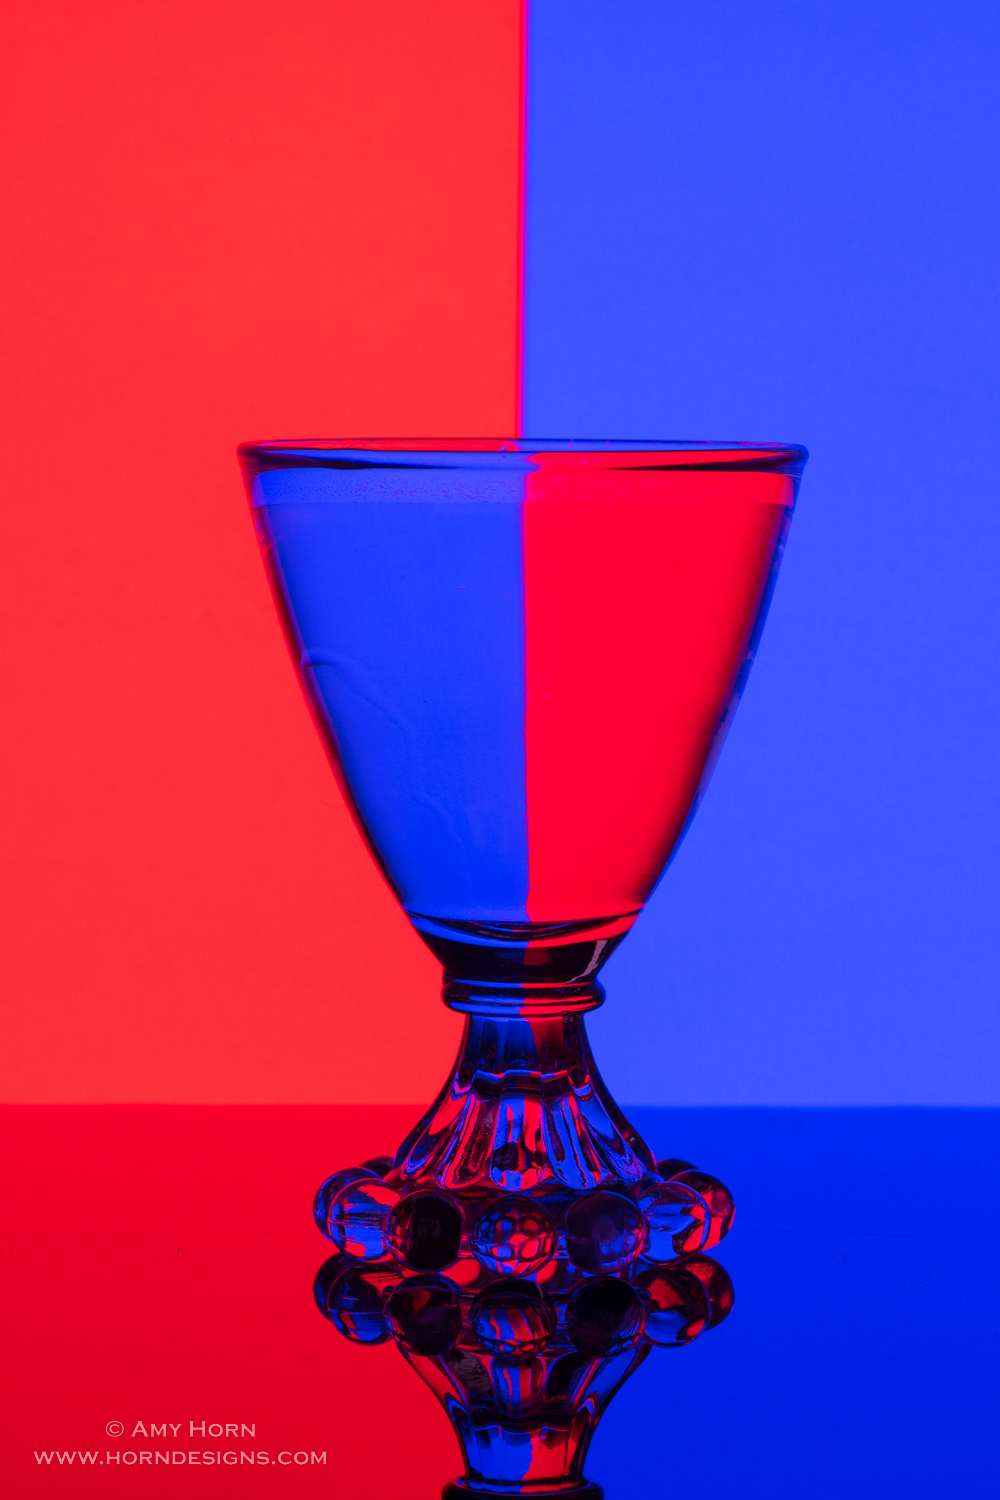
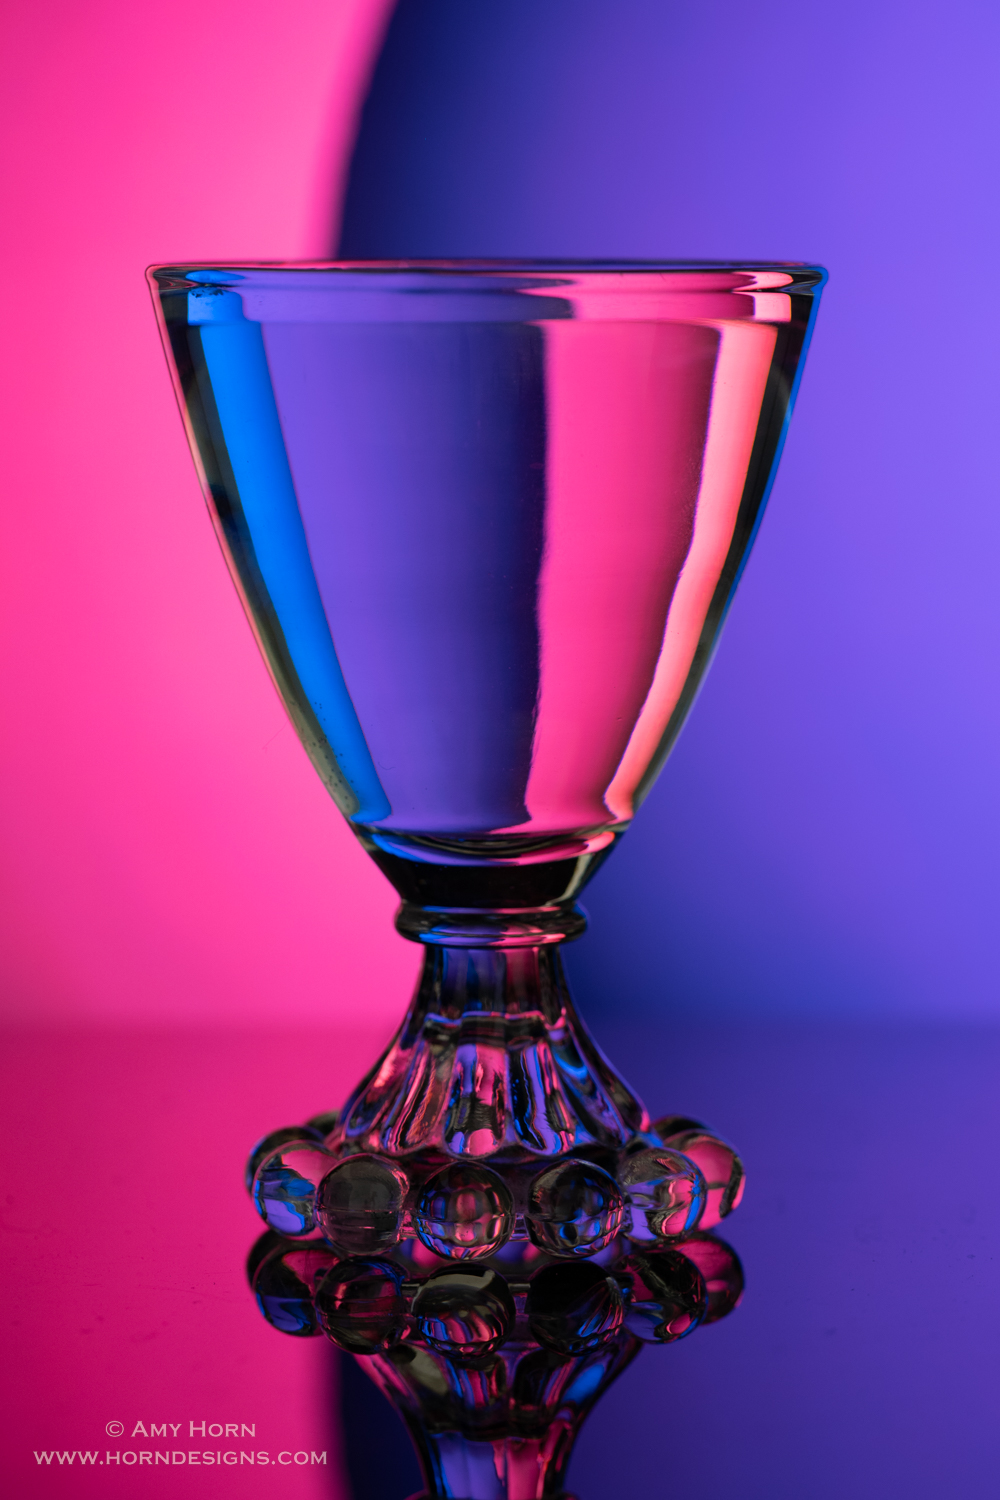
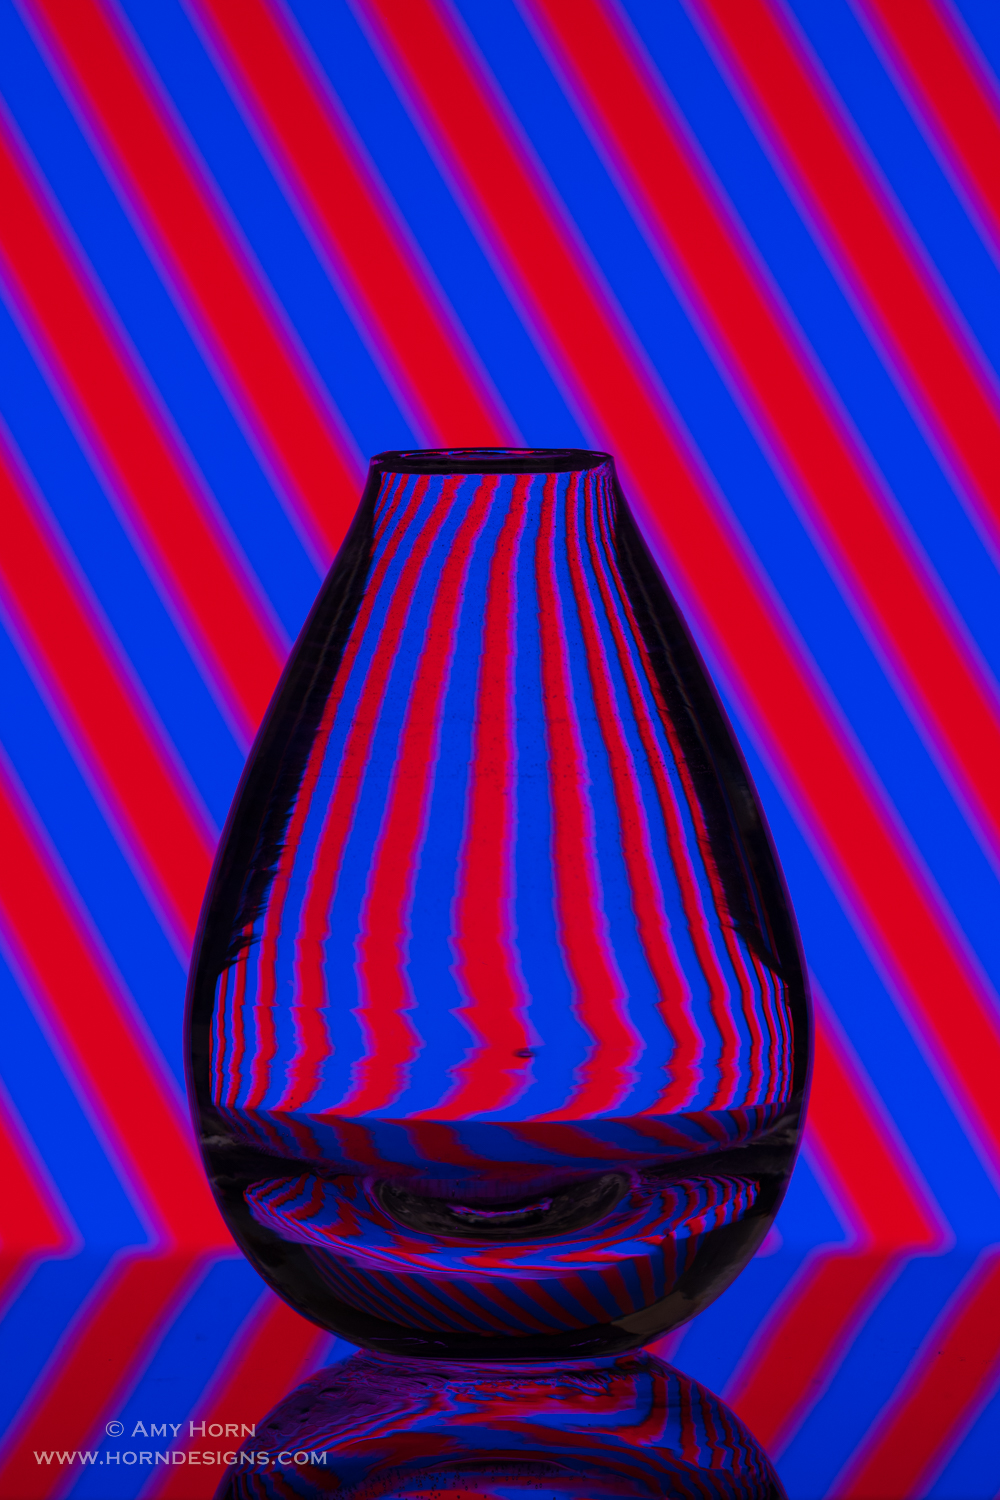
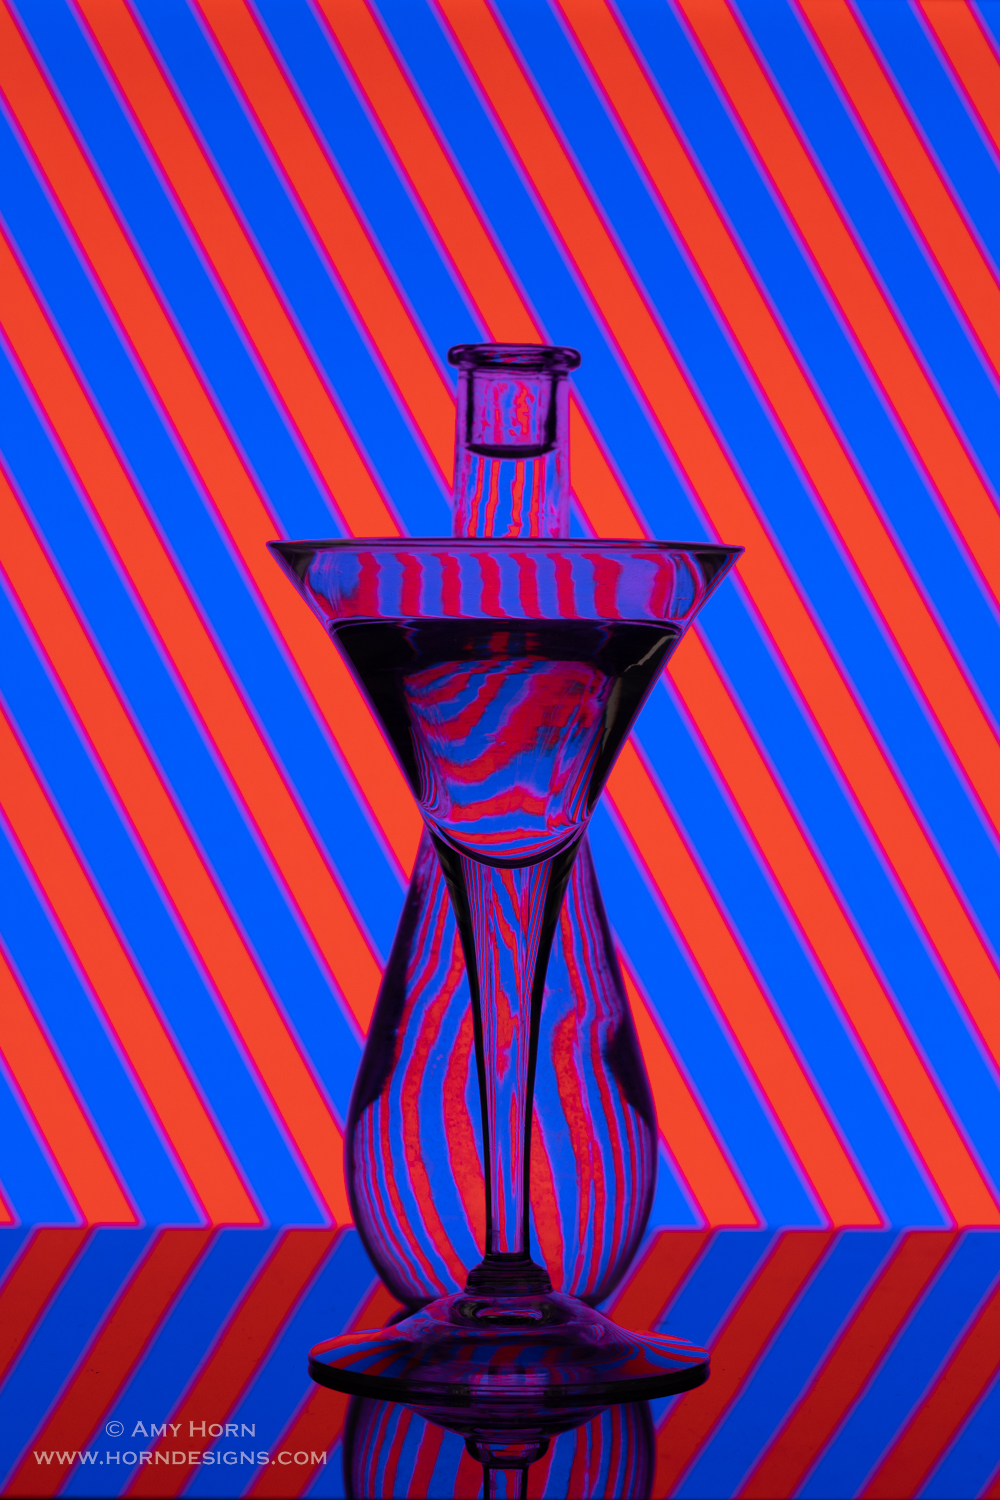
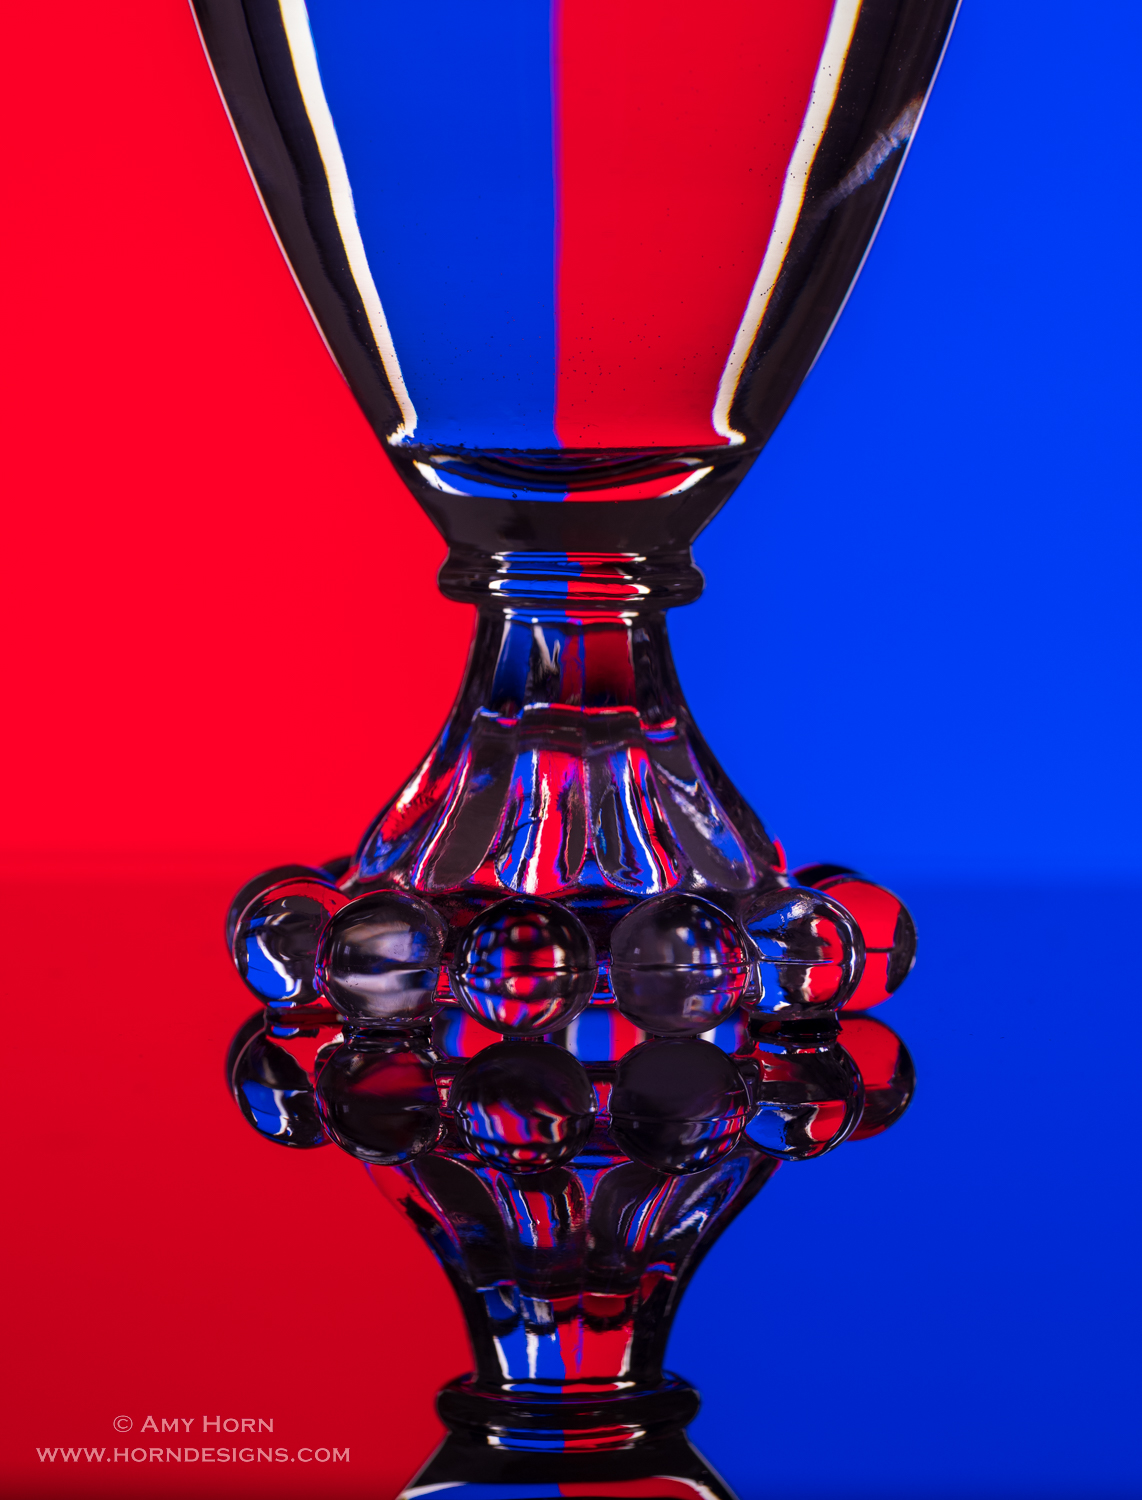
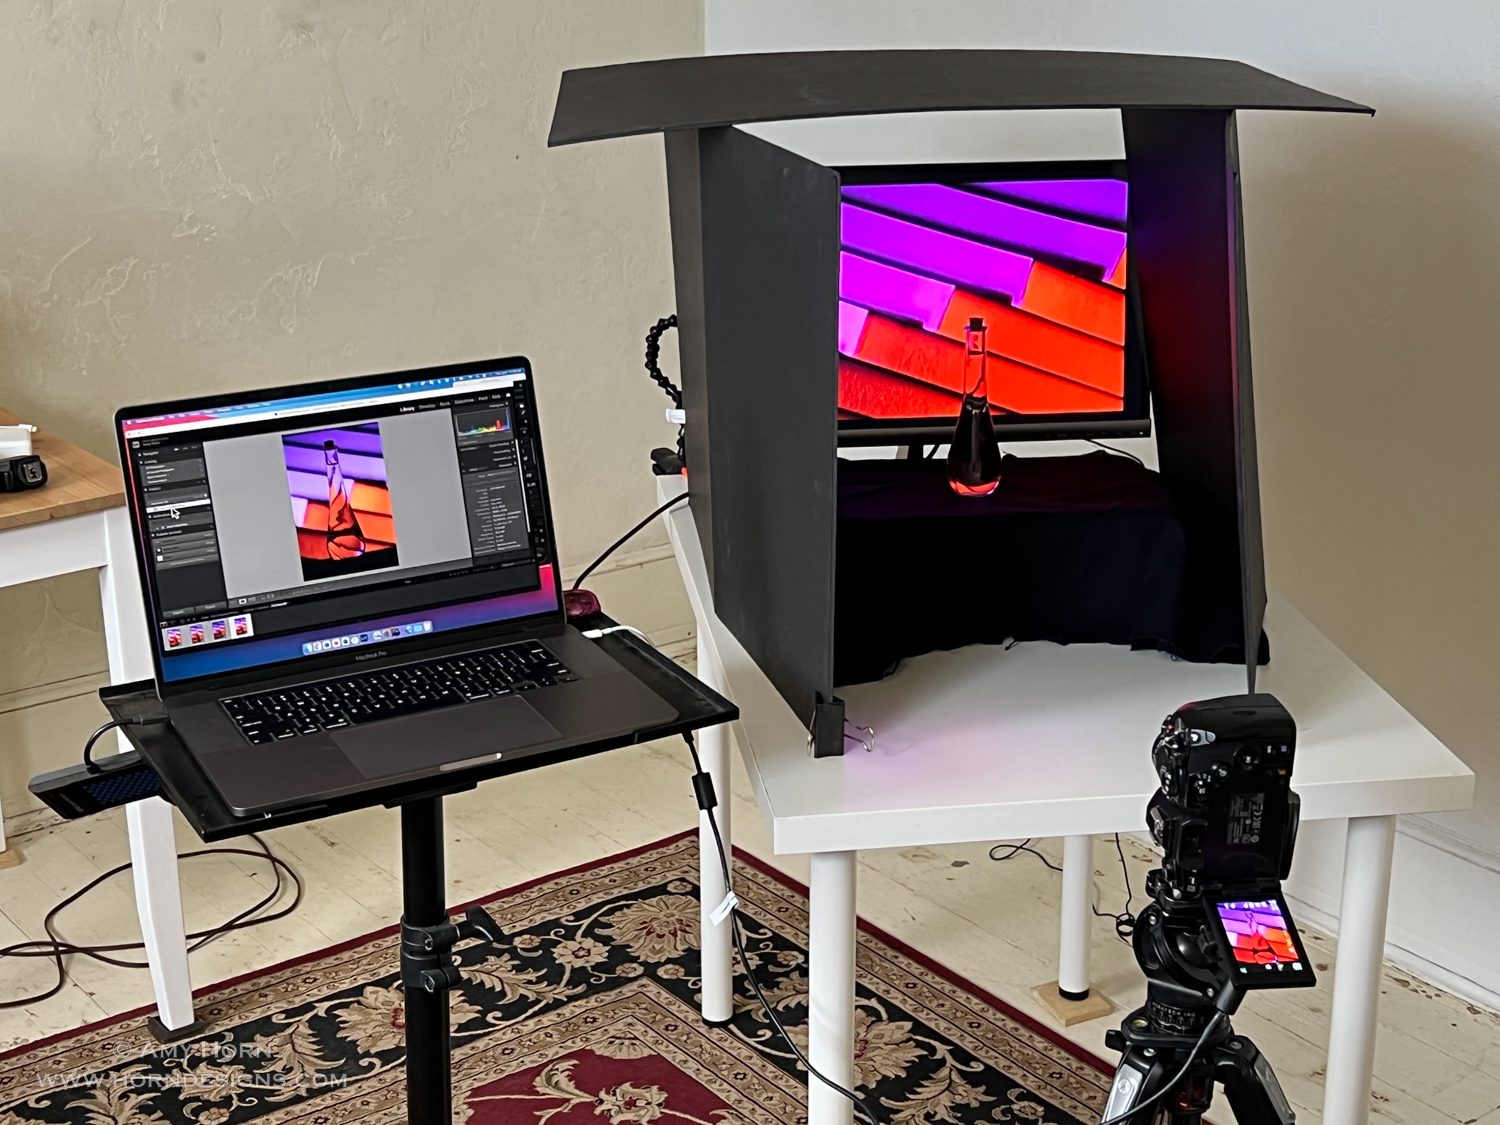
A past participant and friend, Lorri Oliver, shared some water refraction images a while back that used a different technique than mine. Since it was summer, I decided to give it a try. If you are familiar with my work, you might recognize that I hang paper on a background for the colors to refract through the glass. Her method positions a computer monitor with different colored images in the background. So, I created colored boxes and stripes in Photoshop, then pulled a few of my photographs as well to serve as backgrounds. Here are the resulting images:
Finding the perfect glass makes each photo unique. The last time I went to a second-hand store, I found several new glasses to try. I really liked the red/white/blue image glass for its simple top and knobs at the base. I love how the colors refract and shine through the glass knobs. Check out my setup in the below photo. Check out my YouTube video if you want to see more on water refraction. AmyHornphotographer Refraction video.
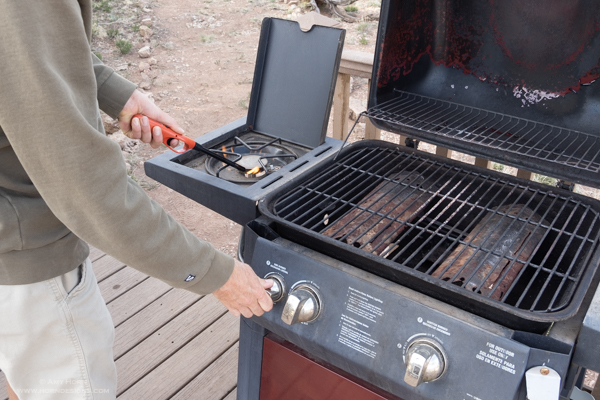
A test shot at the Kaibab Kottage, Grand Canyon Junction
When given the chance, I enjoy helping people out, especially if it is using my camera. So, when our son came up with the idea of building a tiny house on a trailer, we helped. As he finished the build, instead of selling it, he bought property in Grand Canyon Junction (Valle) and set up the most unique off-grid, glamping scene. Now known as Kaibab Kottage. Although I moved bricks, rocks, limbs and dirt; I was happiest when he asked me to photograph his pride and joy.
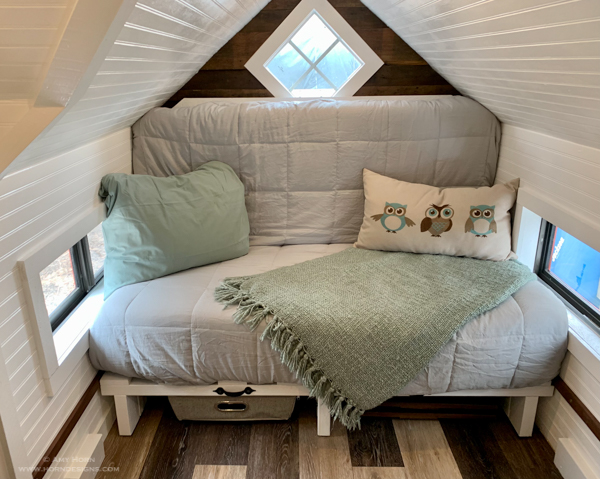
Starting with a few interior shots that he captured with his GoPro. The house is built on an 8′ x 5′ trailer, so it is small. It was much easier to hold up the GoPro to capture these wide angle shots than use my camera.
Interior photo of Kaibab Kottage.Interior photo of Kaibab Kottage.
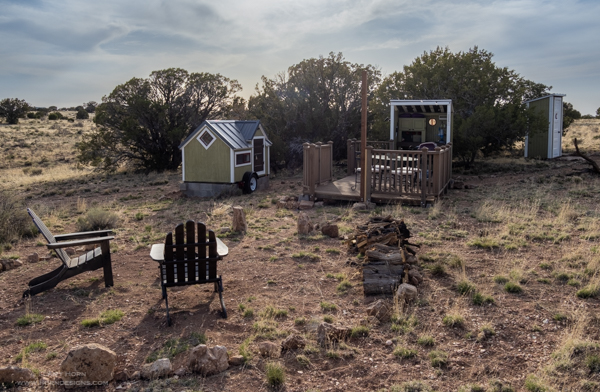
After finding used treasures like Trex decking, table and chairs, and a propane grill, we set everything up including a compost outhouse! He added solar panels to power the lights.
An HDR image of the whole campsite.
Listing/Instructions
This Airbnb listed property needed photos for the listing and the instruction binder. Showing how the bed converts from a couch to a bed through images is beneficial to international visitors. I cropped tight and captured a clear subject.
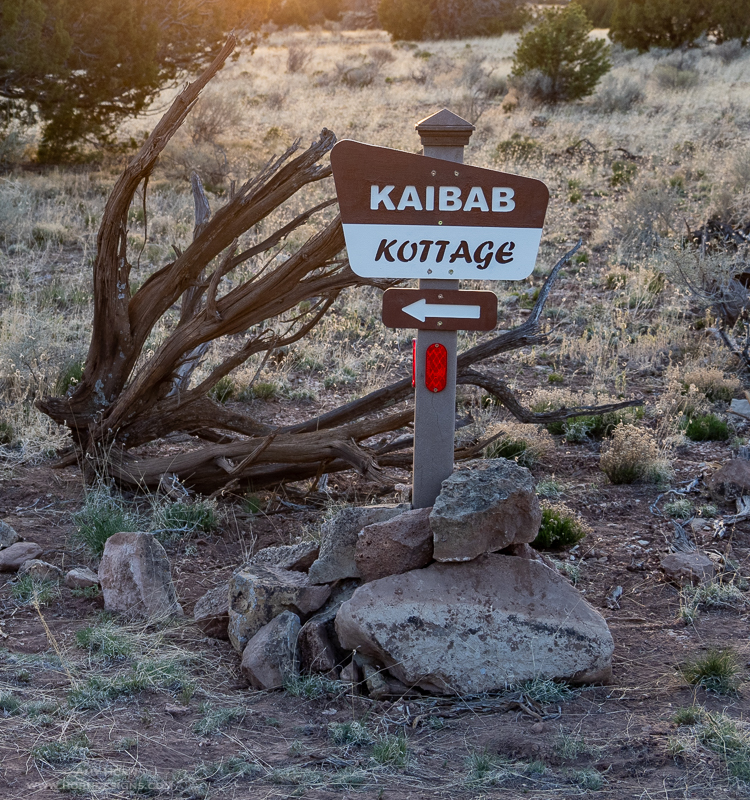
Lighting the grill.Folding the mattress.Camp Kitchen supplies.Locating Kaibab Kottage.
And here are the last images I captured. Using off camera flash to light up the camp kitchen area I captured sunstars and the whole site. A tripod was used for all of these images since my priority was to capture “sunstars” with the lights. This was a fun project and it felt great to help.
With the campfire.House and deck.House, deck, and kitchen.
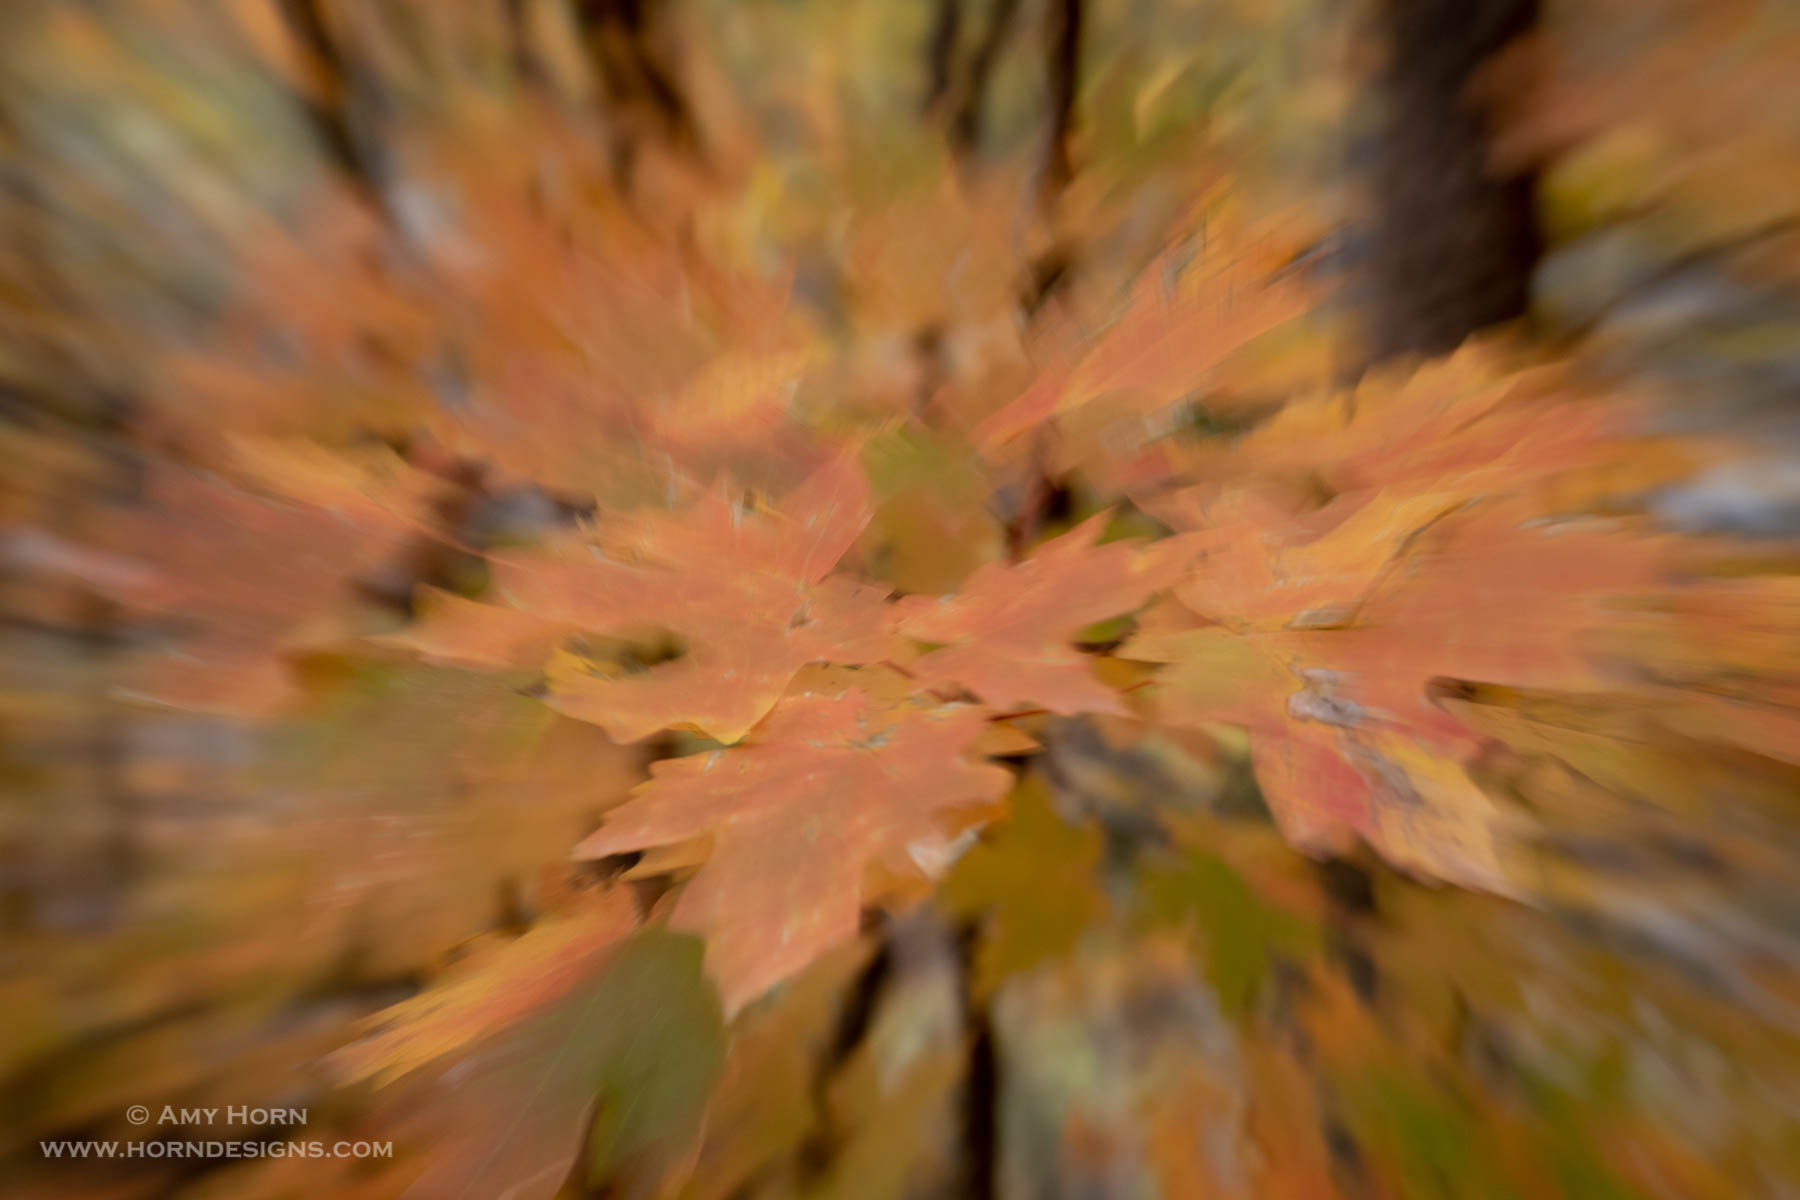
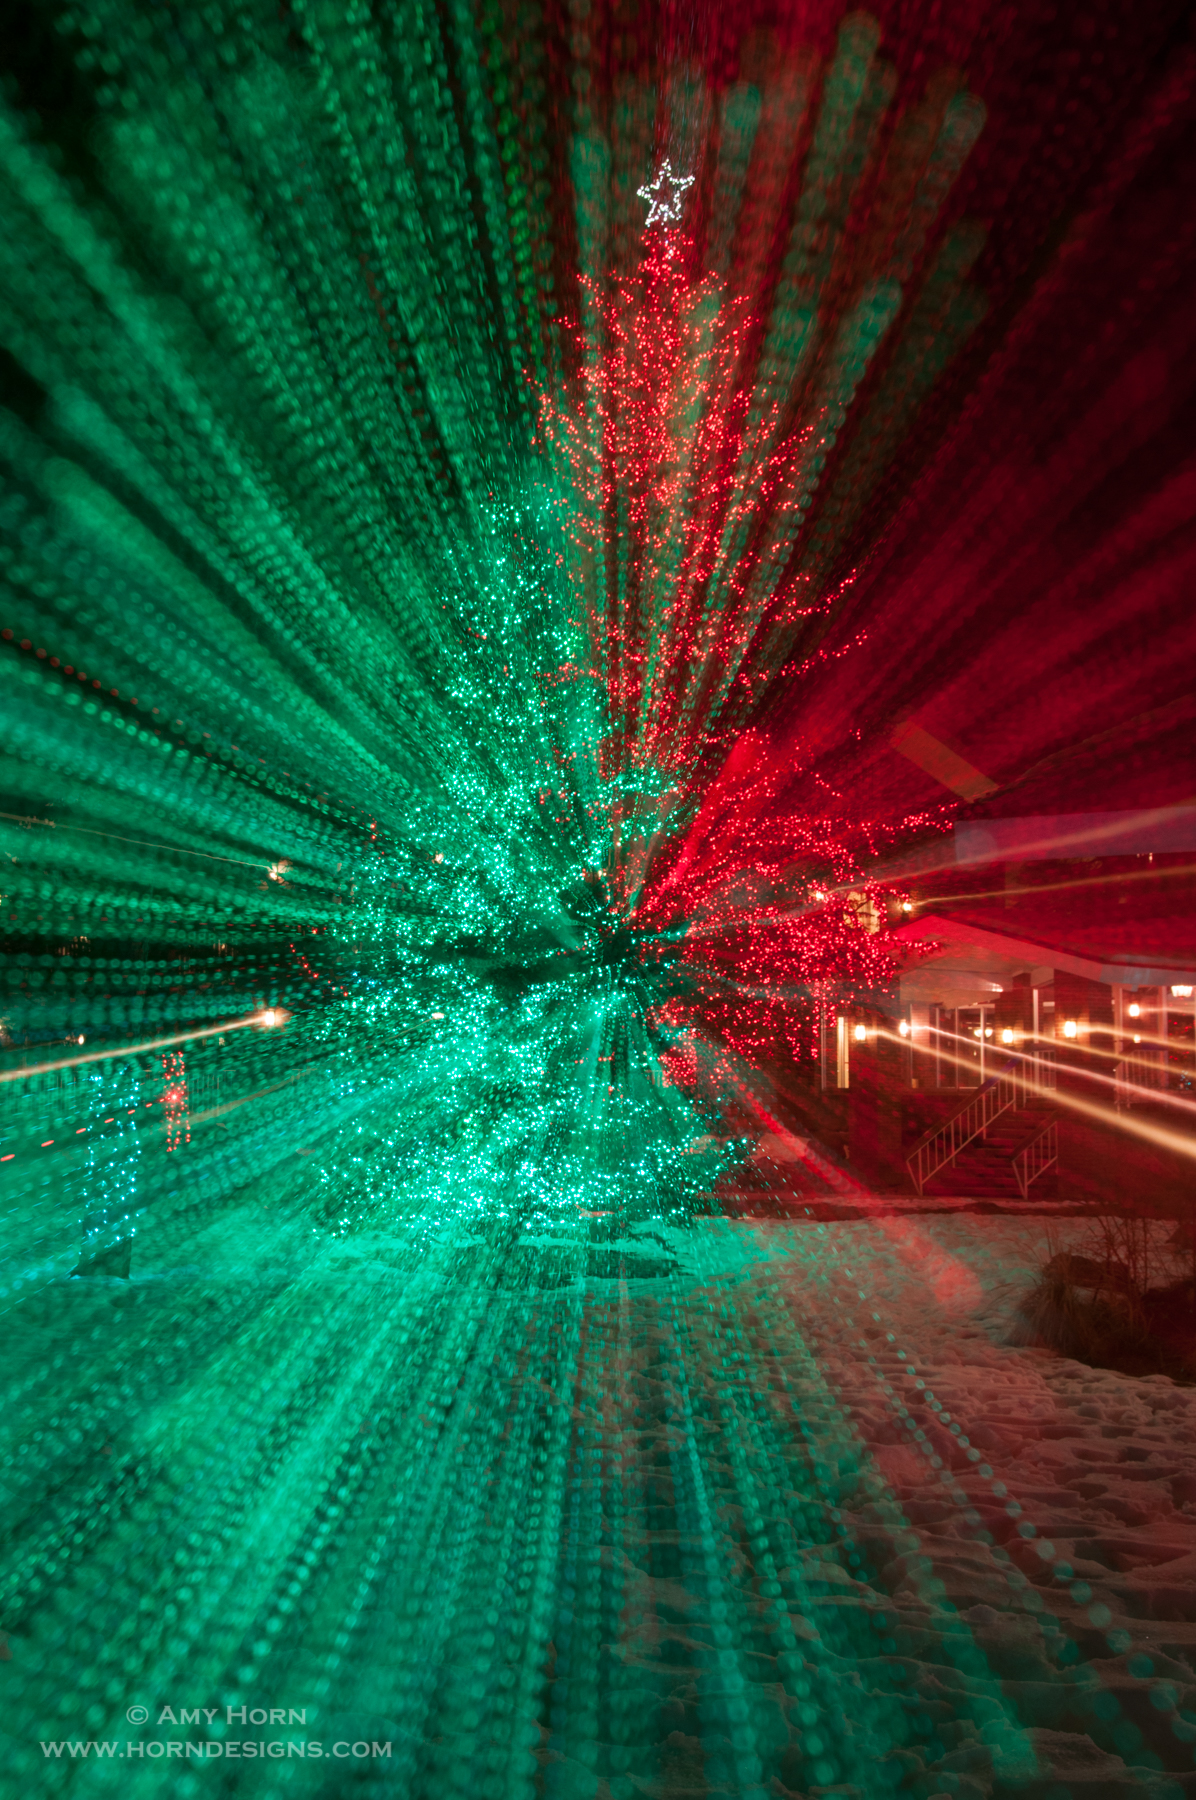
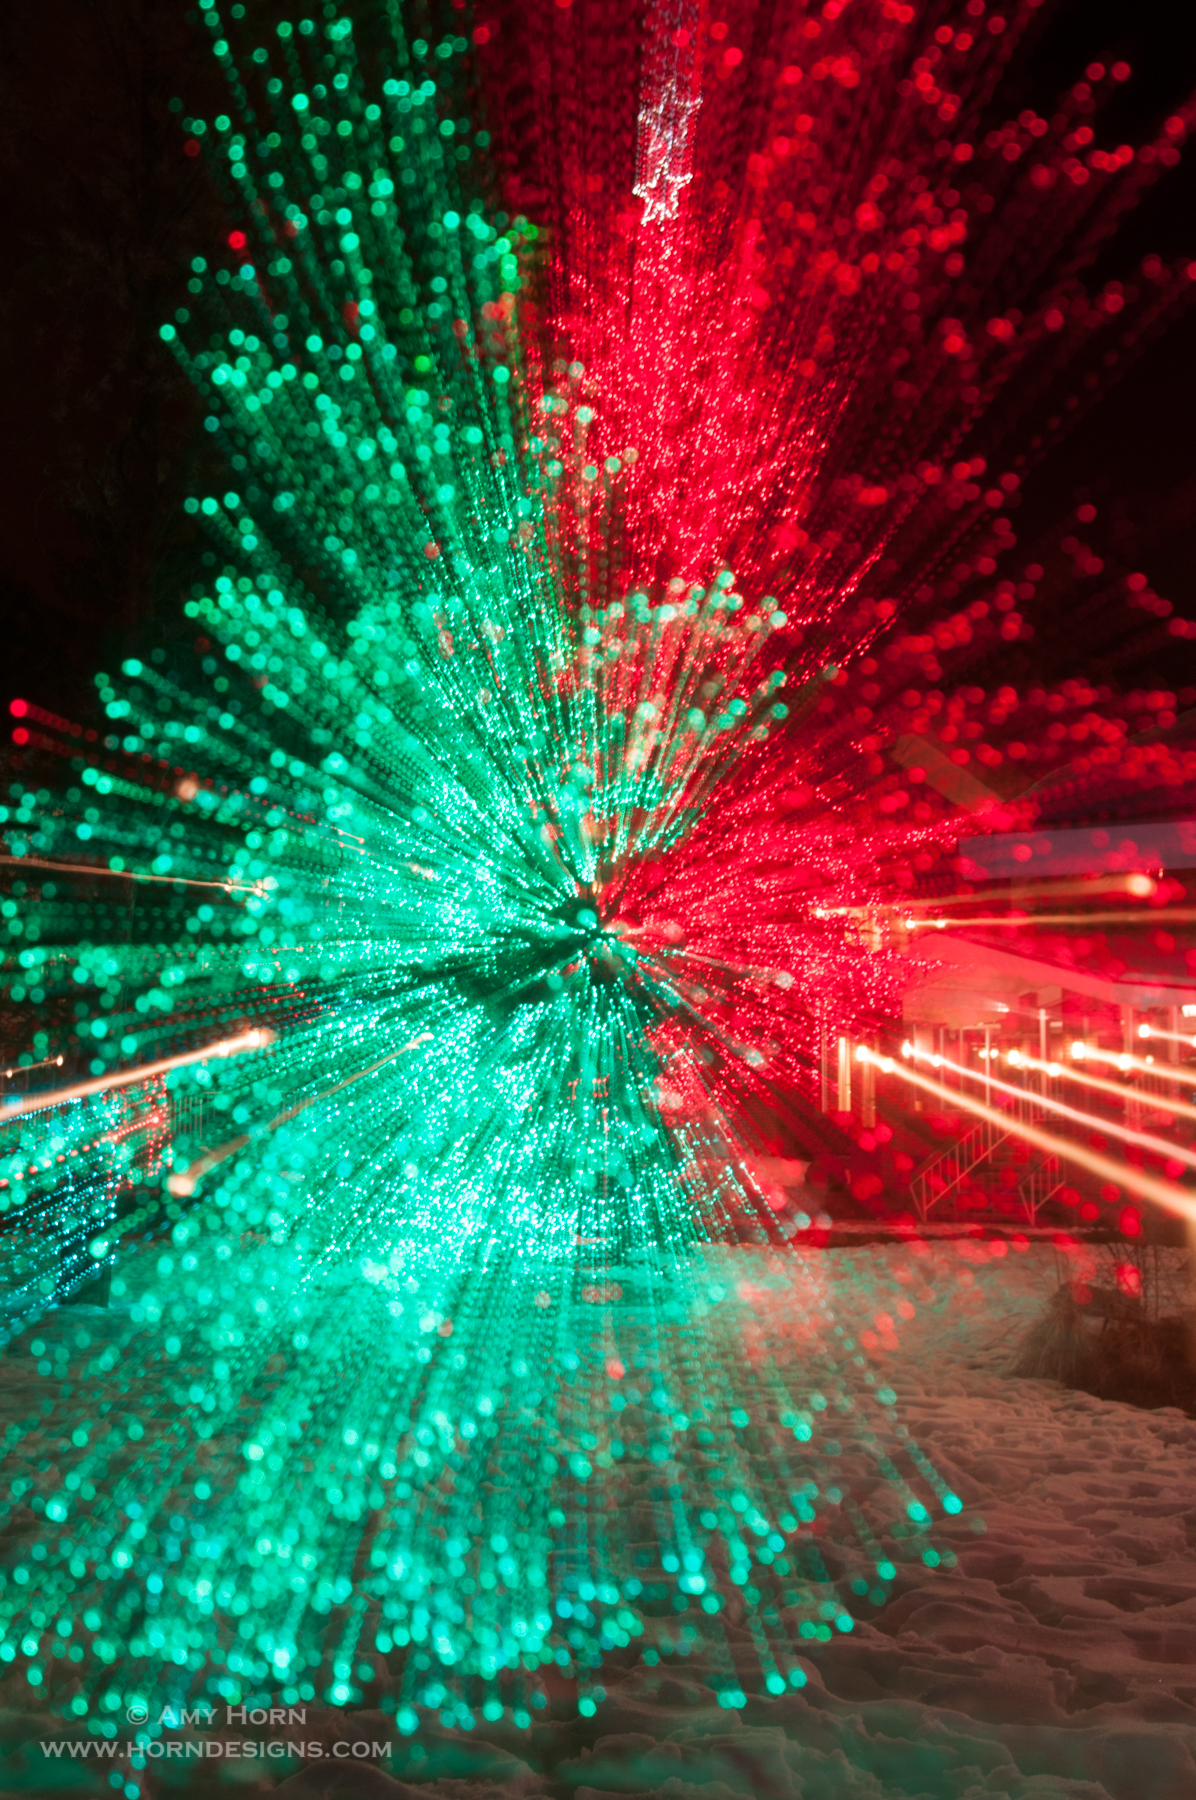
Beauty surrounds us daily but every now and then I still need inspiration. For me, getting creative is the solution. One of my “go to” creative techniques is intentional camera movements. Generally, I put these in three categories: zoom pull, up/down, and spin. One of my favorite times of year to use these techniques is at the end of the year with holiday lights. Let’s look closer at these techniques:
Zoom pulls
Preferably on a tripod, set your camera to a slow shutter speed and after pre-focusing, press down the shutter and zoom your lens. Sounds simple, right? Well, it really is. You can zoom out or in, fast or slow and each option returns a different result. When you find the combination you like, capture a few more shots. Sometimes, I use a shutter release and bulb mode, really mixing up the shutter speeds. Take a look at these examples:
2.5 sec zoom fast and slow
2.5 sec zooming slow
2.5 sec zooming fast
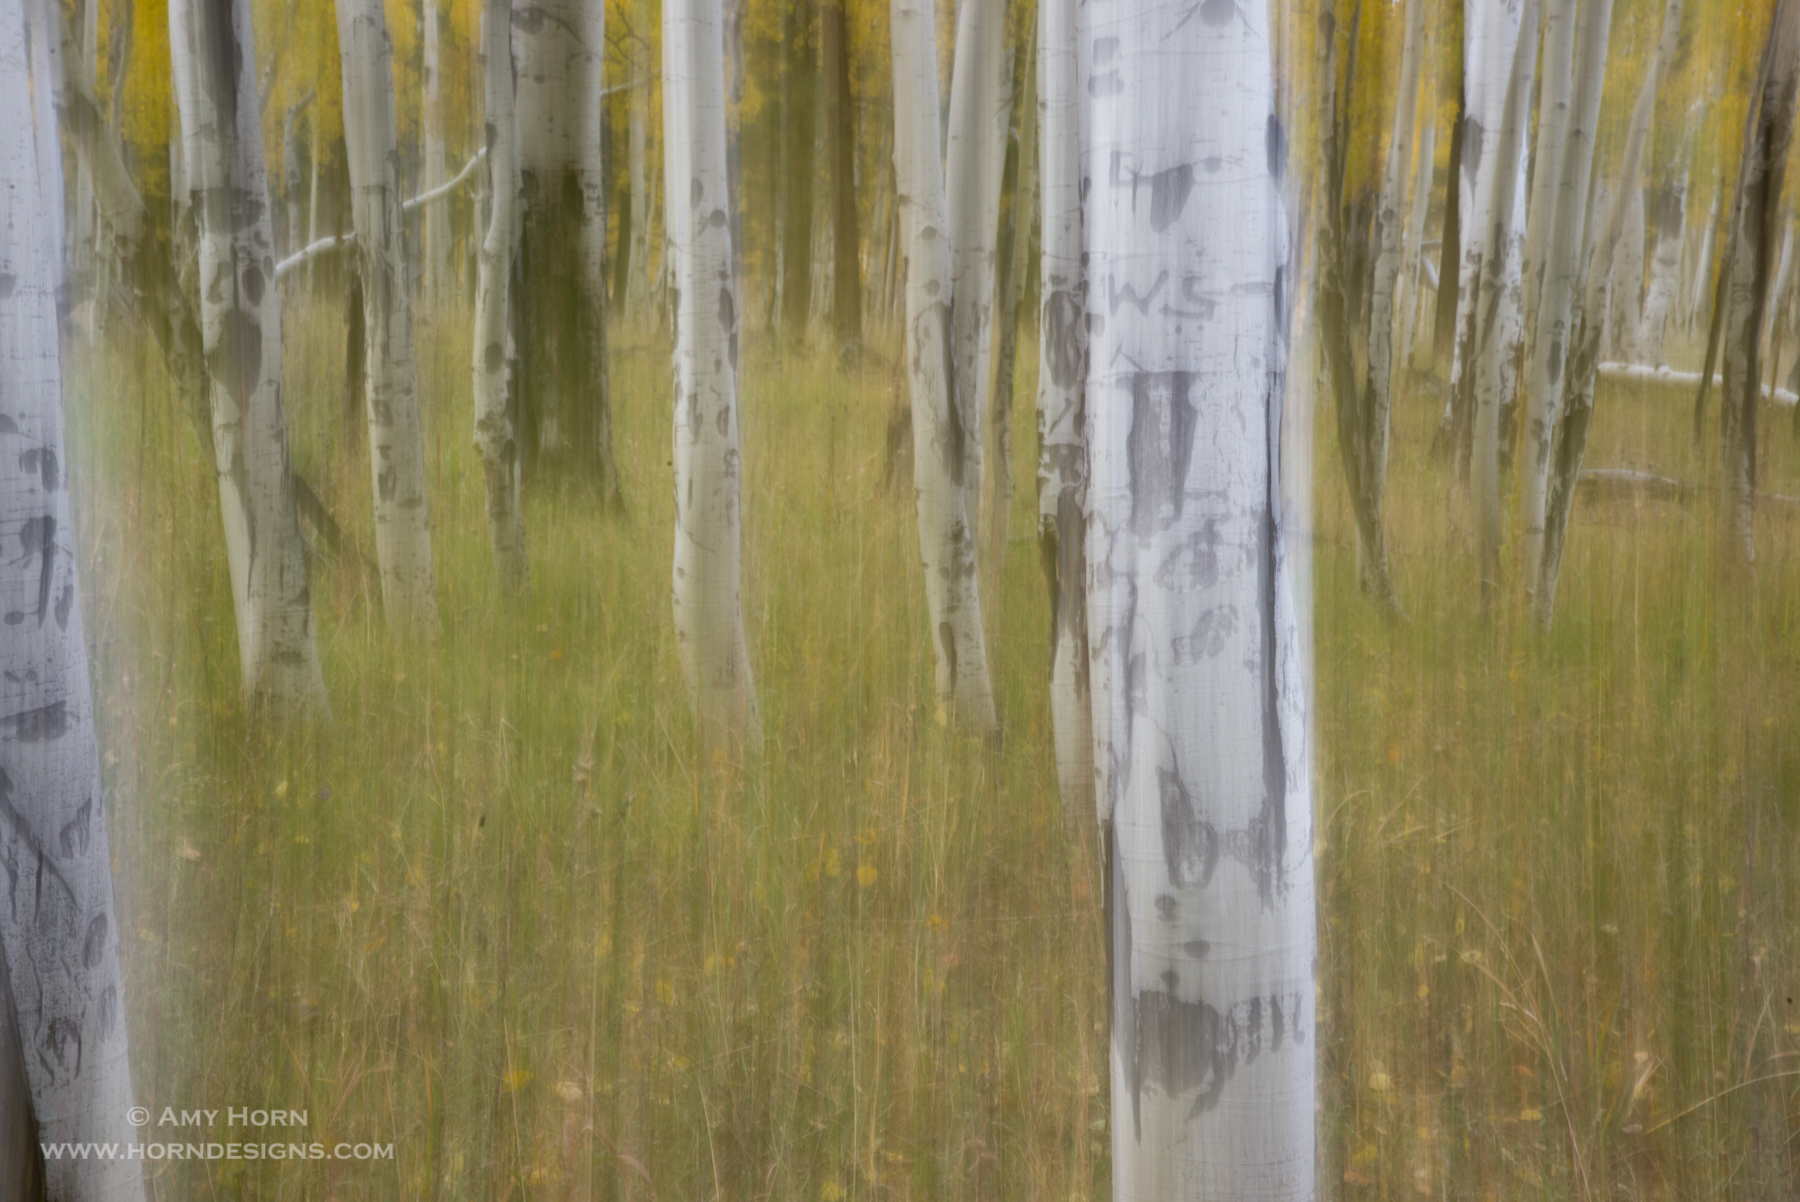
Up/down
For this technique, I prefer to hand hold the camera. My tripod isn’t a gimbal head, so moving the camera up and down isn’t smooth unless I hand hold. Again, with a slow shutter speed tilt the camera up and down. Generally, I use a ¼ sec shutter speed as a starting point and then adjust from there. Like the zoom pulls, move the camera fast or slow until you get the look you desire. Here are a few examples of up/down intentional camera movements:
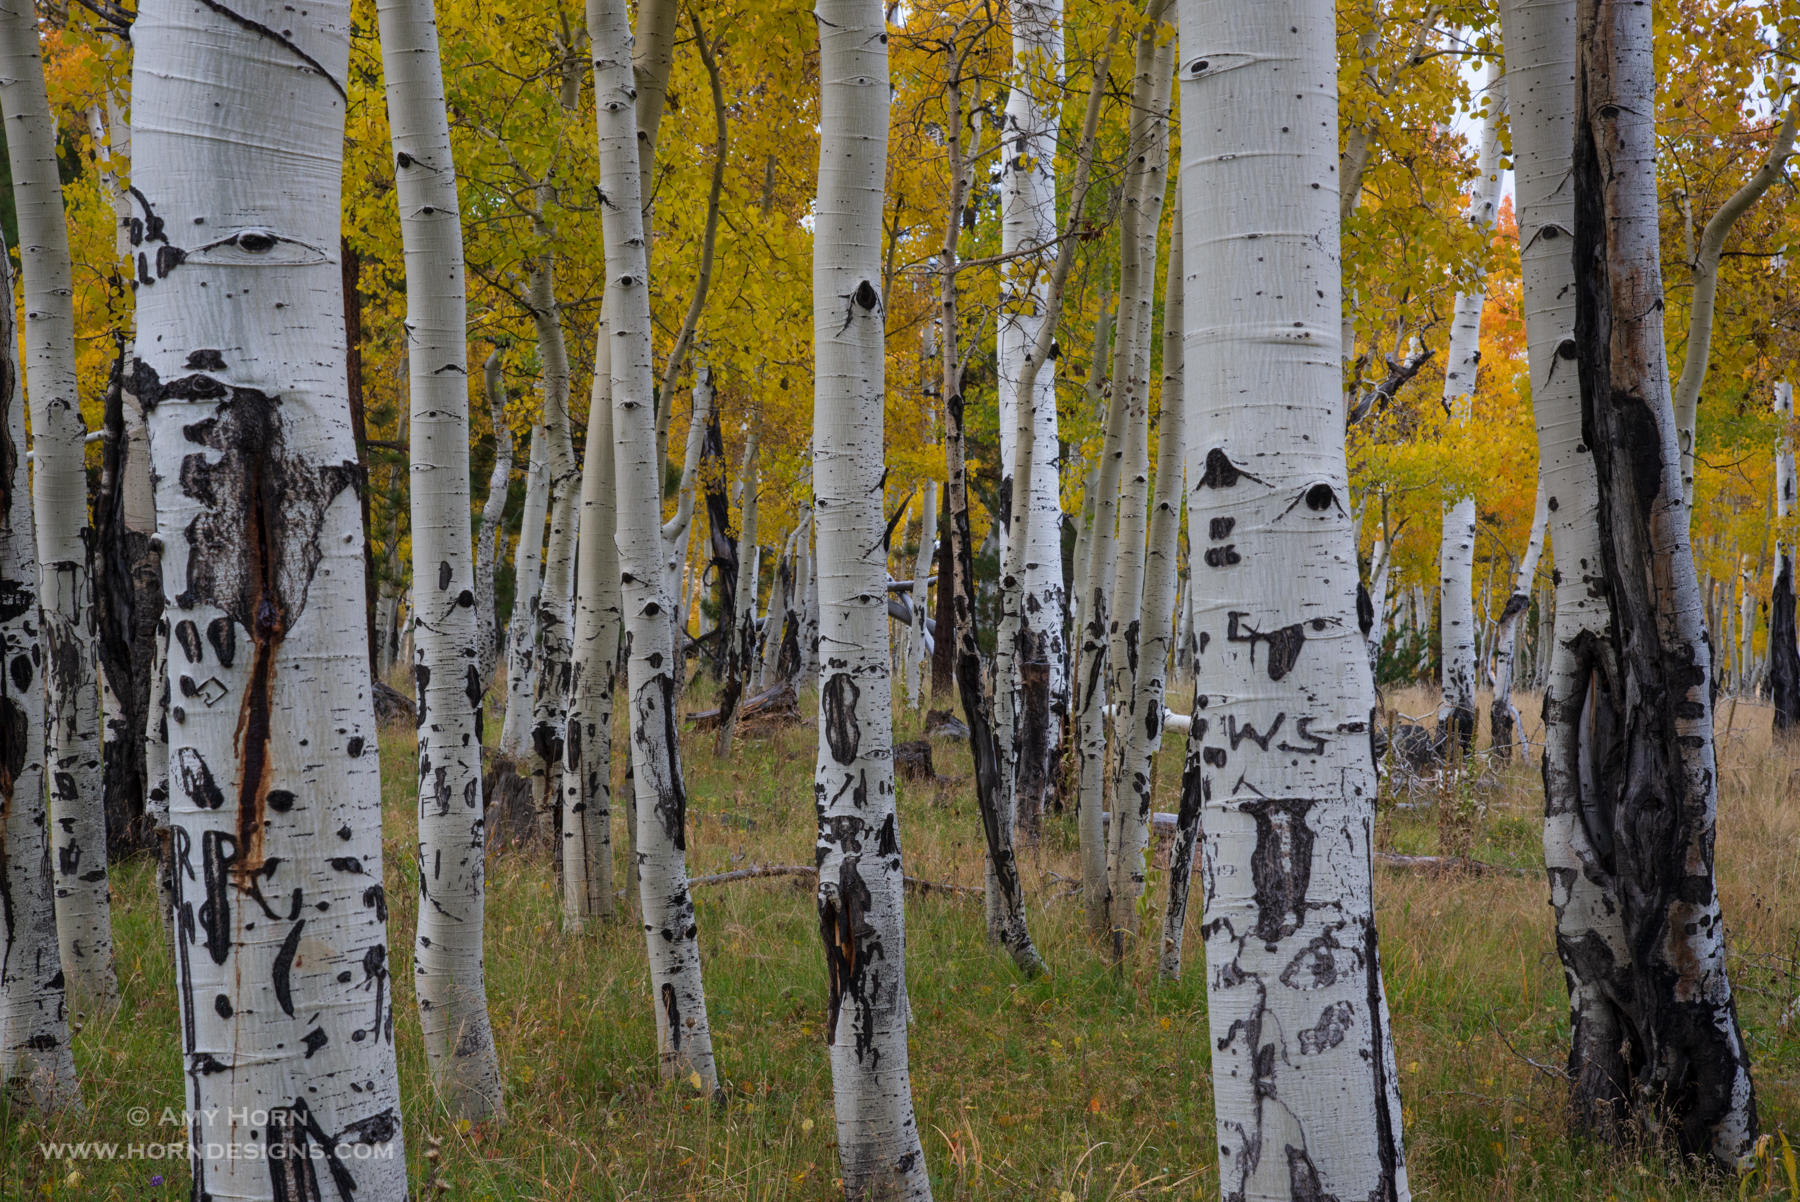
original image
1/4 sec slow movement
1/4 sec fast movement
Spin
This technique is more complicated and difficult to master. Personally, I don’t try this technique much. The only difference from the previous techniques is the spinning of the camera. But, this time spin the camera in a circle with your subject in the center of the frame. If you really like this technique and have a hard time capturing a photo you like, there is always the radial filter in Photoshop that would create the same effect.
There you have it, several approaches to intentional camera movements. Give it a try!
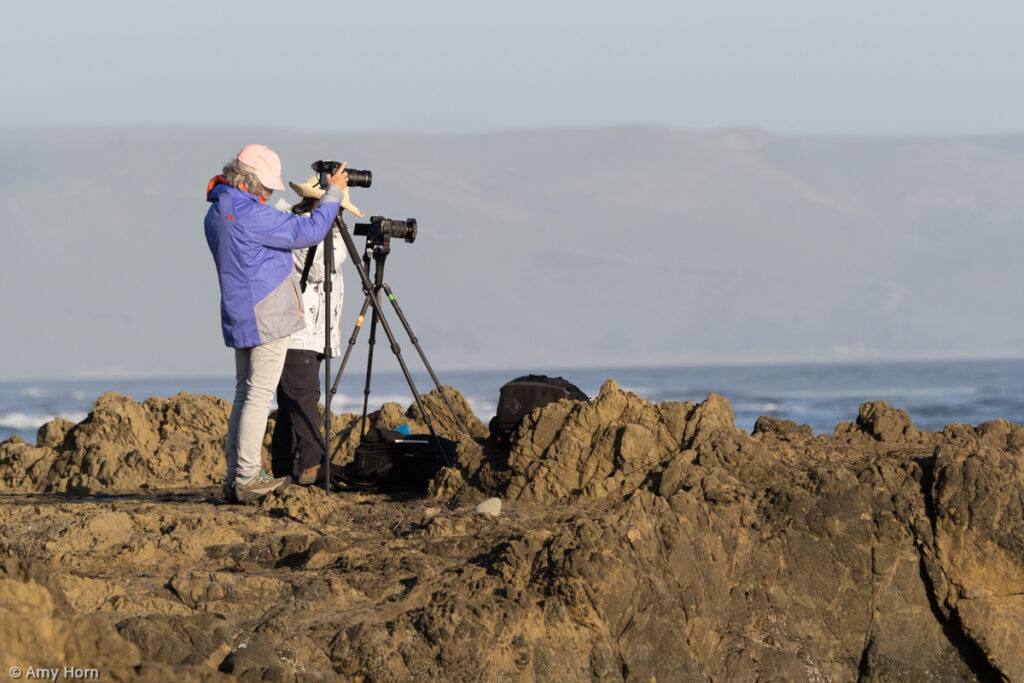
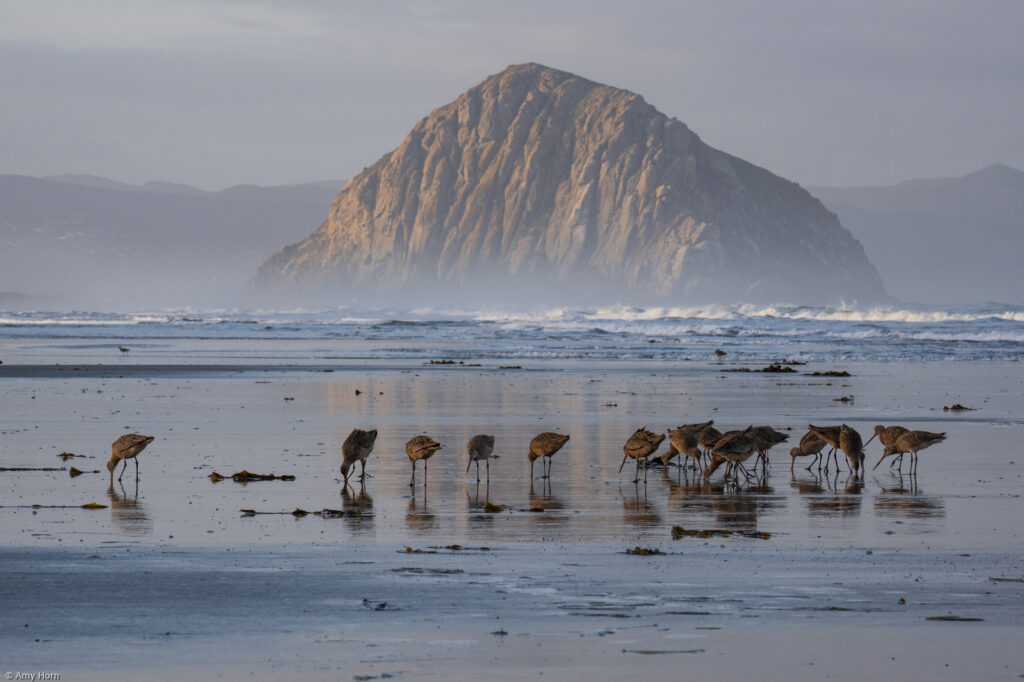
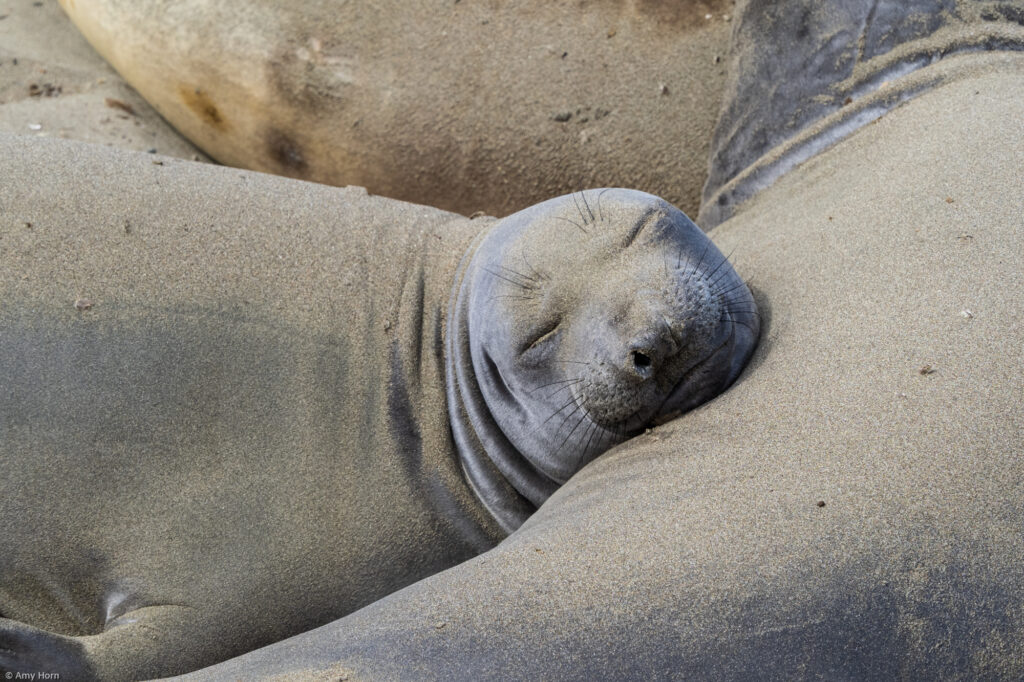
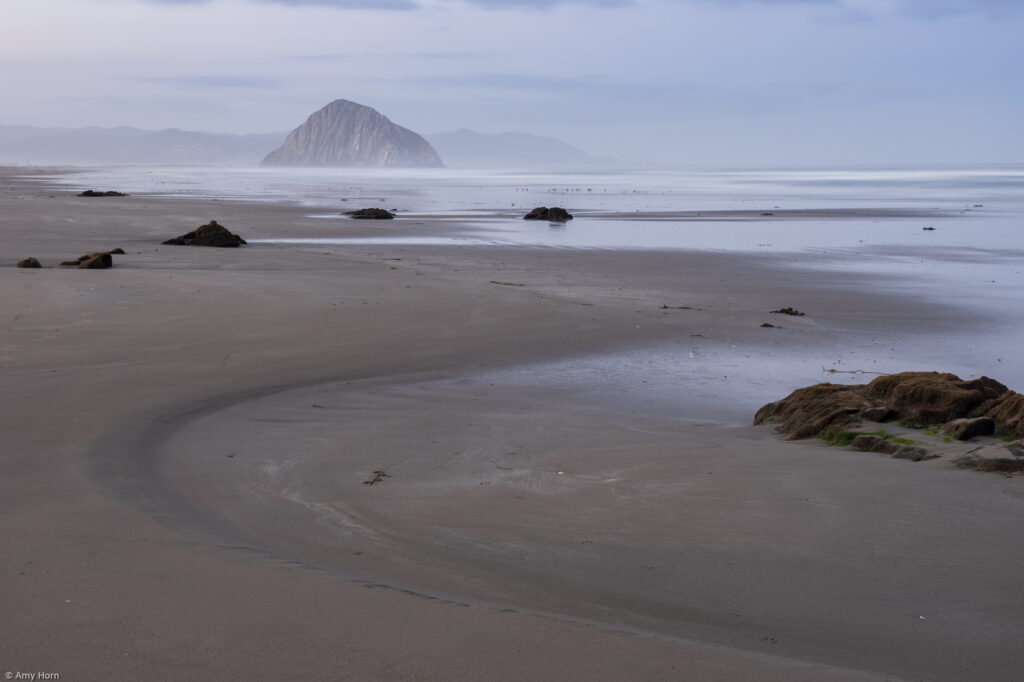
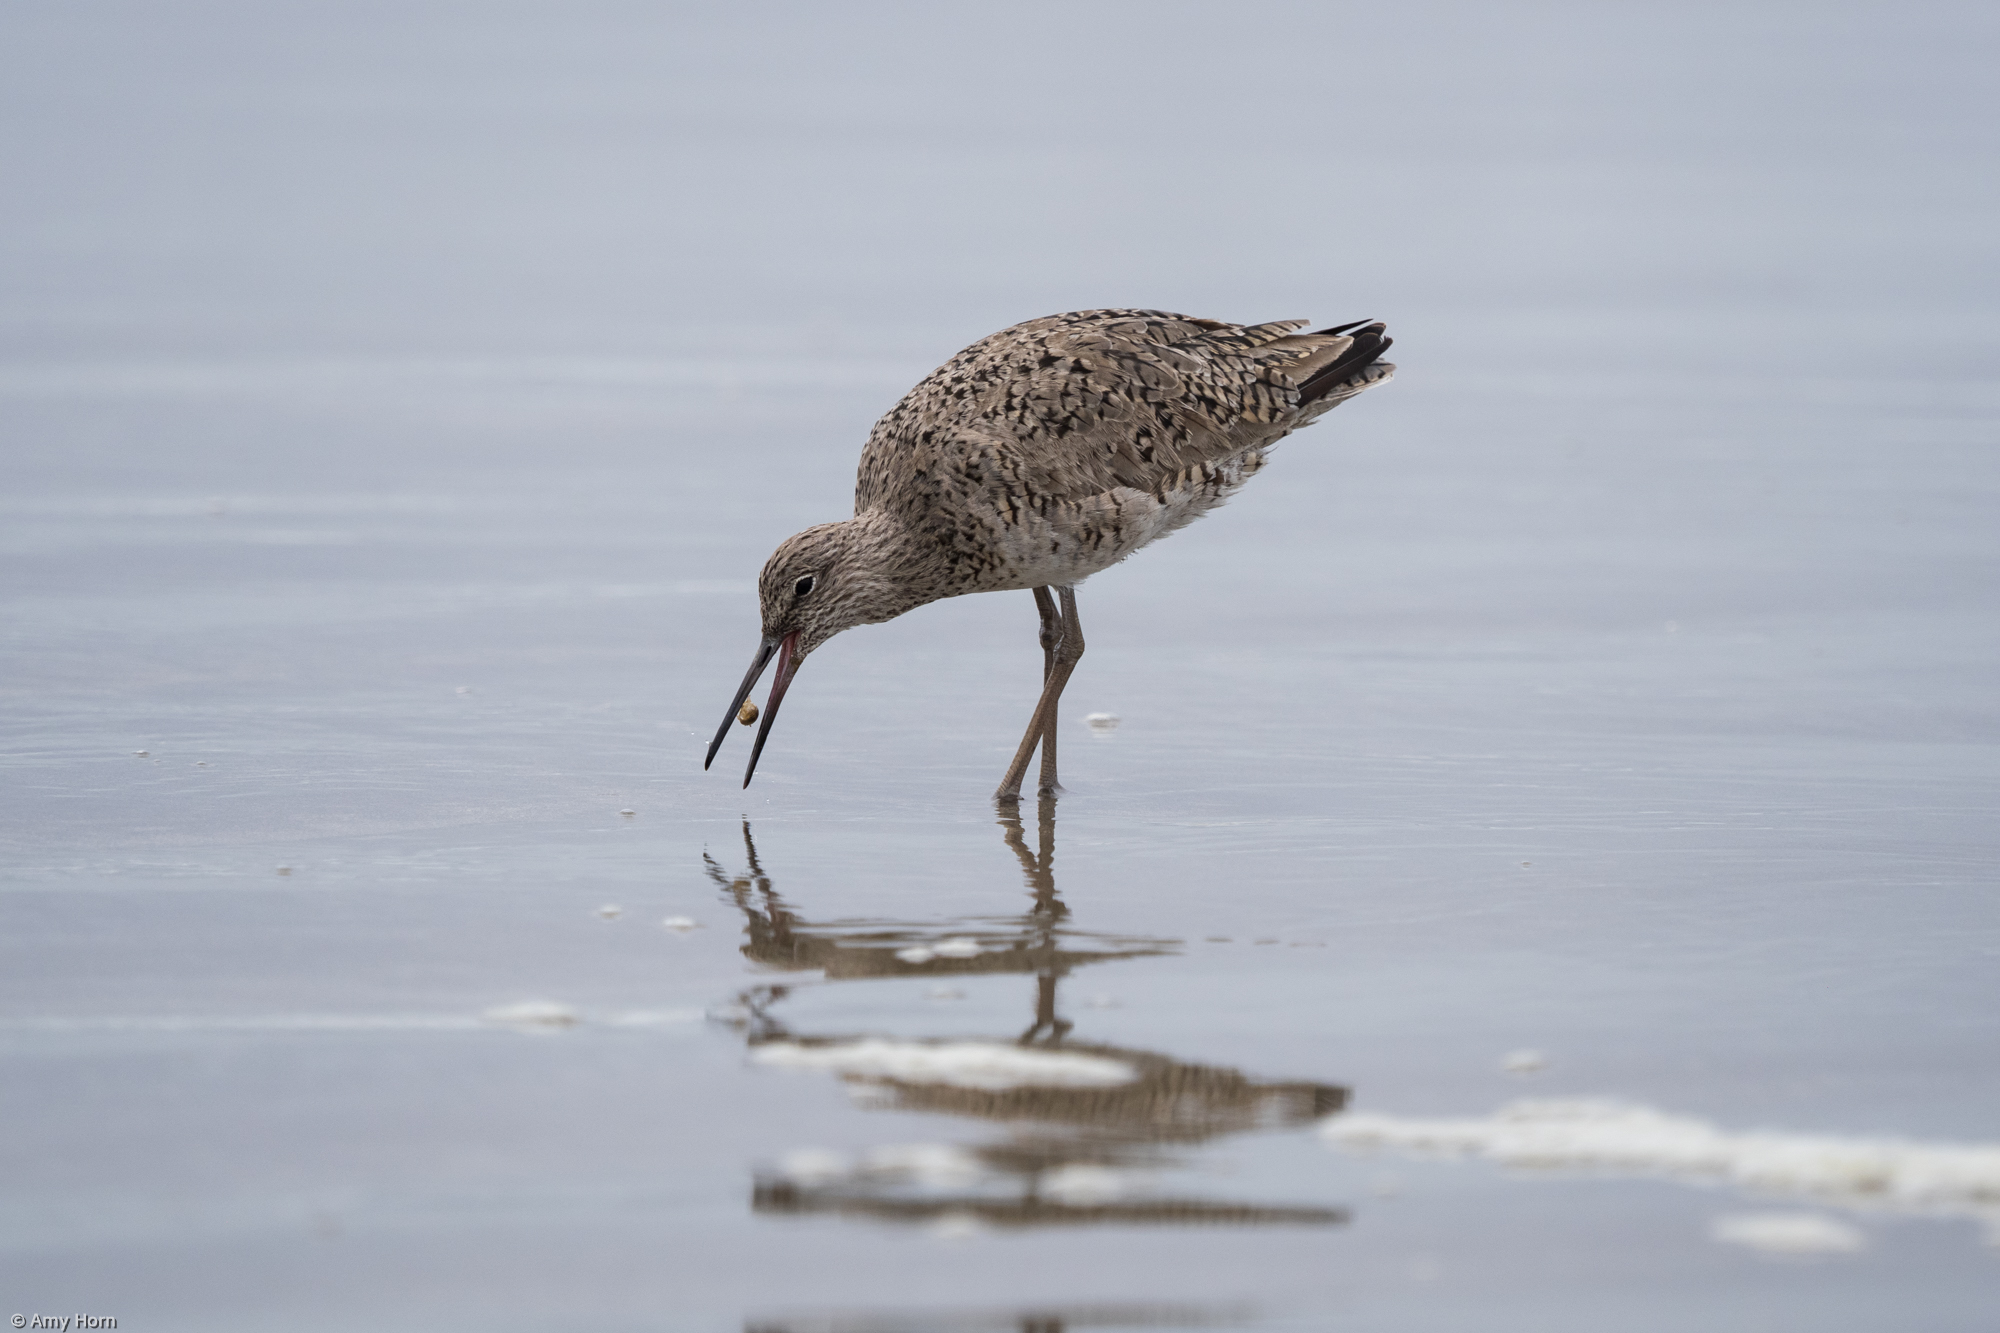
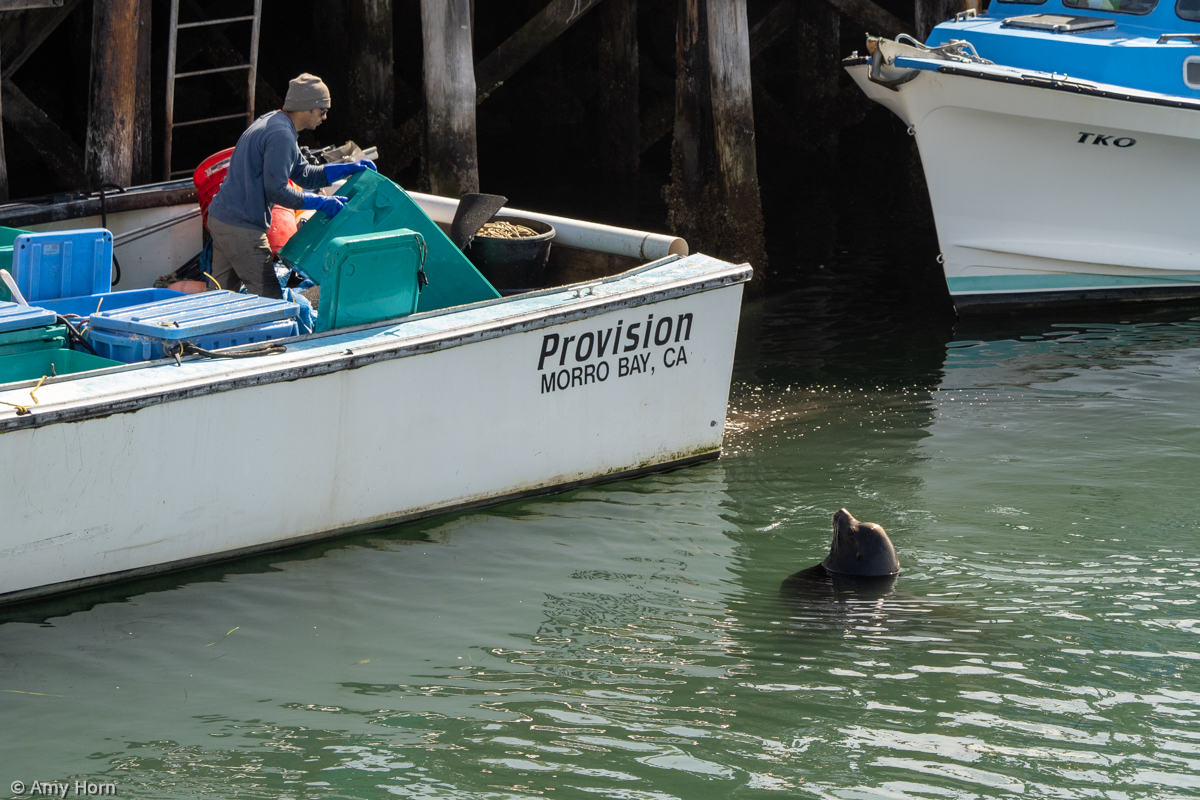
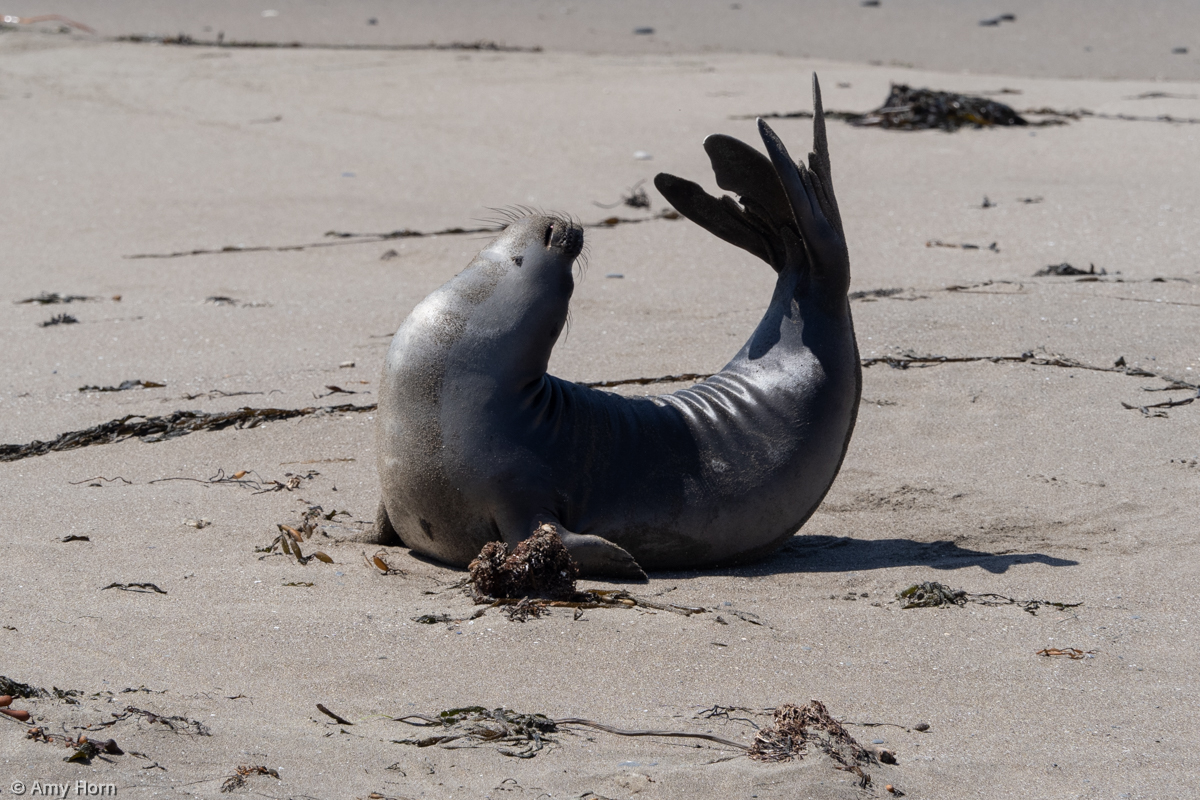
Waiting a year for the Morro Bay Women’s Workshop didn’t stifle any of our fun. We spent four fantastic days photographing the ocean, wildlife, harbors, and of course, Morro Rock. We spent four days capturing sunrise, sunset and everything in between. Don’t worry, I always offer a little down time and image critiques. We managed to schedule three image critiques throughout the four days.
A highlight to many photo workshops (and definitely the Morro Bay Women’s Workshop) is the time bonding behind the camera and in social settings like meals. For example, we found many great restaurants to taste local seafood and baked goods. We had a blast! If you haven’t been on a women’s workshop, here is a photo gallery of our trip. To learn about our next workshop visit ahps.org.
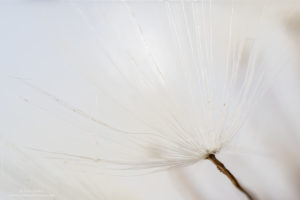
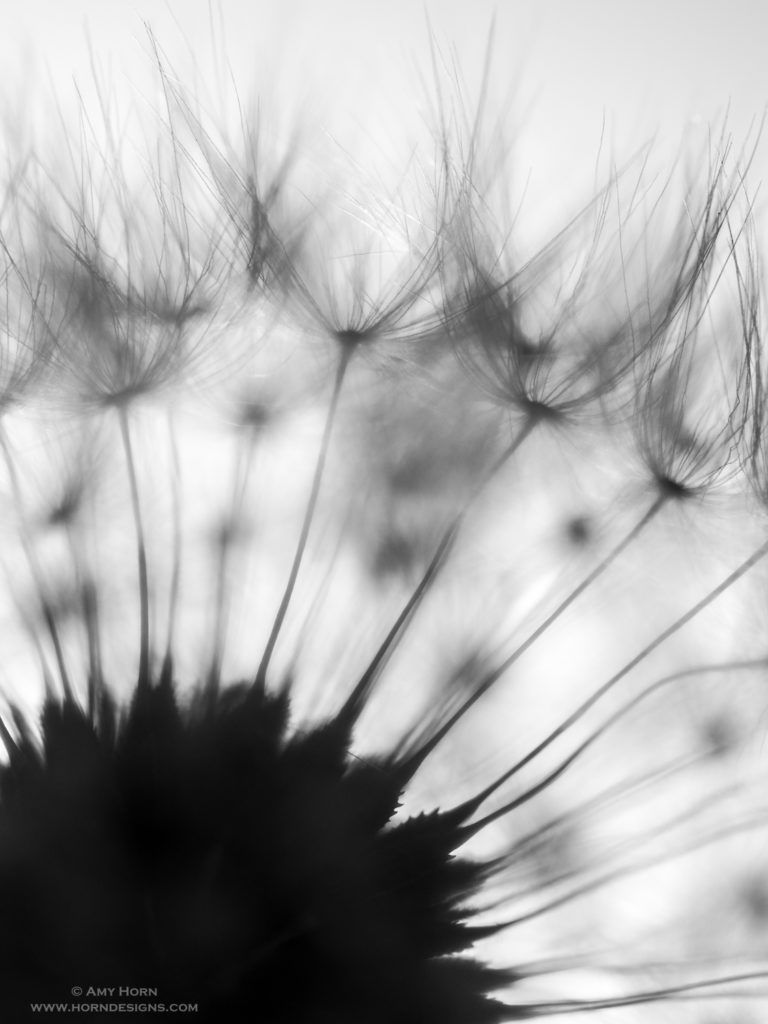
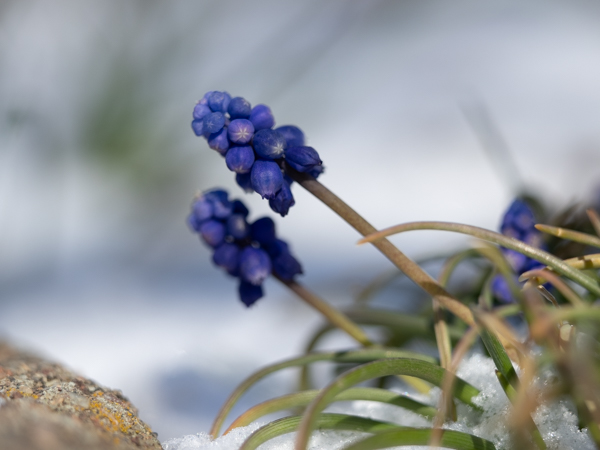
Every spring we remove those pesky dandelions from our yard. This year, before the weed & feed came out, I picked a dandelion to photograph.
As a child, I enjoyed blowing the dandelion seeds everywhere, not grasping why it upset my parents. As an adult, when I look at a dandelion, I imagine myself wandering through those tiny seed pods; maybe it comes from reading The Borrower’s or Dr. Suess’s, Horton Hears a Who. So, I spent a few days photographing dandelions from my yard and I thought I would share my process with you.
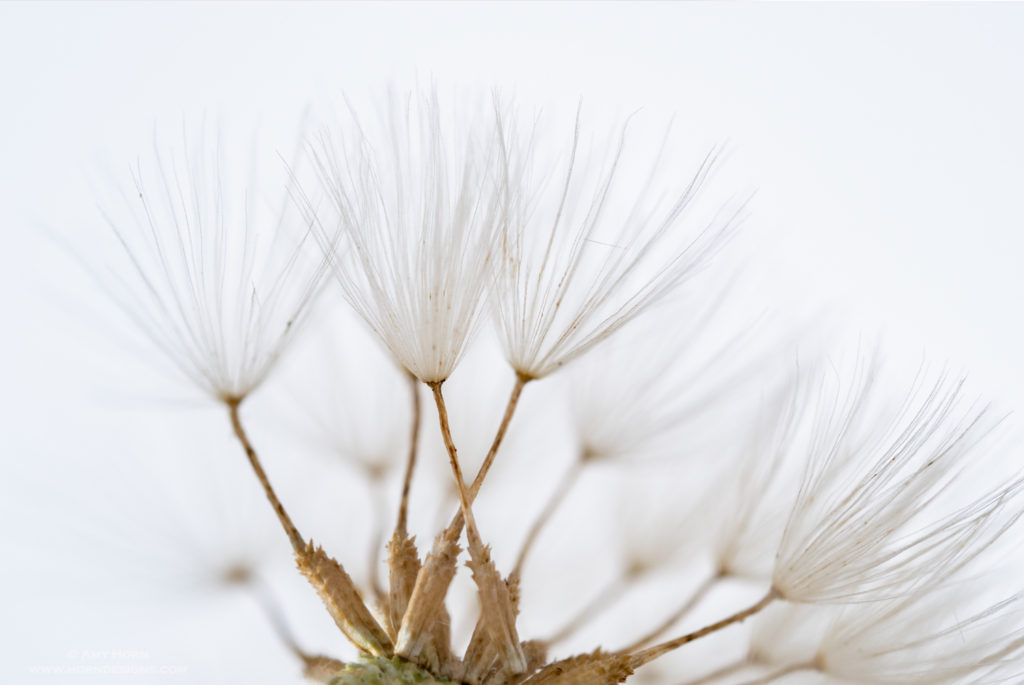
Olympus OMD 1 Mark III, 60 mm macro, with Raynox DCR250 close up lens, 1/200 sec, f/4, ISO 200, two off camera flash, 50 image focus stack.
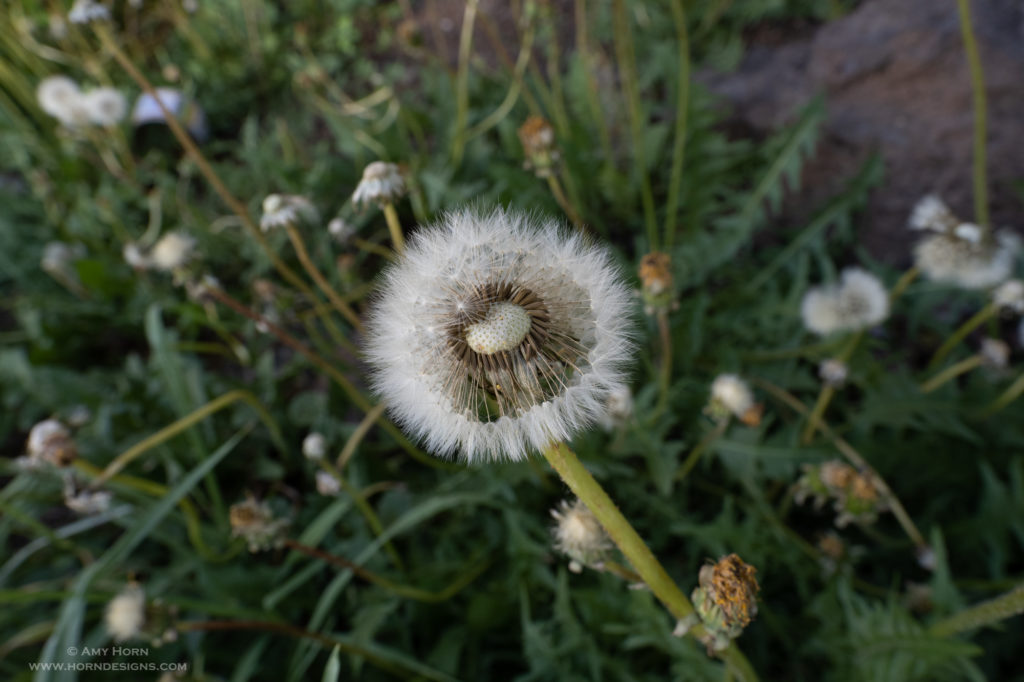
I started with a perfect, fluffy dandelion. But the image was busy and I struggled seeing into the seed pods, so I removed some of the seeds to gain a better vantage point. Using my macro lens, tripod and a Raynox DCR250 close up lens, I captured the above image at approximately 2.5x magnification. The off camera flash units were at 1/64 power with diffusion (copy paper). At this magnification, I chose to focus stack so that the closest seed pod would be in focus.
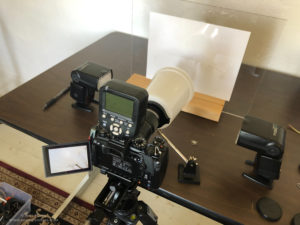
Next, I moved in closer keeping my exposure and flash settings the same. By adding extension tubes to the macro and Raynox lenses, I isolated an individual seed pod achieving almost 4x magnification. When using the Raynox, I use a plastic container on the end of my lens to diffuse the flashes. Anyone that has taken our Arizona Highways PhotoScapes Super Macro workshop (ahps.org) has used this diffusion technique. For these next images, I included my super macro setup and the single seed pod image.
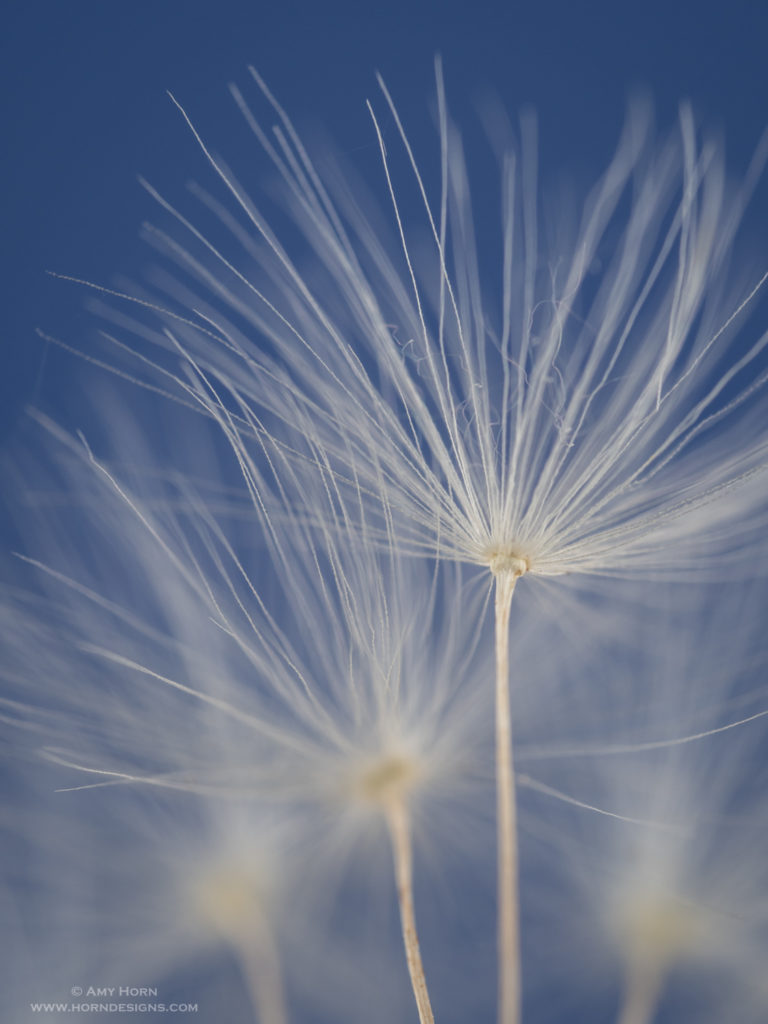
Then, I continued to play with the dandelion seeds, pulling some away to reveal less seed pods drawing me to different compositions. The colored paper background added variety and I chose to capture single images with varying depths of field.
1/50 sec, f/8, ISO 200
1/50 sec, f/5.6, ISO 200
1/100 sec, f/4, ISO 200
No Flash
1/60 sec, f/4, ISO 200
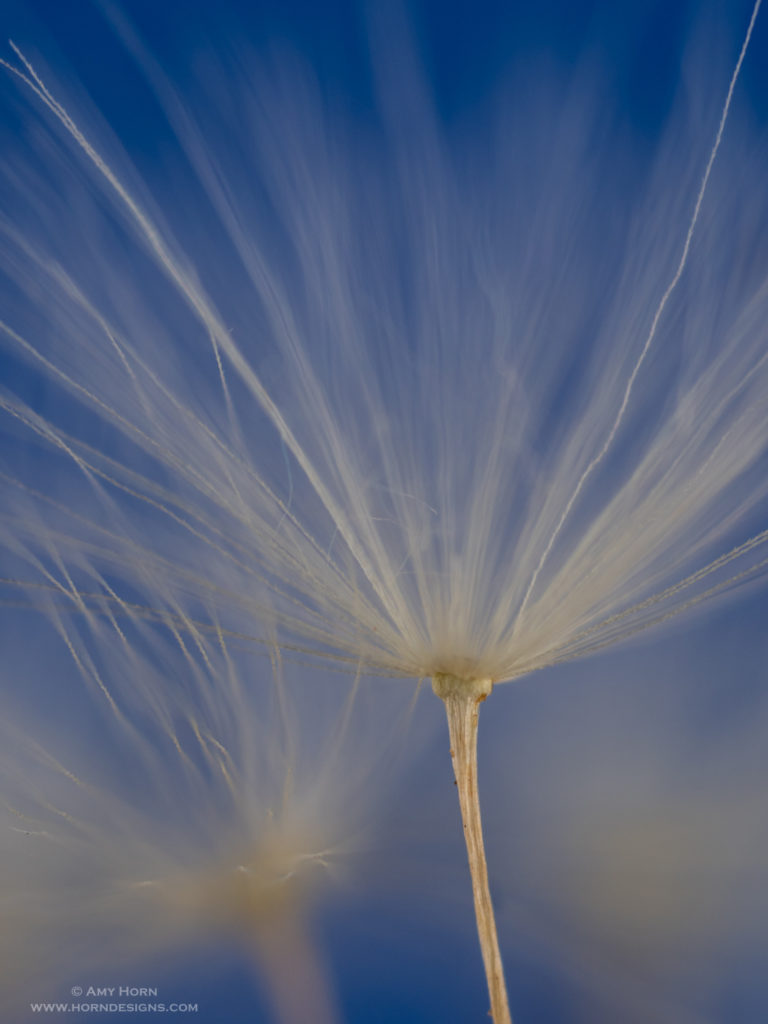
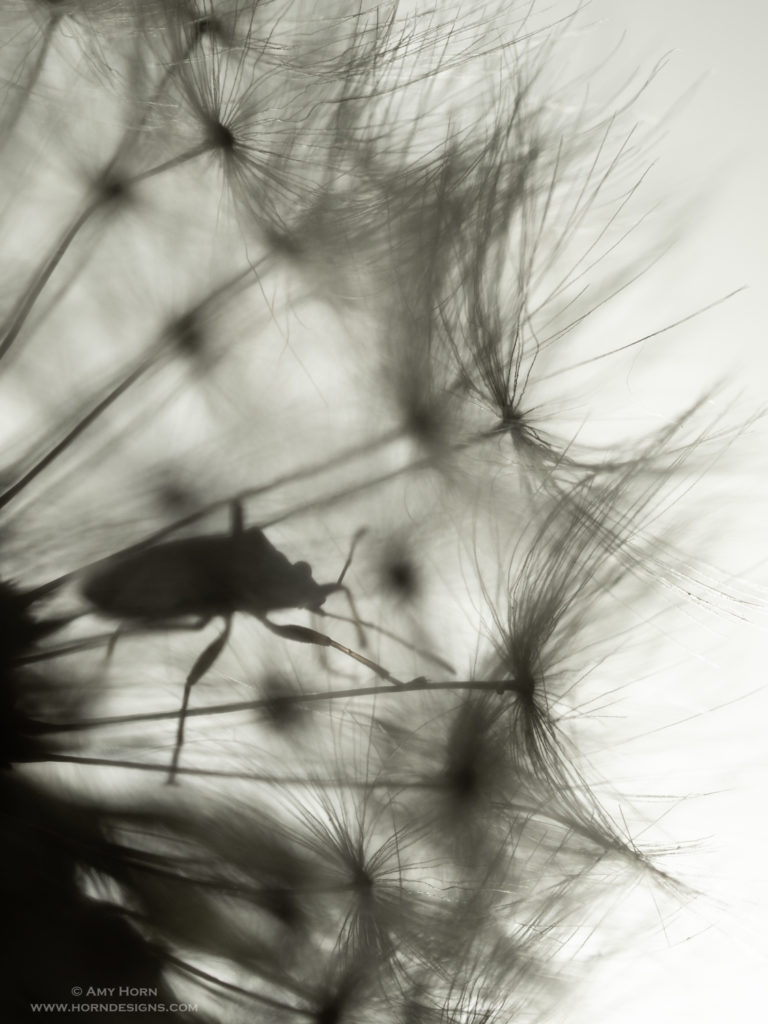
While setting up the next shot, I added a continuous light to the background and loved the silhouetted dandelion. So, I turned off my flashes and captured silhouettes with and without extension tubes. Much to my surprise, I found a bug crawling around in the dandelion. It took a lot of twisting and positioning in front of my lens, but I finally captured the bug in the seeds. The final bug image expressed my original intent – as if I was that bug within the dandelion.
1/30 sec, f/3.2, ISO 200, backlit
1/60 sec, f/4, ISO 200, backlit
So, if you are looking for a project, find something simple around your house and keep “working the subject” by changing settings, lighting, backgrounds, etc until you achieve what you want. These images were captured over the course of three days. When I take on new projects, I like to review, reflect, and then reshoot several times. Regardless, have fun and I hope you enjoyed reading about my process.
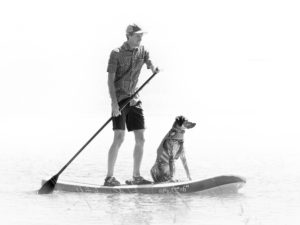
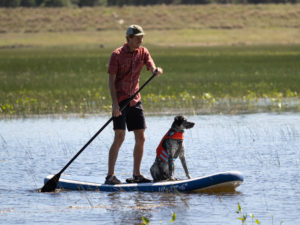
Some days, I just need to play in Photoshop. After spending a couple of hours at Lake Mary with my son and his new dog, Ryder, I had many fun images, but, the lighting was harsh. We went in the middle of the day and to compensate for the harsh light, I used center weighted metering to expose for the shadows. The images were okay, but I decided it would be challenging and different to create a high key image.
After making basic adjustments in Lightroom, I pulled the image into Photoshop. Here I opened the Silver Efex Pro plugin and chose the high key preset. That gave me the basic look but I felt it needed a few finishing touches. So, I added a dodge/burn layer to lighten and darken areas at whim. If you haven’t created a dodge/burn layer, it is very easy.
Hold down the Alt/Opt key while adding a new layer in Photoshop. change the blend mode to Overlay and then check the box to fill the layer with gray. Now, use a white brush to dodge and a black brush to burn in details. You will want to drop the opacity of your brush to 10-15% so that your dodging/burning is subtle.
That’s all it takes to dodge and burn in Photoshop. Next time you are working on images, take a few minutes to try something different – maybe you will like it?
Olympus OMD1 Mark III, 60 mm macro, 1/60 sec, F/8, ISO 200, 2 off-camera flash.
Paper – check; off-camera flash – check; flash gels – check; macro lens – check. Grab those supplies and you are ready to capture abstract art. My YouTube video isn’t ready yet, but I couldn’t wait to show you how to capture these images.
Step-by-step
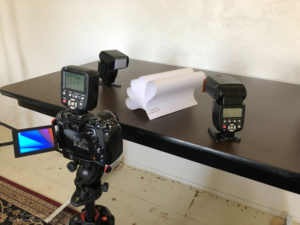
Let me take you step-by-step through capturing these images:
Notice the two flashes facing each other? Each with a different colored gel.
Grab white computer paper and roll or curl it to a desired shape, then either staple or paper clip it so the shape holds in place.
Place two off camera flashes facing each other pointing toward the paper (see image). A good starting point to the flash power is 1/32.
Add a gel to each flash. I used a red and a blue.
Set your camera on a tripod and focus on the front edge of the paper. I used Manual exposure, 1/60 sec, f/5.6 to f/10 and ISO 200.
Take a photo.
Review your image checking the histogram and composition. Adjust camera settings as needed.
Now, modify your shape or change gel colors. The images below represent some of these changes.
Example images
A
B
C
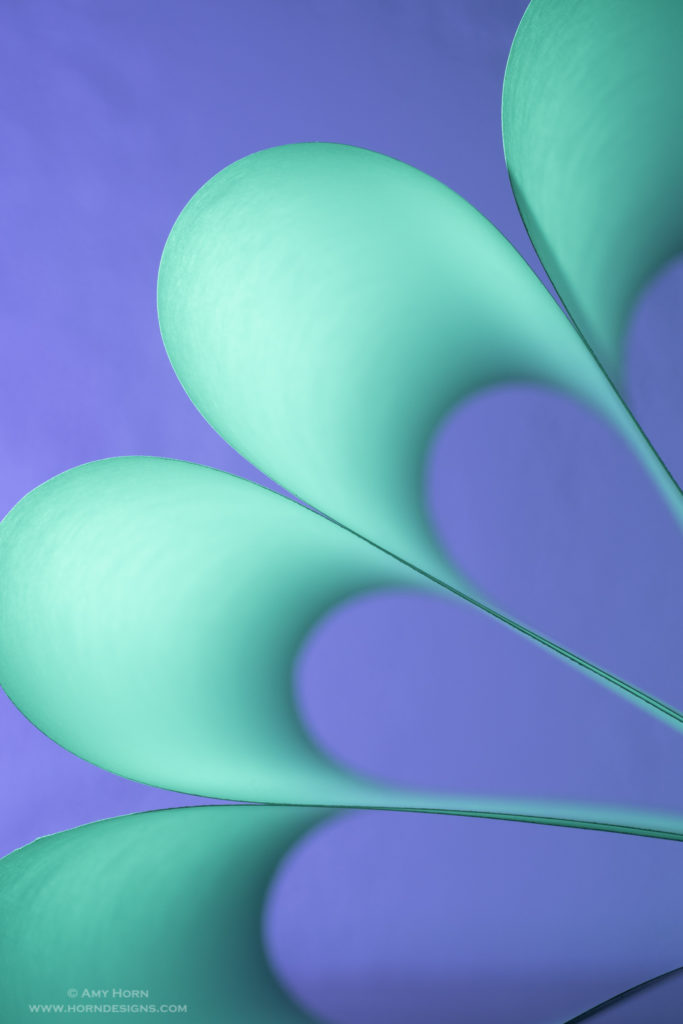
Image A: For this image, placed one flash with blue gel on the background (wall) and a green felled flash on the paper. Olympus OMD1 Mark III, 60 mm macro, 1/60 sec, F/10, ISO 200, 2 off-camera flash.
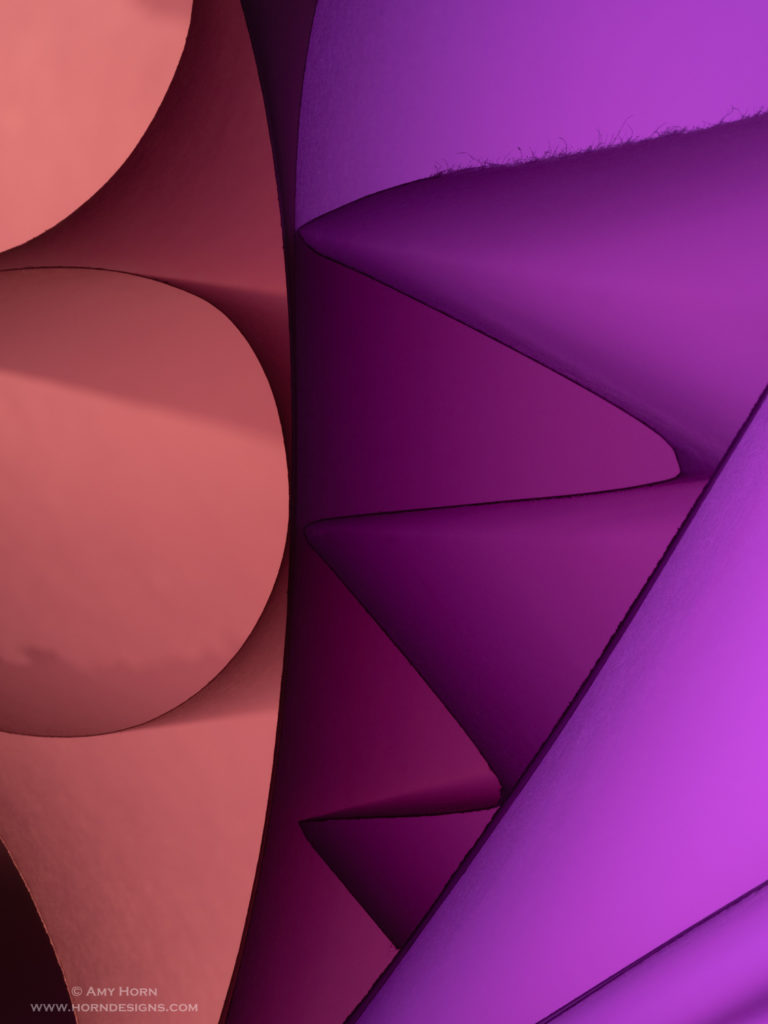
Image B: This image uses an orange gelled flash from the left and a purple gelled flash on the right. I added small curls of paper in my loops to create different shapes. Olympus OMD1 Mark III, 60 mm macro, 1/60 sec, F/10, ISO 200, 2 off-camera flash.
Image C: Here is the looped paper and added curls to create image B.
Gels are transparent colored material placed on the flash unit. Purchase them where you purchase lighting equipment. If you find the Rosco Swatchbook in stock – buy it! The swatchbook gels are sized perfectly for flash units and includes a variety of colors.
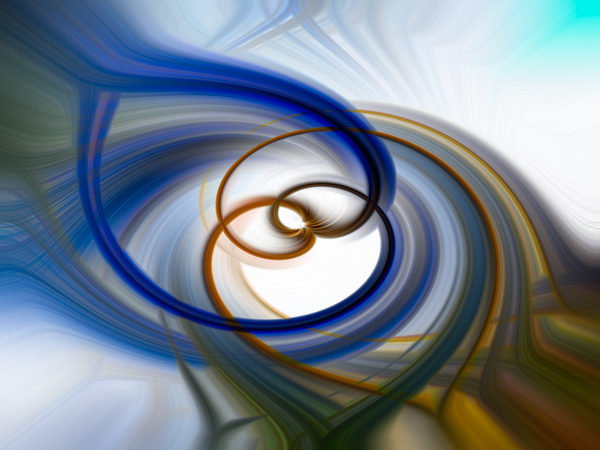
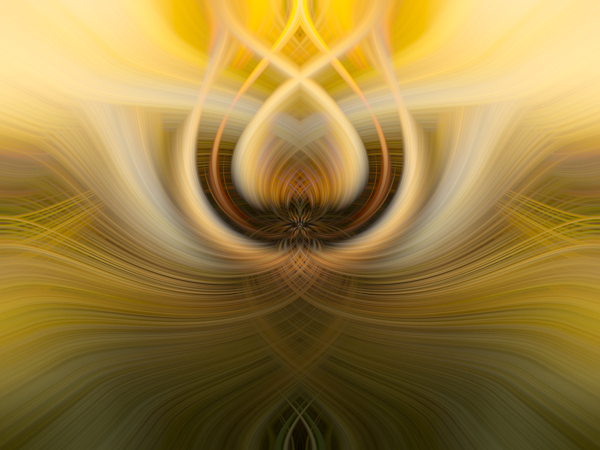
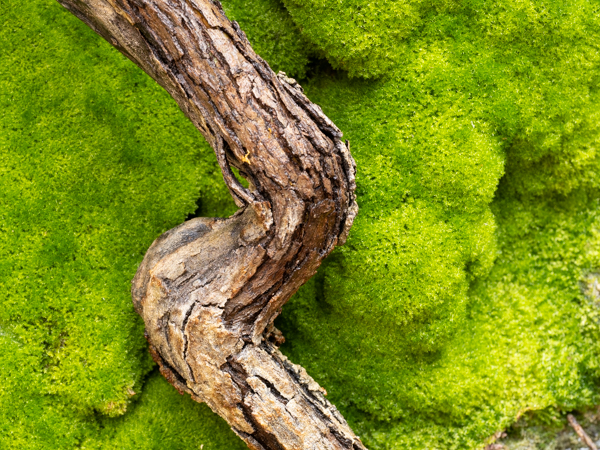
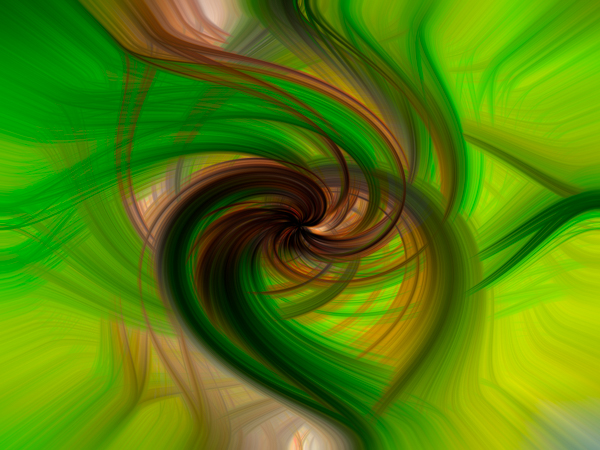
Several photographers I follow post “twirling” images. It is a different look, but since I love abstract photography it was worth an afternoon of watching YouTube videos and playing in Photoshop. I won’t say I am a pro at this effect, but I will say it was fun. Below you will see several images, before and after applying the twirl effect. If you are interested in this, I recommend following the tutorial I followed: https://www.youtube.com/watch?v=pwsjgqI4eaY&list=LLUutBD_IesM1vaEiZiWQmgw&index=8&t=0s