After our second annual trip to the Boundary Waters, I wanted to share how I kept my camera safe, dry and easy to access through canoeing and portaging. Boundary Waters Gear can be simple if you think through what you really need. If you aren’t familiar with the Boundary Waters, check out my previous post here.
On the Boundary Waters, we carry everything: food, tents, clothing, etc. Each day we packed up camp, paddled and portaged most of the day, then chose a new camp. During the week, we paddled and portaged about 50 miles. With this schedule, my gear needed to be light, accessible and water safe.
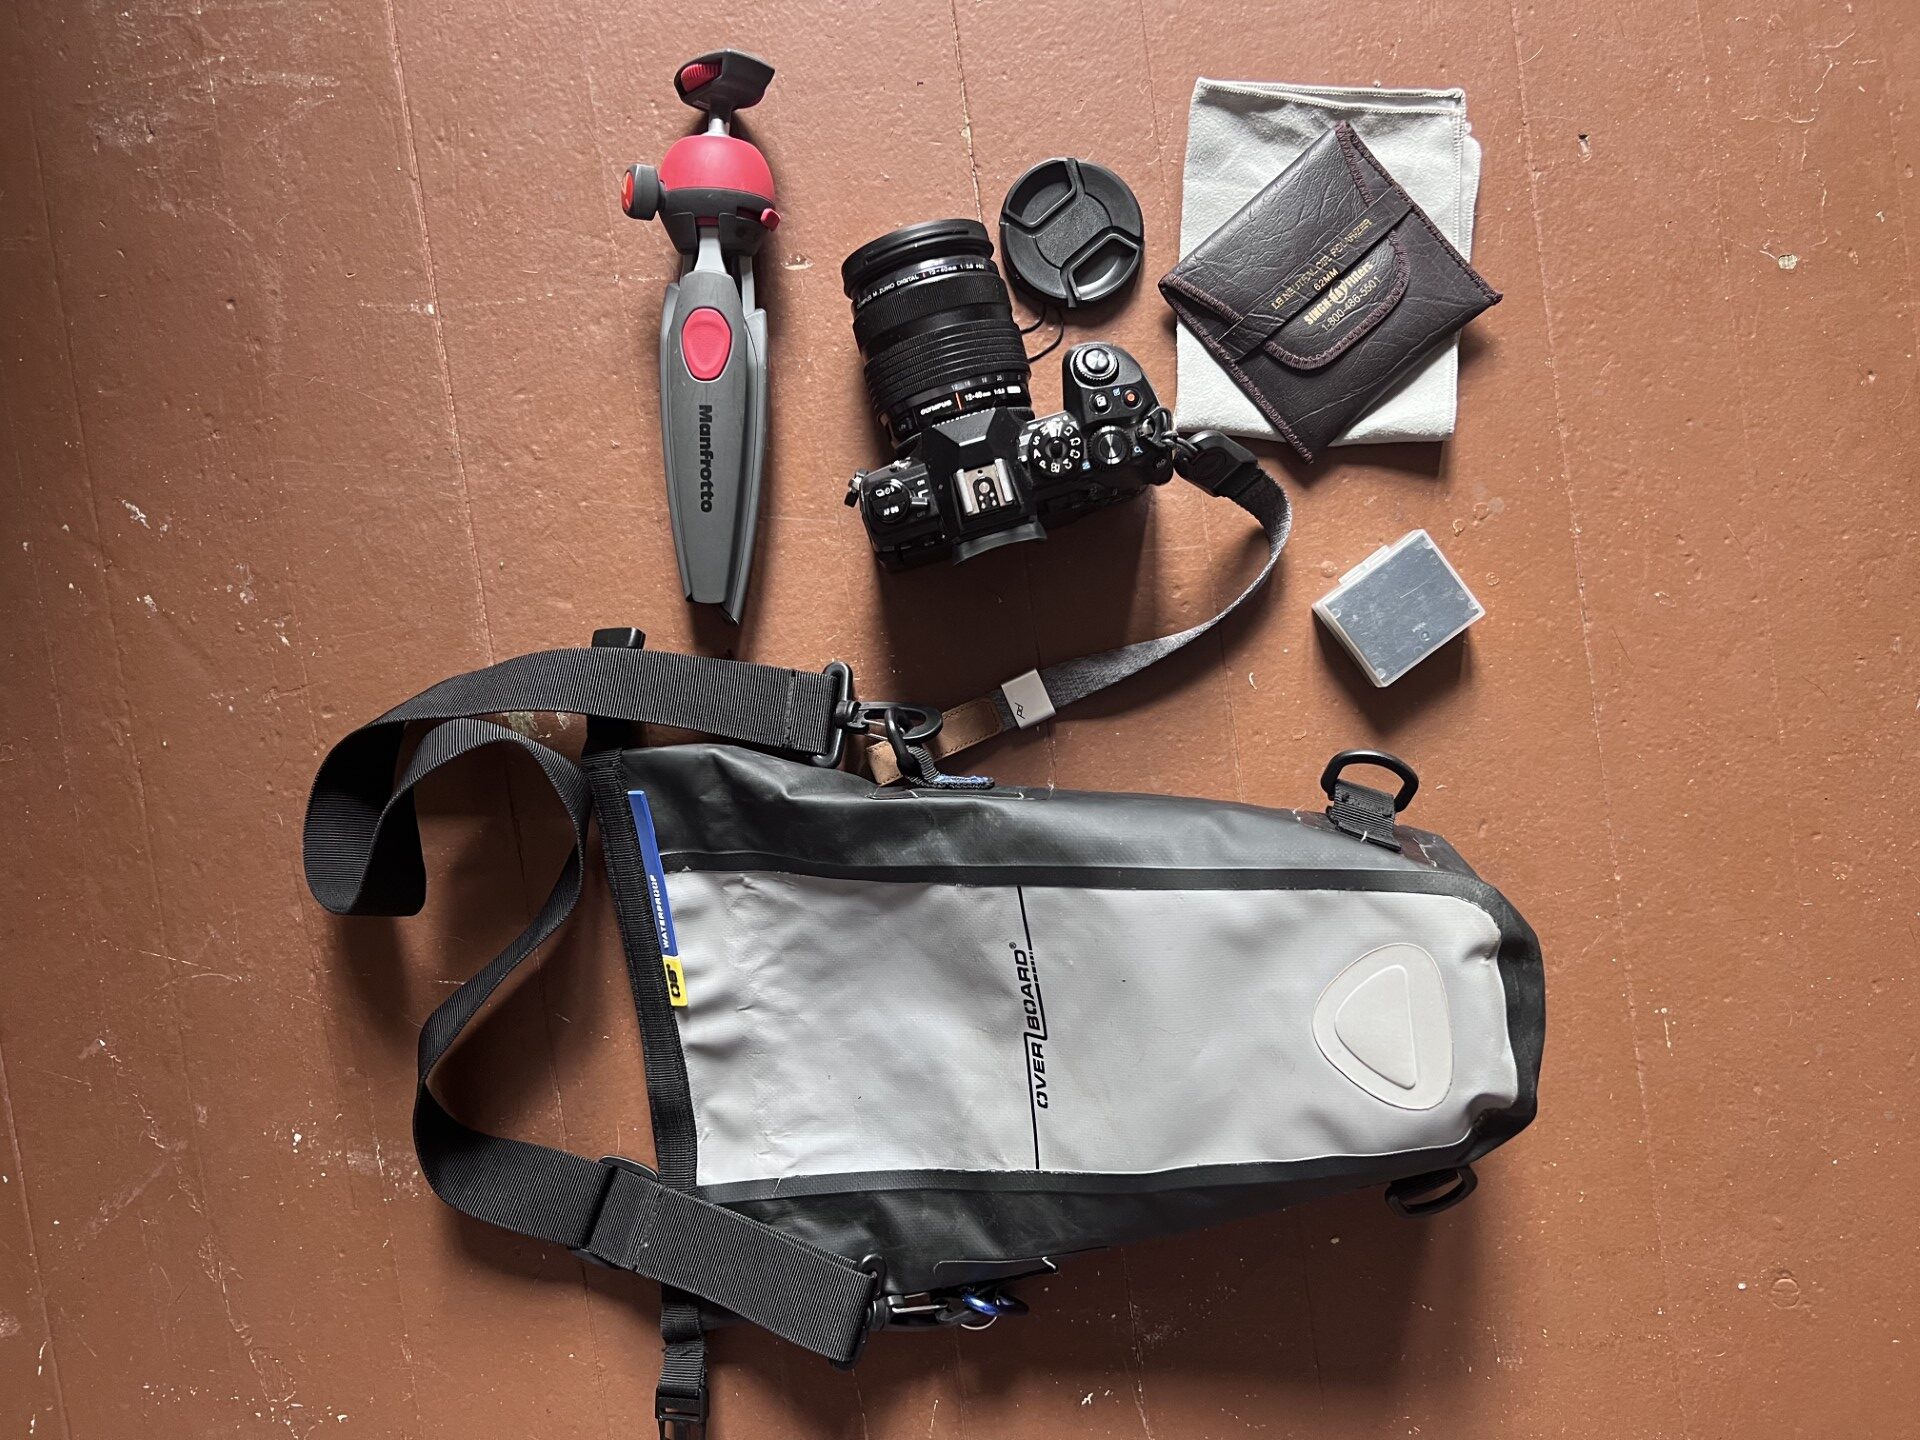
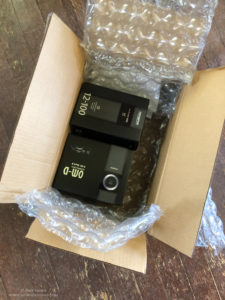
My camera was the Olympus OMD1MII with the 12-40 f/2.8 lens. I chose this lens because it was light and captures great close up (wide angle macro) images too. In addition, I purchased a lens cap leash – last year I dropped a lens cap and lost it in the water. A long lens would have been great for birding, but not worth the weight in my opinion.
Gear
The Manfrotto mini tripod was perfect for sunrise and sunset shoots and a Singh-Ray Circular Polarizer completed the setup. Of course, I took an extra battery. All of this fit into my Overboard Camera Dry Bag (https://amzn.to/3qpLR5o). The shoulder strap on the dry bag made it easy to clip onto the boat or wear over my shoulder during portages. See the photo with my camera dry bag and the large 60 lb Duluth bag of gear and food? This was captured at the start of a portage. So, I could easily open the bag and grab photos whenever needed.
In places like the Boundary Waters, I don’t want the gear to take over from the fun of the trip, so I kept it simple. Below are a few more images captured on the trip.
Have you ever tried narrowing your yearly images to your top 5? That is the theme here, my top images of 2022. I do this every year and it isn’t easy. Do I pick top images from different quarters? trips? genres? Well, this year, they are the top images that stood out based on light, composition, subject matter, and wow factor. I did get a little help from the family. I put the images in grid mode and starting with about a dozen images I kept asking them to remove two that weren’t as strong until I was down to these five.
Olympus OMD1 M3, 12-40mm, 1/640 sec, f/5, ISO 400.
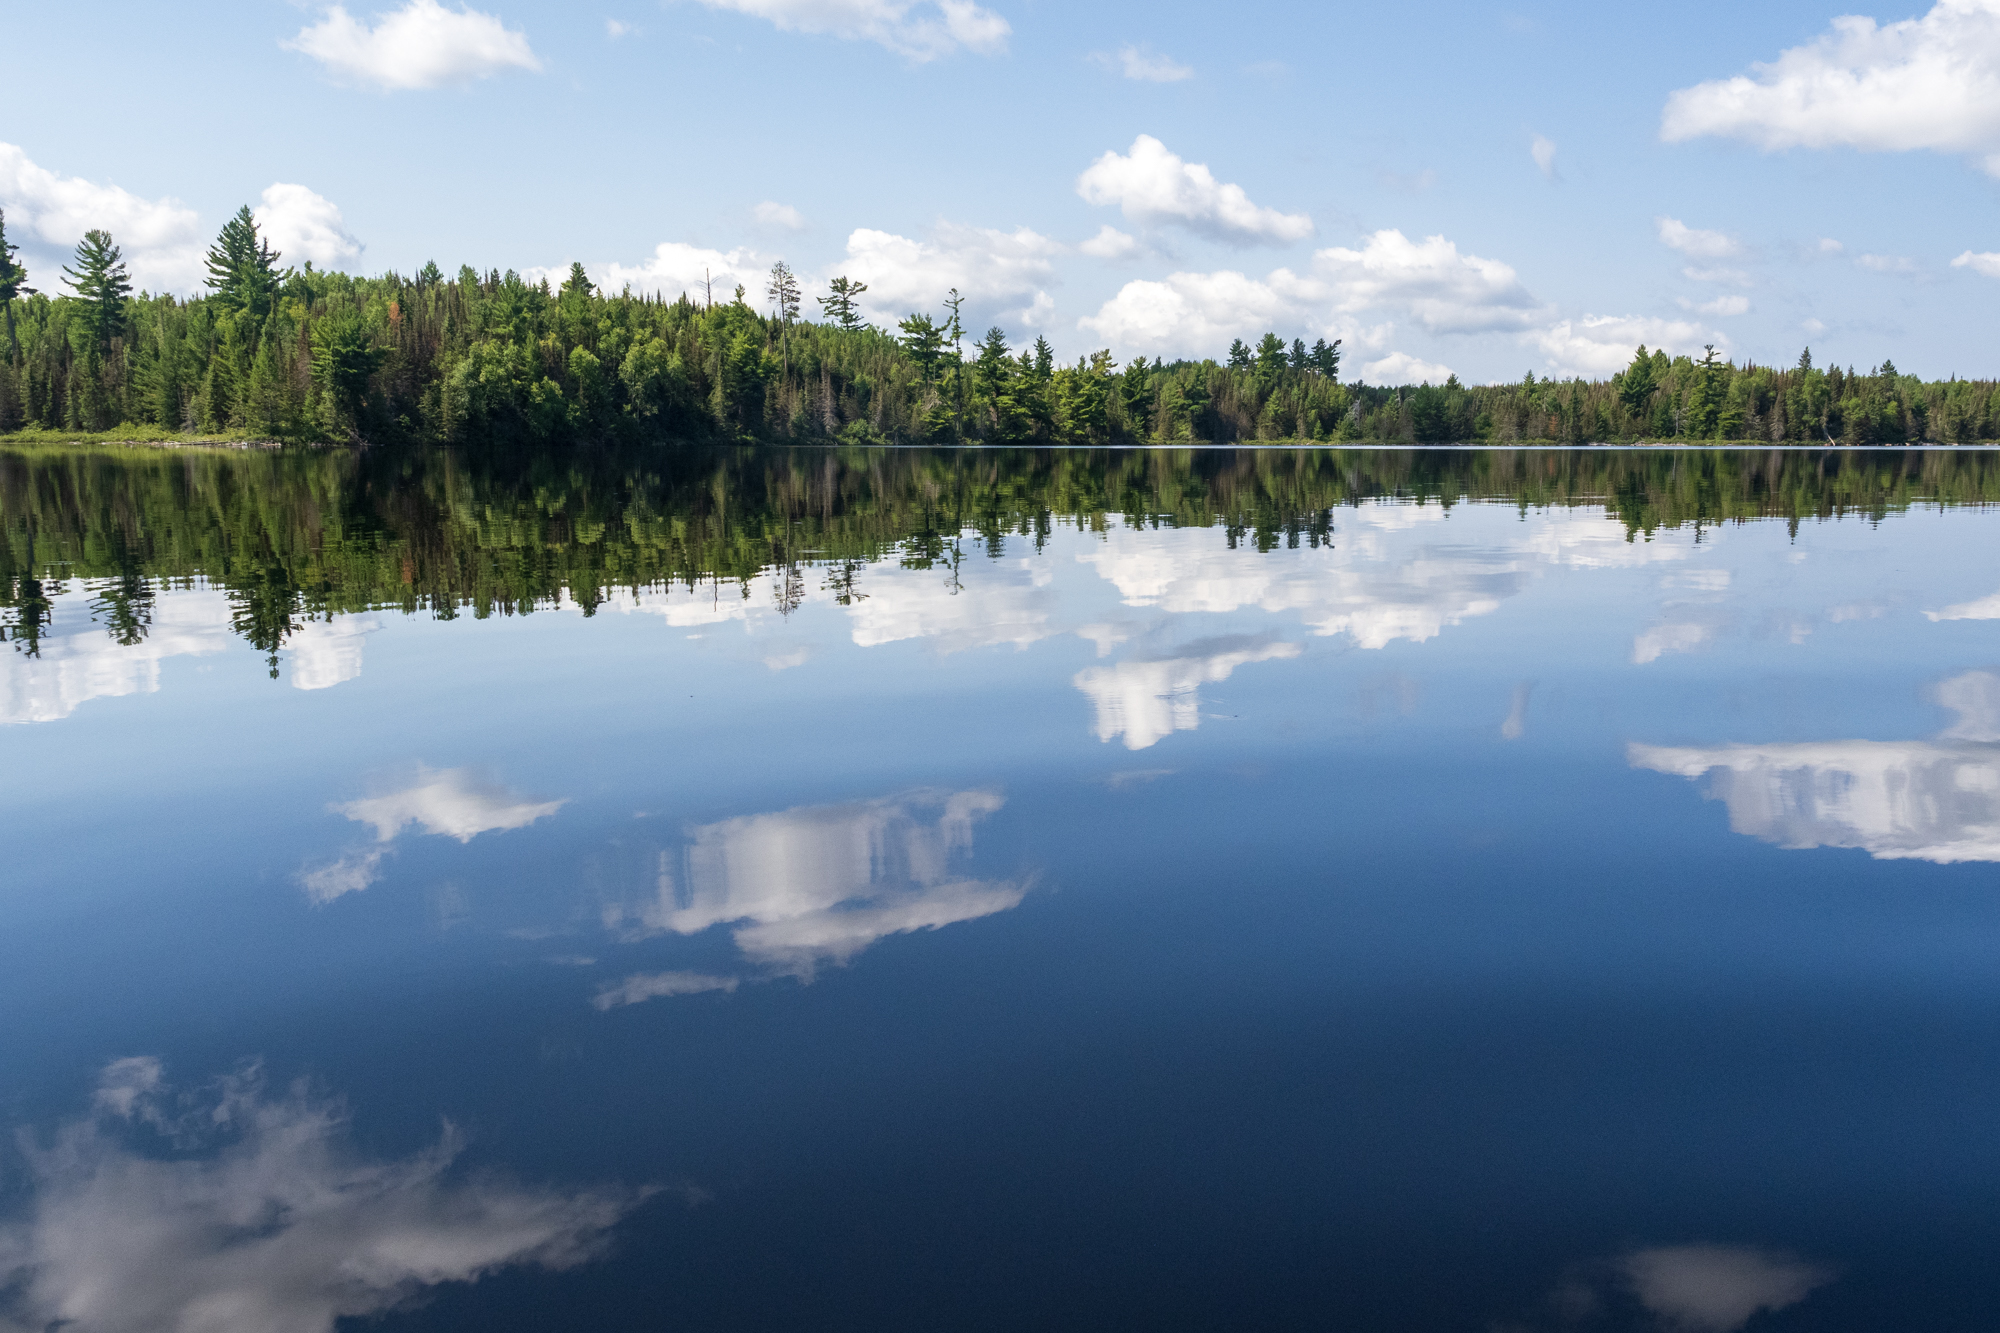
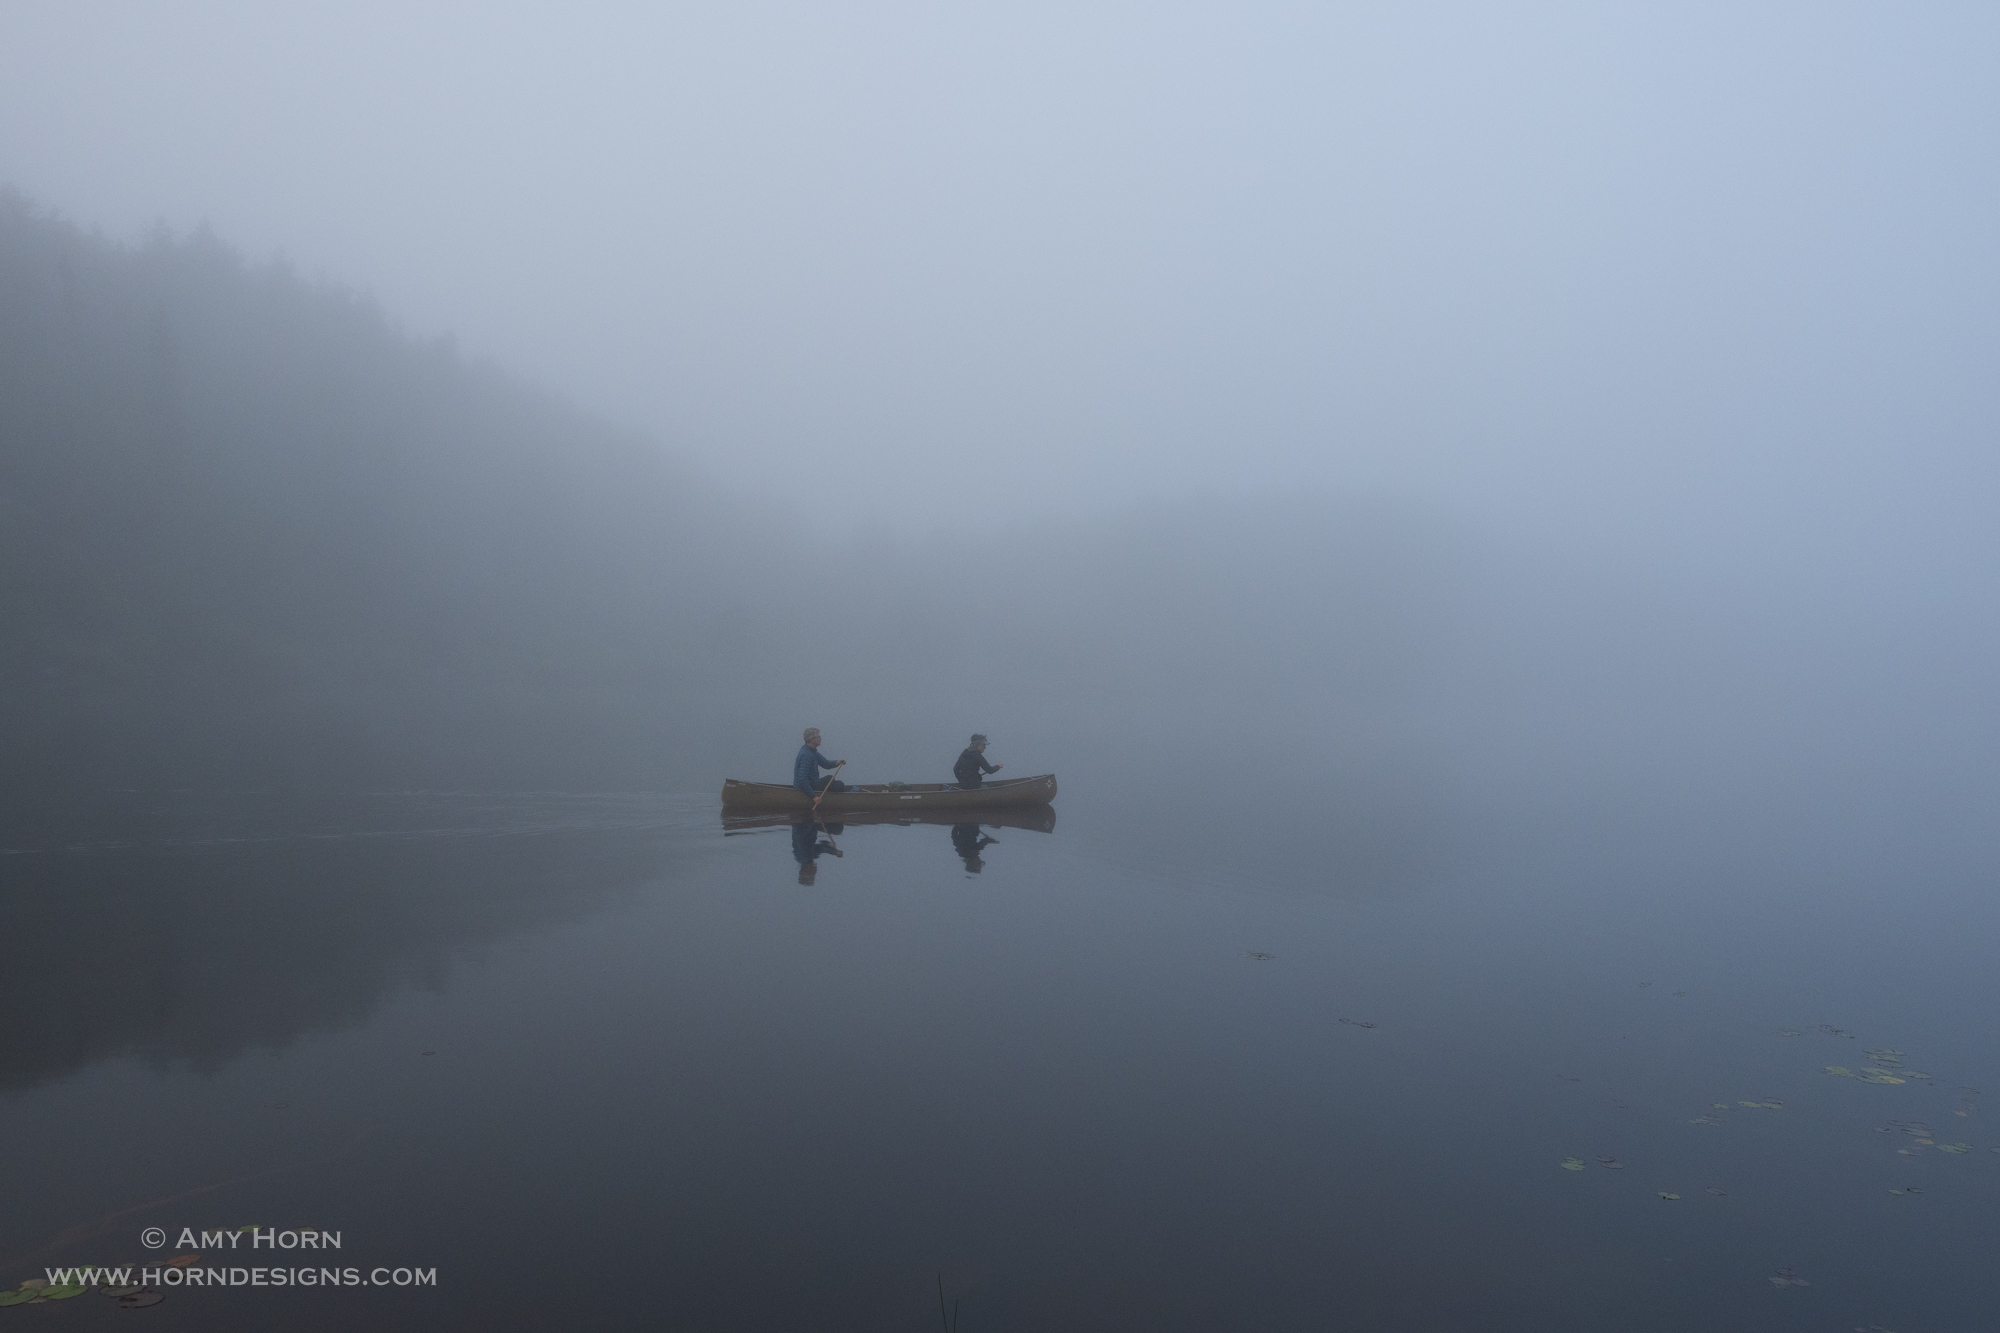
Boundary Water Fog
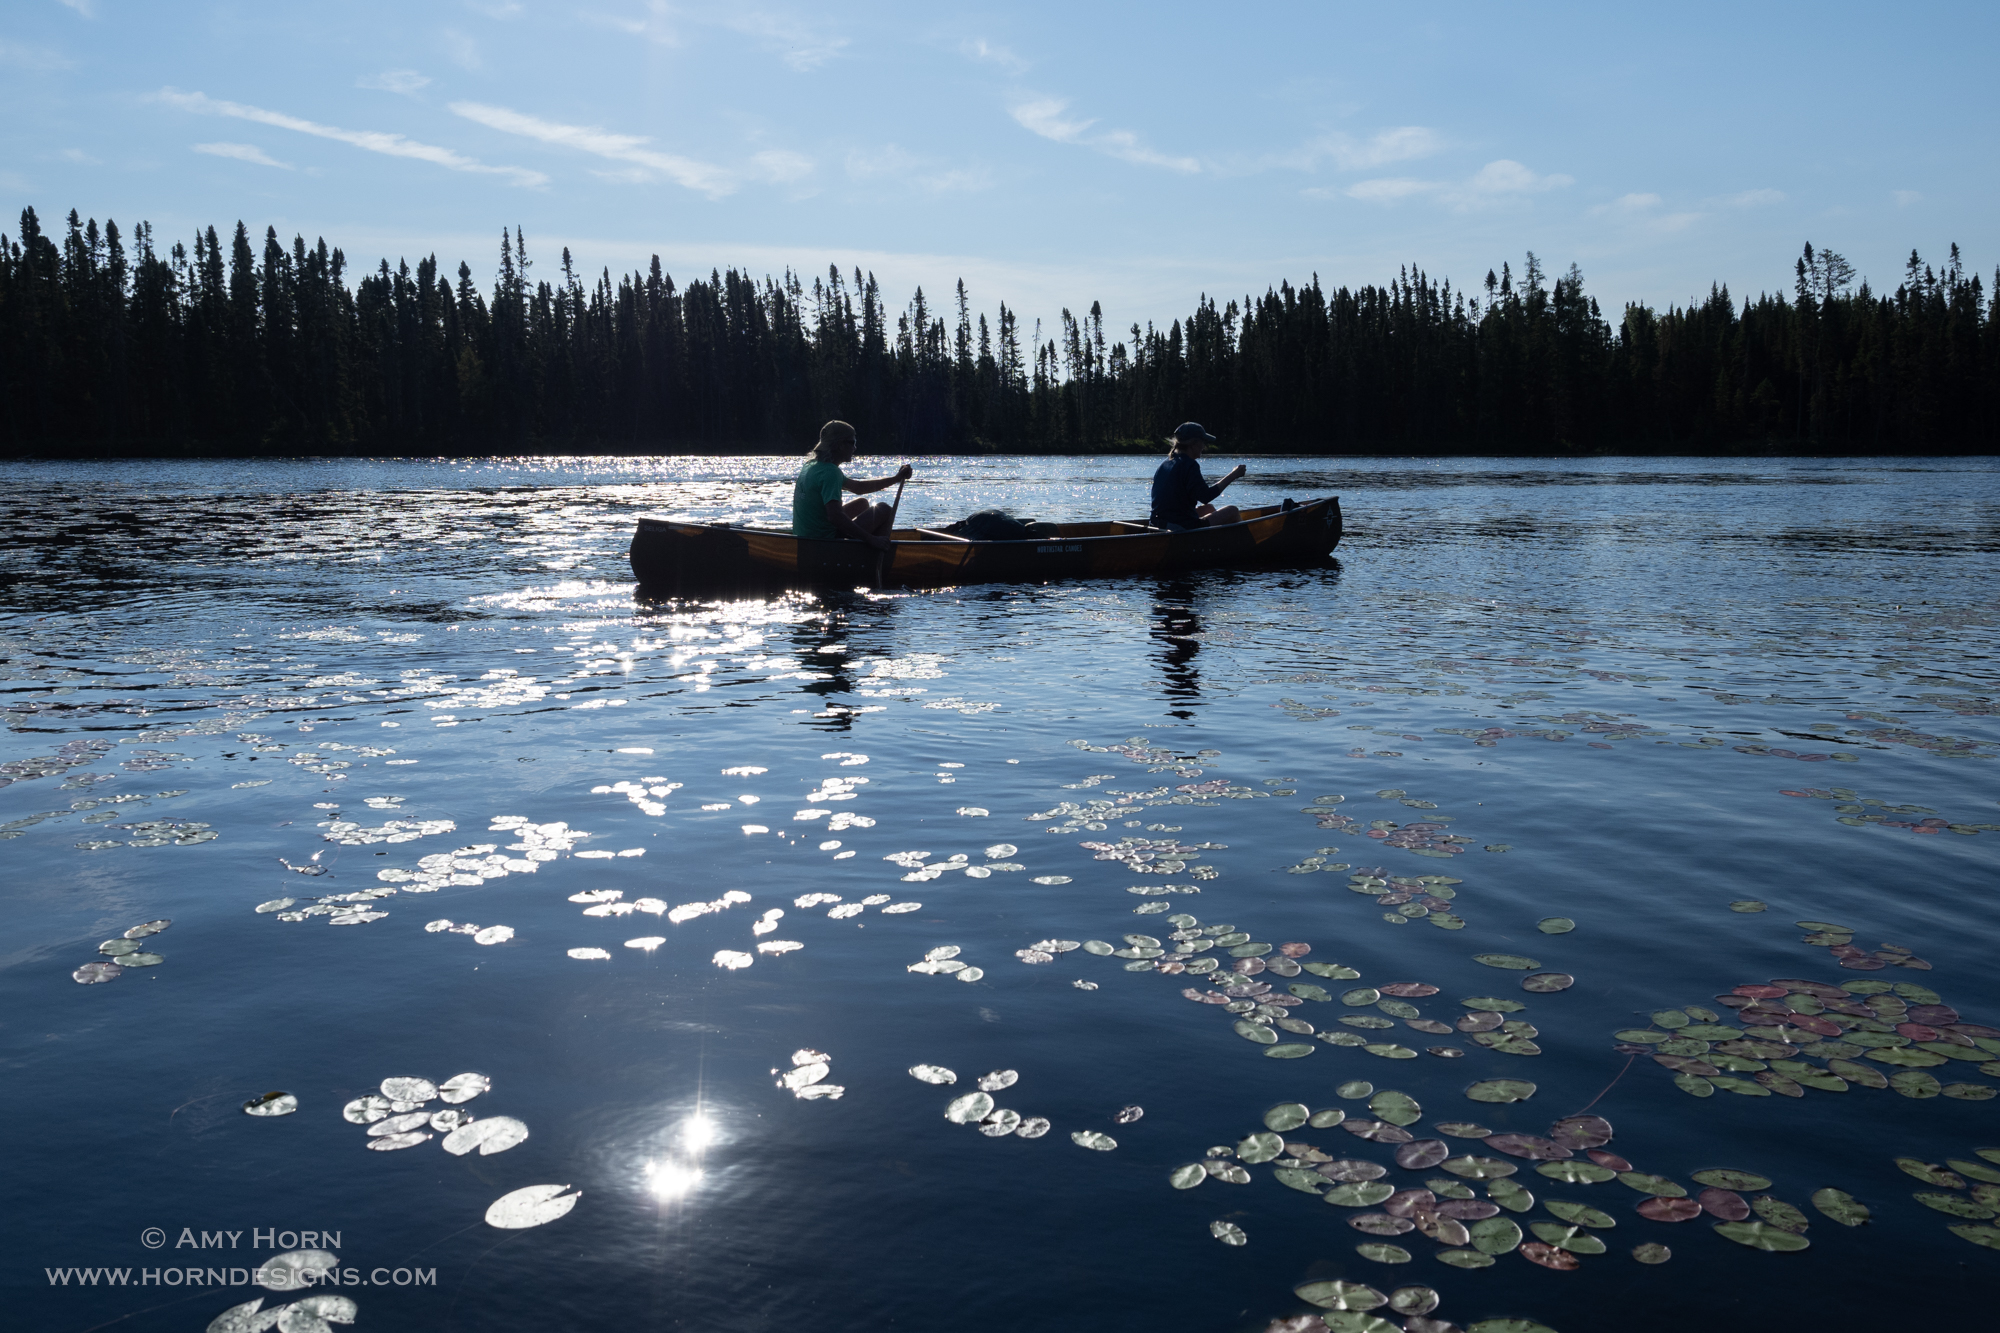
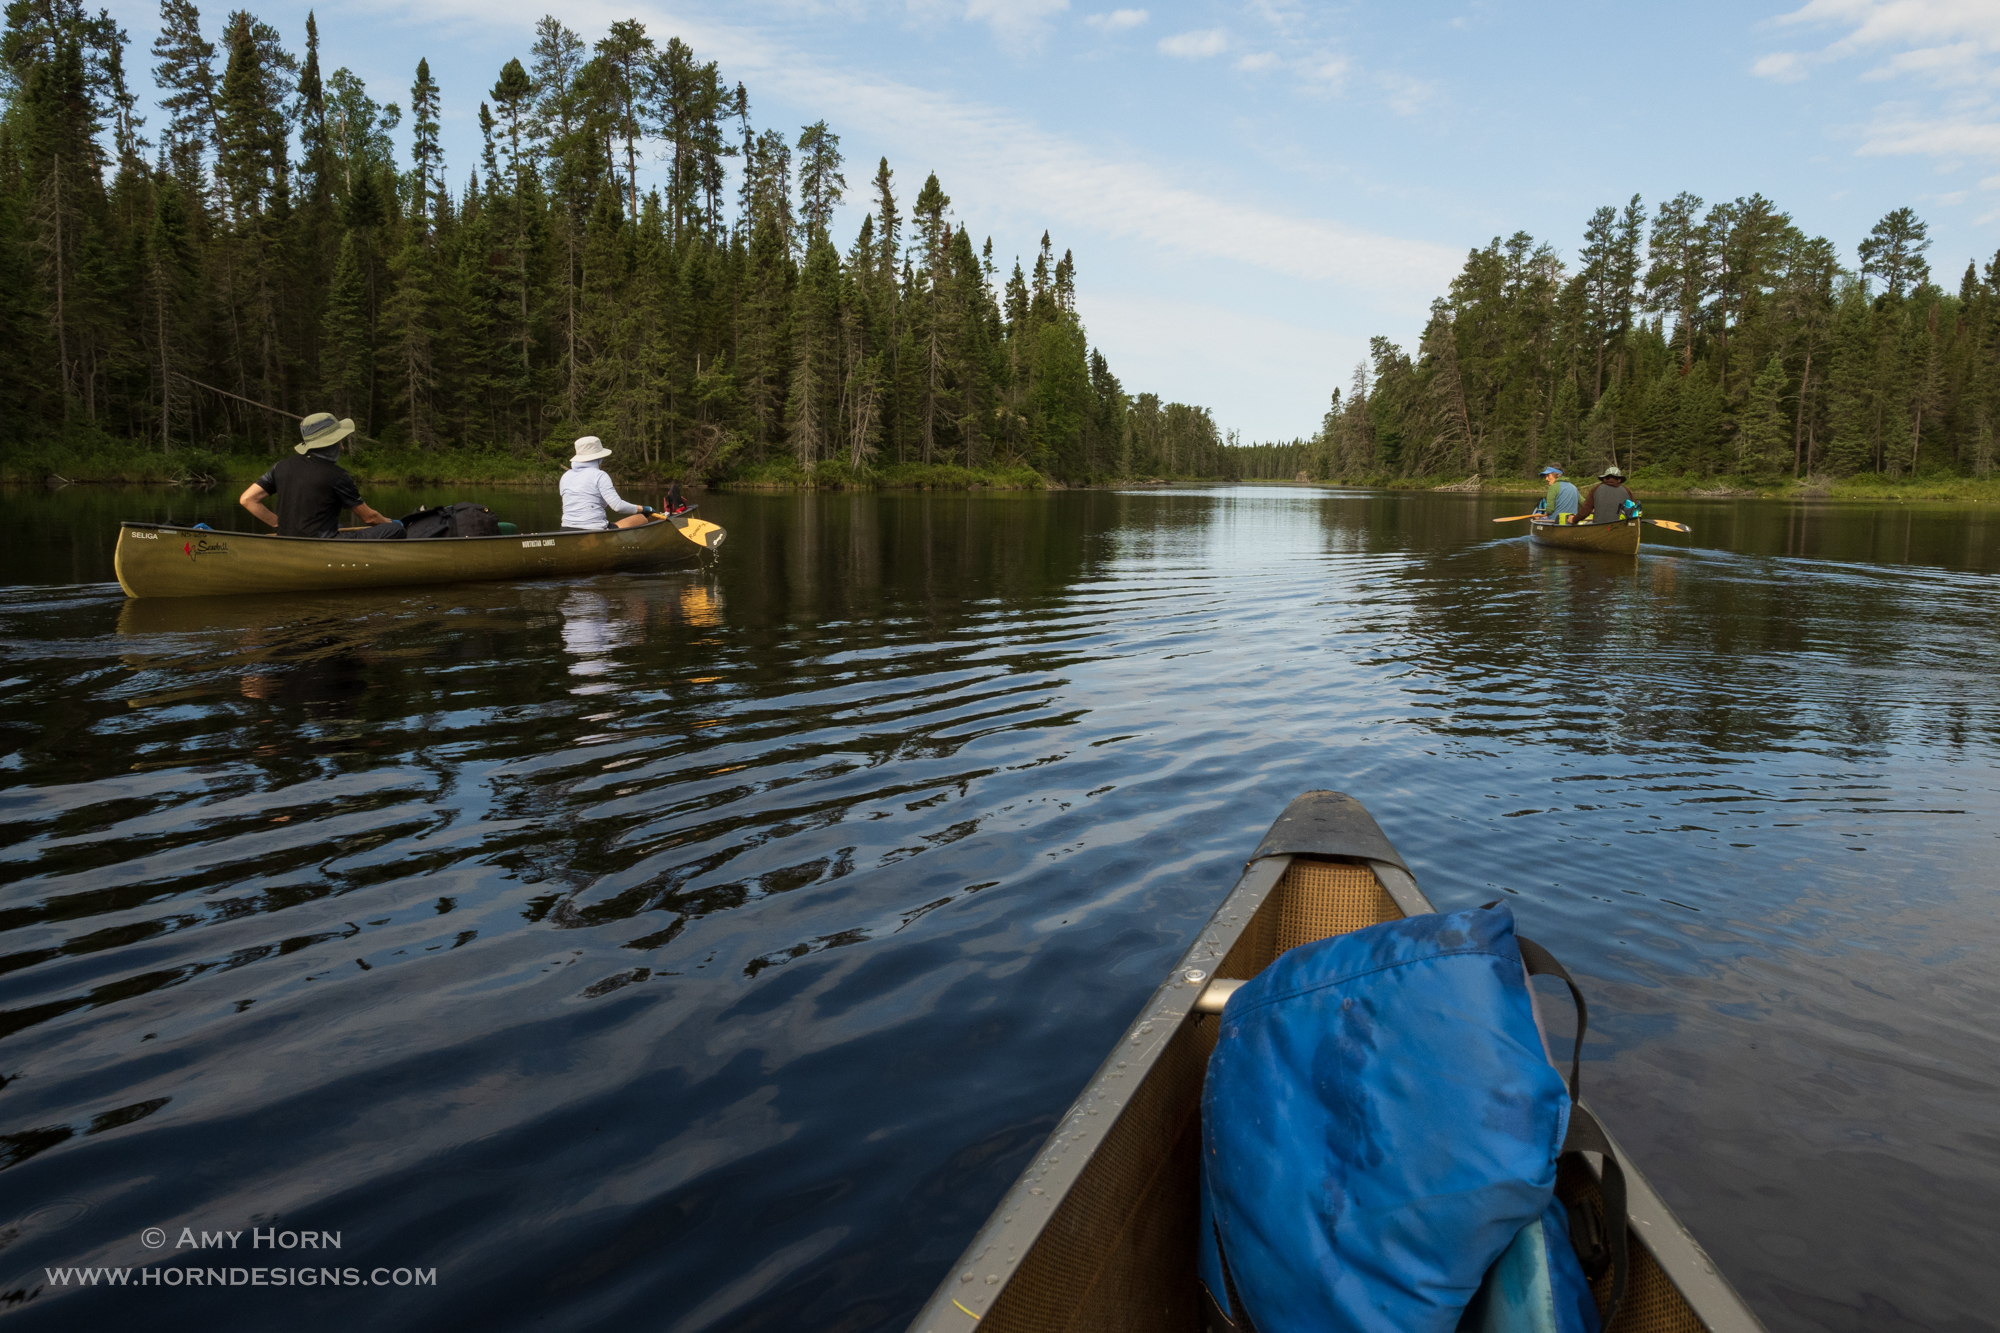
I captured this image while canoeing in Minnesota’s Boundary Waters in August of 2022. We woke up to a thick fog and thought it had to be captured. So, Gretchen and her brother, Neil paddled and I “duffed” (sat in the middle) taking photos before the fog lifted. This image brings back that peaceful feeling from that morning on the water. Olympus OMD1 M3, 12-40mm, 1/640 sec, f/5, ISO 400.
Olympus OMD1 M3, 35mm, 1/25 sec, f/5.6, ISO 100.
Cape Perpetua Light
While driving along Highway 1 on the Oregon coast in September 2022, I was treated to a spectacular light show at Cape Perpetua. I turned a corner and saw this light coming through the fog on the pullout to a campground. My gut told me to stop, so I turned down the road, stopped and took the shot. Moments later, the fog was gone. My takeaway lesson – don’t ever think you will get the shot later – stop and capture the moment.
Nikon Z, 50mm, 1/00 sec, f/16, ISO 200.
Paper Project
Macro photography is my passion, so this project incorporates uniquely folded sheets of paper and off-camera gelled flashes. When I started this project, my husband decided to purchase a laser cutter so that we can cut our own paper perfectly. As a result, I plan on pursing more of these in 2023.
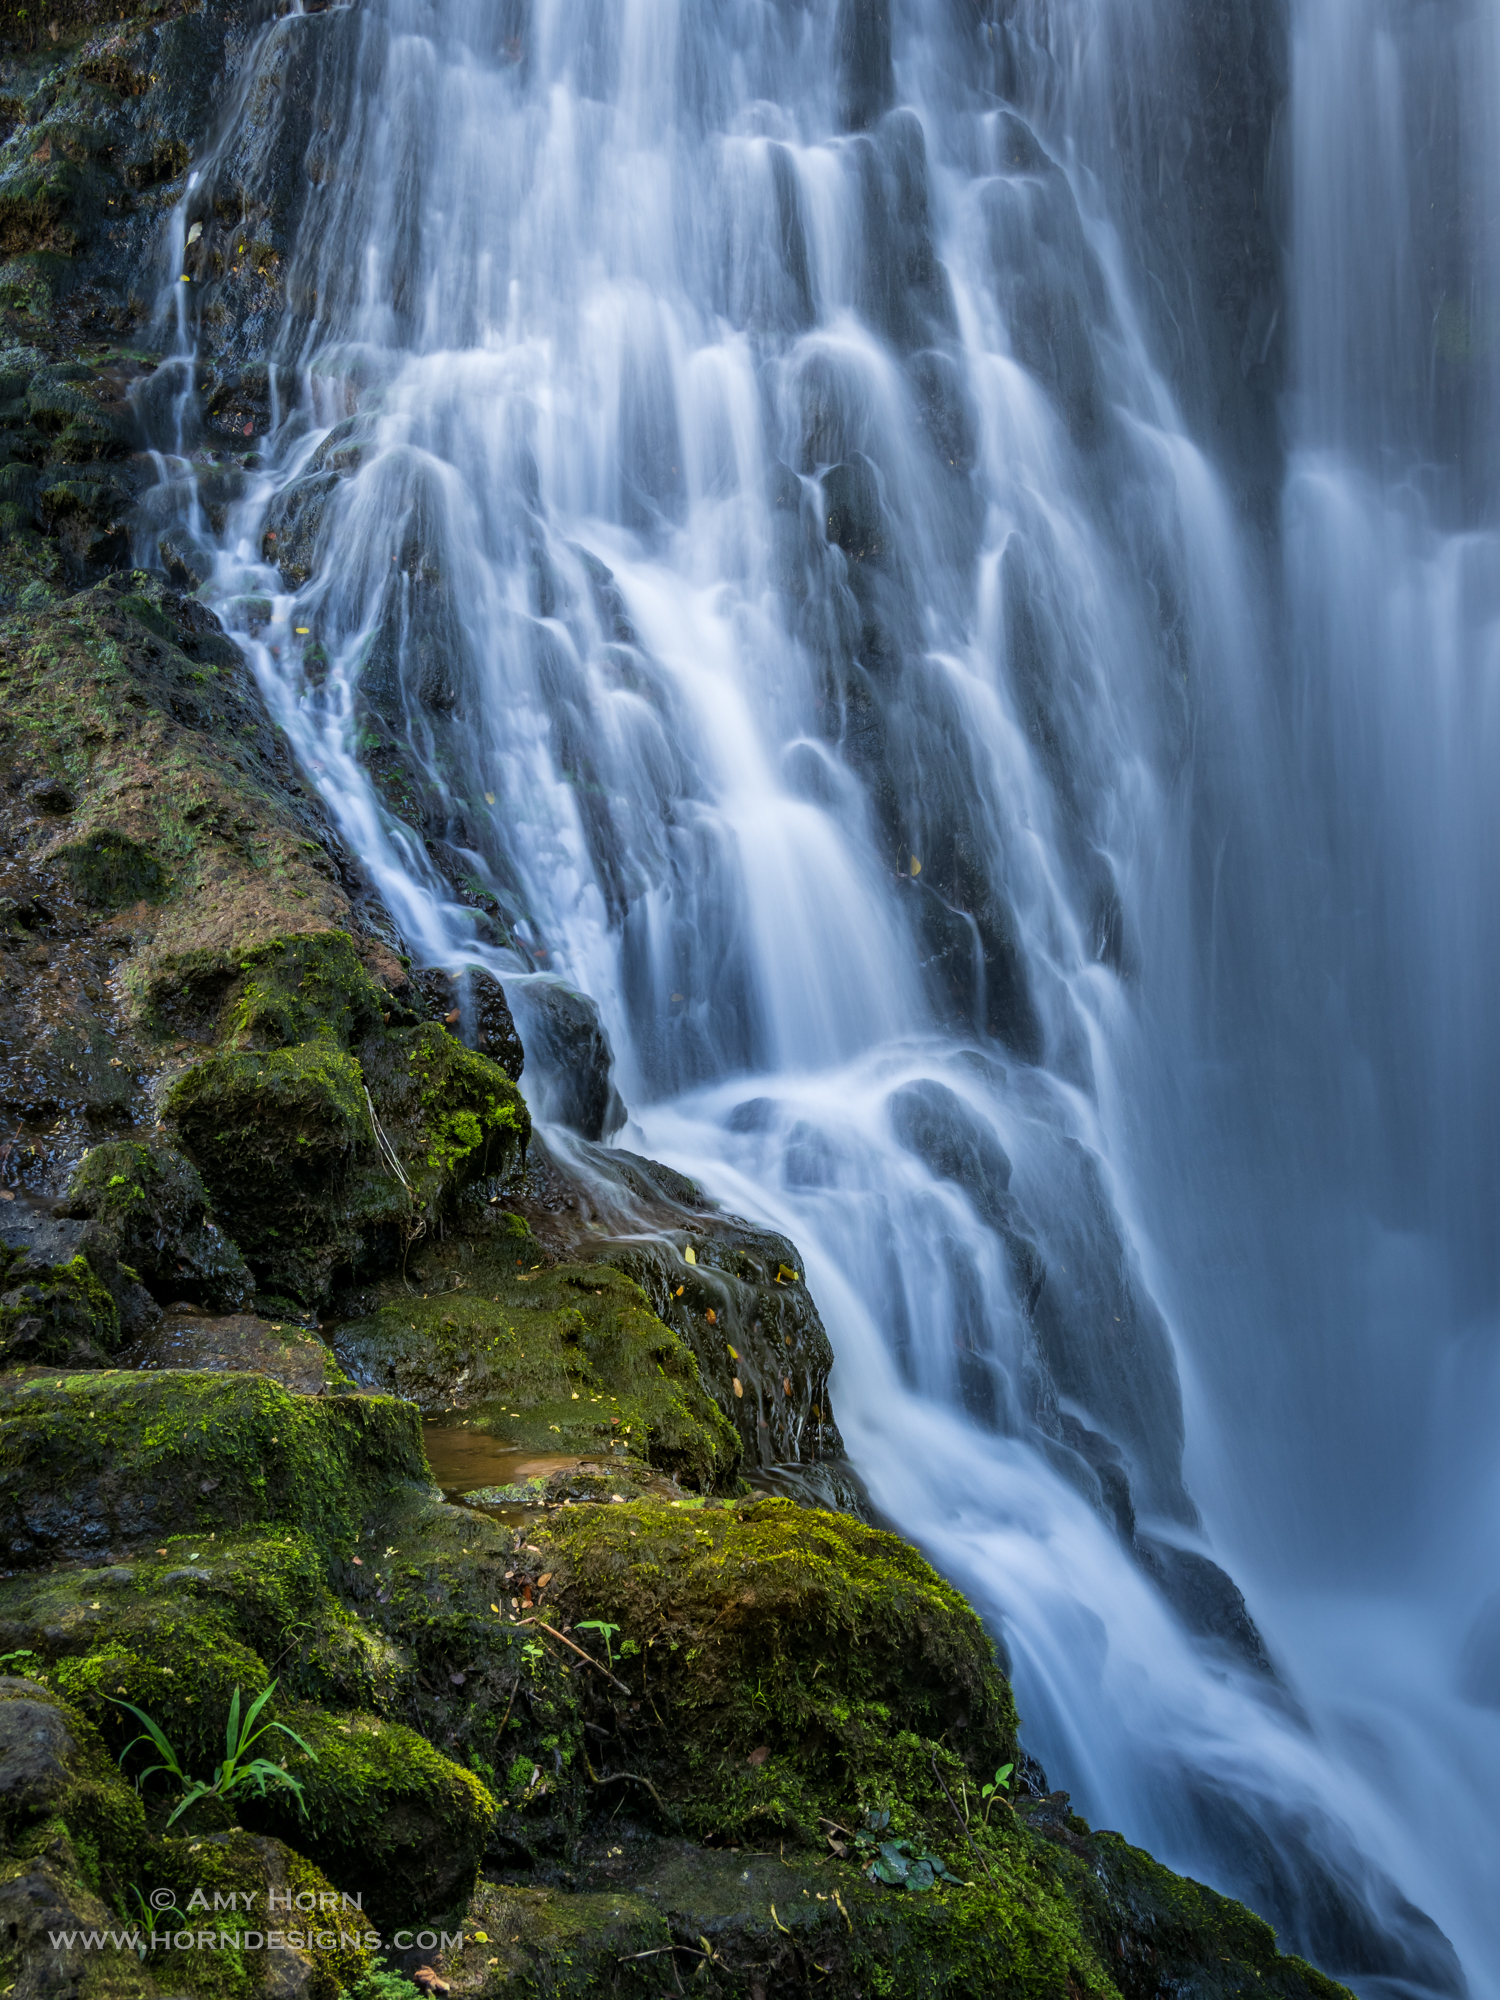
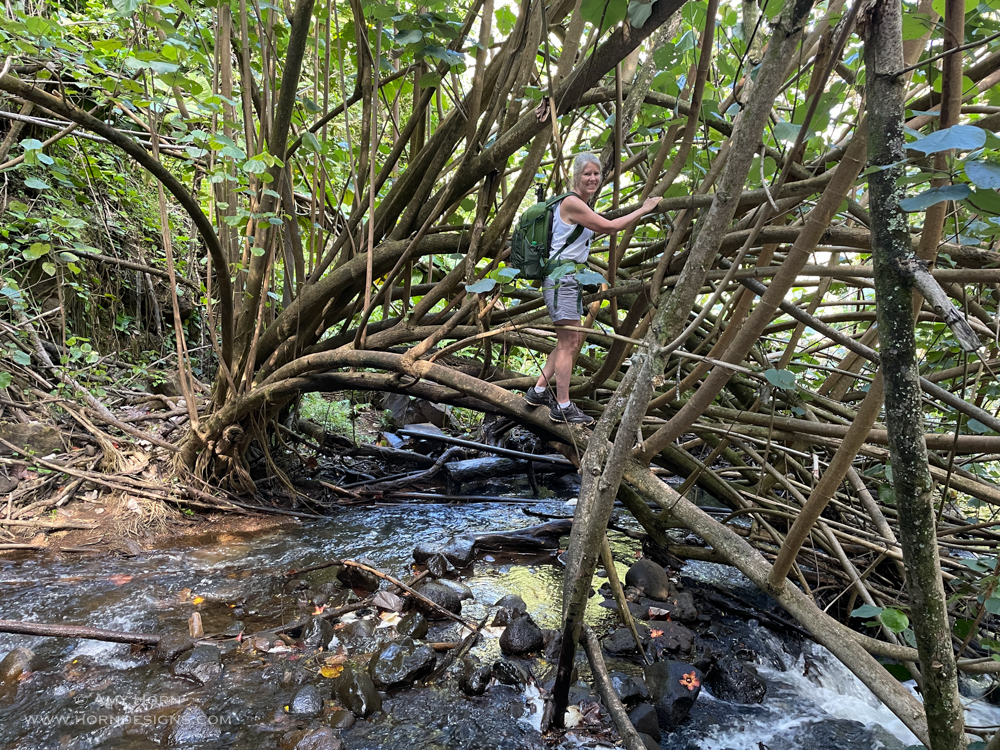
To celebrate our 30th wedding anniversary, Rod and I spend 10 days in Kauai. We hiked, ran, and photographed waterfalls. What an absolute joy. Getting to this position in the waterfall took some clever walking and handling of gear. Thankfully, Rod is always up to assist!
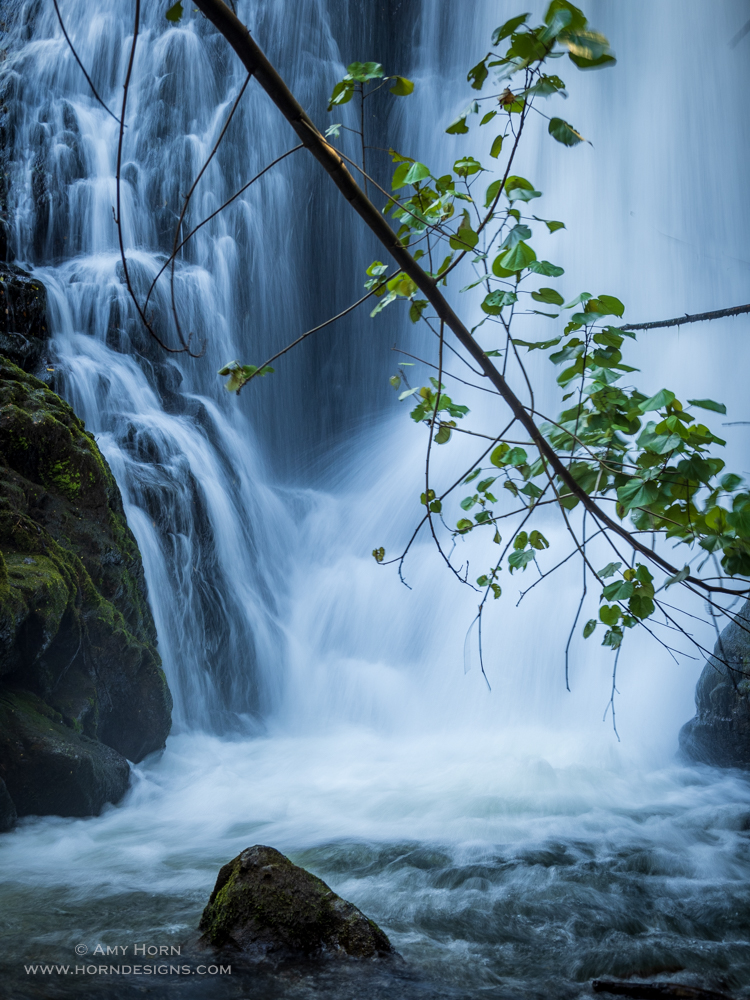
Olympus OMD1 M3, 12mm, .4 sec, f/10, ISO 200.
Ferguson’s Cafe
If you ever saw the movie “Benny & June,” then Ferguson’s Cafe might look familiar. In Spokane, Washington’s Garland District I walked up and down the street photographing the many neon signs at night. Ferguson’s was by far my favorite.
There you have it, my top five images of 2022. I’m thankful my family offered opinions on these images because sometimes I get stuck on my emotional attachment to the area instead of the quality of the photo. This is a great exercise in evaluating photos, if you haven’t tried it before, give it a try.
The question asked most about our trip to Minnesota’s Boundary Waters was, “How were the mosquitos?” Well, I have to say, they enjoyed our visit! The mosquitos were thick at times, but we were prepared and dealt with them. I knew very little about the Boundary Waters, so this travel blog shares my new knowledge of the area and our back country adventure.
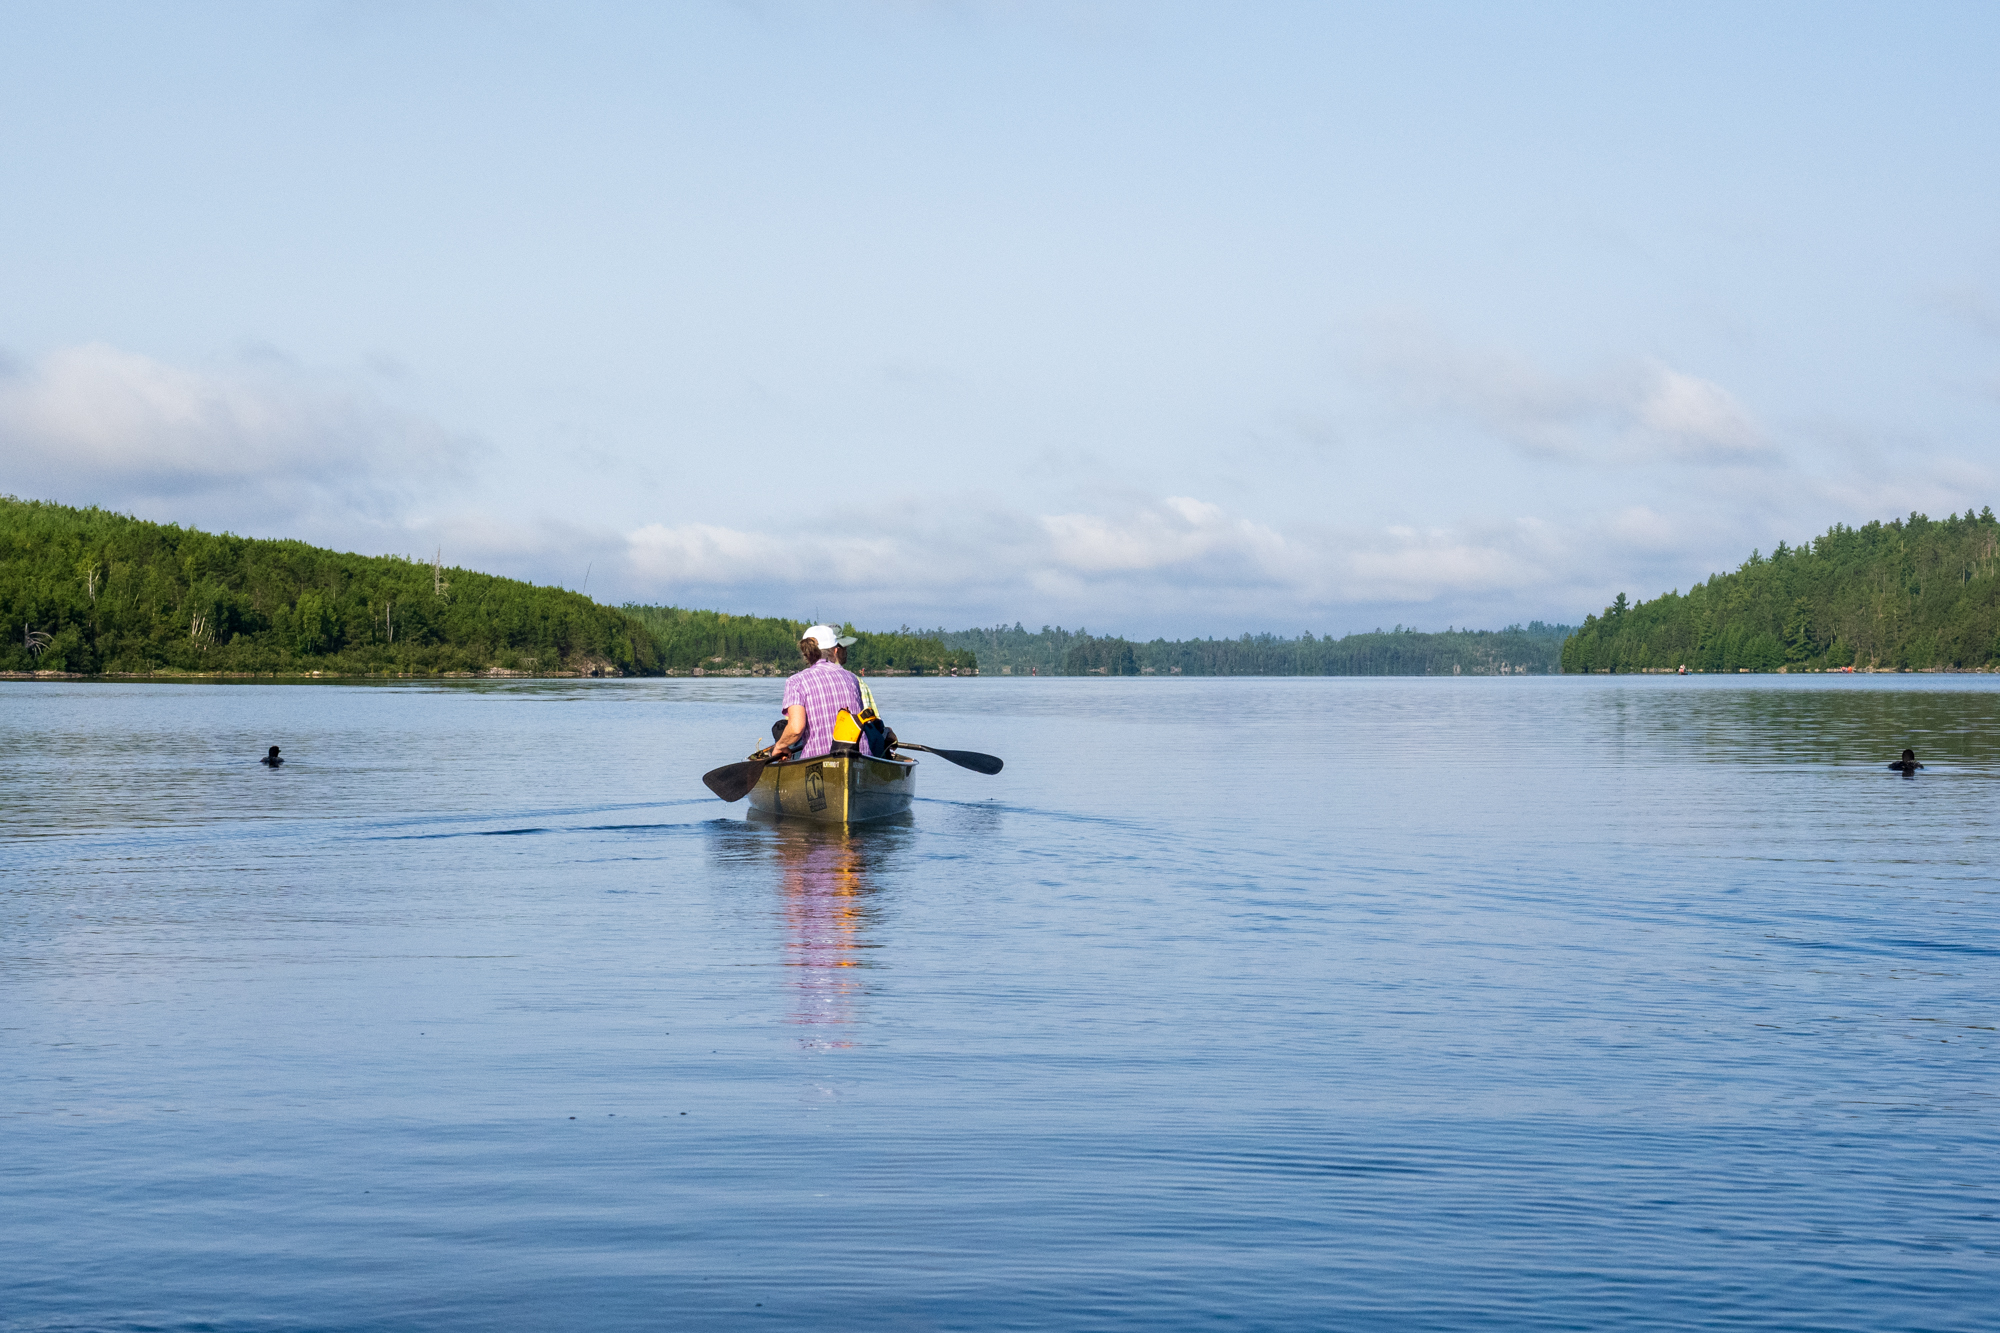
According to Paul Vincent, the Boundary Waters Canoe Area (BWCA) is one of America’s most remote and cherished wilderness areas accessible primarily by canoe. It extends 150 miles along the U.S.-Canada Border, with over 1,100 lakes and 1,500 miles of canoe routes. It was hard for me to imagine until I saw it firsthand. (Explore Minnesota) In the large lakes, the water is so clean, that it is drinkable without a filter.
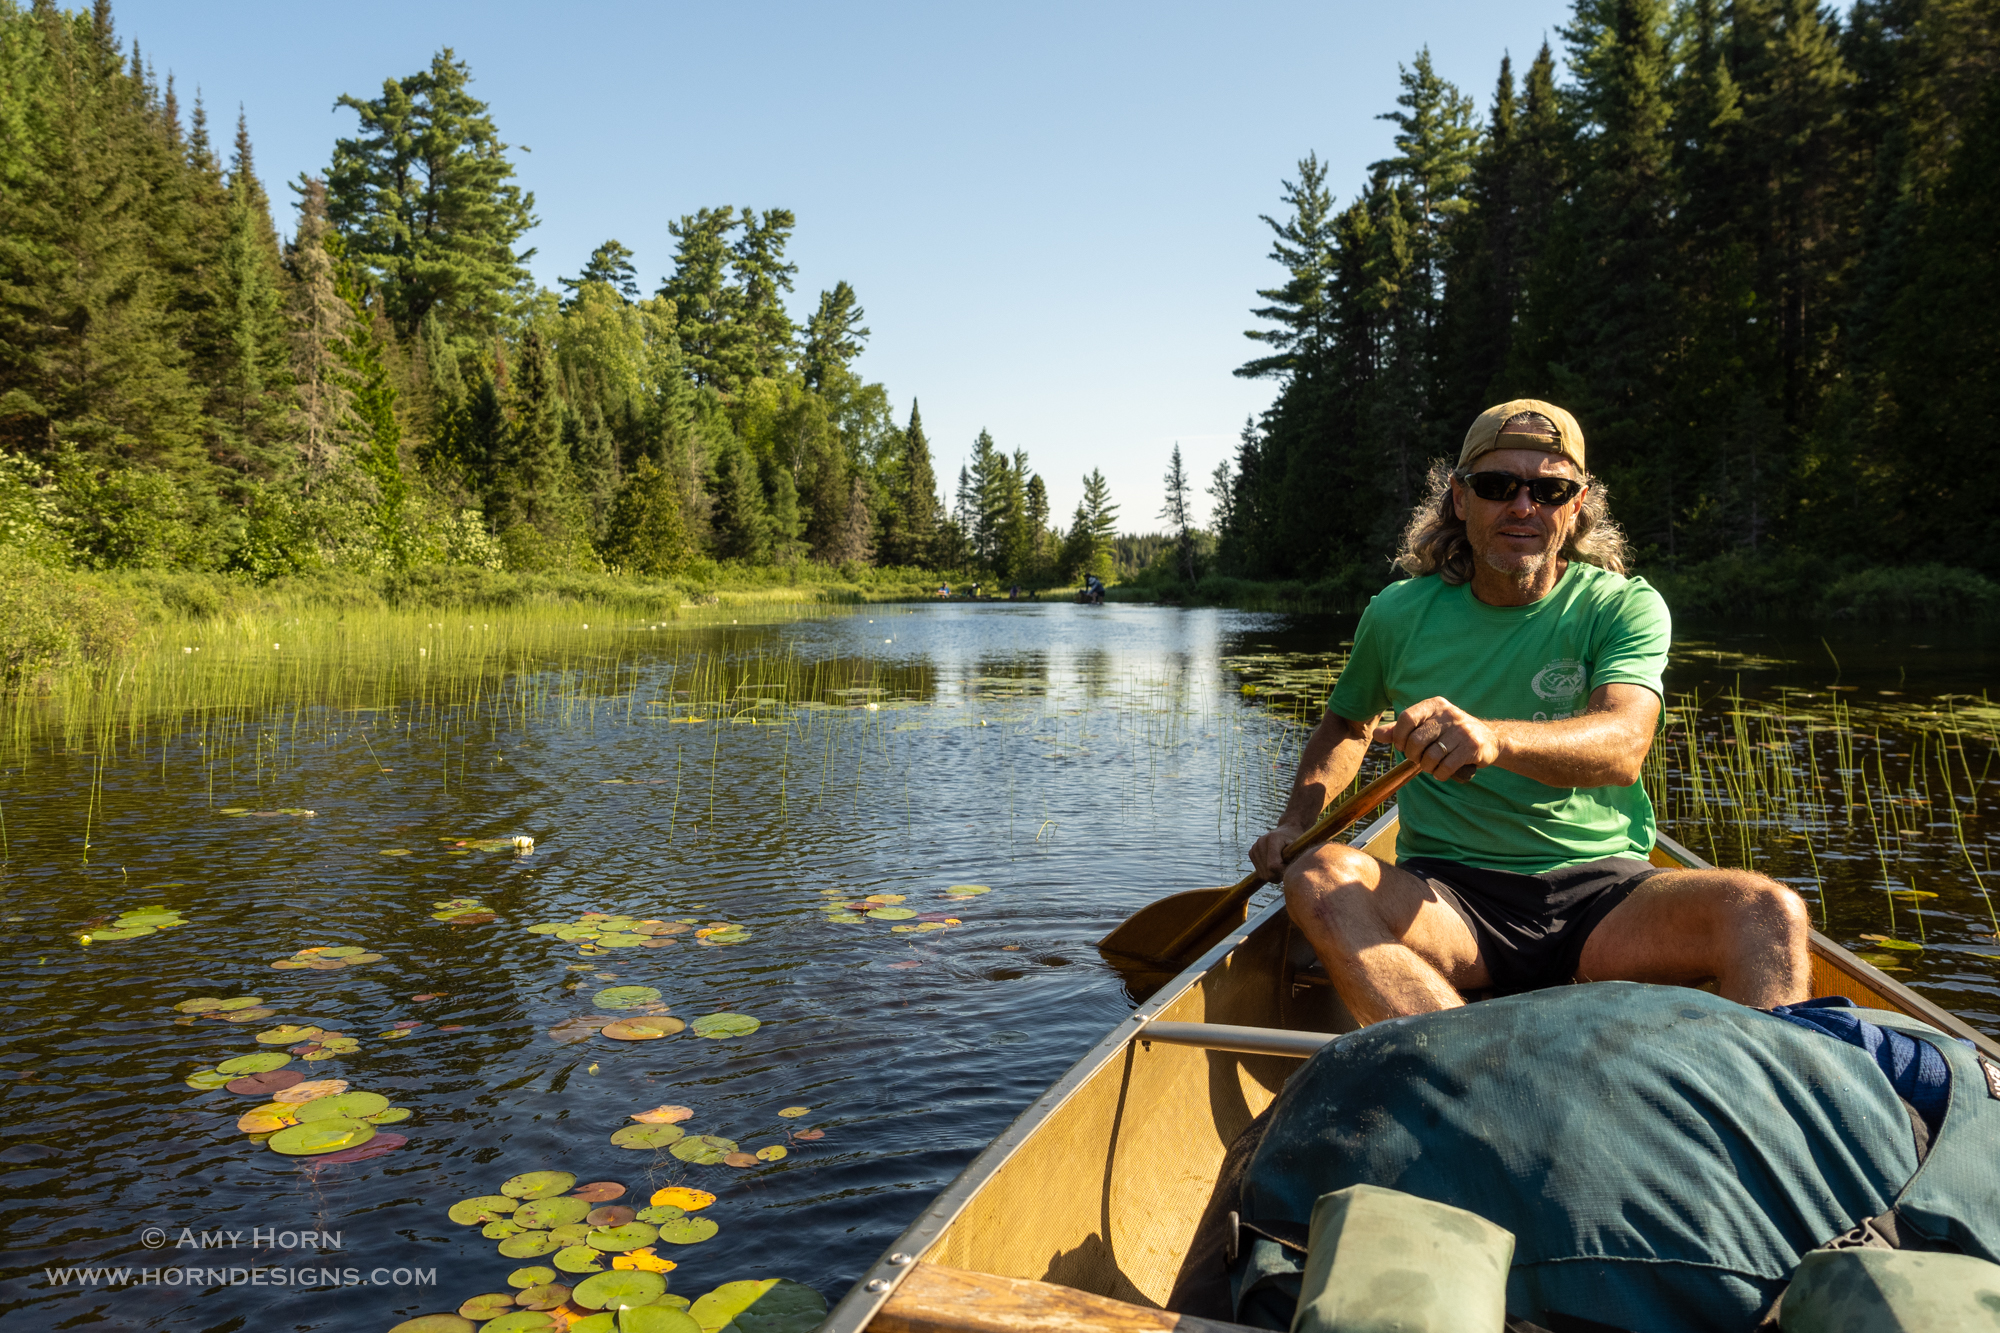
Rod and Amy Canoeing in the Boundary Waters
Preparation
Our good friends (Gretchen and Ron) have extensive knowledge and experience in the BWCA, so we followed all their gear recommendations. We brought one wet outfit and one dry outfit for the 6.5 days with additional waterproof gear/warm layers. The clothes were pretreated with Permethrin to discourage biting bugs and it worked well. We also acquired an ultra-lightweight tent, sleeping bags, and chairs to keep us comfy at camp. Of course, I brought a camera, so I bought a waterproof bag (OverBoard Waterproof SLR Bag) that clipped to the canoe or hung over my shoulder. The easy-to-access bag kept me shooting on land and water. Lastly, an outfitter provided us with canoes and packs.
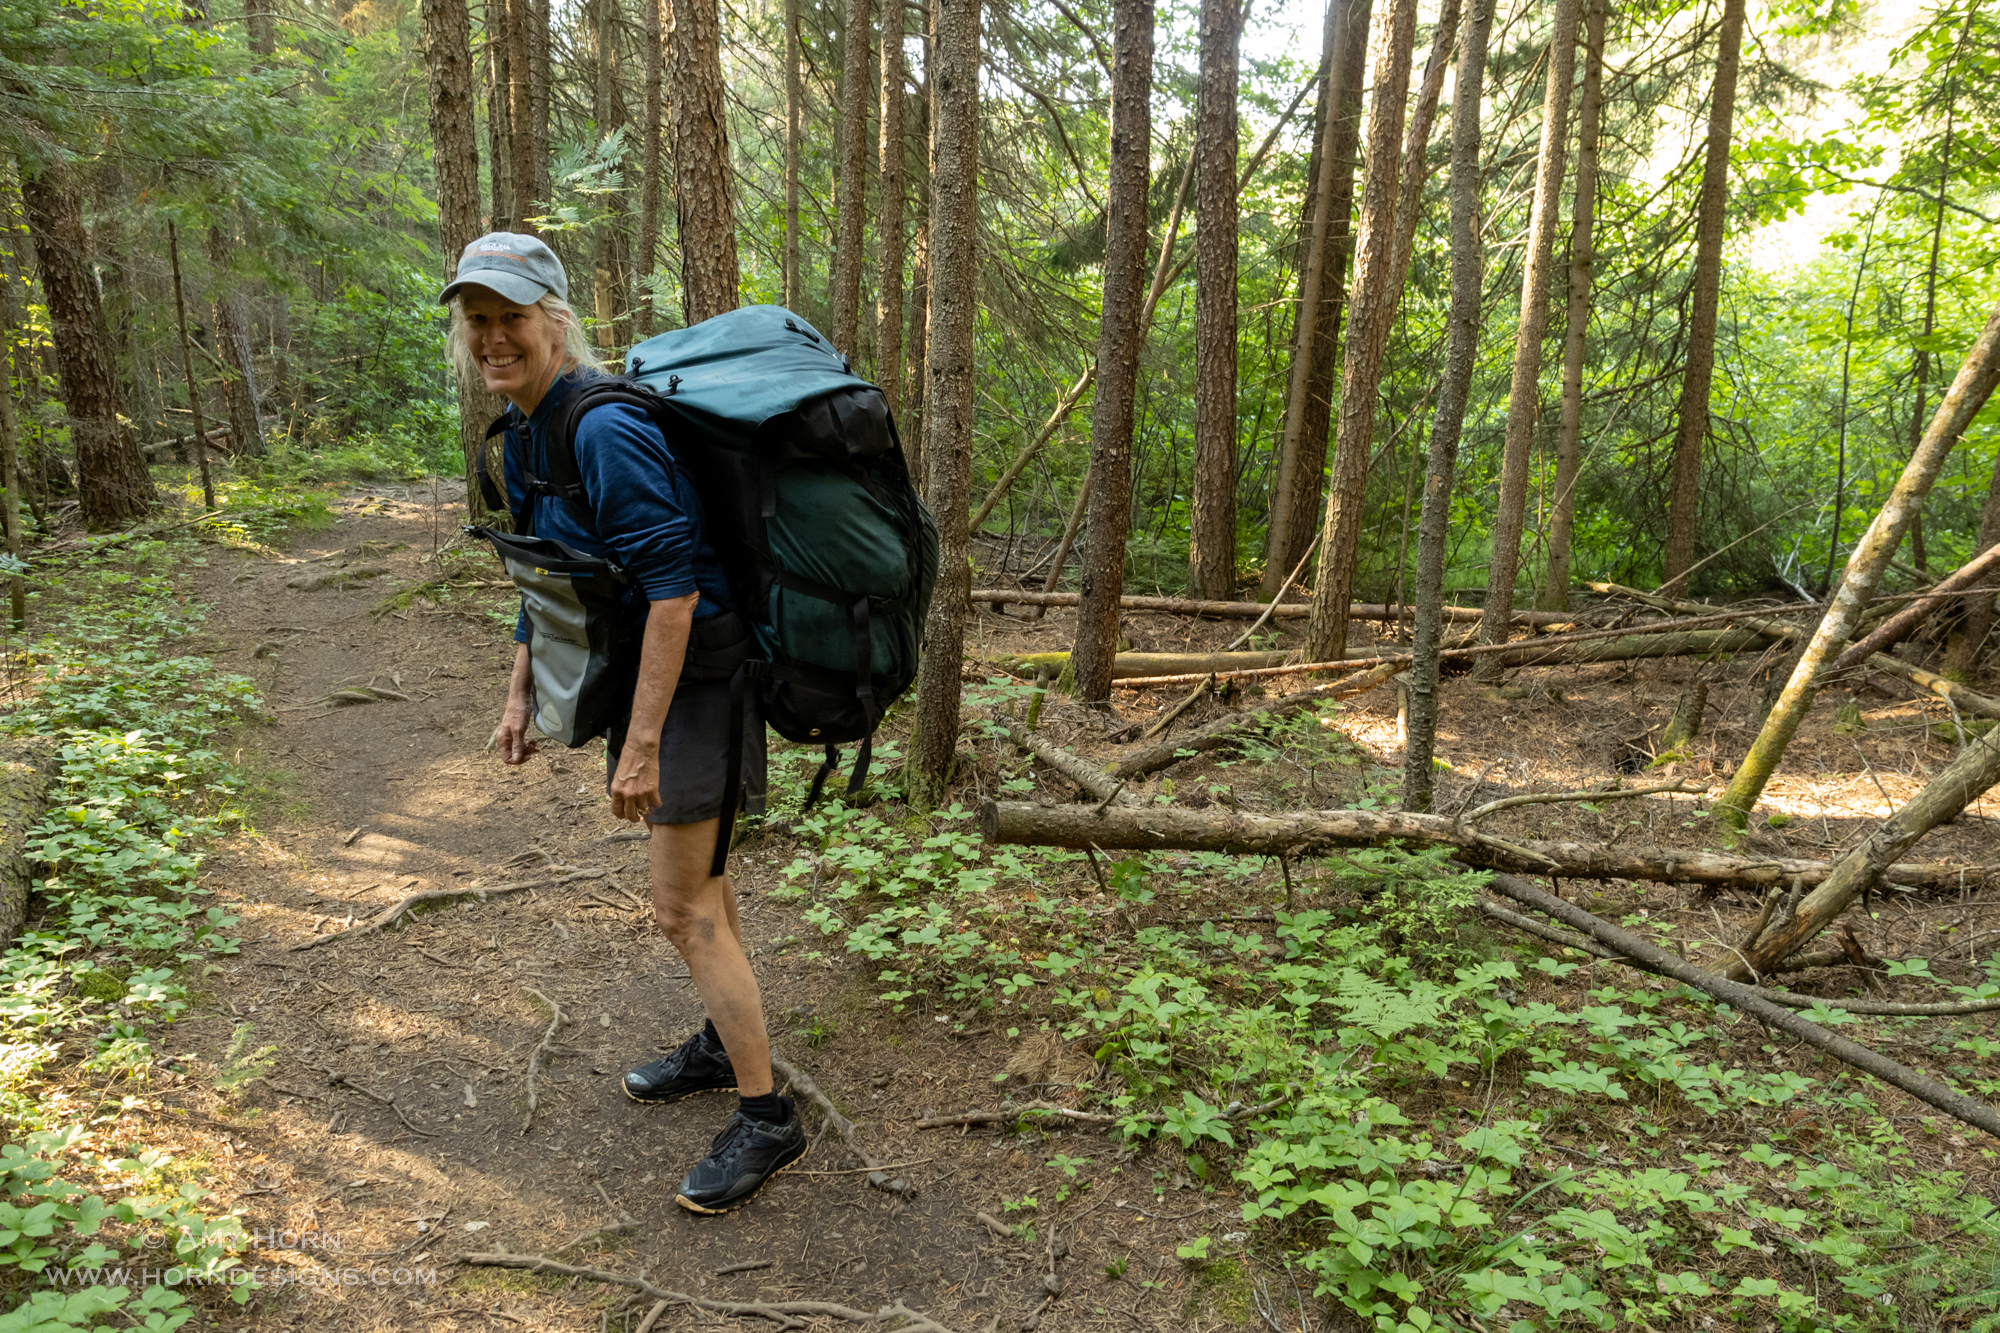
Our group included eight people with four canoes, and each canoe carried two people, with all their gear (personal gear, tent, sleeping bags) along with a portion of group gear (food, stoves, tarp, pans, etc). We carried food, a tarp, and the pancake griddle pans as our group gear. This made for a heavy pack. When I first put it on, I started falling backward. Rod caught me and expressed concern about whether I would be able to carry it all. We estimated the pack was 60 pounds. After cinching down the straps and leaning forward, I was ready to go.
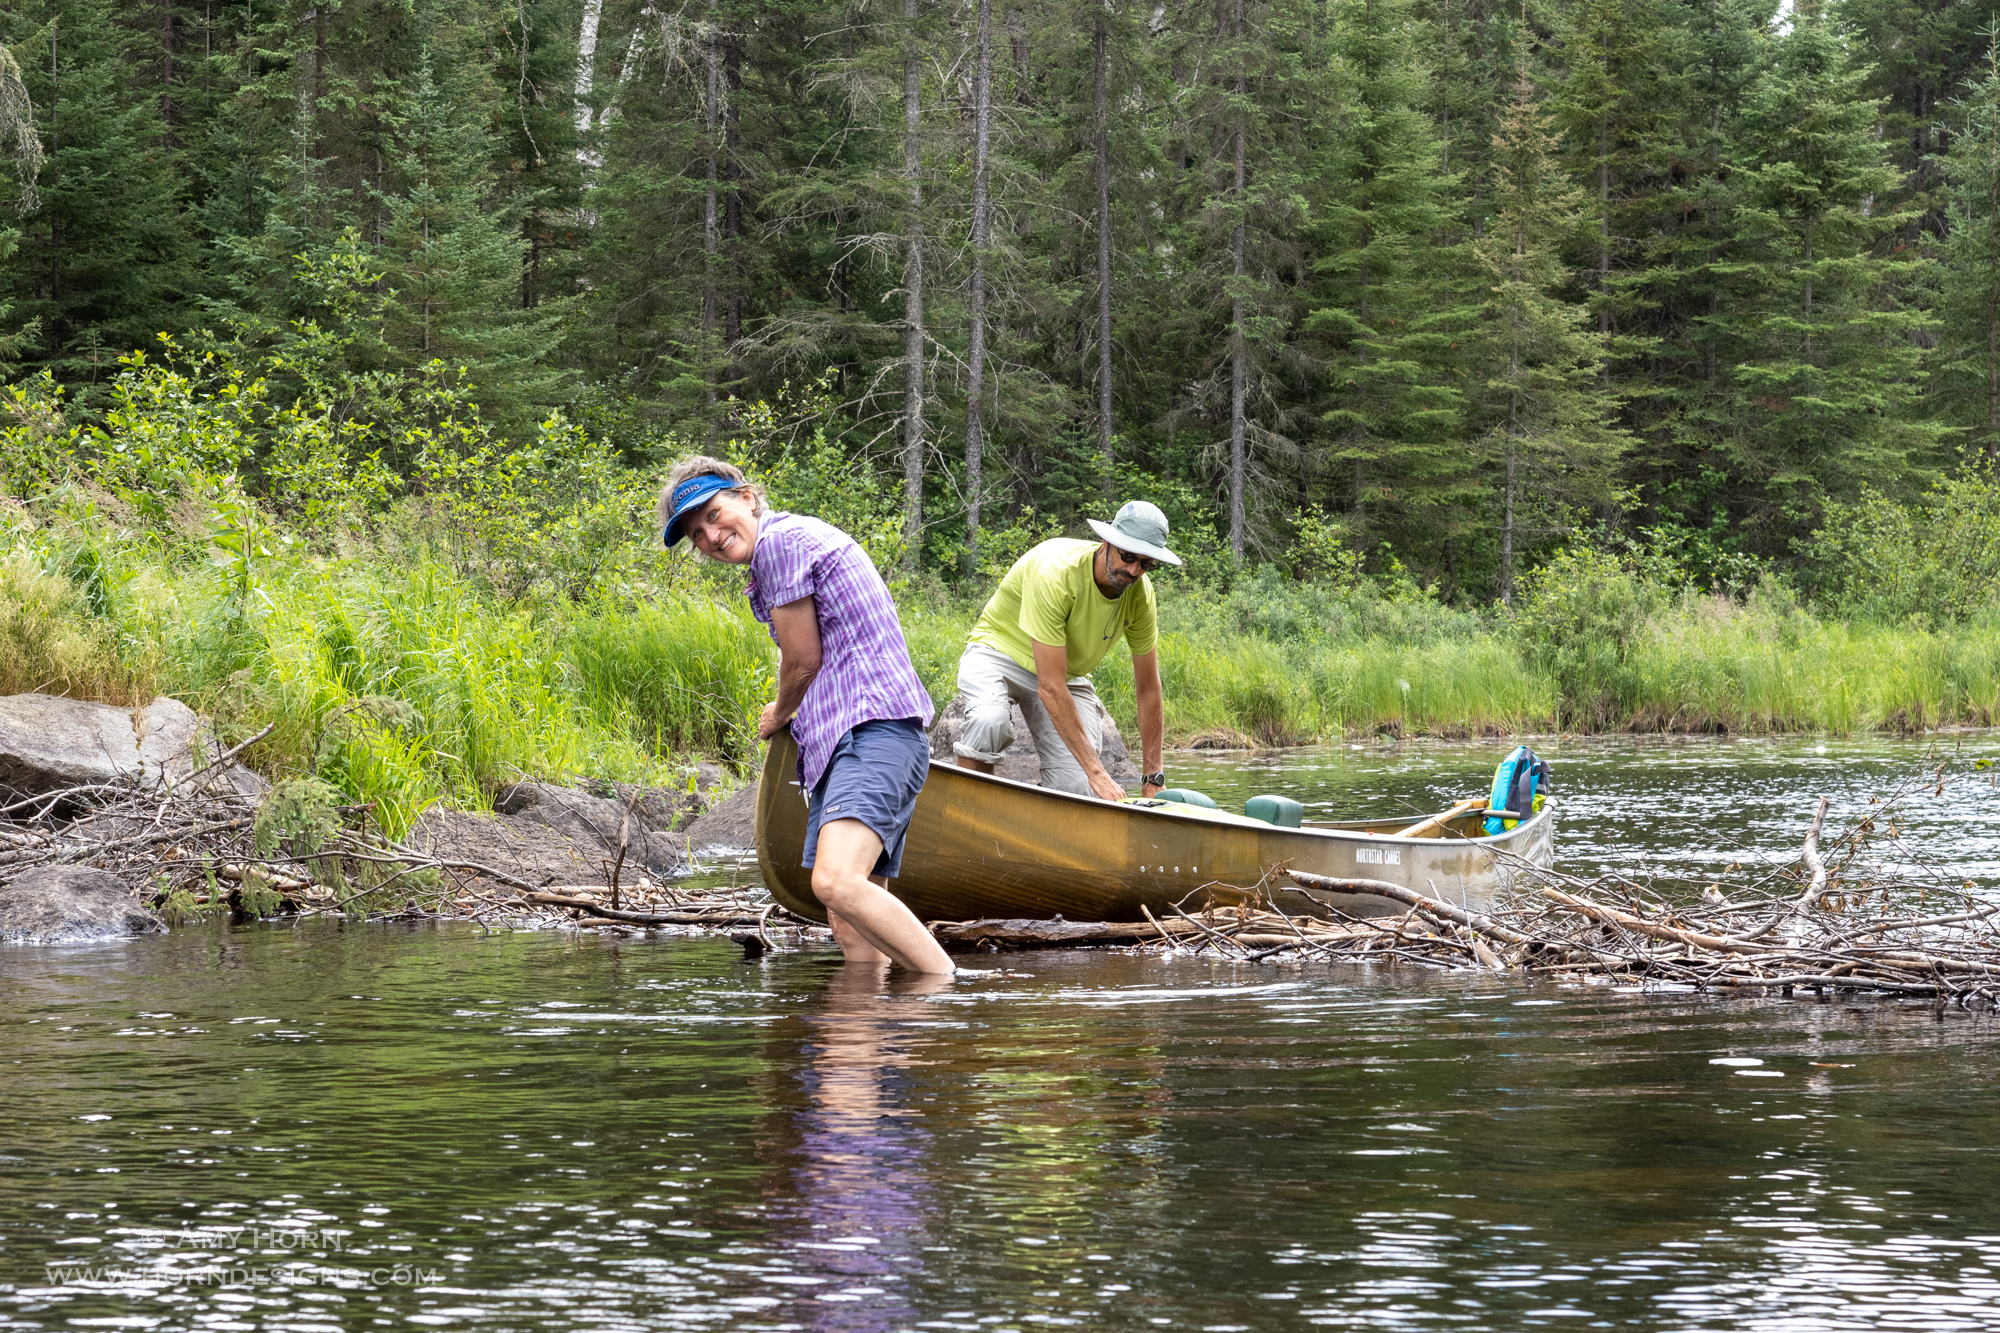
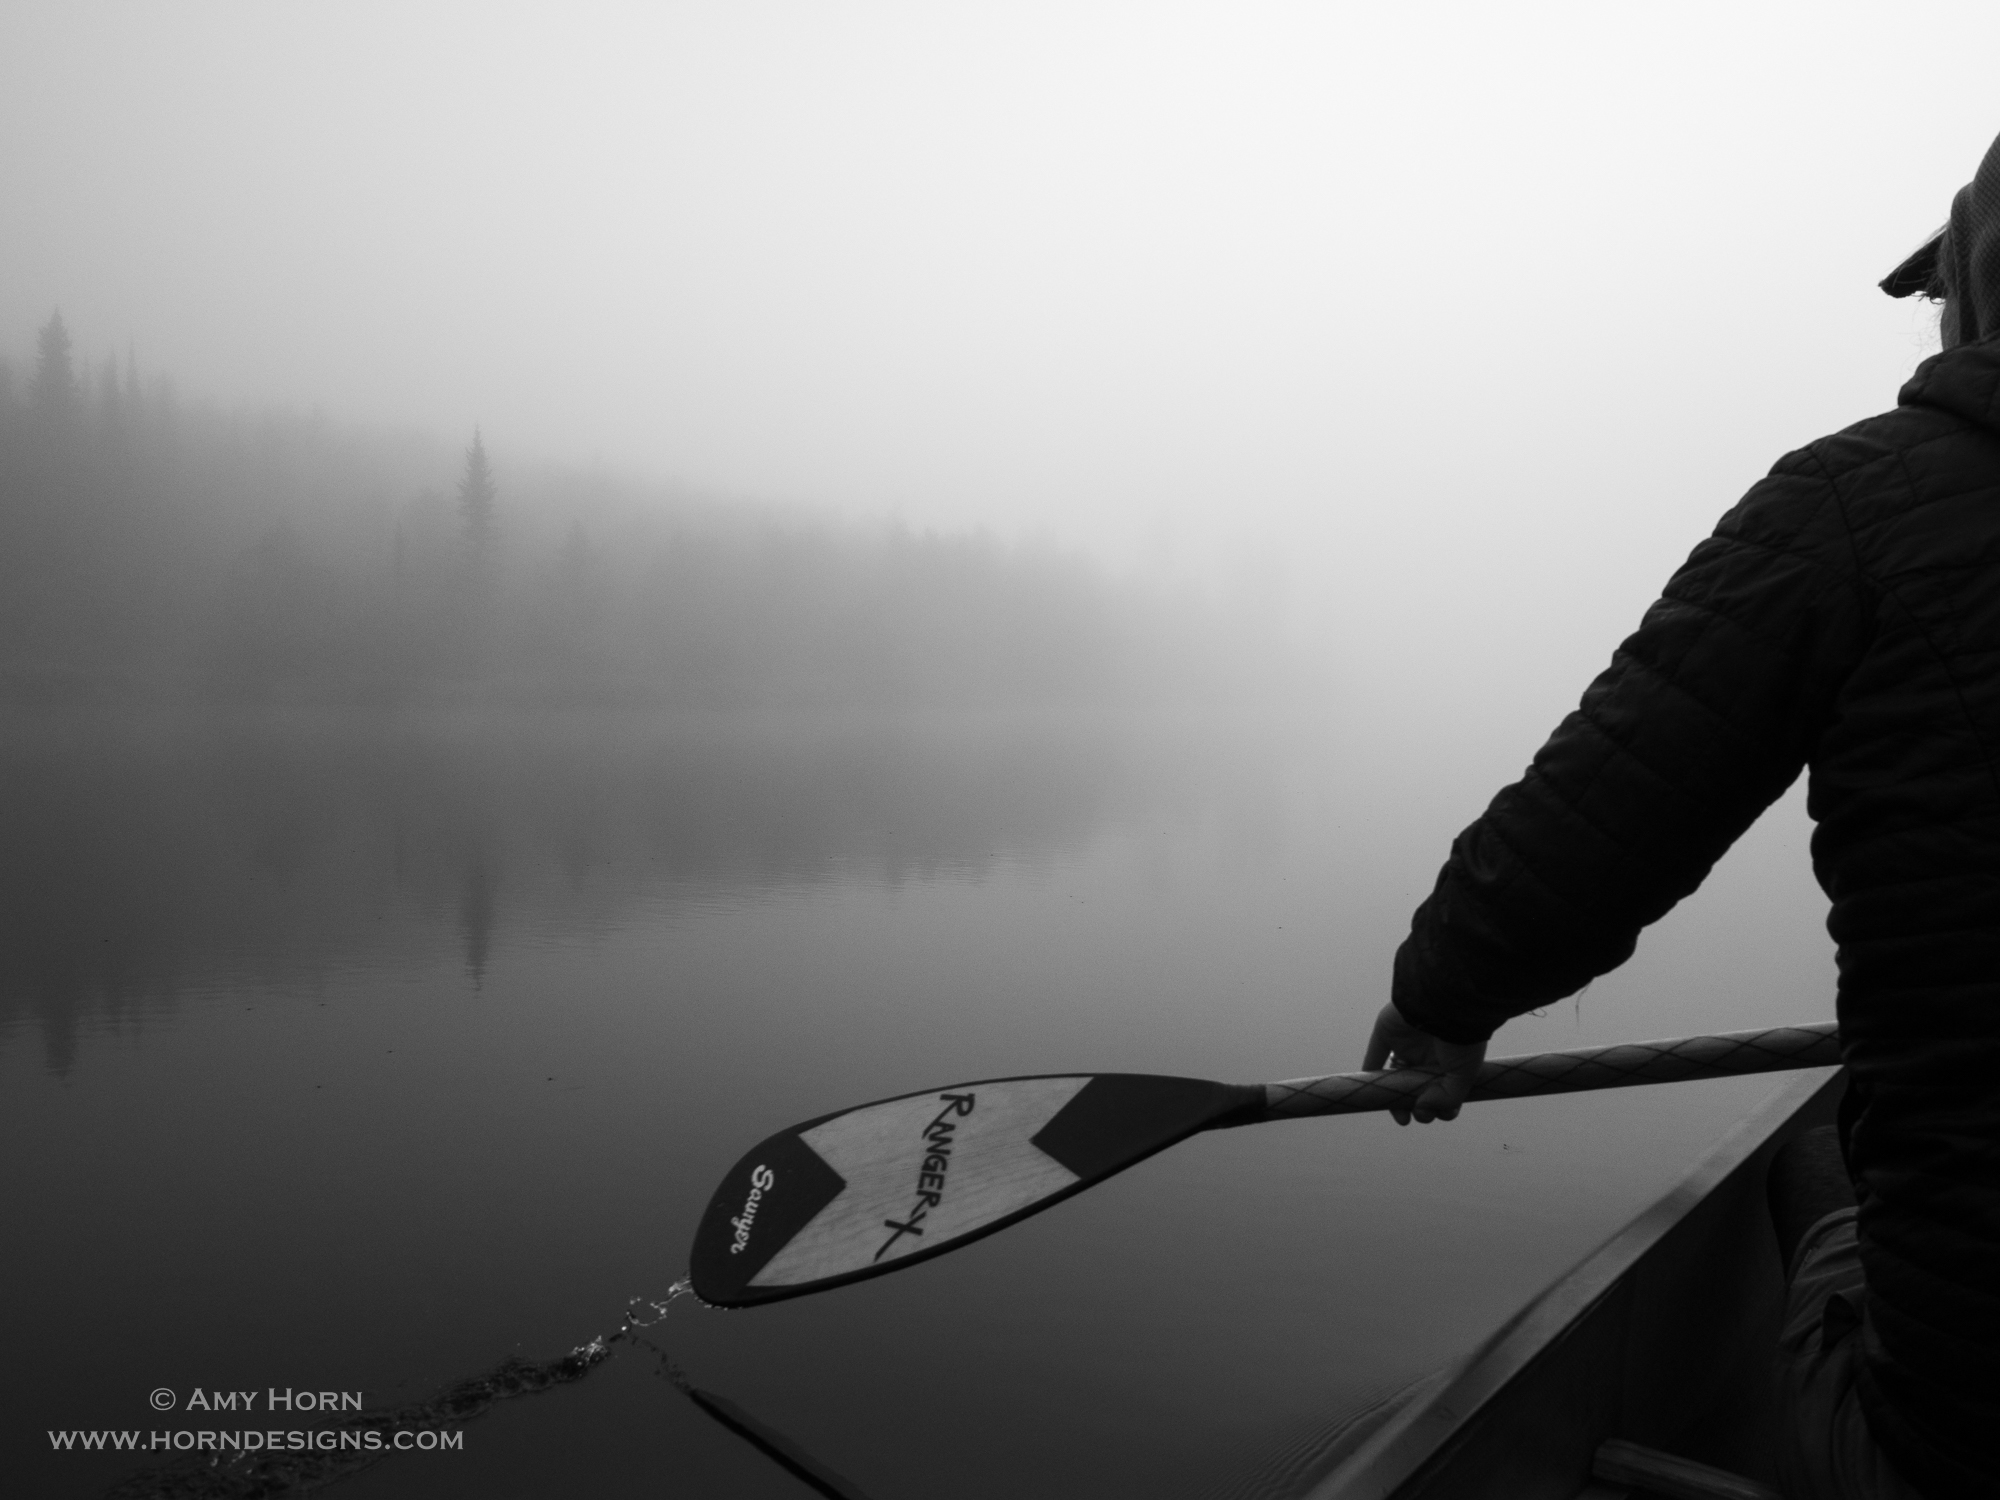
Rod steering the canoe.Gretchen & Ron passing over a beaver dam.
On the Water
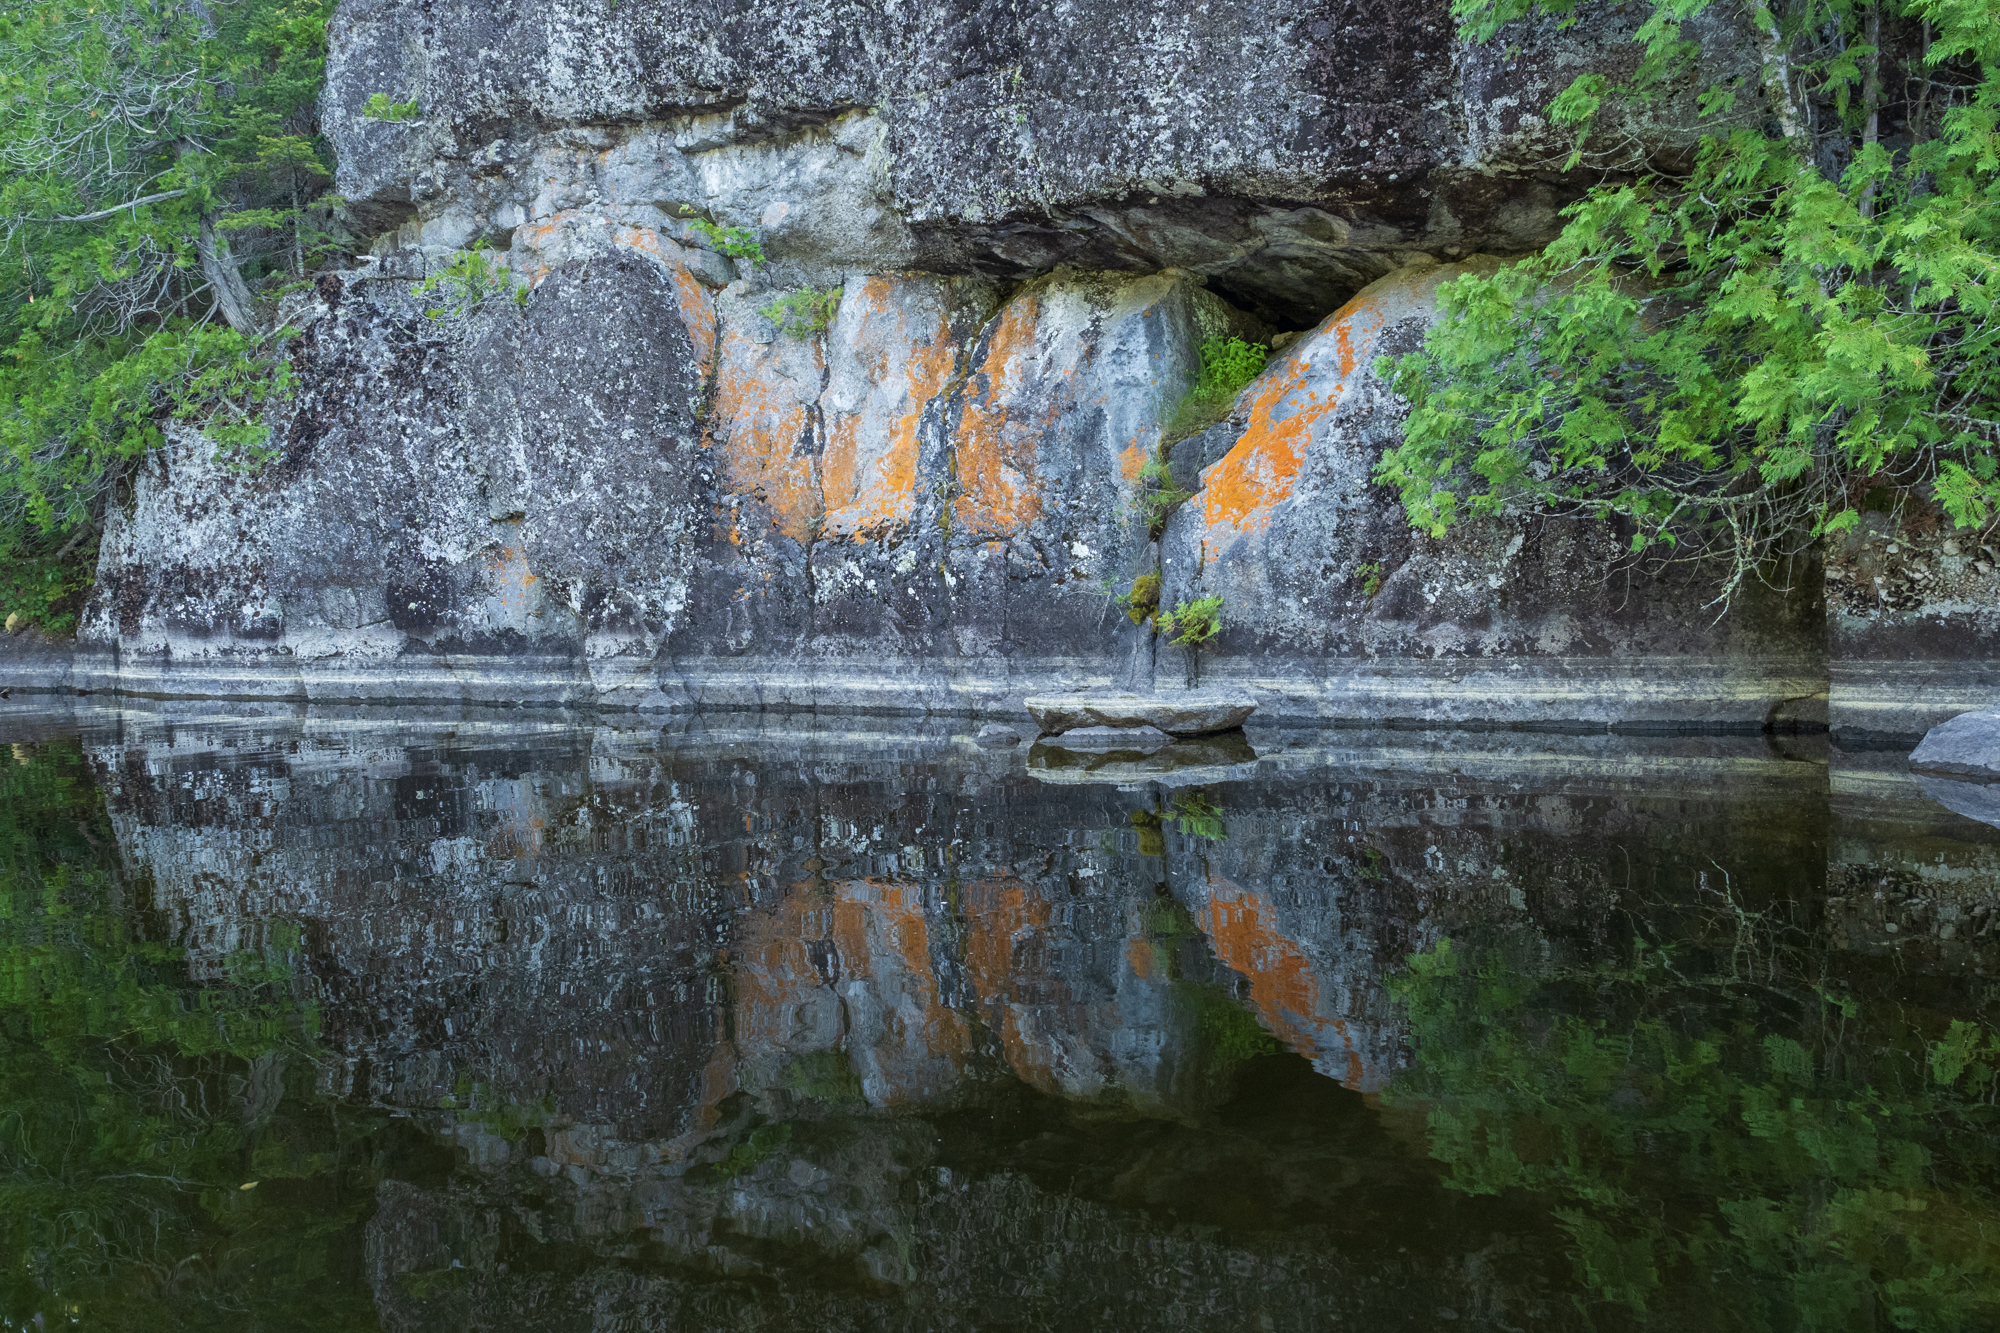
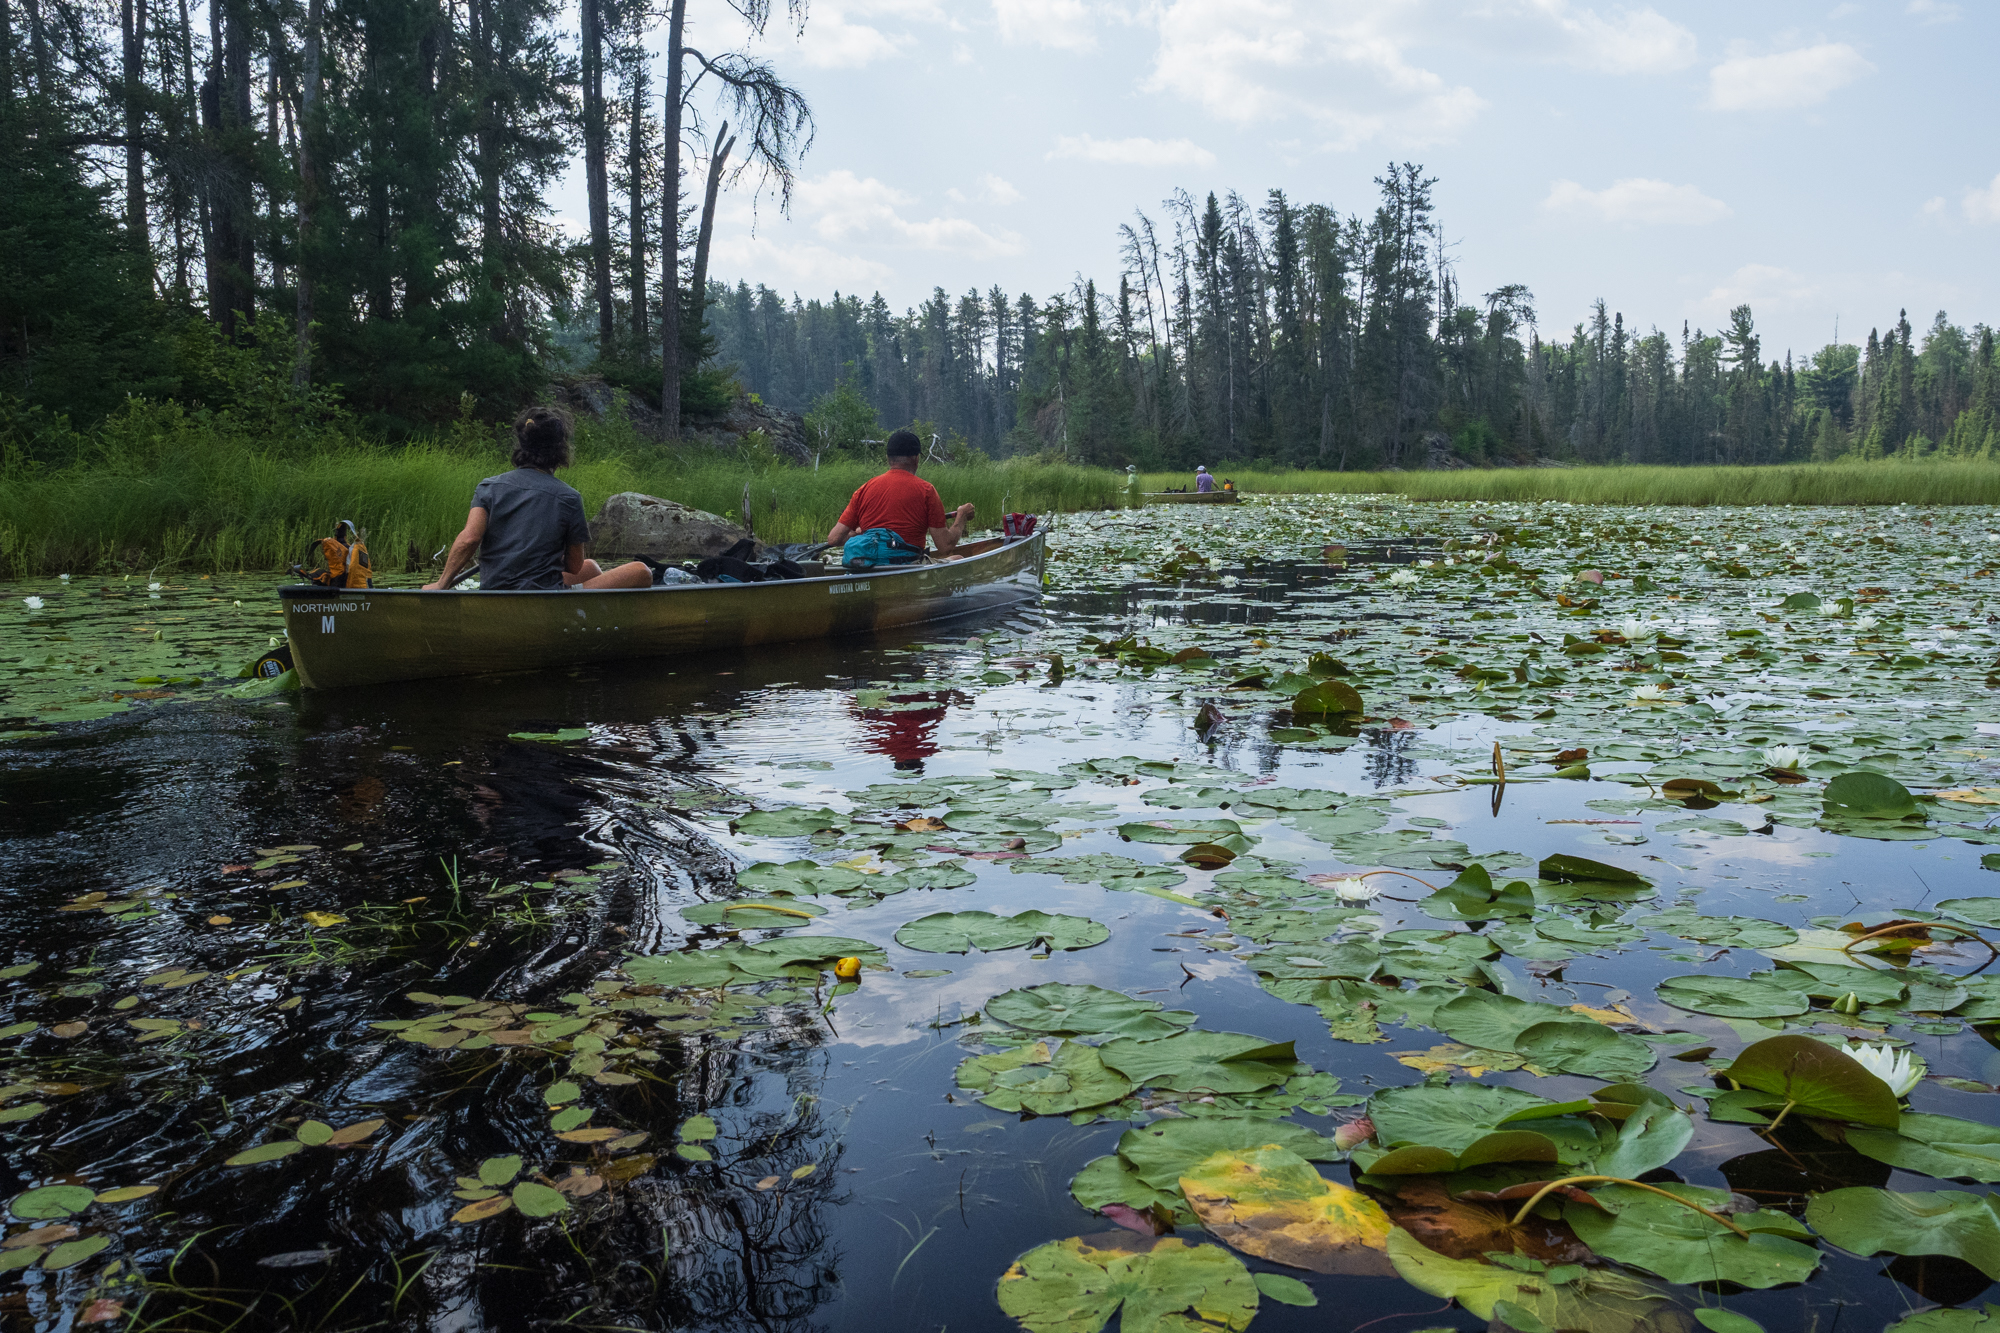
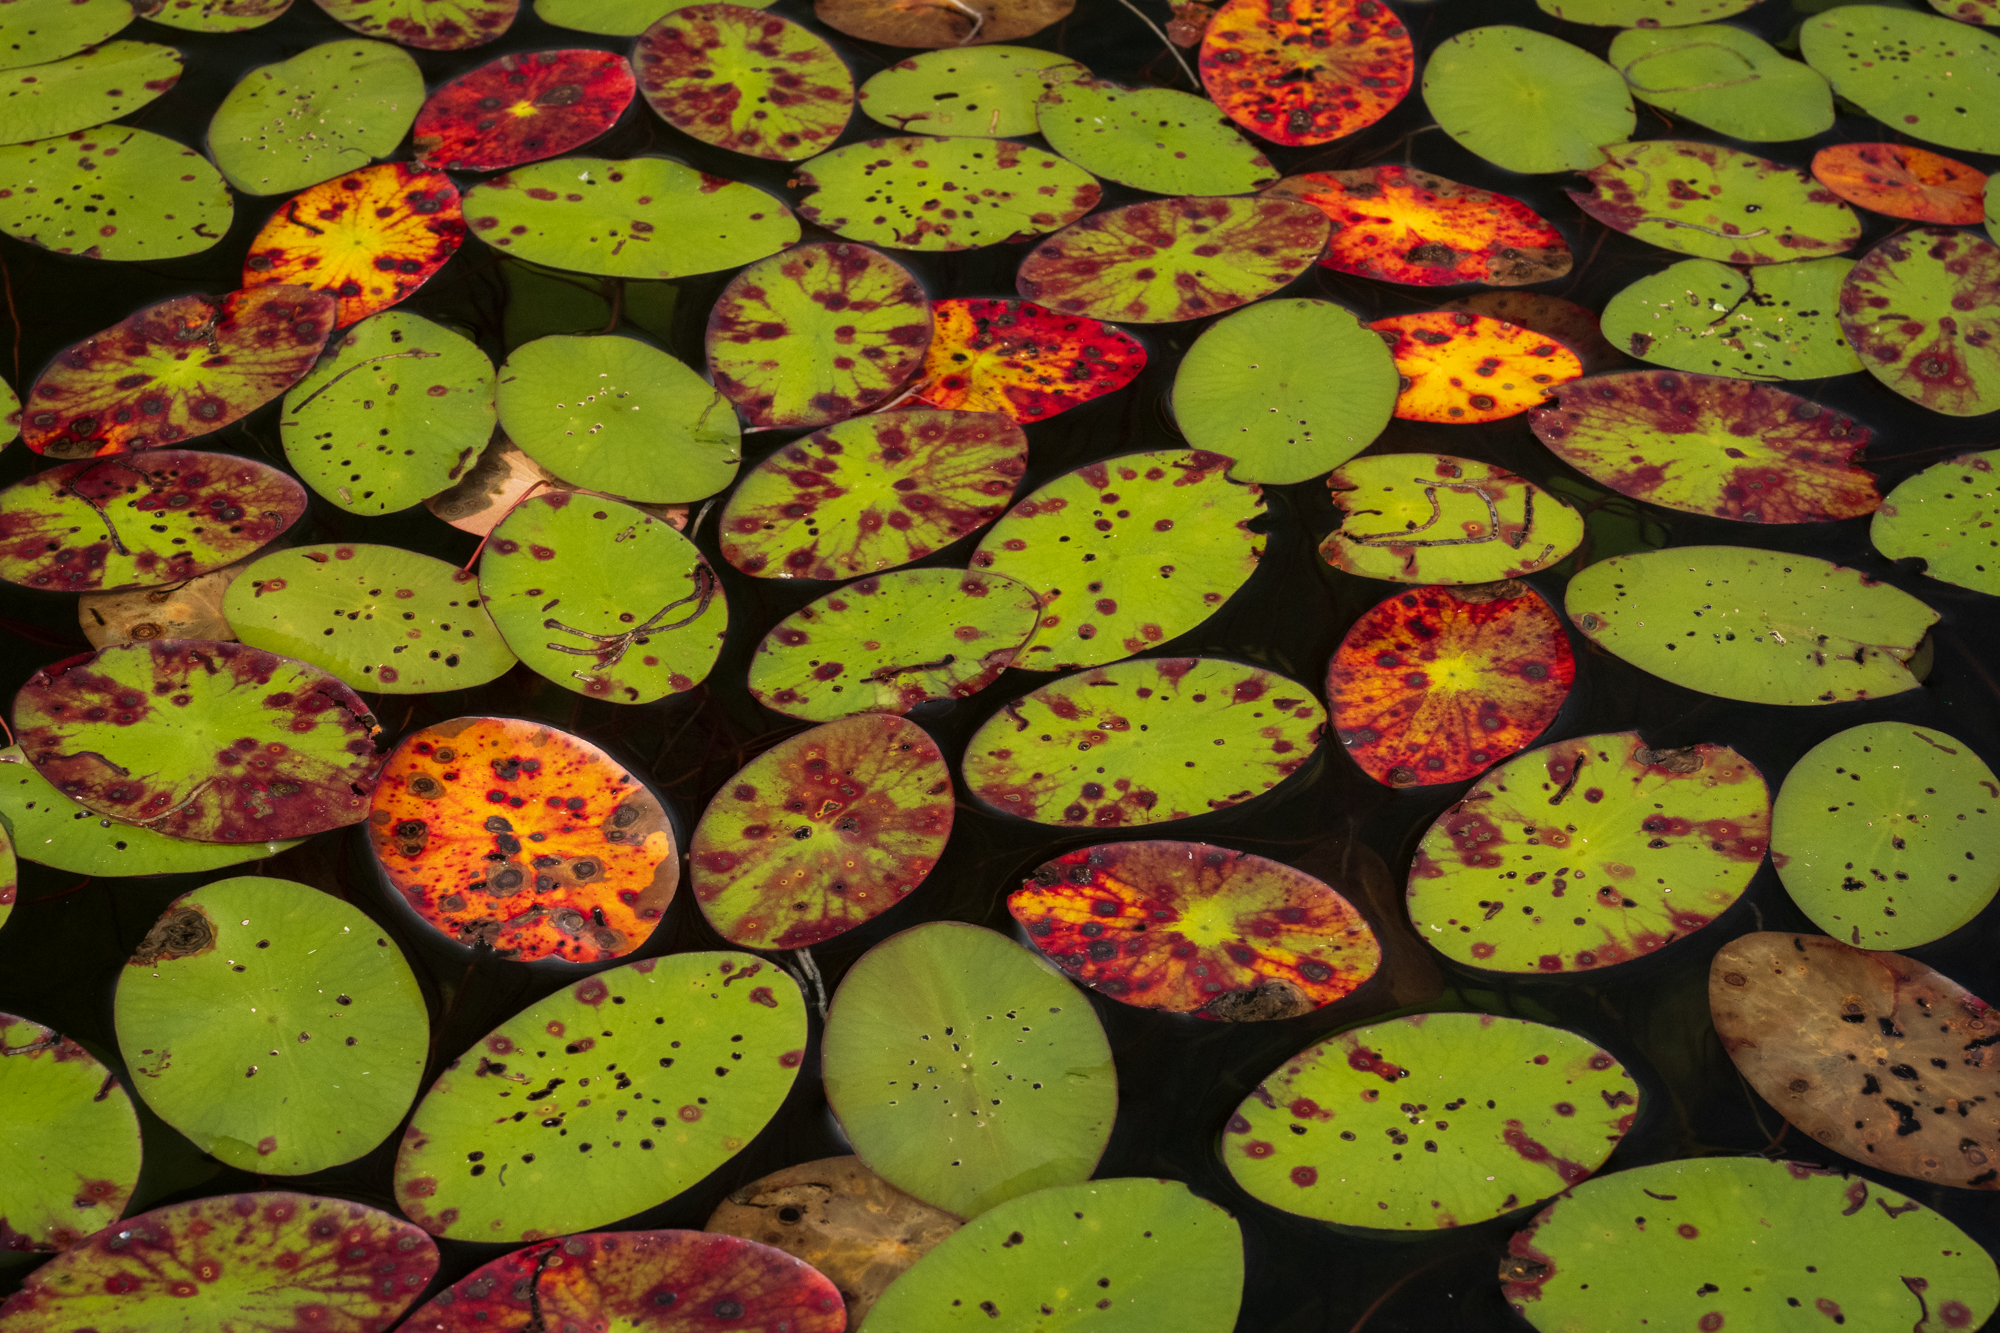
We put in at Baker Lake, a small quiet lake with lily pads, flowers, and towering trees along the shore. An amazing sight to see. After a mere 2000 feet of paddling, we got out of our canoes to portage. Portaging consists of carrying your gear (canoe too) across the land to get to the next lake or river. At this portage, we decided to walk the canoes through the stream and bypass the land portage. That put us on Peterson Lake.
In such a short timeframe, we were immersed in nature where the only sounds came from loons, white-throated sparrows, eagles, paddles, and us. As we paddled, Gretchen and Ron taught us how to read the maps identifying approved campsites and portages. We floated past lily pads and dense forests, and occasionally, beaver dams caused us to exit the canoe. After two days, Rod and I were somewhat pros at portaging. He picked up the pack and put it on my back before we left the water. Then, he picked up the canoe, flipped it on his shoulders and we hiked to the other side. Our portages ranged from 25 feet to almost a mile and are measured in “rods” (unit of measurement). 320 rods equal a mile.
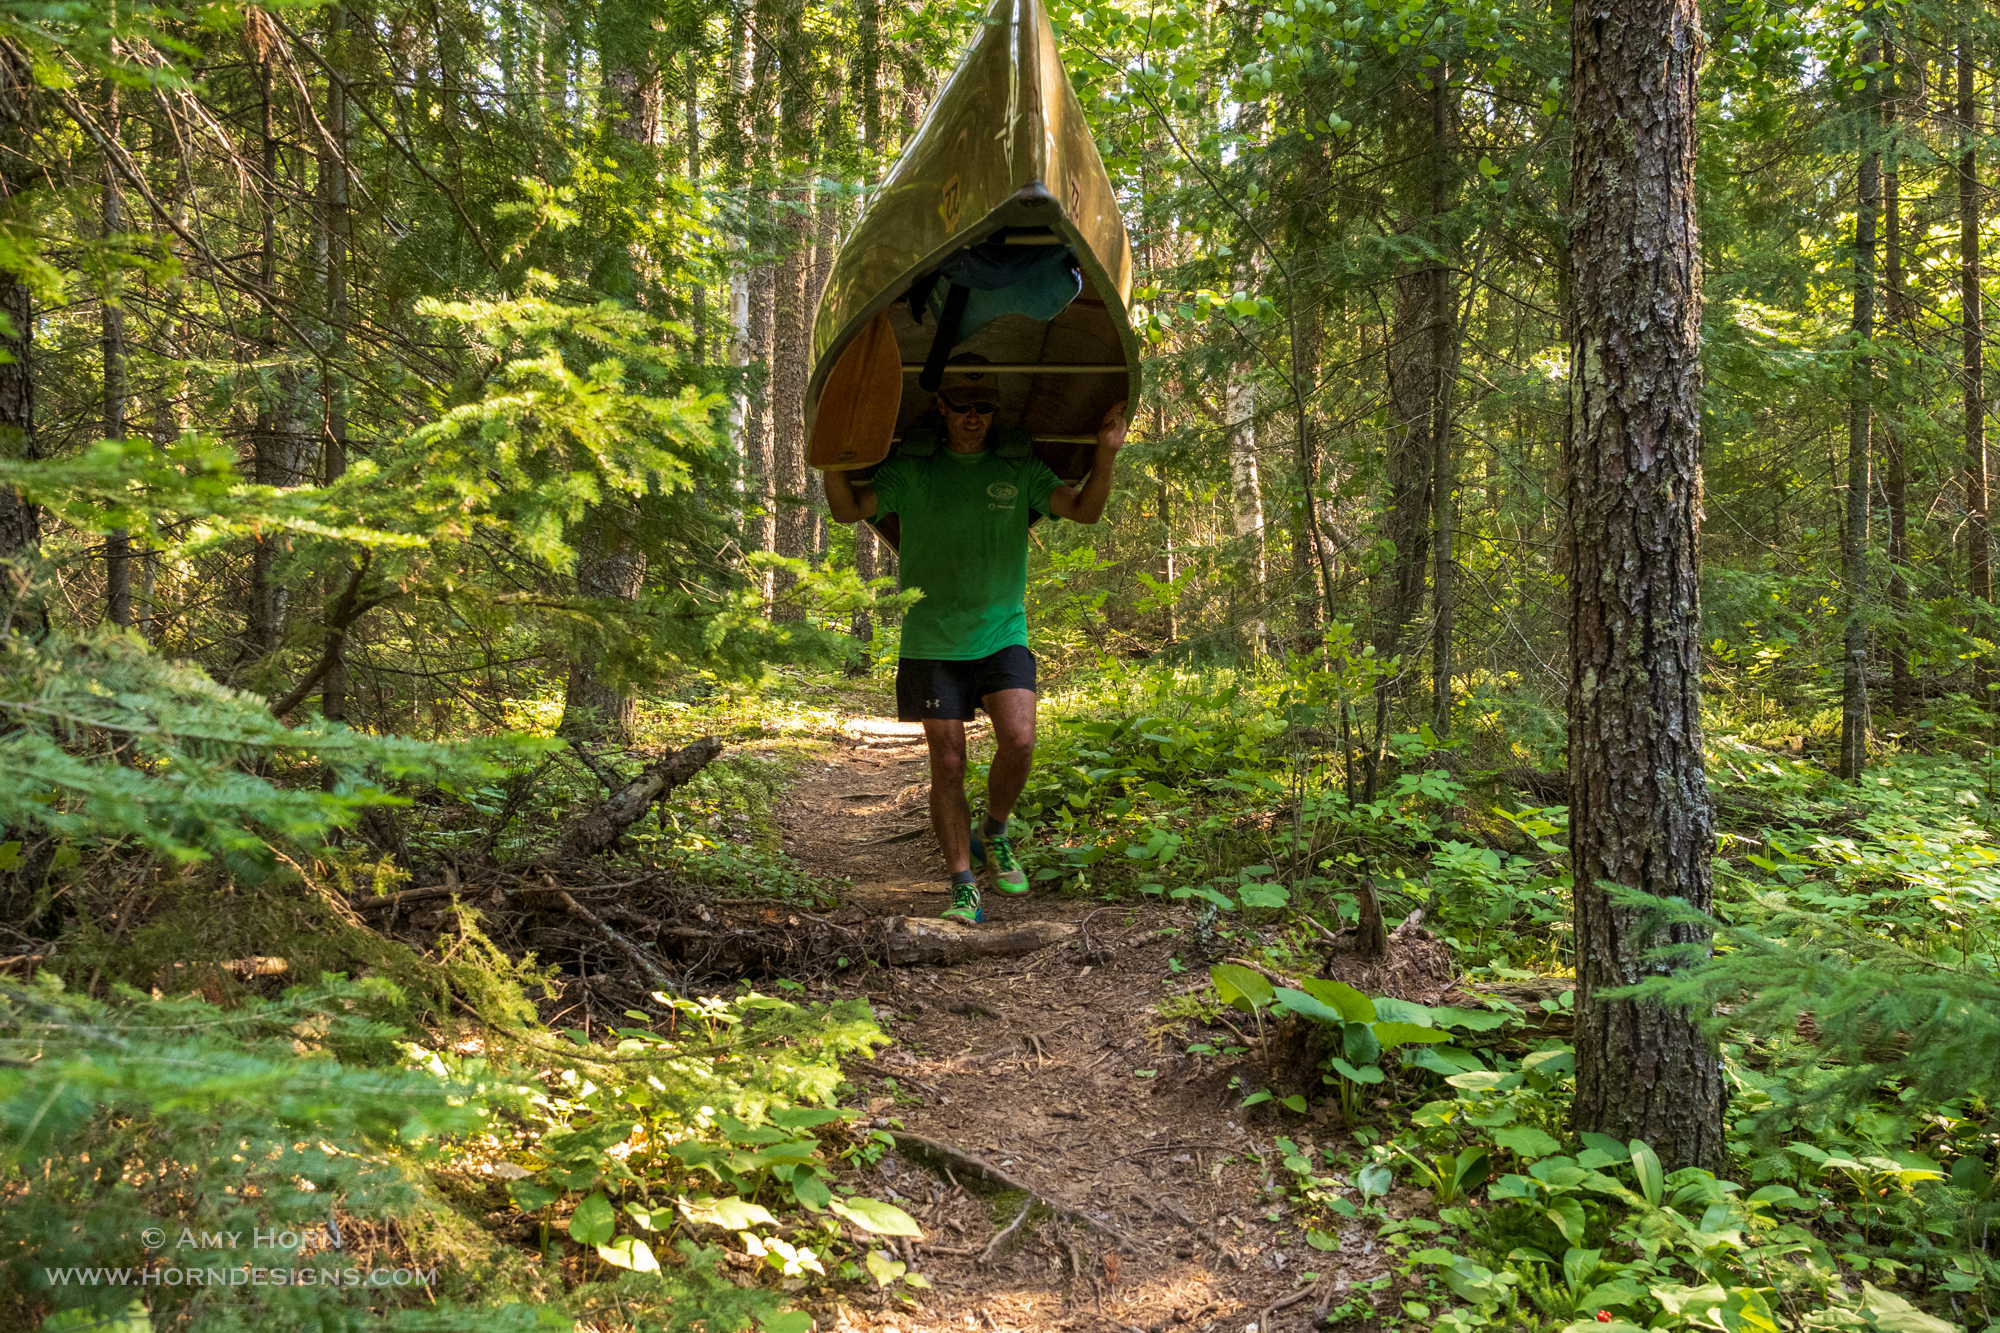
Amy’s heavy pack.Rod portaging.
Portaging
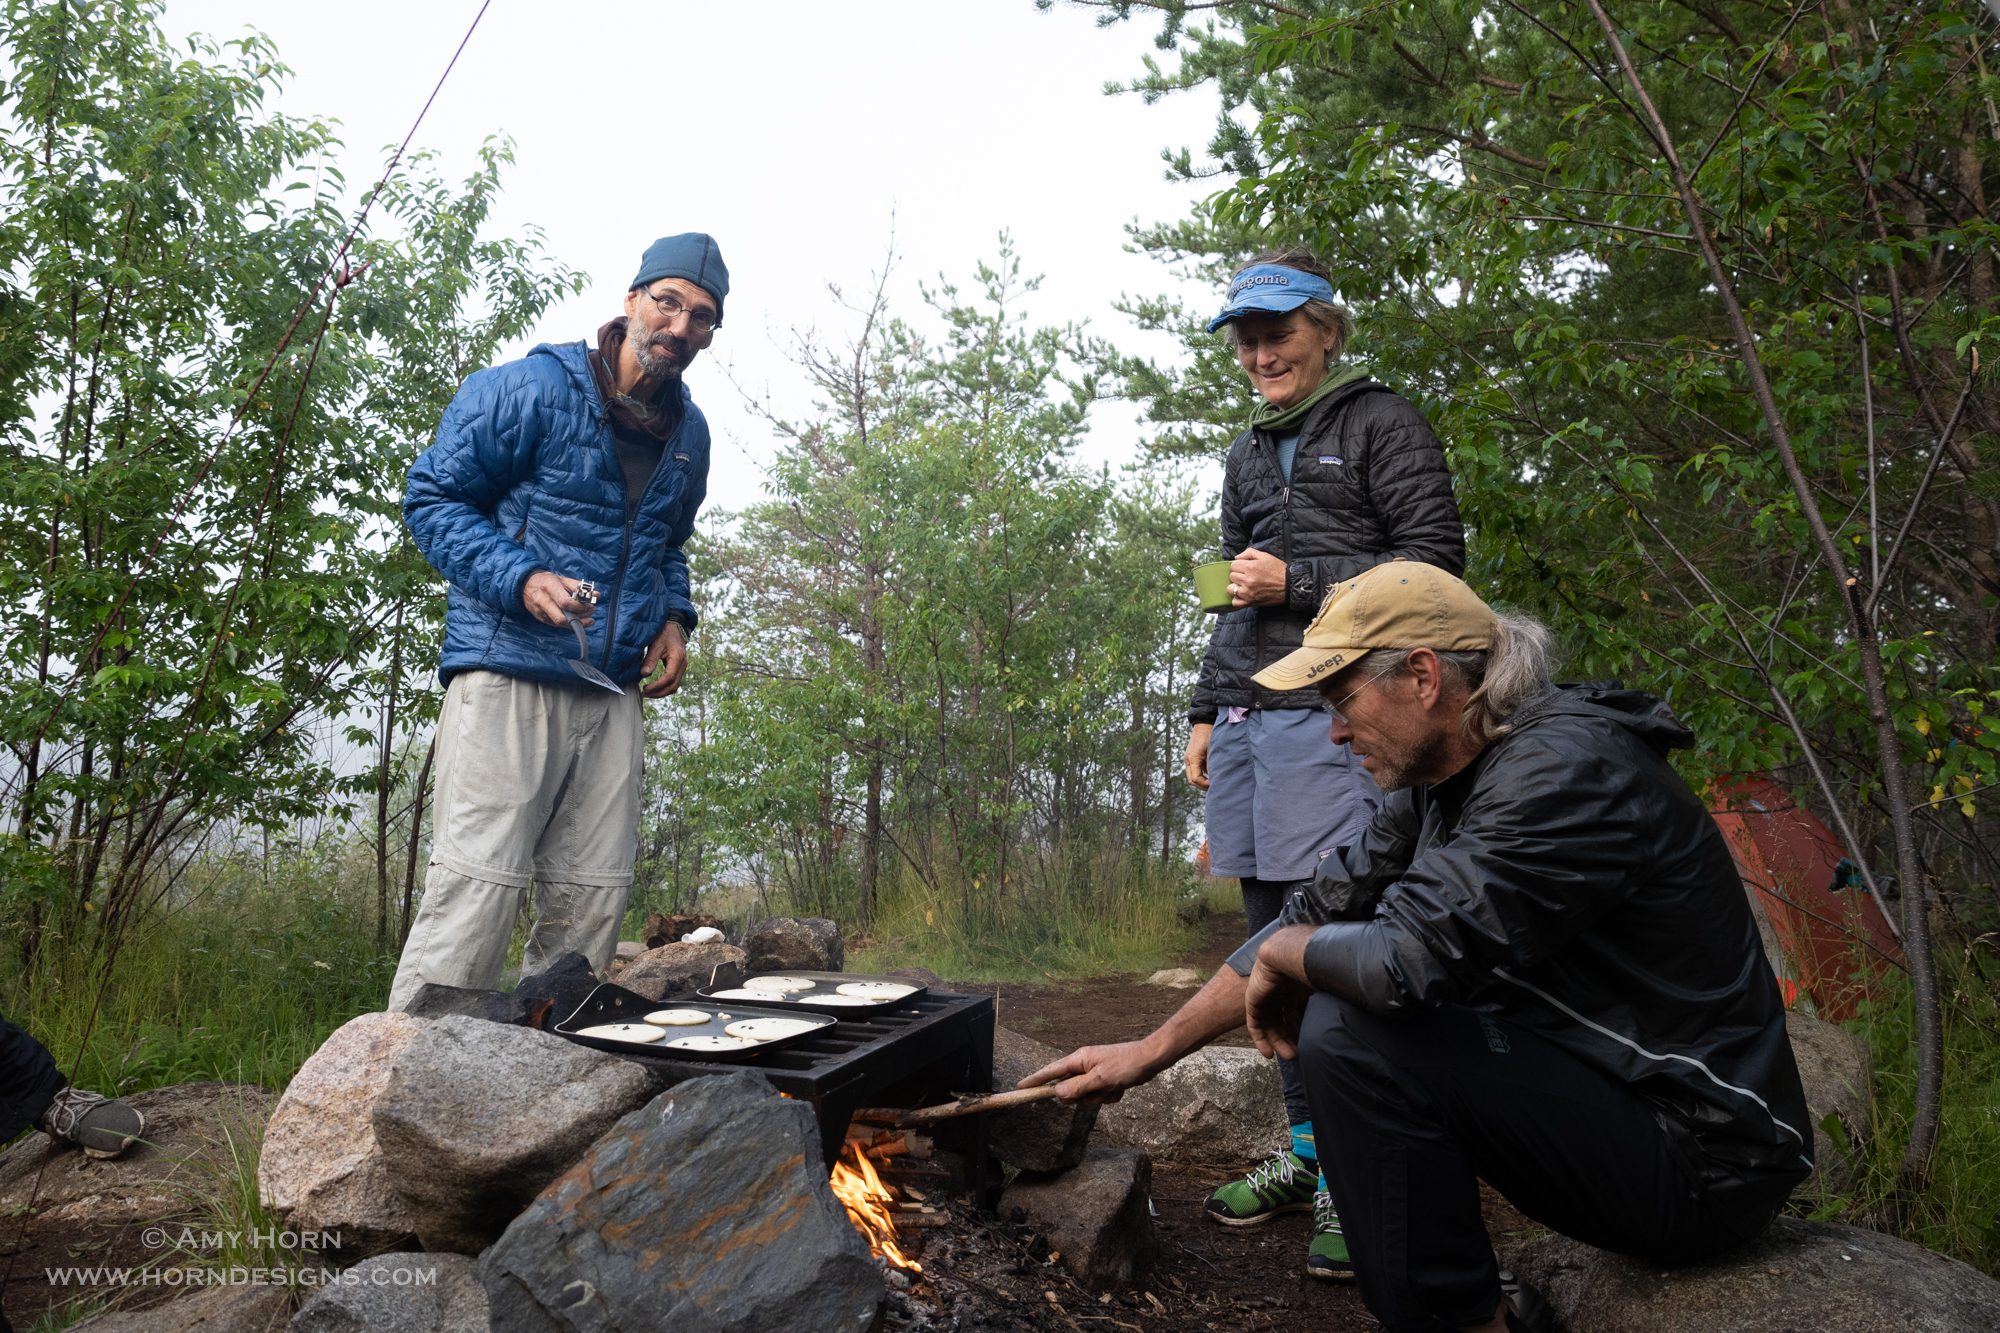
The best part of portaging was grabbing the wild blueberries, raspberries, and chanterelle mushrooms. On one portage, others in our group picked a bunch to use in our pancakes the next morning. We saw bear scat, moose footprints, leaches, swans, frogs, and turtles. On a few of the longer portages when I was hiking alone, I did sing out loud to avoid encountering any bear.
We paddled and portaged an average of 7 miles a day with a total of 40+ miles for the week. Although portaging got easier, I slipped once and fell on my back (pack). The pack was so awkward, I looked like a turtle and needed help getting up. Each day, we paddled to a campground for lunch. Sometimes we took a swim, then paddled more to a new campground to pitch our tents for the night. We passed some people on canoes, but most of the time it was just our group. We did encounter rain on several occasions, but we had the right gear, so it wasn’t problematic. It was all so relaxing.
Paddling through the reeds.Quiet morningSelfie! Amy & Rod
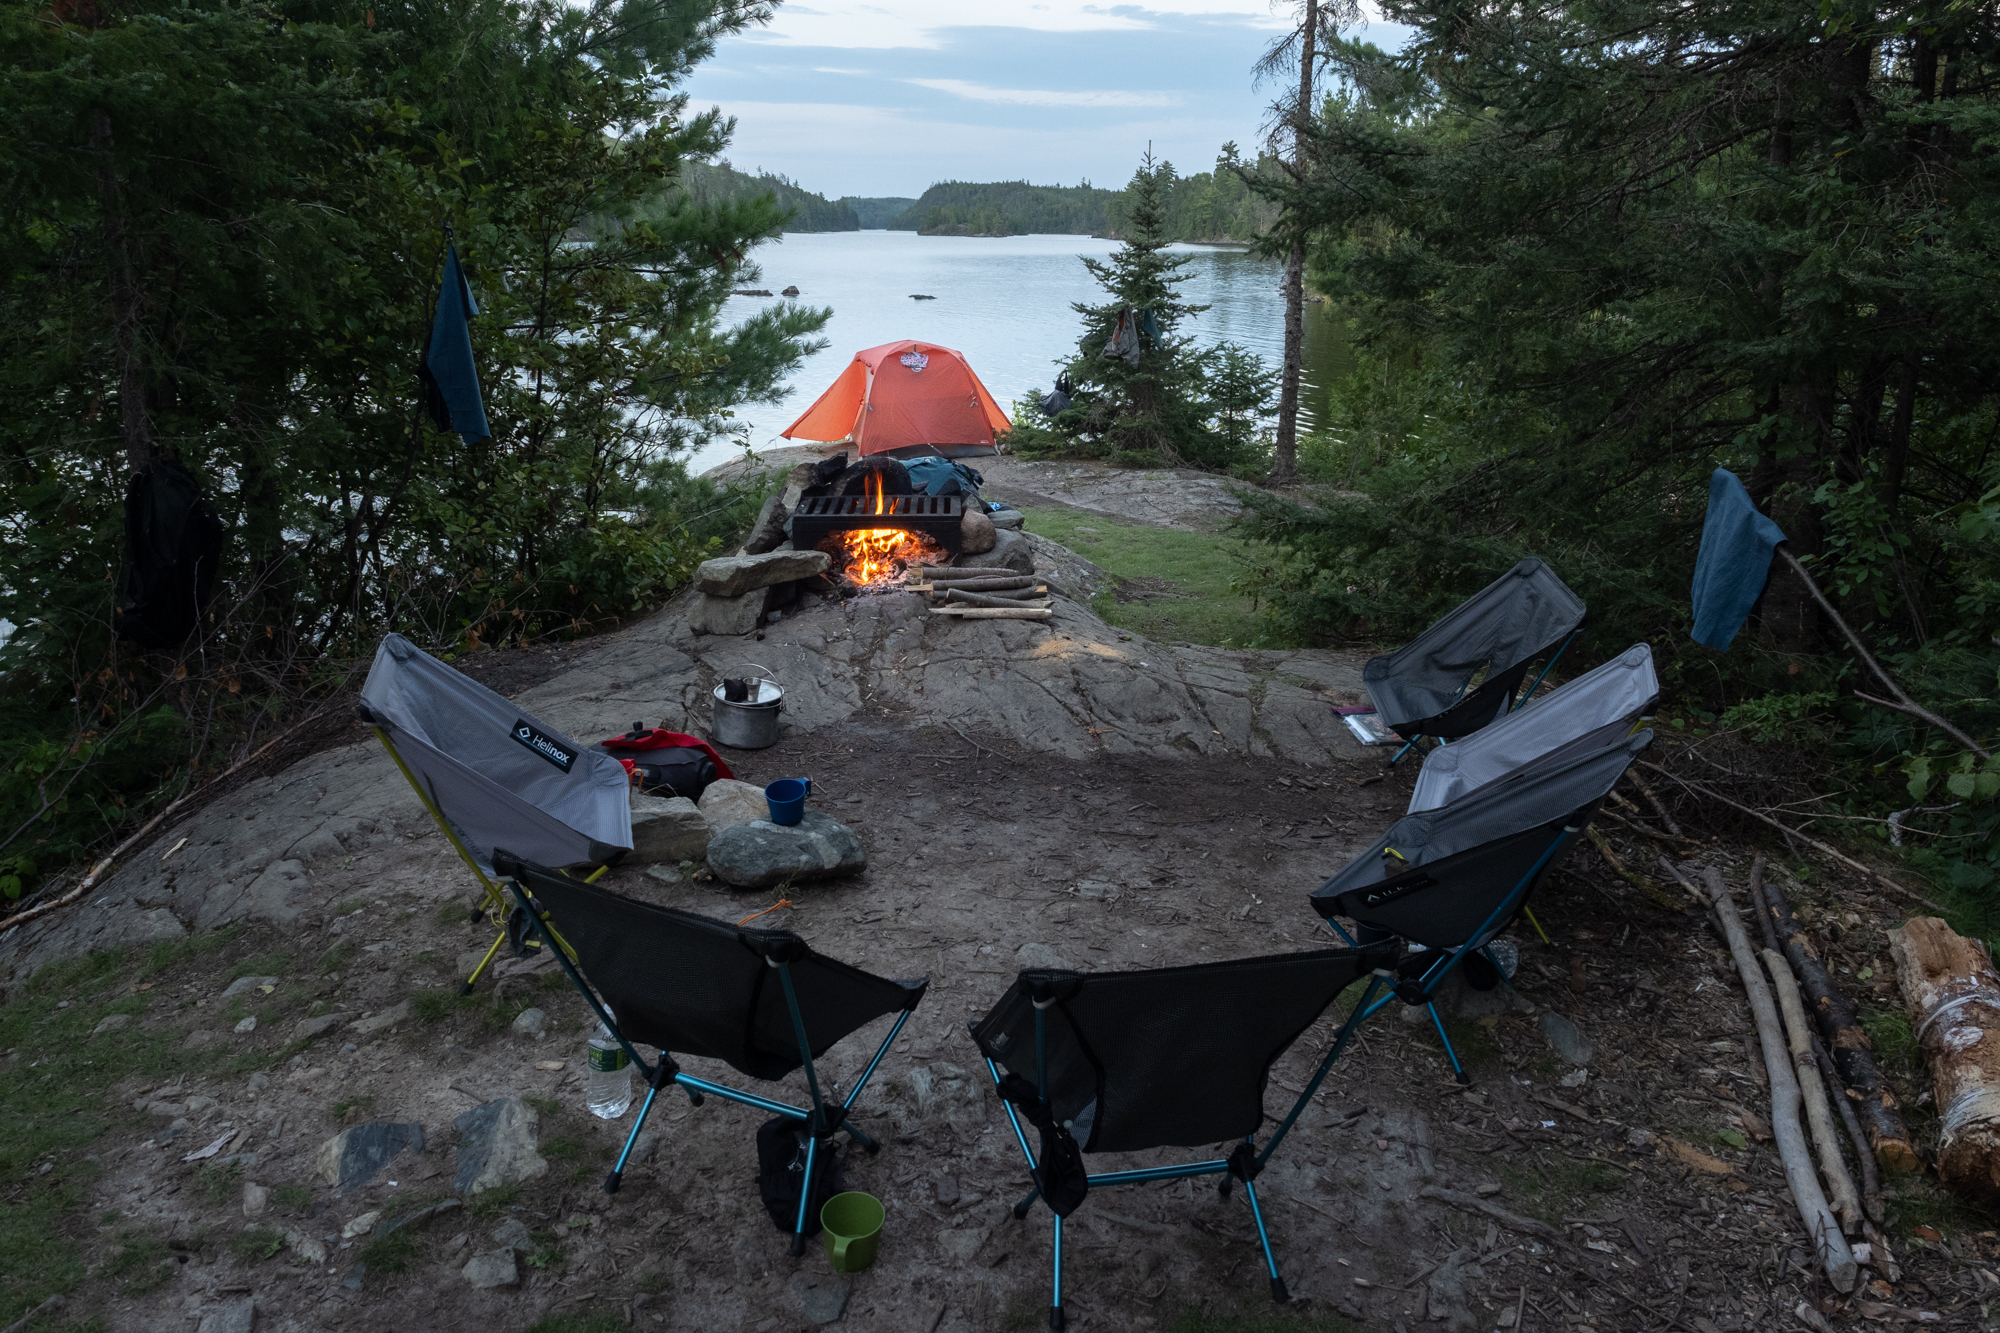
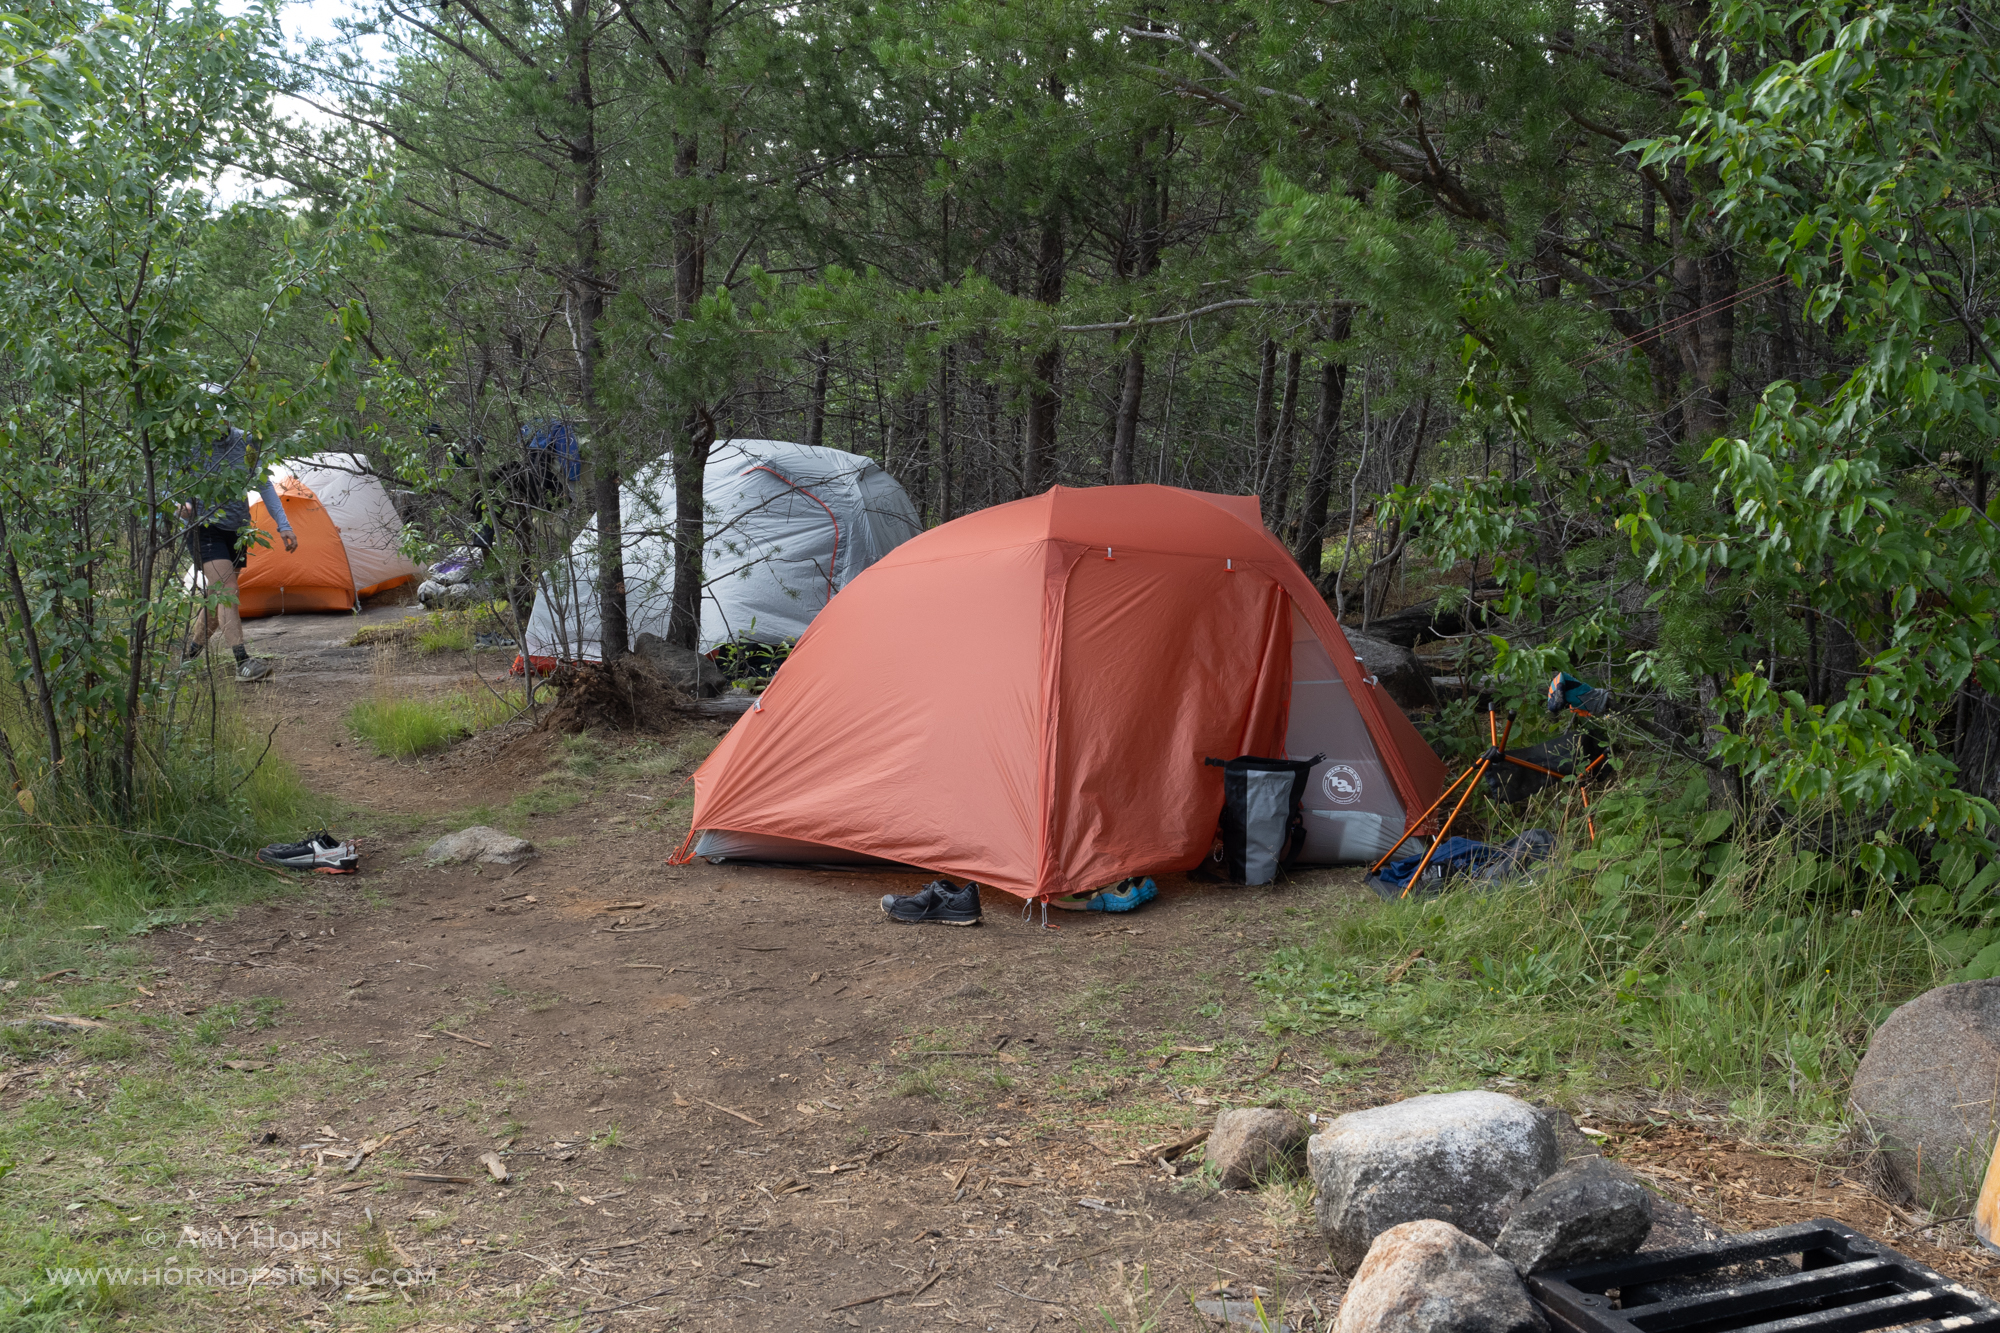
At Camp
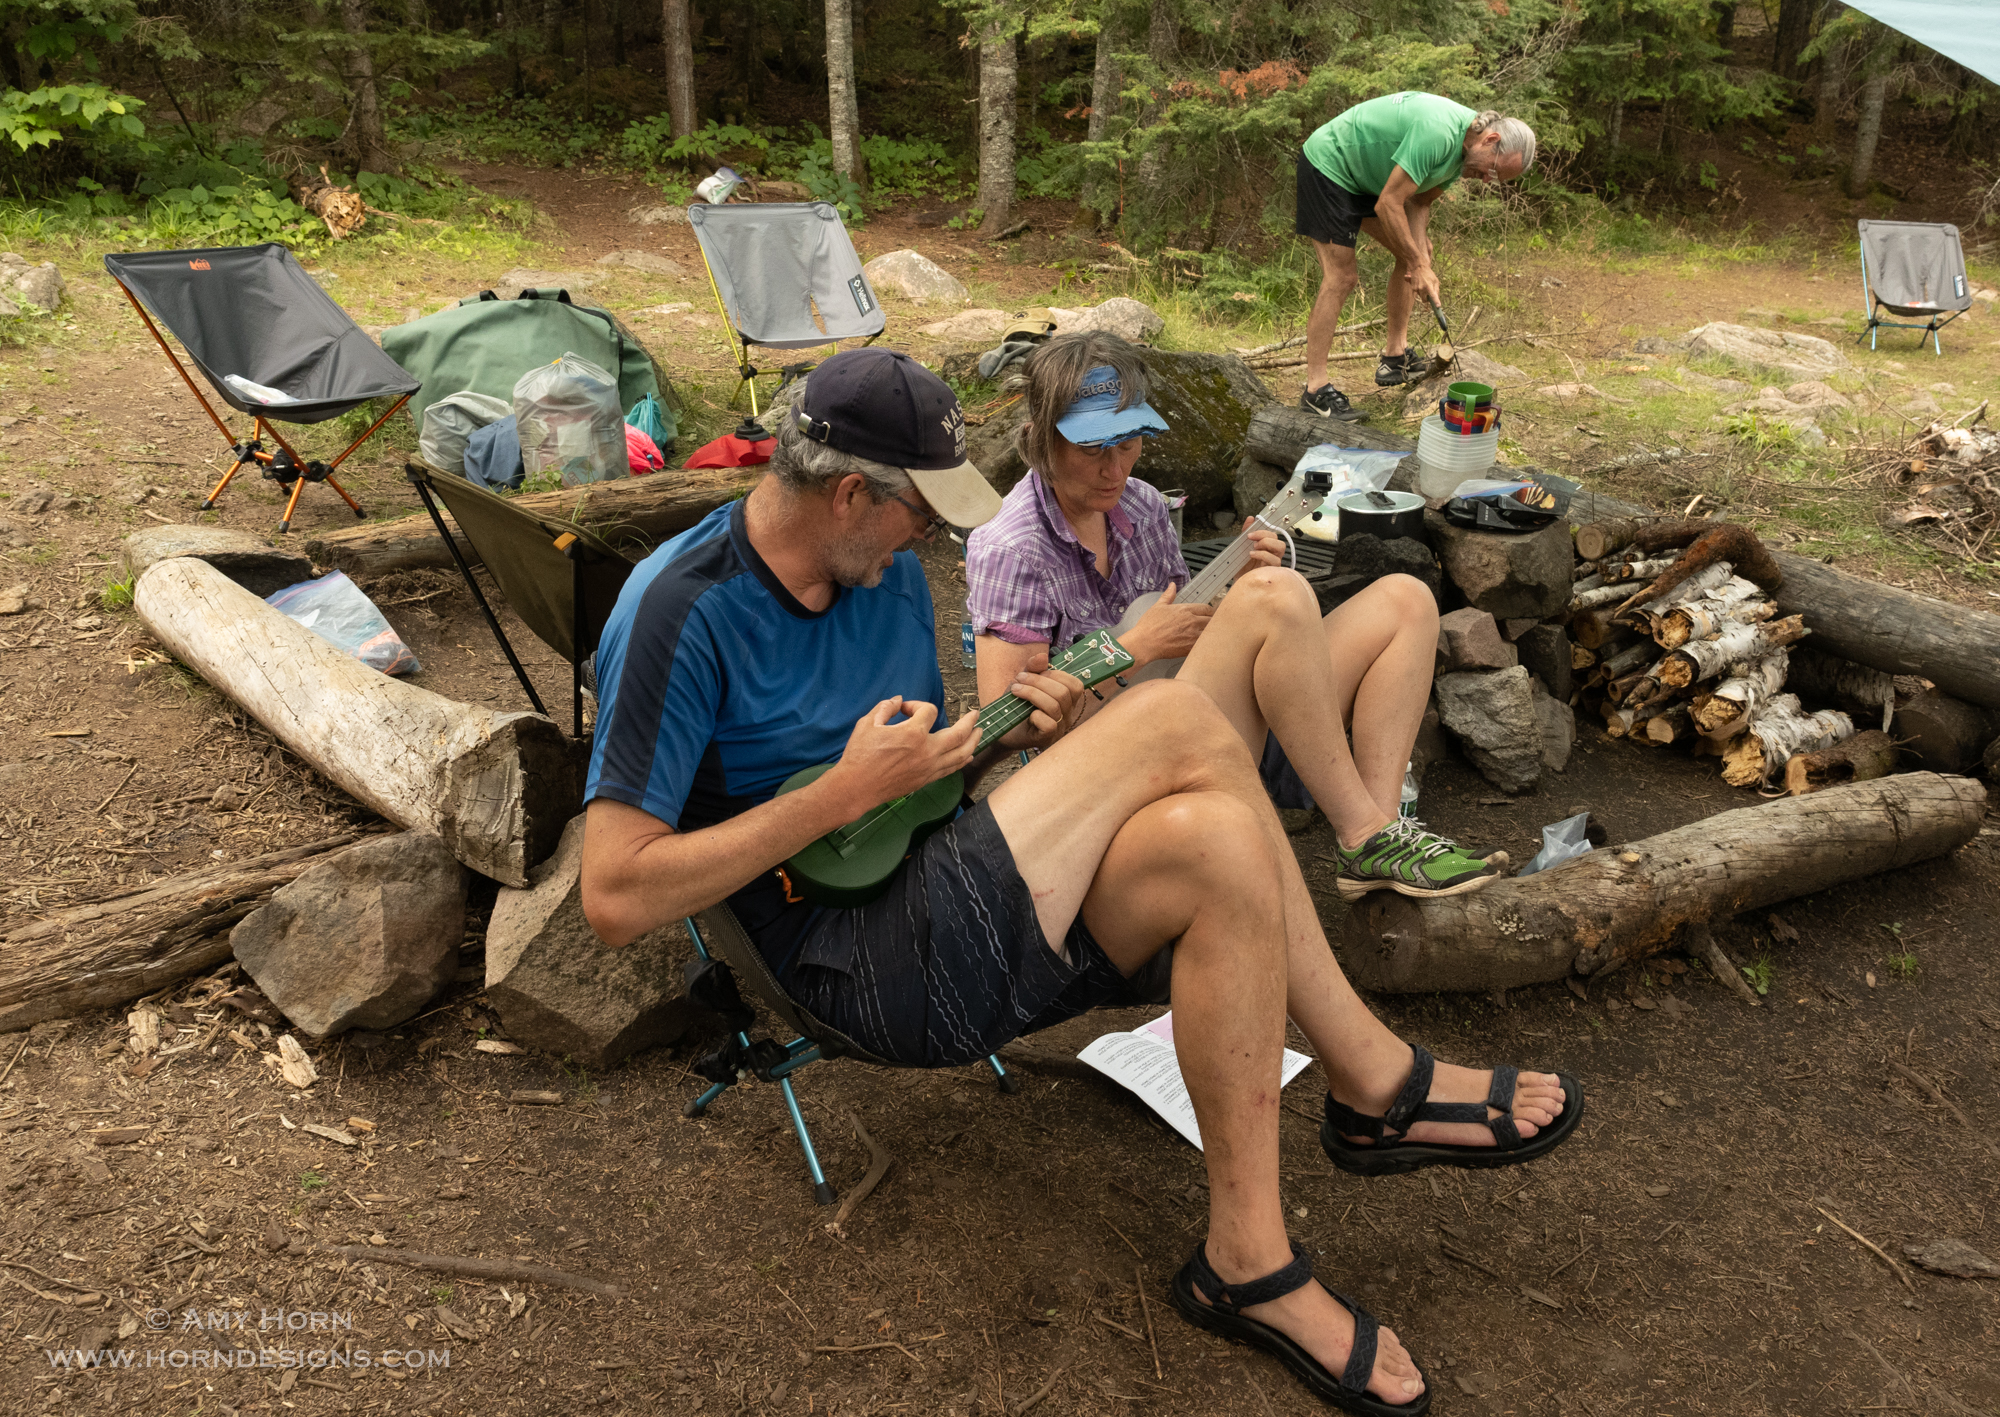
Each afternoon was an adventure to find a campsite. Camping is permitted at approved sites only and if you can’t find an open campsite on a lake, you portage until you find another site. Sometimes that meant you went to several different lakes because campsites are not found on all lakes. Once at camp, we pitched tents, set up the tarp, gathered wood, swam, played music, ate, and on our last night, we had a poetry slam. Gretchen challenged us to write a poem based on 5 given words. It was fun seeing the creativity put into each poem. We heard love poems, poems written from the perspective of a swan, from the mosquito perspective, a haiku, and my short and sweet poem sums up my week (bold words were required):
A canoe and paddle we did rent, to float the lake and pitch a tent. I hope that every son and daughter get to row on the beautiful Boundary Waters.
Amy Horn
Planning tomorrow’s route.Ready for rain.Cooking pancakes over the fire.Playing music.
Highlights
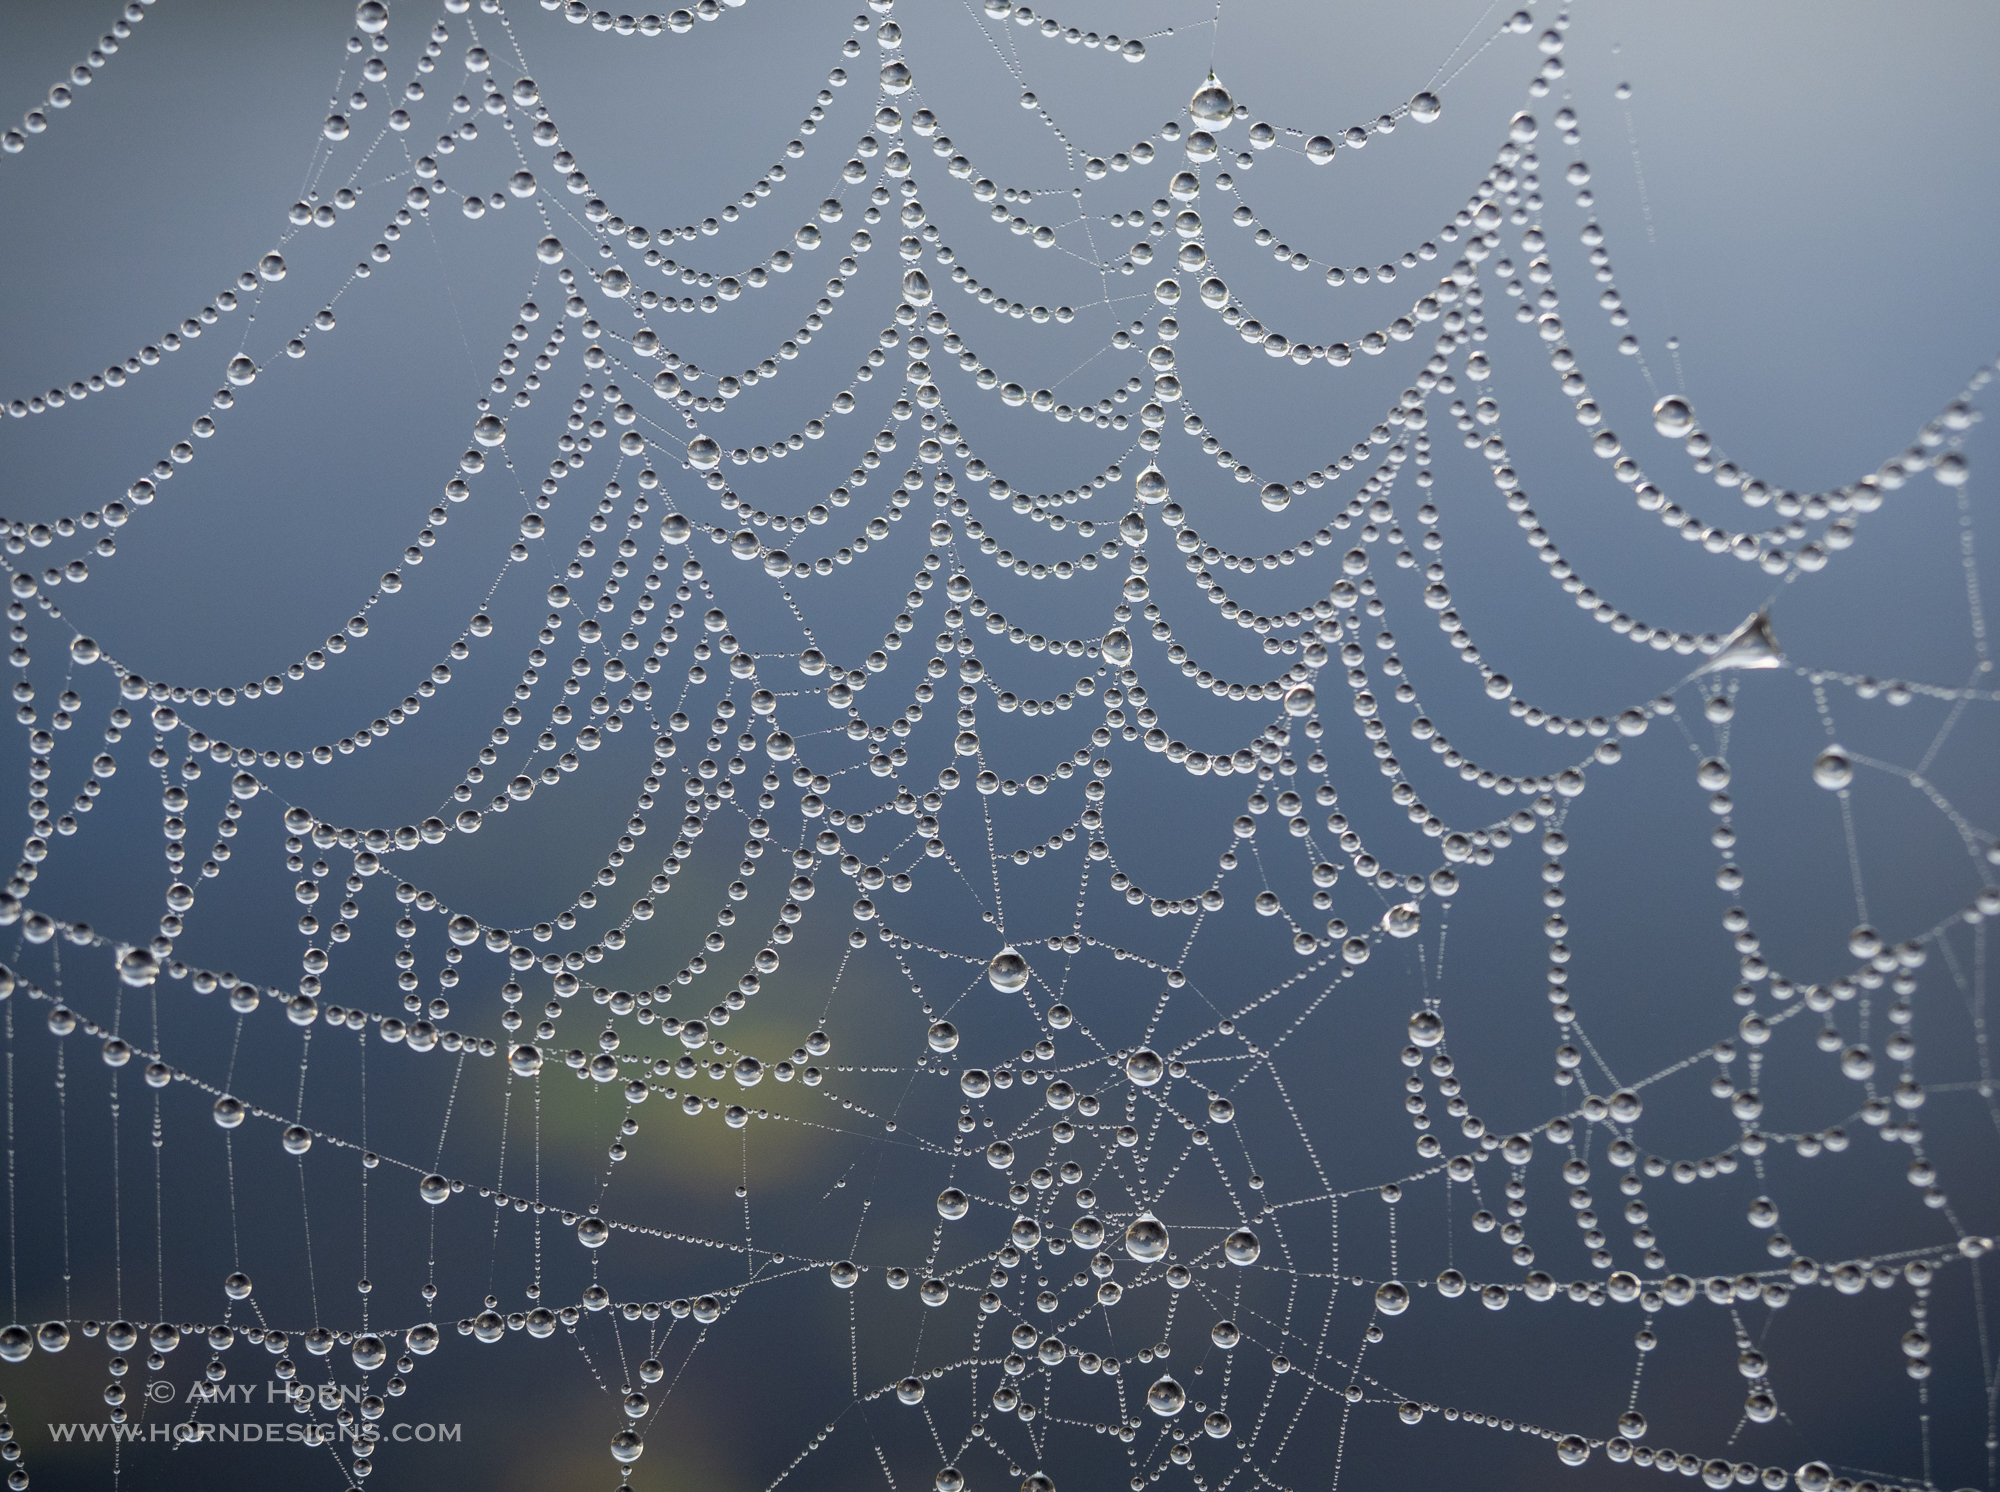
Besides the cool things mentioned above, my highlights of the week were many, but my favorite memory was the foggy morning. Before I could even ask anyone to get out in the water on the canoe, Neil and Gretchen offered. And then they had me “duff” (sit in the middle of the canoe) and took me out on the water. It was a magical morning – so quiet and still. When we returned to land, I photographed the dew on spider webs. I could have spent hours at this site.
It has been two weeks since we returned and all I do is think of returning. I didn’t think spending 6.5 days in nature without electronics would have such an impact on me. The BWCA is such a pristine area with fresh water so clean (big lakes only) you don’t need a filter to drink it. I didn’t know that was possible today. Let’s protect this area. The Boundary Waters is threatened by copper mining and if you would like to take action visit: https://www.savetheboundarywaters.org/.
Neil and Gretchen in the fogGretchen paddling through the fogFoggy morningTree snag and its reflection in the fogSpiderweb with dew drops
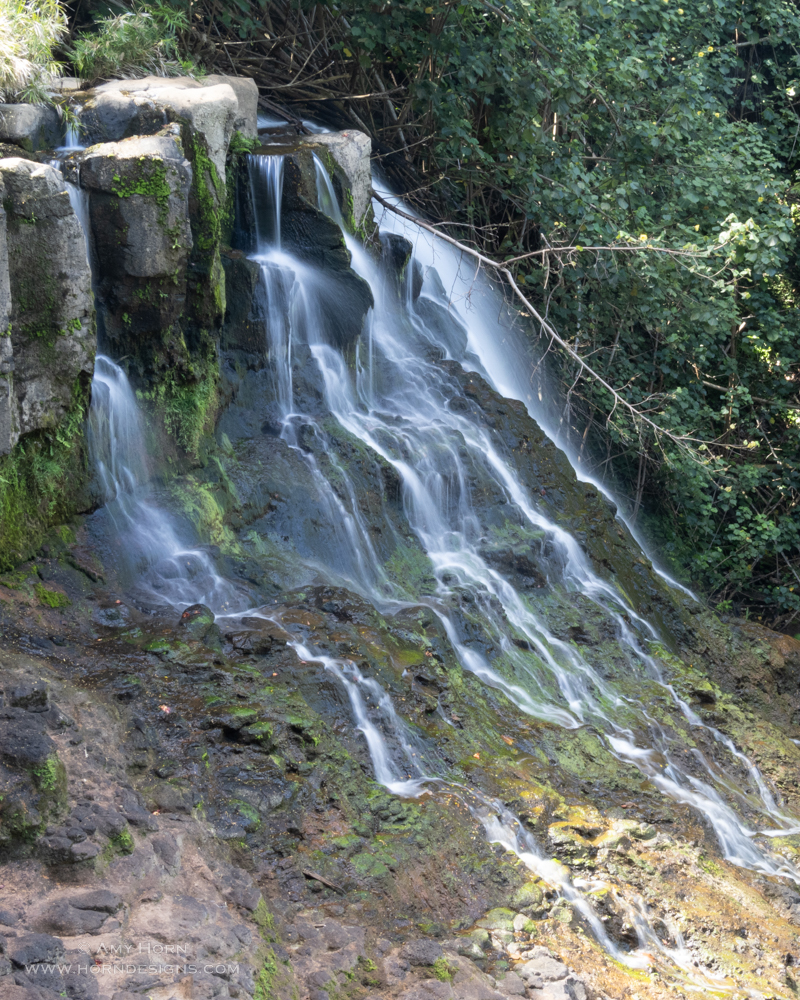
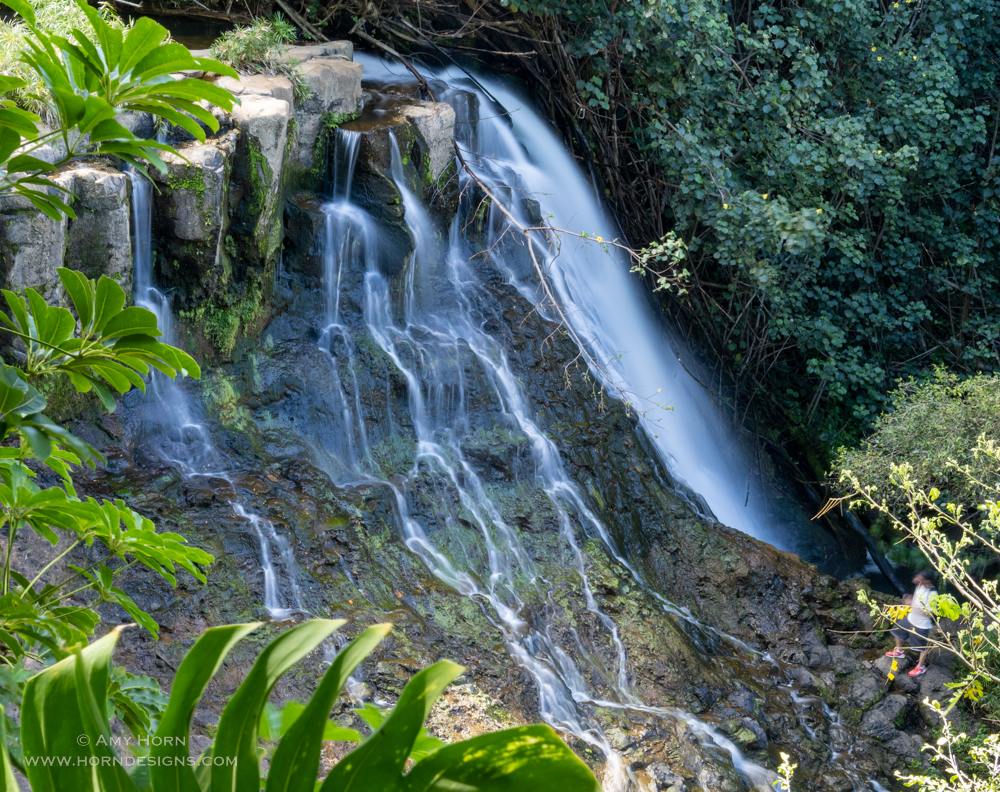
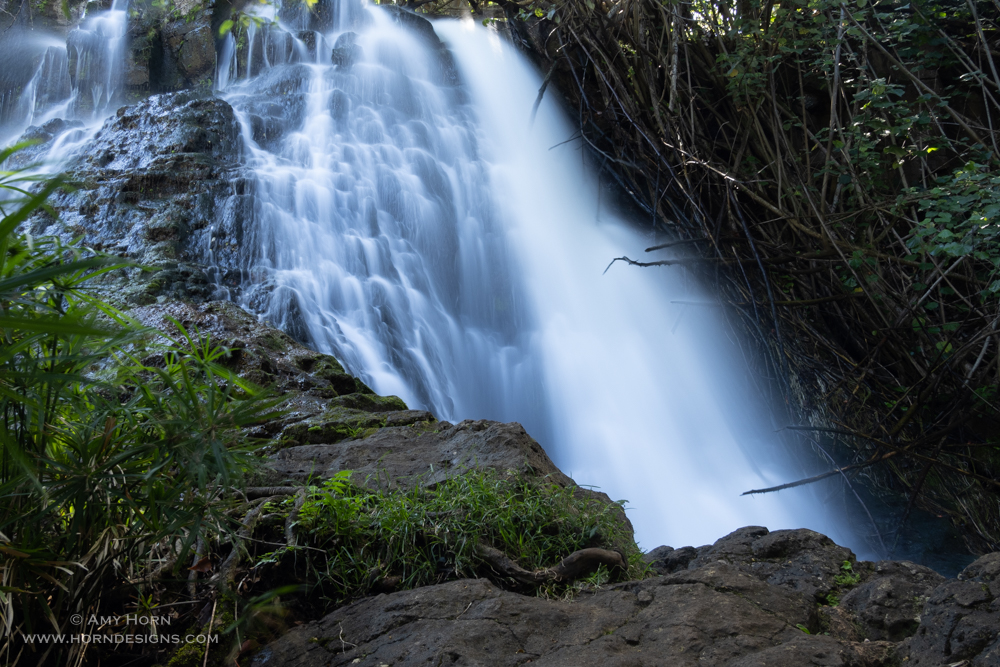
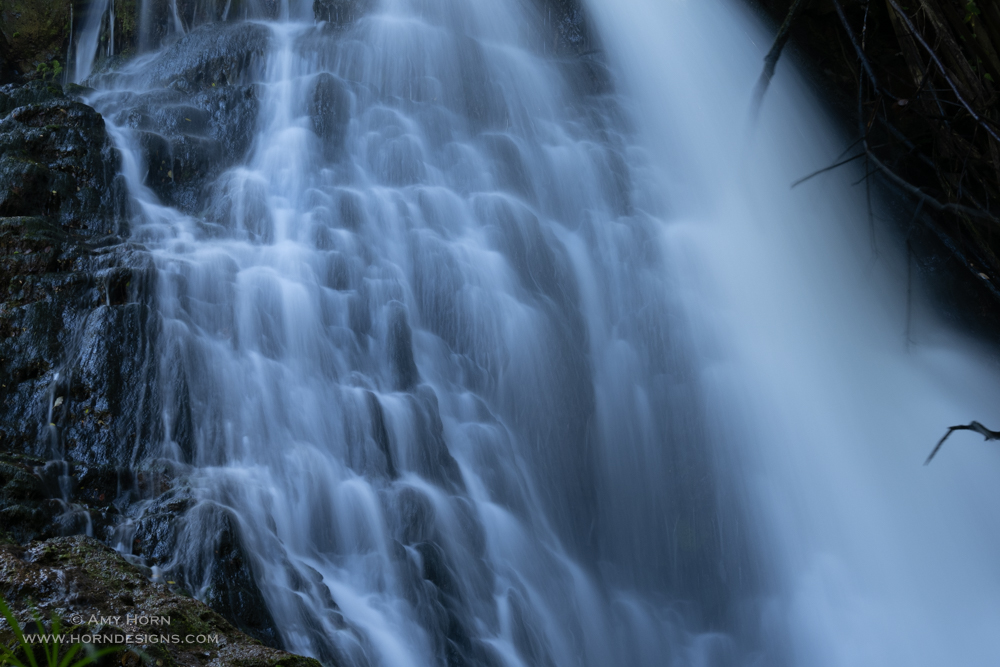
While on our 10-day Hawaiian vacation celebrating our 30th anniversary, my husband and I hiked to Ho’opi’i Falls, Kauai. Normally, we get up early for the best light, but our plans changed when we woke up to rain, so we ended up at Ho’opi’i Falls. With less-than-ideal light, it was important to find a good location that eliminated direct light.
Here is my process as I found the best composition that day.
Waterfall in cloud coverAdded a foreground from close-up bushesDown at the water levelTight shot of just the waterFound a “bridge” to cross over for a better perspectiveImage from across the bridge.
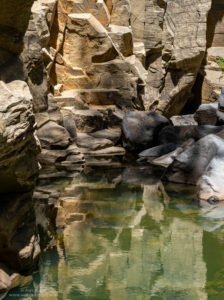
Waterfall at Queen’s Bath, Princeville, Kauai. Olympus OMDI Mark III, 12-100mm at 12mm, f/5.6, 8 sec, ISO 400, Singh-Ray Bryan Hansel Waterfall Polarizer Filter.
This question haunts me every time I use my camera, “Did I achieve focus?” It’s not as simple as zooming in on the LCD panel. For the past four years, my eye prescription changed dramatically causing cataract surgery in both eyes and as a result, I wasn’t always sure my images were in focus. My eyes see distance fairly well, but not close up (because my new lenses are for distance only). My doctor and I thought this was the best solution for the sharpest images. The only problem is that the surgery only corrected the astigmatism in one eye. As a result, I still need prescriptive adjustment to see far sharply. The downside to my new lenses is that I can’t see near.
So, for the past year, I’ve used progressive glasses to accommodate both the astigmatism and seeing near. I don’t like progressive glasses. Hiking over rocks at Watson Lake was miserable, not to mention I constantly moved my head around to find the sweet spot of focus. So, for the past two months, I returned to contacts to correct my astigmatism and readers for close-up/computer work. I’m finally back to really enjoying photography and don’t find myself saying, “Is it in focus?” after every image. Do you have a better solution to finding focus with vision problems?
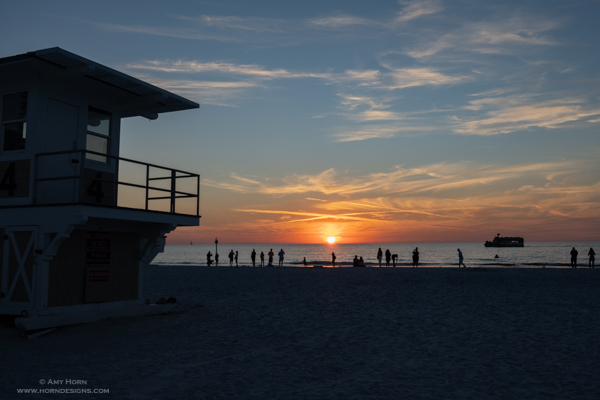
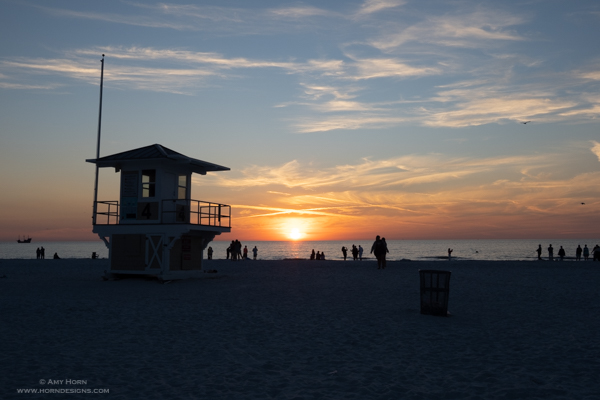
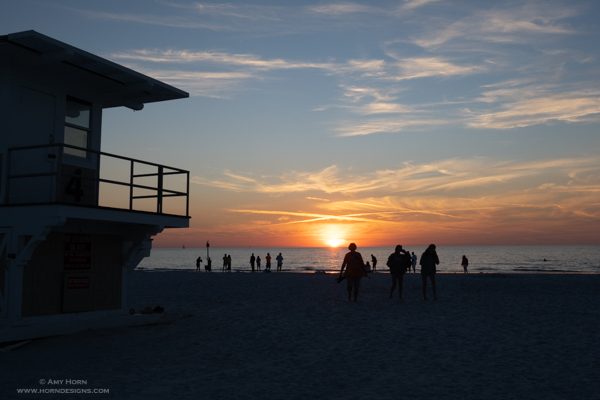
While in Florida this winter visiting family, we stopped for sunset at Clearwater Beach. We were running late, so as soon as we parked, I scanned the area to find a foreground and was pleased to see a lifeguard tower. While walking toward the beach, I extended my tripod legs and checked my camera settings (we were really late for sunset!) I stopped before the lifeguard tower and took a quick shot to test my composition and realized there was a trash can in the photo (see the first image below). So, I moved a bit closer and captured another frame, but the people walking toward me were too close (see the second image below). Then I waited for the ship to enter my frame and got my final shot above. With digital cameras, it is ok to take several images to “build” your photo.
First photo with trash canSecond photo with people too close
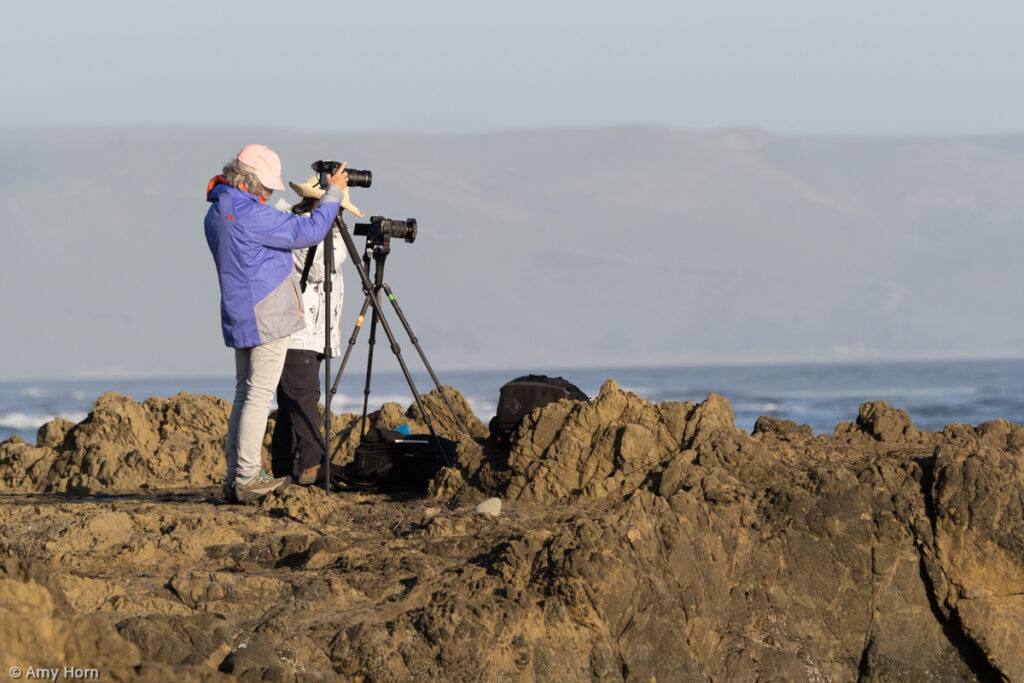
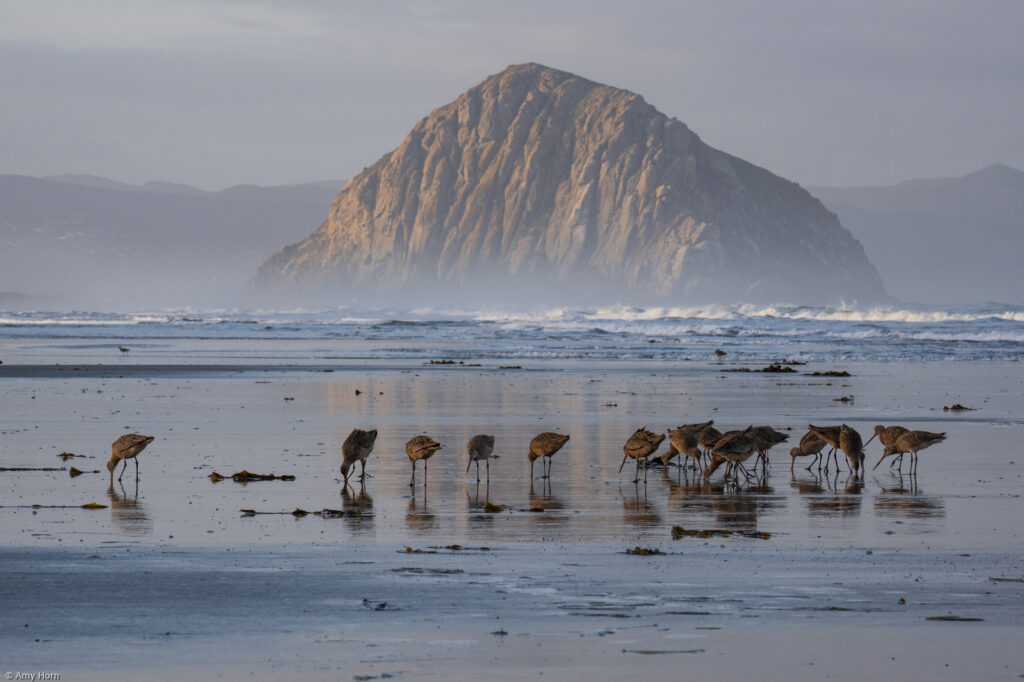
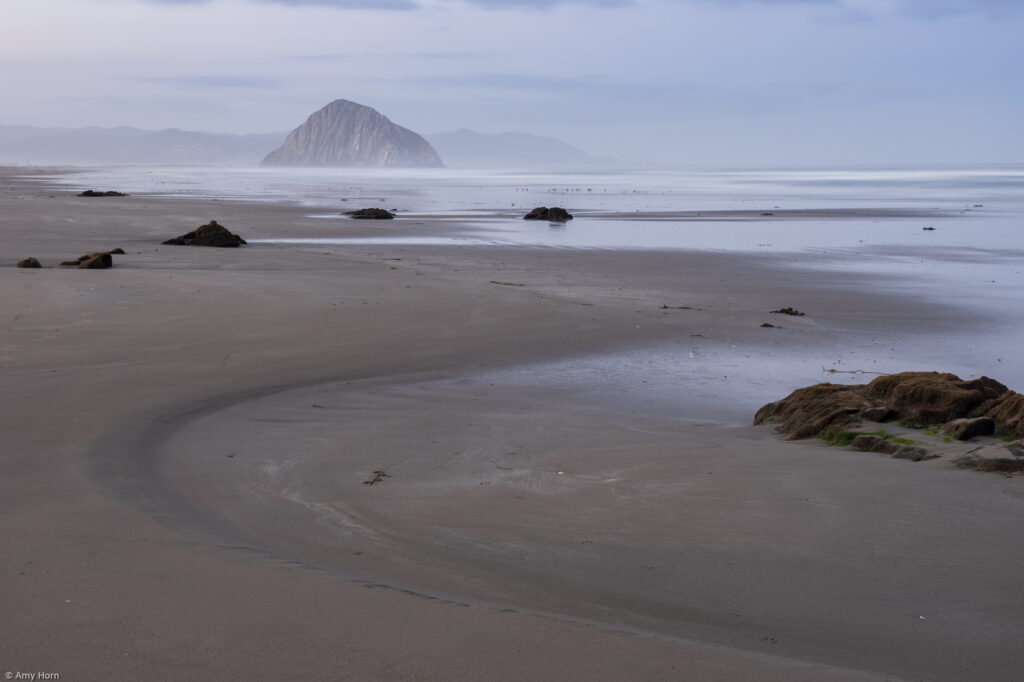
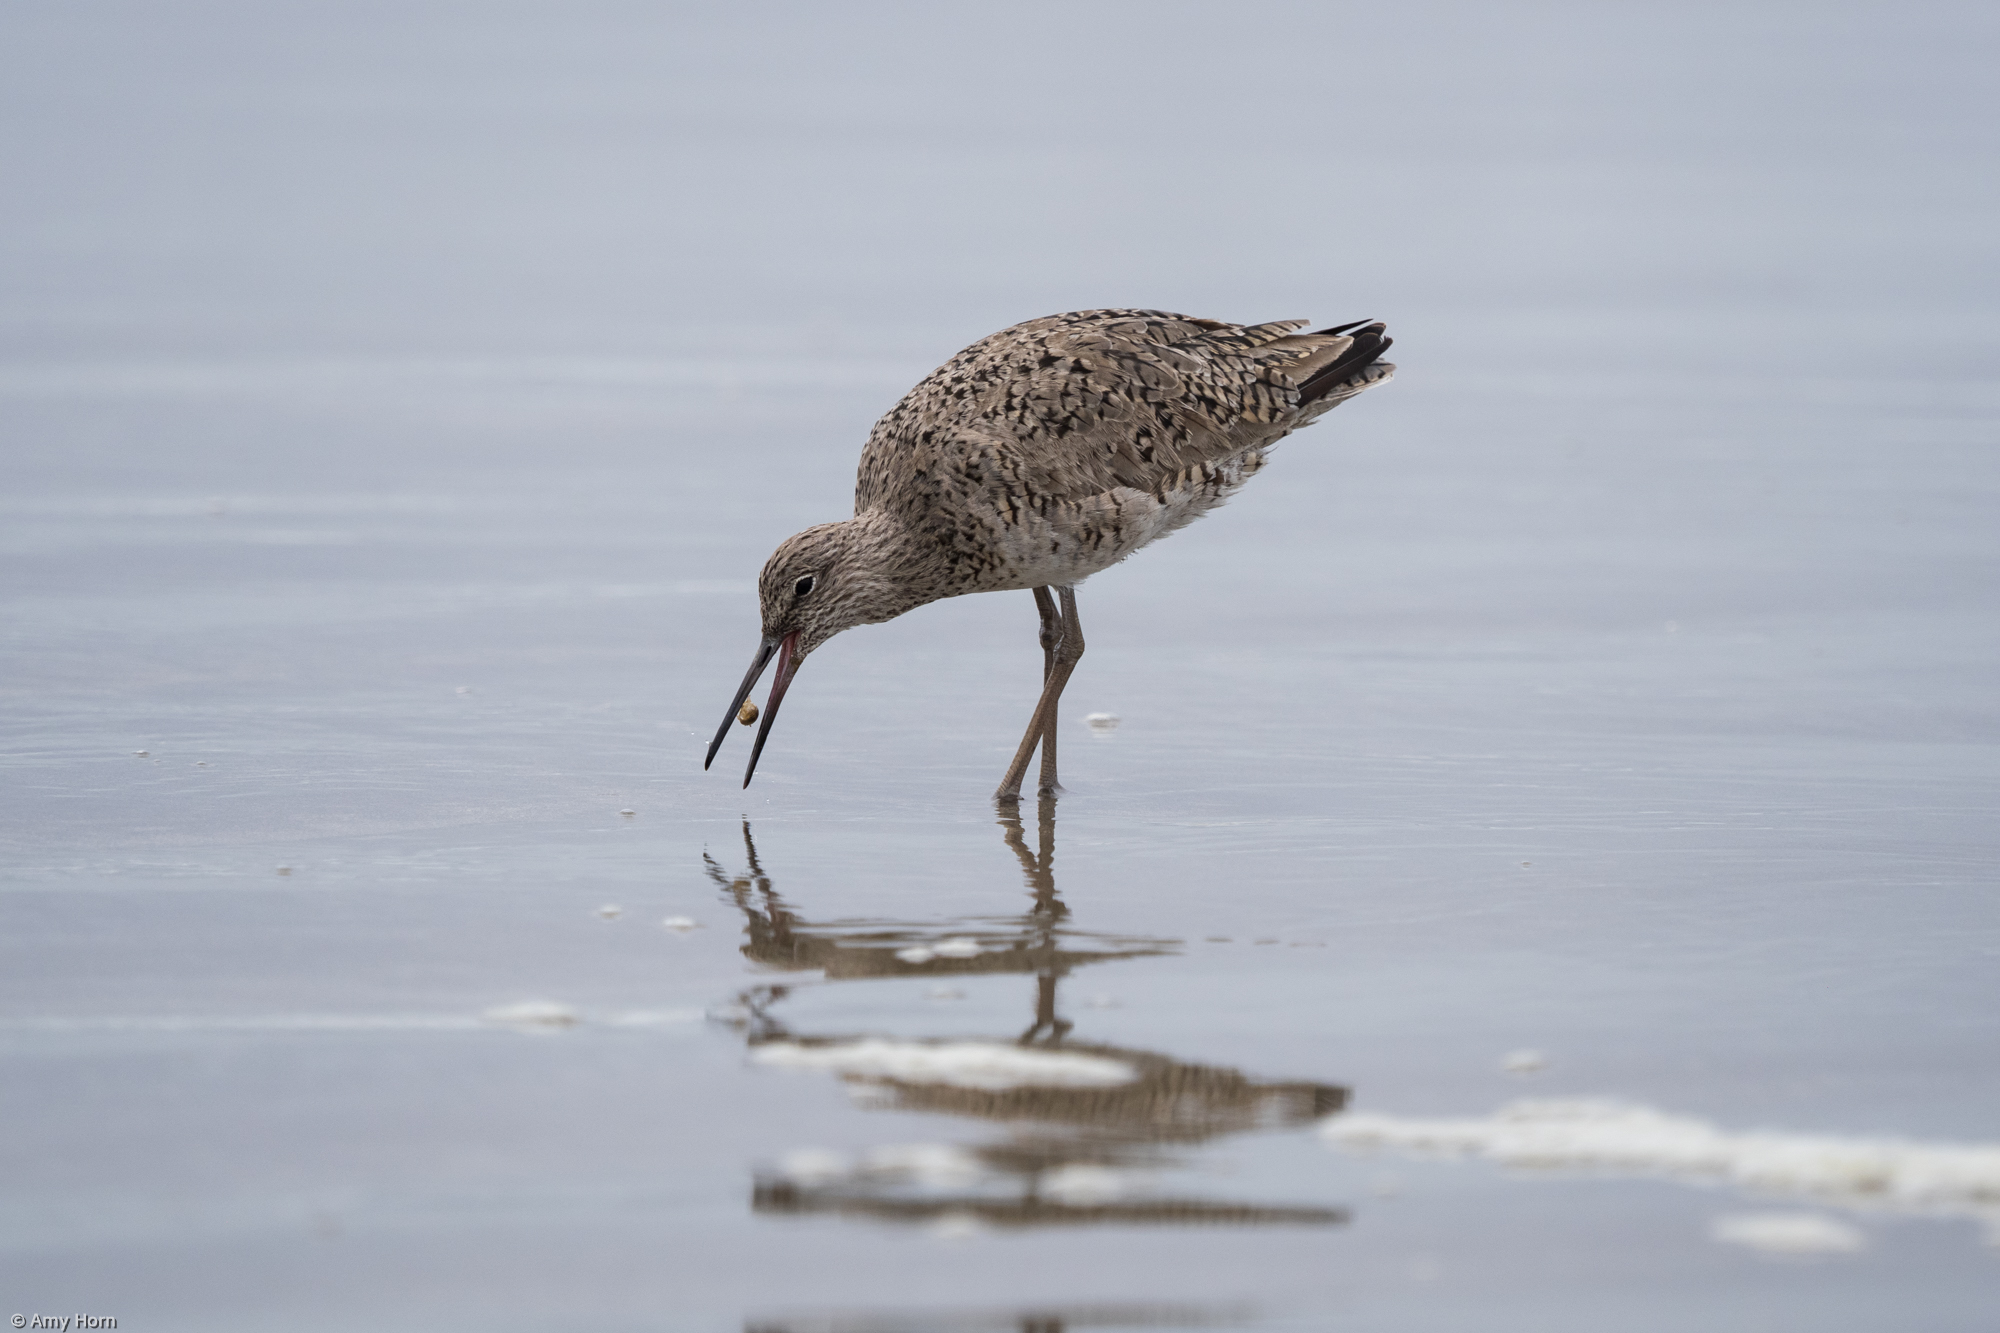
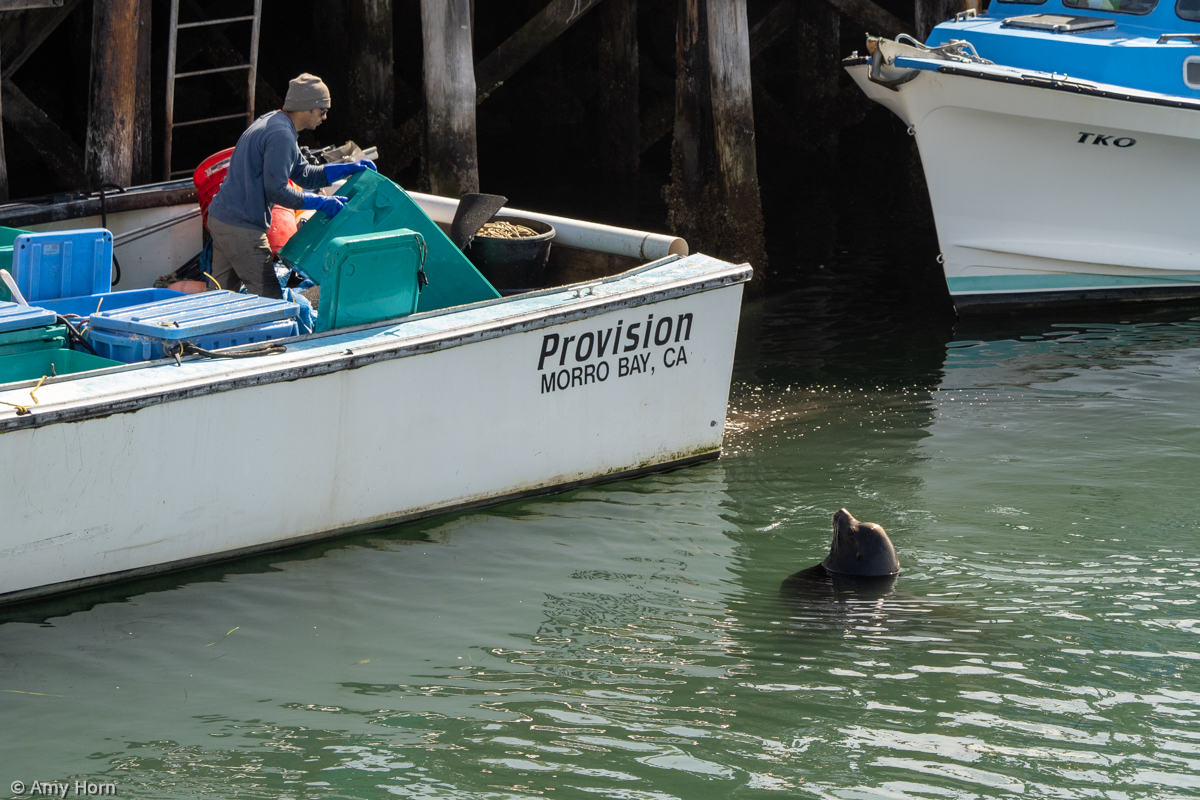
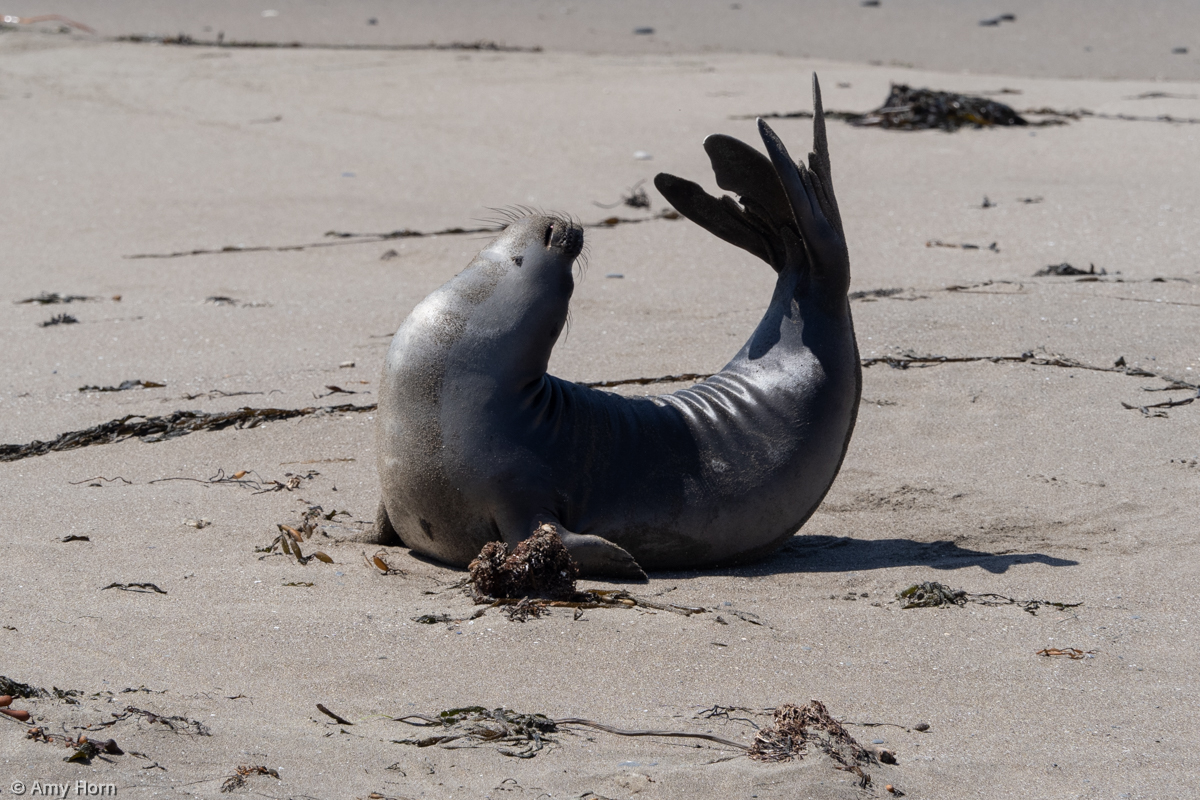
Waiting a year for the Morro Bay Women’s Workshop didn’t stifle any of our fun. We spent four fantastic days photographing the ocean, wildlife, harbors, and of course, Morro Rock. We spent four days capturing sunrise, sunset and everything in between. Don’t worry, I always offer a little down time and image critiques. We managed to schedule three image critiques throughout the four days.
A highlight to many photo workshops (and definitely the Morro Bay Women’s Workshop) is the time bonding behind the camera and in social settings like meals. For example, we found many great restaurants to taste local seafood and baked goods. We had a blast! If you haven’t been on a women’s workshop, here is a photo gallery of our trip. To learn about our next workshop visit ahps.org.
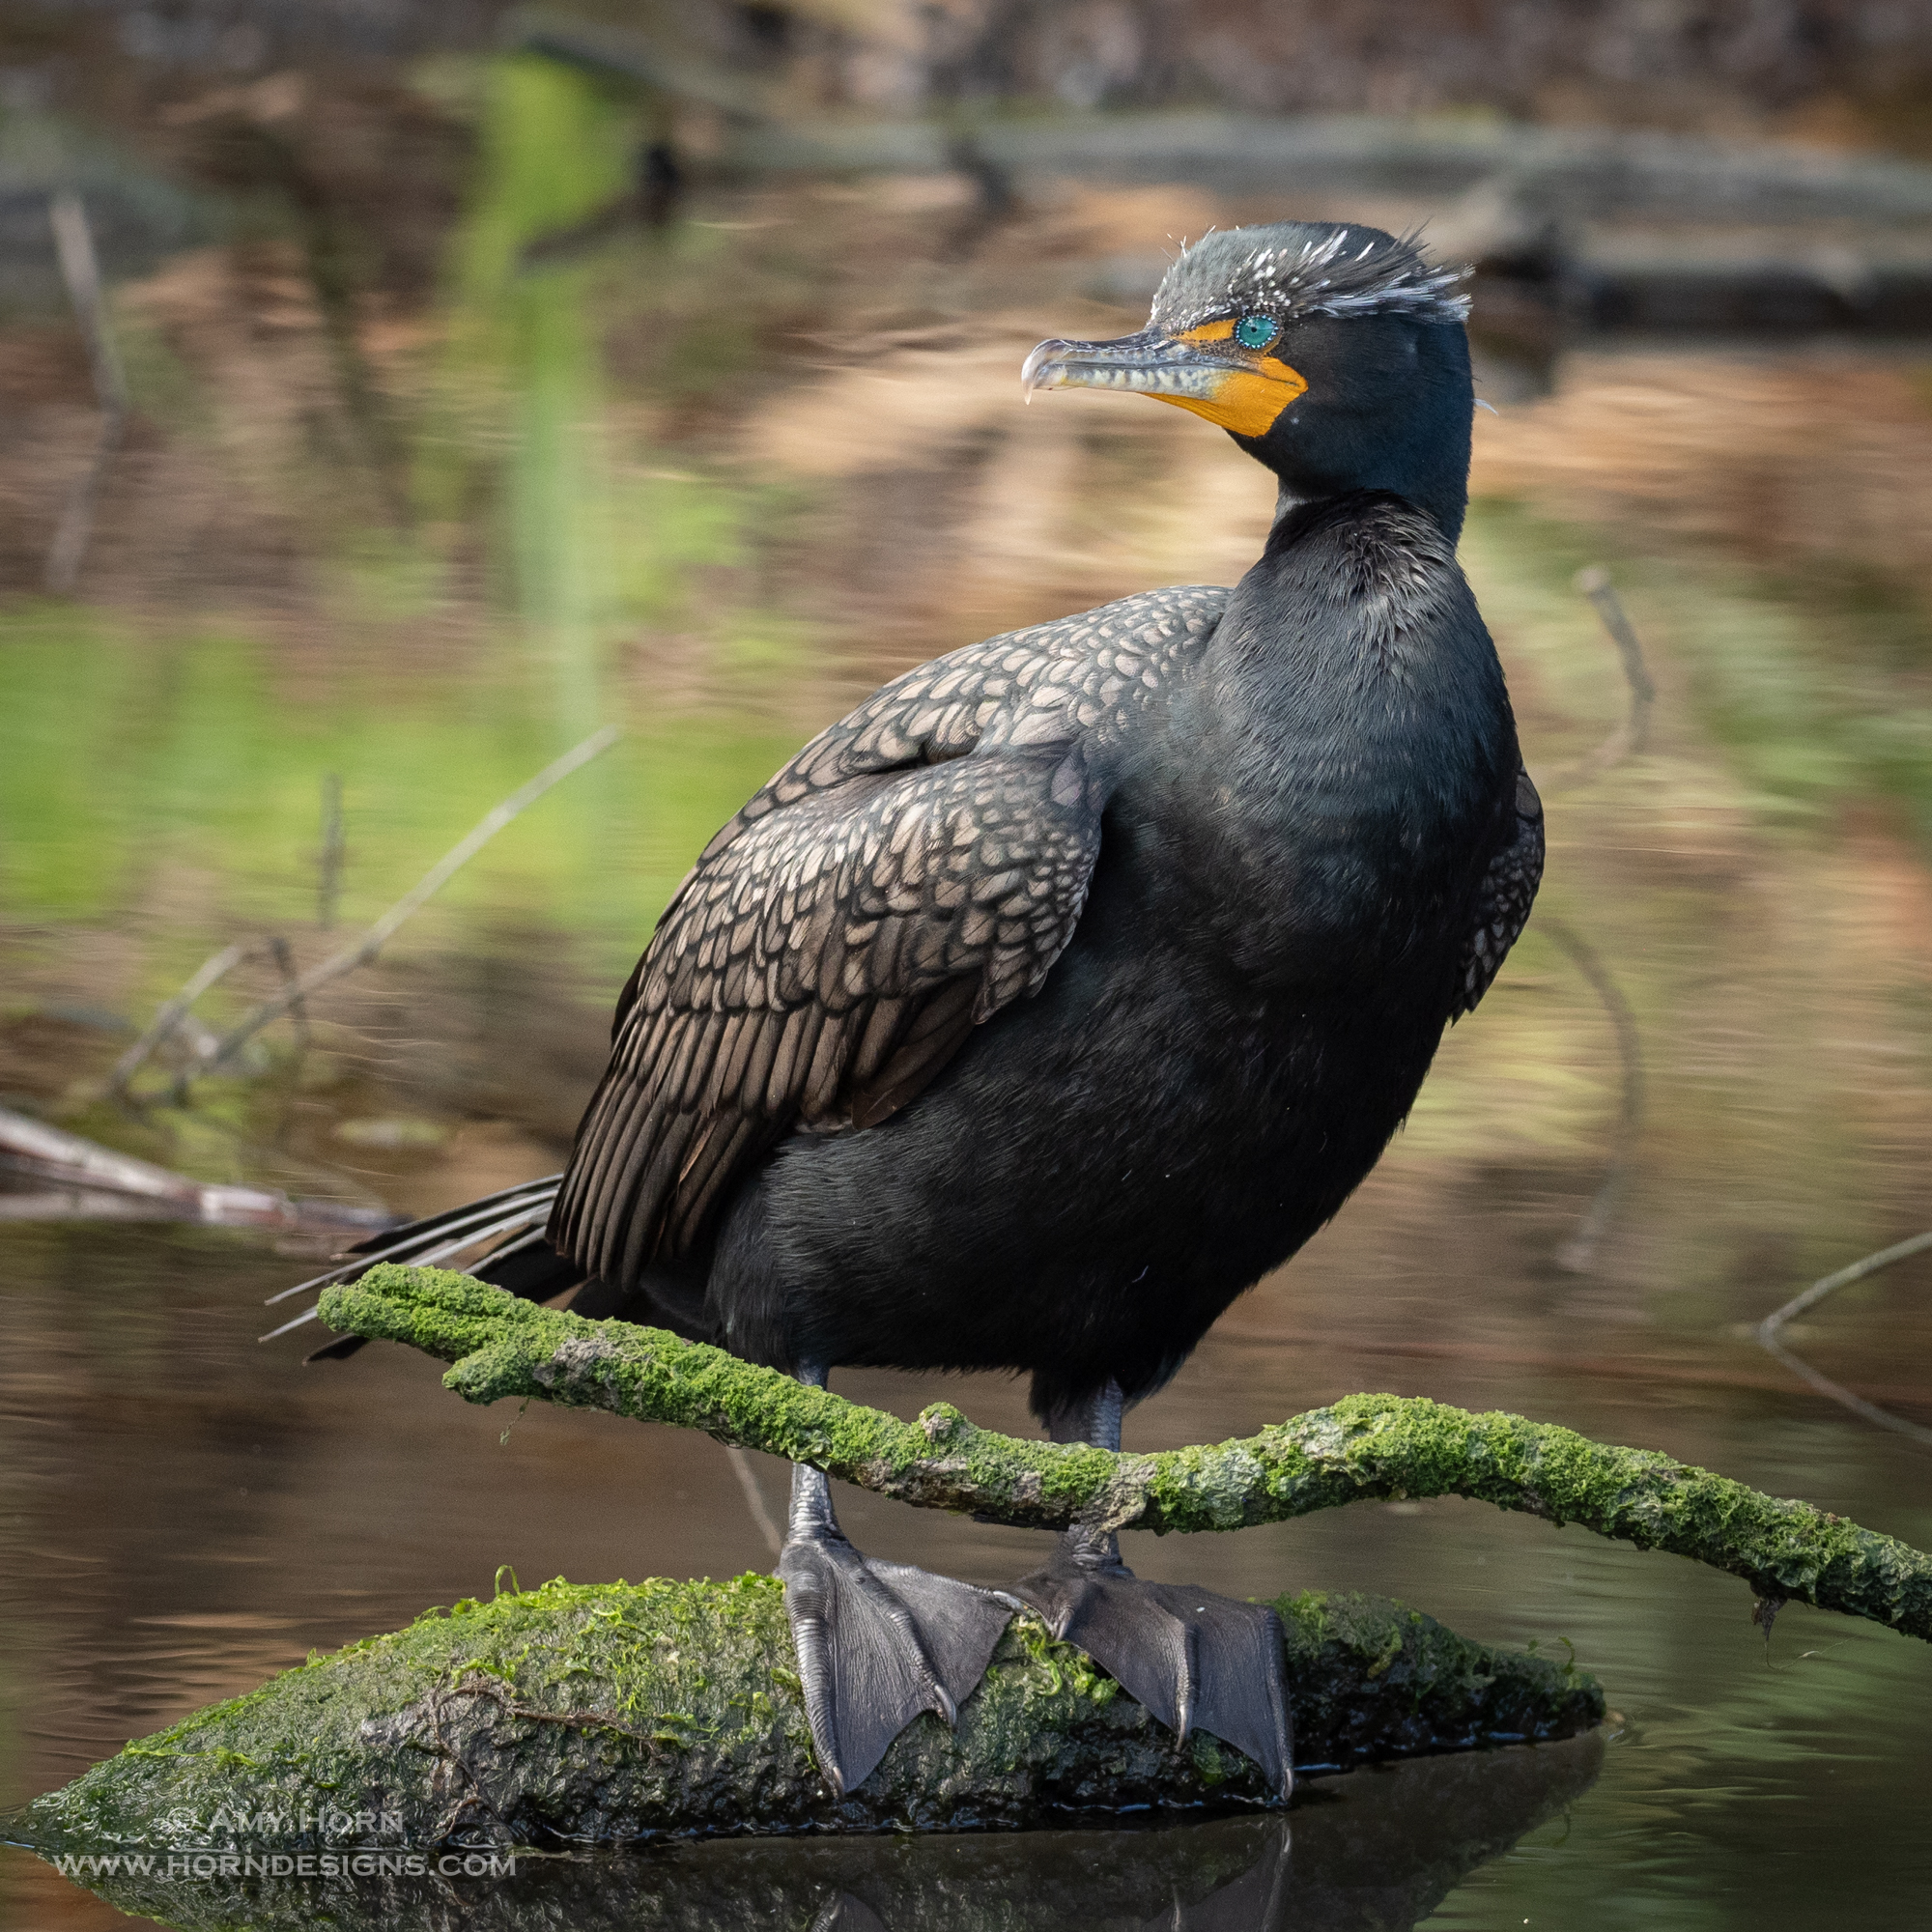
Practicing at local ponds prepare me to capture this Cormorant in Morro Bay, CA.
Photography is like any other hobby – to improve you need to practice and this is especially true with wildlife photography. To practice my wildlife photography, I love to visit local ponds and zoos in my area. After all, I’m not much of a tracker, so I go where it is easy to find the animals. That way I can practice camera settings, technique, and composition to prepare for when I see animals in the wild. Fortunately, there are several ponds near my house with a variety of waterfowl and birds to practice photographing.
My Gear
Along with my camera, I pack a long lens (100-500mm range). My favorite Olympus lenses are the 300mm f/4 and the 40-150mm with a 1.4x extender. If I am photographing at a zoo through fences, I prefer the 300mm. Longer focal lengths eliminate the fence better. My gear is in my hand, or my backpack and I make sure to include extra camera batteries, memory card, water, and snacks. Sometimes I will use a monopod, but not if there are a lot of people around.
My Settings
This lion image was captured through a fence at the Wildlife World Zoo.
Setting the shutter speed correctly is crucial in wildlife photography. Generally, you have two options – a fast shutter to stop the action (like wings in flight) and the shutter speed should be at least 1/2000 sec. The second option is a slower shutter speed for panning shots. Panning requires a little more practice and the shutter speed changes depending on the speed of your subject. For example, 1/30, 1/60, 1/125 sec are shutter speeds I have used on wildlife. So, once you decide on the vision of your photo, set the shutter speed.
Focus is most often in continuous and either a single spot or a small group of spots. Birds flying in the air are easier to focus on using multiple spots. But to focus on a bear’s eye, the single spot is best. Get eye level with the animal to capture the strongest possible image. Below are a few images from zoos, ponds and my backyard.
Next time you have the opportunity – go out and practice!
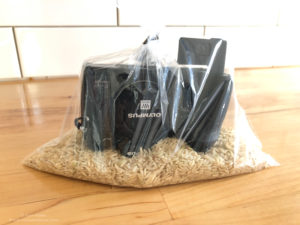
The memory card survived the water! Olympus OMD 1 Mark III, 12-100mm lens, 1/200 sec, f/7.1, ISO 200.
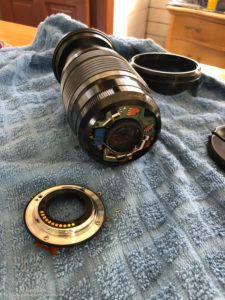
On a recent hike with my husband through Pumphouse Wash I dropped my two-month-old camera. The hike required wading through many thigh-high polls of water, and I was careful while wading. Hiking was slow through the water, so after three hours of hiking, we turned back toward the car. That meant wading through the pools of water again. The walk-able ledge on the last pool meant we would stay dry, well that was the plan anyway. Somehow, my pack was open and my camera took a swim. I watched it submerge 18” under water, so I jumped in too. As I grabbed the camera strap the lens broke off and water gushed inside the camera. After getting the camera, I spotted the lens wedged between two rocks and retrieved it. I pulled the battery and memory cards from the camera immediately, hoping to keep the images from the hike.
Broken lens with water inside.
Once on dry ground, I wrapped the gear in a towel, and we hiked the last 1/3 mile back to the trail head. At the car, I opened every compartment to dry them out and knew Monday I would call my insurance company. Almost ten years ago, I purchased a policy from State Farm Insurance to cover my gear since I own too much camera gear for a traditional homeowner’s policy. On Monday, I called in my claim. A few days later, a claims adjuster called and by the end of the phone call, he issued me a check for the full value of my gear minus the $100 deductible.
Insurance
Camera in rice to dry out.
Hopefully, this event got you thinking about insuring your gear. My policy cost $20/month and with over $3000 replaced gear, insurance was a wise choice for me. Not only can you get a special policy through most homeowner’s insurance agents, but many photography organizations offer insurance as part of your membership. Here is a short list of options for insurance, but there are many more.
PPA – Professional Photographers of America
PSA – Photographic Society of America
NANPA – North American Nature Photography Association
Howard Burkholz of Allstate
I contacted Olympus to see if a repair was possible. Although they couldn’t say for sure without evaluating it, dropping the camera in water void the warranty. While I waited to hear from my insurance agent, I placed the camera in a bag of rice. I’m glad I had insurance.
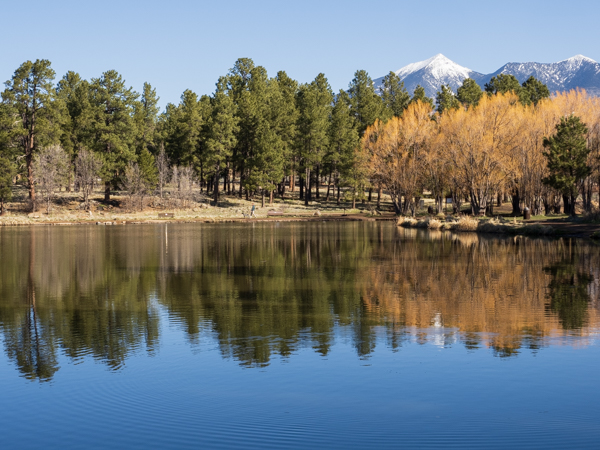
Francis Short Pond with the San Francisco Peaks in the background. Olympus OMD1 MIII, 31mm, 1/160 sec, F/10, ISO 200
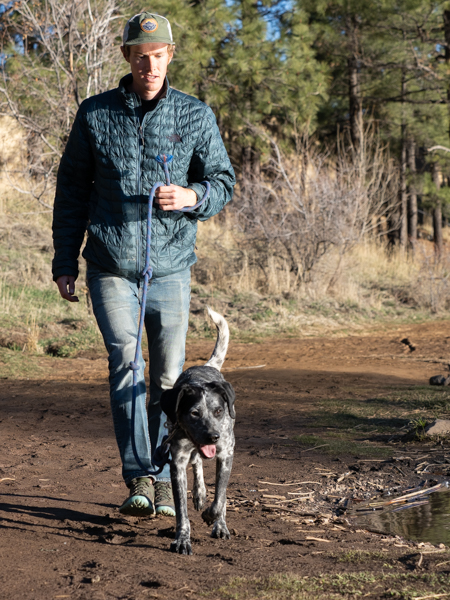
Our son, Austin adopted a dog last month. Ryder (dog) is a
great addition to our home and we walked him day and night for the first few
weeks. Most of these walks were to Francis Short Pond, a ½ mile from our house
and easy to maintain social distancing. Here are several photos from these
walks.
An early Flagstaff morning in March with a thin layer of ice on Francis Short Pond. Olympus OMD1 MIII, 150mm, 1/3200 sec, F/2.8, ISO 200
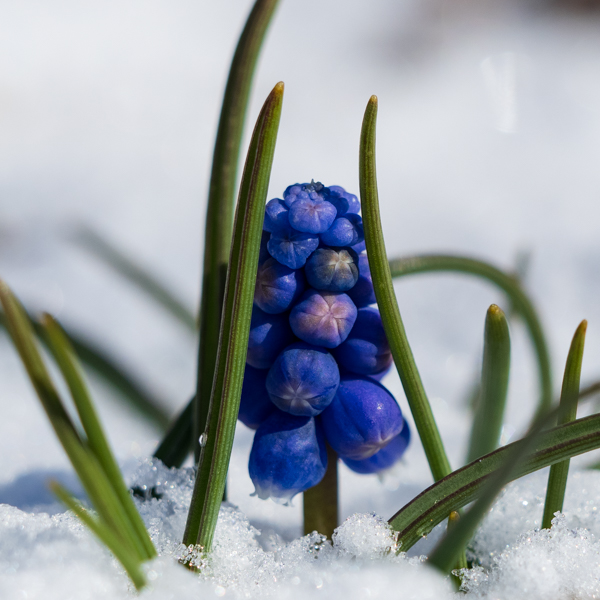
Blue grape hyacinth poking through the fresh snow. Olympus OMD1 MIII, 150mm, 1/2000 sec, F/4, ISO 200
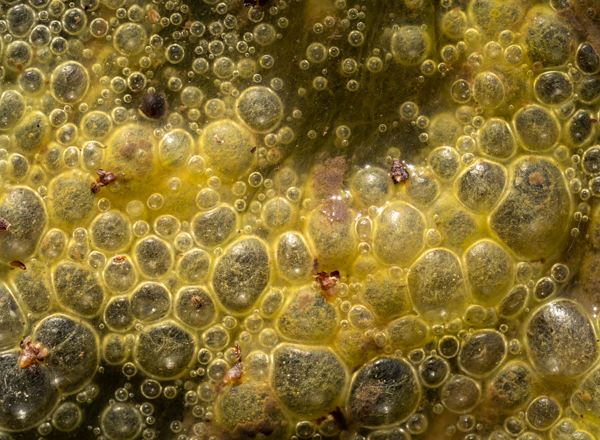
Algae. Olympus OMD1 MIII, 60mm, 1/40 sec, F/6.3, ISO 200
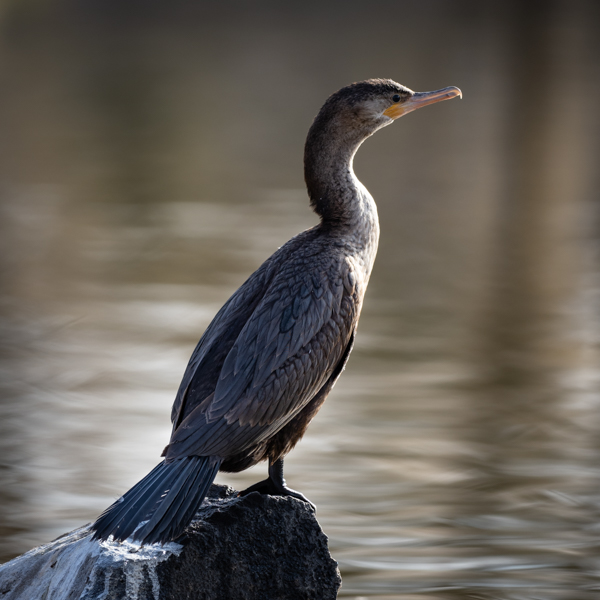
Cormorant at Francis Short Pond. Olympus OMD1 MIII, 300mm, 1/640 sec, F/4, ISO 200
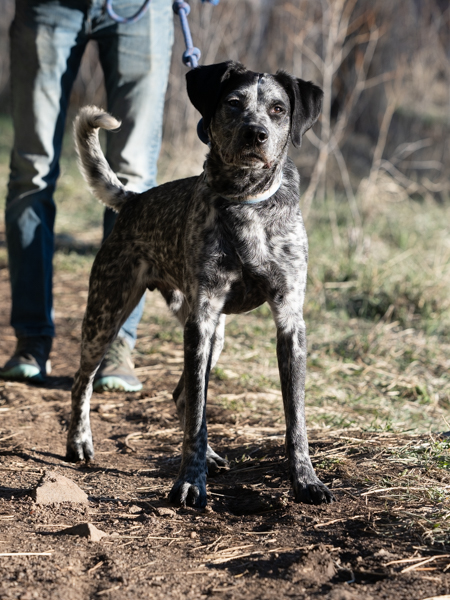
Ryder on his daily walk. Olympus OMD1 MIII, 95mm, 1/500 sec, F/4, ISO 200
Austin walking his dog, Ryder. Olympus OMD1 MIII, 46mm, 1/640 sec, F/4, ISO 200