Tag Archives: travel

Ho’opi’i Falls

Ho'opi'i Falls
Olympus OMD1 MIII, 24mm, f/7.1, 1.6 sec, ISO 200, Singh-Ray Bryan Hansel Waterfall Filter.

While on our 10-day Hawaiian vacation celebrating our 30th anniversary, my husband and I hiked to Ho’opi’i Falls, Kauai. Normally, we get up early for the best light, but our plans changed when we woke up to rain, so we ended up at Ho’opi’i Falls. With less-than-ideal light, it was important to find a good location that eliminated direct light.

Here is my process as I found the best composition that day.

Always walk around to find your best composition.

Kaibab Kottage

A test shot at the Kaibab Kottage, Grand Canyon Junction

When given the chance, I enjoy helping people out, especially if it is using my camera. So, when our son came up with the idea of building a tiny house on a trailer, we helped. As he finished the build, instead of selling it, he bought property in Grand Canyon Junction (Valle) and set up the most unique off-grid, glamping scene. Now known as Kaibab Kottage. Although I moved bricks, rocks, limbs and dirt; I was happiest when he asked me to photograph his pride and joy.

Starting with a few interior shots that he captured with his GoPro. The house is built on an 8′ x 5′ trailer, so it is small. It was much easier to hold up the GoPro to capture these wide angle shots than use my camera.

After finding used treasures like Trex decking, table and chairs, and a propane grill, we set everything up including a compost outhouse! He added solar panels to power the lights.

An HDR image of the whole campsite.

Listing/Instructions

This Airbnb listed property needed photos for the listing and the instruction binder. Showing how the bed converts from a couch to a bed through images is beneficial to international visitors. I cropped tight and captured a clear subject.

And here are the last images I captured. Using off camera flash to light up the camp kitchen area I captured sunstars and the whole site. A tripod was used for all of these images since my priority was to capture “sunstars” with the lights. This was a fun project and it felt great to help.

Find a Foreground

Clearwater Beach, FL, find a foreground
Clearwater Beach at Sunset

While in Florida this winter visiting family, we stopped for sunset at Clearwater Beach. We were running late, so as soon as we parked, I scanned the area to find a foreground and was pleased to see a lifeguard tower. While walking toward the beach, I extended my tripod legs and checked my camera settings (we were really late for sunset!)  I stopped before the lifeguard tower and took a quick shot to test my composition and realized there was a trash can in the photo (see the first image below). So, I moved a bit closer and captured another frame, but the people walking toward me were too close (see the second image below). Then I waited for the ship to enter my frame and got my final shot above. With digital cameras, it is ok to take several images to “build” your photo.

The Benefit of Using a Tripod

Barred owl captured with a tripod
Olympus OMD1 Mark II, 300mm, F/5.6, 1/80 sec, ISO 1600, tripod

Do you dislike using a tripod? After teaching photo workshops for several years, I recognize it is not a popular piece of gear for new photographers. Tripods can be clunky, unstable, awkward, and temperamental. The “unstable” can be solved by purchasing a quality tripod from the start. Many photographers start with an inexpensive tripod and then realize why it was inexpensive…it doesn’t support their camera or is not built well. Save yourself some time and money and buy a good tripod from the start. The clunky, awkward, and temperamental can be overcome by using it.

I often hear participants state they only need a tripod when photographing landscapes, low light, or macro subjects, well, that is not true. A tripod in any shooting situation will improve the quality of your photos. Here is an example when I used a tripod in full sun to improve my photos.

Ibis image taken with a tripod
Ibis with a crab. Olympus OMD1 Mark II, 300mm, F/6.3, 1/4000 sec, ISO 400.

While in Florida on vacation, I photographed birds, from egrets to owls and they entertained me for hours. But holding a long lens for hours was not a solution for sharp photos, so I used my tripod. I started with my Olympus 40-150mm lens (80-300mm FF equivalent) and handheld many images, but since I use live view at 3-5x to verify sharp focus on the eyes of my subject, holding the camera still at this magnification was impossible. Even more so when I switched to my Olympus 300mm lens (600mm FF equivalent). As a result, I grabbed my tripod. Not only were my images sharper, but at the end of the day, my arm wasn’t sore from carrying the weight of the long lens.

Burrowing Owls

Photo of burrowing owl, by Amy Horn taken with a tripod
Burrowing Owl. Olympus OMD1 Mark II, 300mm with 1.4x teleconverter, F/5.6, 1/1250 sec, ISO 250.

One afternoon in Cape Coral, Florida, I spent hours photographing burrowing owls. These small owls are only 7-10 inches tall and like all wildlife, a photographer should keep a good distance to not disturb them. Therefore, I chose to use my Olympus 300mm lens and 1.4x teleconverter giving me a focal length of 820mm (full frame equivalency). With such long focal lengths, a tripod was a must. We drove to several neighborhoods in Cape Coral to photograph these owls with different backgrounds.

I recently purchased a Fotopro X-Go Plus carbon fiber tripod for airplane travel since it is smaller, lighter and fits in my suitcase. If you purchase a tripod for travel, be sure to check the weight of your gear with your heaviest lens and make sure that is below the max load of the tripod you are considering. With my lightweight Olympus system, my max load is less than most DSLR’s.

Using a tripod to capture images of owls
iPhone image of cpaturing burrowing owls

Taking Photos on a Family Trip

Crystal Lake, Hayden Trailhead

Hayden Trailhead. Olympus OM-D E-M1 Mark II, 12-100mm, ISO 800, f/4, 1/1600 sec.

Taking photos on a family trip can be difficult. Fortunately, my husband and children are artistic and enjoy nature themselves.  I travel alone specifically for photography but for family trips, I employ a few strategies to make photography possible. On a recent family trip to Telluride, CO for the Imogene Pass Run, I applied these three tips and the result was a win-win for all!

Tip #1 – Don’t plan to photograph everything

Austin Horn running Imogene Pass Run

Austin at the start of the Imogene Pass Run. Olympus OM-D E-M1 Mark II, 40-150mm, ISO 1600, f/4, 1/500 sec.

After all, it is a family trip and when you are taking photos you are not engaged with the family. The Imogene Pass Run is a 17-mile run over Imogene Pass from Ouray, CO to Telluride, CO. These Rocky Mountains are stunning and the aspen trees had a hint of gold as they started their fall change. On race day, I had a schedule to follow but while waiting for runners to pass, I practiced “mental photography.” I scout where ever I go, knowing I can always come back in the future. At the start of the race, I hiked ½ mile onto the course to capture the runners and discovered Box Canyon. This canyon is huge with granite walls and a waterfall. I didn’t have my tripod, so, Box Canyon is now on my “to-do” list. I did

capture fun photos of the race both from the start and the finish.

Tip #2 – Divide and conquer

Waterfall in Telluride

Olympus OM-D E-M1 Mark II, 12-100mm, ISO 800, f/13, .8 sec., Singh-Ray Waterfall Filter.

When the race was over, Austin was ready for a nap and I was ready for photography. So, my husband and I hiked up to Bear Creek Falls south of Telluride. This 2-mile hike offered scenic views of the rugged cliffs and the waterfall was spectacular. It was late in the day so we didn’t have as much time as I wanted so, I added it to my “to-do” list.

Tip #3 – Involve the family

Hot springs

Olympus OM-D E-M1 Mark II, 12-100mm, ISO 400, f/10, 1/125 sec.

Prior to the trip we discussed what to do the day after the race. Our son loves driving to Silverton so we added that to our plan. We also planned on finding a few spots with water for me to photograph. Austin did the research and took us to hot springs, mountain lakes, and waterfalls. At each stop, we all went exploring; me with my camera/tripod and them with iPhone’s.

The trip was a success. I didn’t capture the same number of photos if I had been alone, but it was a great compromise.

Amy photographing a waterfall

Amy photographing a waterfall along the highway.

detail photo of bubbles

Bubbles. Olympus OM-D E-M1 Mark II, 12-100mm, ISO 400, f/5.6, 1/160 sec.

Artistic photo of water at Pinkerton Hot Springs

Water moving over textured rock. Olympus OM-D E-M1 Mark II, 12-100mm, ISO 400, f/16, 1/8 sec.

Spokane

Spokane Falls

Spokane Falls. Olympus OM-D E-M1 Mark II, 12-100mm, ISO 200, f/18, .4 sec., Singh-Ray Waterfall Filter.

Clock tower at Riverfront Park

Clock tower at Riverfront Park. Olympus OM-D E-M1 Mark II, 12-100mm, ISO 200, f/16, 25 sec.

Spokane is a city I visit often, after all, my sister lives here. I arrived a few days early from my big trip in need of people to talk to, a place to call home and to cheer her on in her 1.2 mile open water swim at Coeur d’Alene Lake. The first three days in Spokane were relaxing as I caught up on photos, played ukulele with my nephew (him on guitar) and became addicted to Handmaid’s Tale on Hulu. I guess I should binge all the seasons before I go home since I don’t have Hulu?

Back to Work

Spokane Falls

Spokane Falls. Olympus OM-D E-M1 Mark II, 40-150mm, ISO 200, f/11, .4 sec., Singh-Ray Waterfall Polarizer.

When the weekday rolled around and everyone went to work, so did I. I spent hours photographing this beautiful river city. I went hiking in Coeur d’Alene with a friend from my days as a high school teacher but the smoke from summer fires around the state made landscape photography difficult. Most of my photographs so far are from the downtown area including Riverfront Park, Spokane Falls and downtown neon lights.

When my sister went downtown with me to photograph neon, I was in the middle of the street to capture an image of the street lights. She told me the road was closed to traffic. Well, when the bus came around the corner at me I realized she was wrong! I got the shot then cleared out of his path quickly.

Spokane's Thomas Hammer Coffee Roasters sign

Thomas Hammer Coffee Roasters neon sign. Olympus OM-D E-M1 Mark II, 12-100mm, ISO 200, f/13, 2 sec.

Even though I have been to Spokane before, I haven’t always photographed it. So, I went to Google like I do in most cities. My sister drove me around to areas she thought would be strong subjects and then I added a few from my Internet searching. These scouting times are easily done in midday sun. I have one last morning to capture images and I can’t wait to go to High Bridge Park and Manito Gardens.

Downtown lights

Downtown Spokane Lights. Olympus OM-D E-M1 Mark II, 12-100mm, ISO 200, f/9, 2 sec.

For the Photogs!

Spokane Falls

Upper Spokane Falls. Olympus OM-D E-M1 Mark II, 40-150mm, ISO 200, f/11, .6 sec., Singh-Ray Waterfall Polarizer.

When I am out taking photos, I love to look for textures and colors. That is what prompted this photo. Part of Spokane’s Upper Falls this riffle stood out to me from the opposing textures and color. I was on a bridge looking down at the water and used my 40-150mm lens. If you take photos off a bridge, watch for other pedestrians or runners. Every time one would cross the bridge, the bridge would shake. I waited until they cleared the bridge and stood very still myself when I took the shot. Like all my water images recently, I also used the Singh-Ray Waterfall Polarizer, Olympus OM-D E-M1 Mark II, 40-150mm, ISO 200, f/11, .6 sec.

La Push

James Island, La Push. Olympus OM-D E-M1 Mark II, 12-100mm, ISO 200, f/8, 1/160 sec., Using high-res mode creating a 50 mp image.

One last fun story from my trip. Throughout my trip I have spent many hours practicing the ukulele. Since I can now change chords quick enough to play a tune, I decided to practice on my last night while I waited for sunset. Normally, I practice when campers around me are away. As soon as I tuned the uke, my neighbor came out asking if I was a musician. Well, that is not what I would call my playing to be and I don’t sing. Well, he and his wife are musicians and they asked me to play with them. So, we had a jam session with a guitar, autoharp, concertina and my uke. Lauren traded off on the guitar and concertina (like an accordian), Shery played the autoharp. Good thing Lauren would tell me when to change chords. We played two songs and Lauren sang, he also kept the chord changes simple for me. Then, the fog settled around James Island and the sun began to set and I ran off to photograph my last sunset on the Washington Coast for now.

Enjoy this image from La Push, Washington. Oh, and one of the best meals from the entire trip was here in La Push at Rivers End Restaurant. I ate the Seafood Louie salad with shrimp, crab and smoked salmon along with a cup of clam chowder – delish. Excellent finish to an excellent trip!

Seafood Louie Salad. iPhone

Last Days Solo

Last sunset

Kalaloch Sunset, iPhone

Dry Hoh Rainforest

Dirt covered plants. Olympus OM-D E-M1 Mark II, 12-100mm, ISO 200, f/8, 1/8 sec.

My last days on the Washington Coast were at Kalaloch in the Olympic National Park and La Push just outside of the park on the Quileute Reservation. When I arrived at Kalaloch, I was eager to visit the Hoh Rainforest. Our family visited 20 years ago and it was spectacular. Of course, August is a dry month for the Hoh so I wasn’t sure what to expect. I didn’t expect to find 83-degree Fahrenheit temperatures and sunny skies. It was so dry all the ferns were covered with dirt and parking was almost impossible with the influx of visitors. I made a new plan.

Last Waterfall

Marymere Falls. Olympus OM-D E-M1 Mark II, 12-100mm, ISO 200, f/13, 10 sec., Bryan Hansel Filter.

The next day, I woke up early and drove to Lake Crescent in the Olympic National Park to photograph Marymere Falls before the sun came over the treetops. This was an almost 2-hour drive and it was worth it. Walking to the falls a fawn and doe greeted me on the path. They were within 10-feet and didn’t run off. I enjoyed the moment instead of grabbing the camera. Even when my foot slipped in the water, I just laughed. Luckily, I had dry shoes in the car. After the falls I went sightseeing in Forks and La Push – don’t blink or you might miss them! La Push was my next destination, so I was happy scouting the area. I walked on the

Marymere Falls

Marymere Falls. Olympus OM-D E-M1 Mark II, 12-100mm, ISO 200, f/18, 20 sec., Bryan Hansel Filter.

beaches and watched the fog banks come and go.

While driving back to Kalaloch, I thought about this trip from the first night in Tehachapi, CA to this point with only one last night in La Push remaining. It has been an amazing journey and as my stepmom said, “Empowering.” I can not agree more. Even though my seven-week (49 day) solo journey is complete, my sabbatical is just beginning. On August 20, 2018, I will not report to work at NAU but instead Boston with my sister. I will continue to blog about my travels and photo challenges as I continue to photograph water and waterfalls.

Things I learned:
  • last morning

    Kalaloch Beach, last morning

    How to build a fire with wet wood, thank you Firestarter.

  • Hiking alone is empowering and I don’t need to hyperventilate.
  • My only limits are when I limit myself
  • My husband is still my best friend.
  • Family still comes first and my future trips won’t be for this long away from them.
Things I will miss:
  • Doing what I want when I want. I only ate when I was hungry and didn’t plan for the next meal. Some meals were cheese and crackers, others more elaborate.
  • Taking naps when I’m tired.
  • The open road and all it offers. Many people asked me why I wasn’t traveling out of the country on sabbatical and I thought there are so many places near home I haven’t seen or photographed.
  • Being popular at campgrounds with the “cool teardrop.”
What I look forward to now:
  • Rialto Beach

    Rialto Beach. Olympus OM-D E-M1 Mark II, 12-100mm, ISO 200, f/10, 1/1600 sec.

    Showering without wearing flipflops and taking showers without hitting the button to reset my 30-seconds of water.

  • Changing clothes standing up instead of in a W5’ x L8’ x H3.5’ bedroom. And just being in a room larger than this if it is cold outside!
  • Not having to plan for charging camera batteries/laptop in the car when I drove (not all campgrounds had power).
  • Washing dishes in a sink and/or dishwasher.
  • Not buying ice every 4-5 days.
  • The remainder of the year to continue photographing water, studying imagery, reading, learning new photo techniques and teaching workshops.
  • Learning new strumming patterns on the ukulele and a few new songs. I almost memorized the ones in my book.
  • Eating Mexican Food.
  • Sorting my photos to find the ones I overlooked!

Water reflections

Reflections. Olympus OM-D E-M1 Mark II, 12-100mm, ISO 200, f/10, 1/5 sec.

Tomorrow morning, I drive approximately eight hours to Spokane. Tonight, I will eat out at the only restaurant in La Push!

Ocean City

ocean city beach sunset

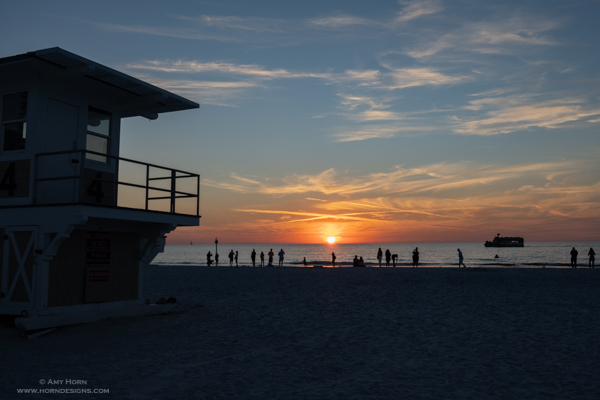
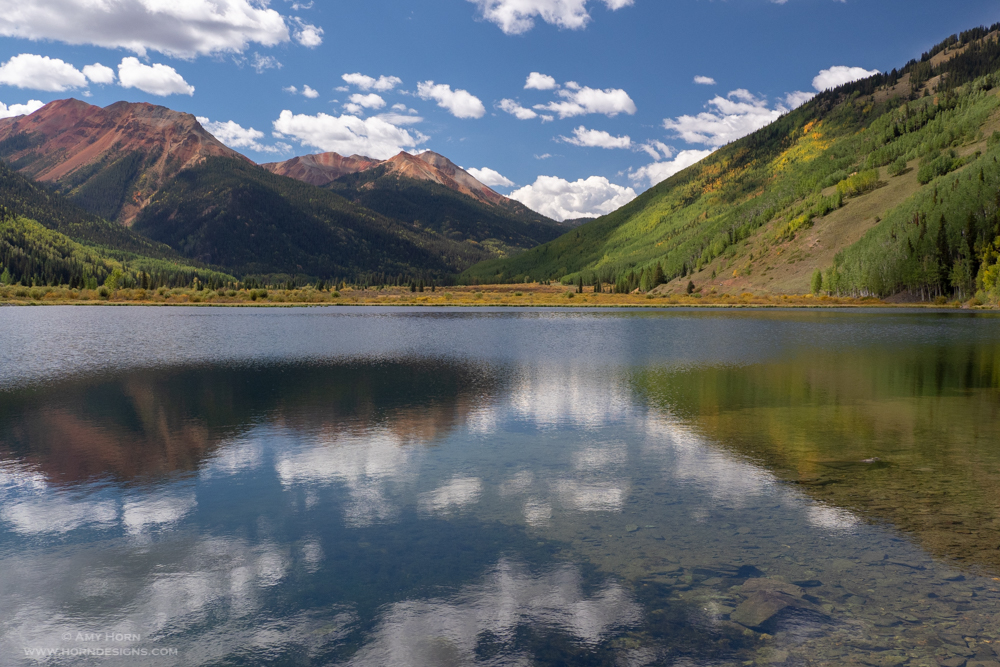
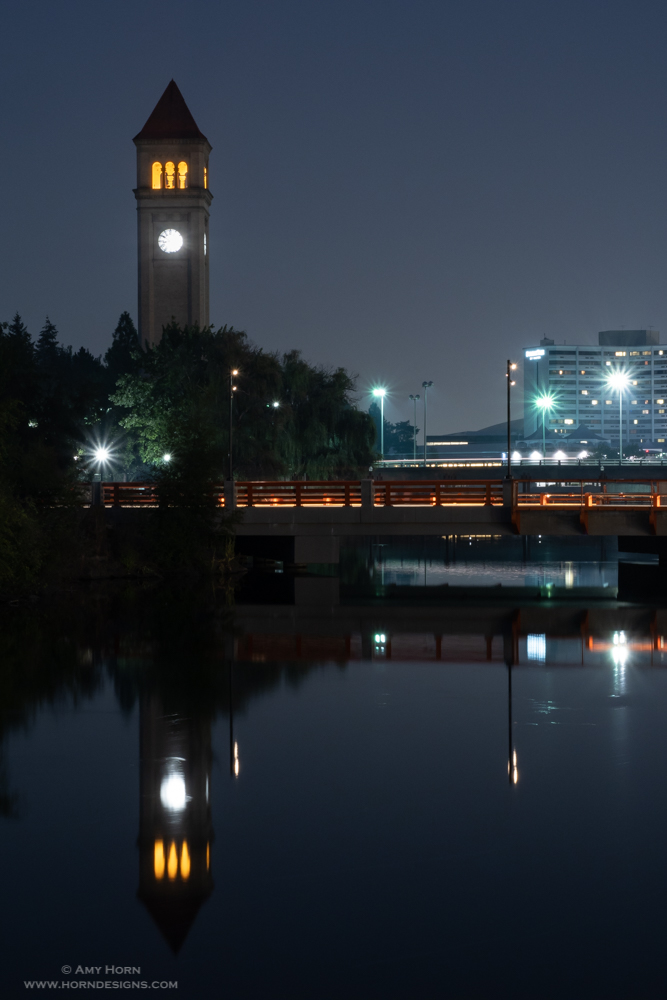
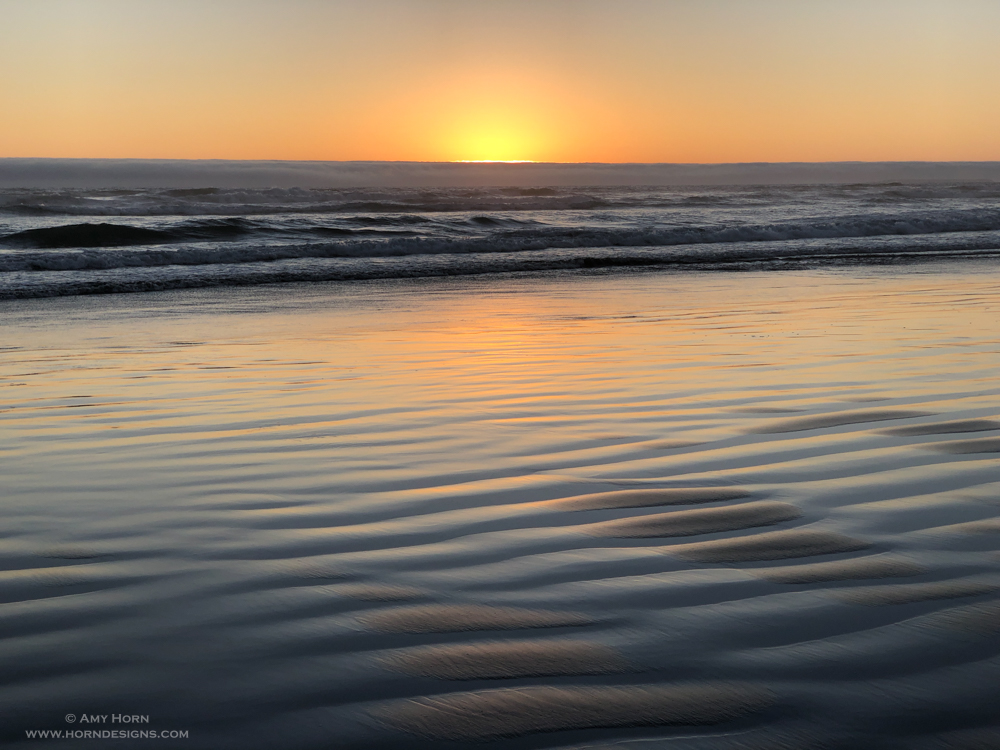
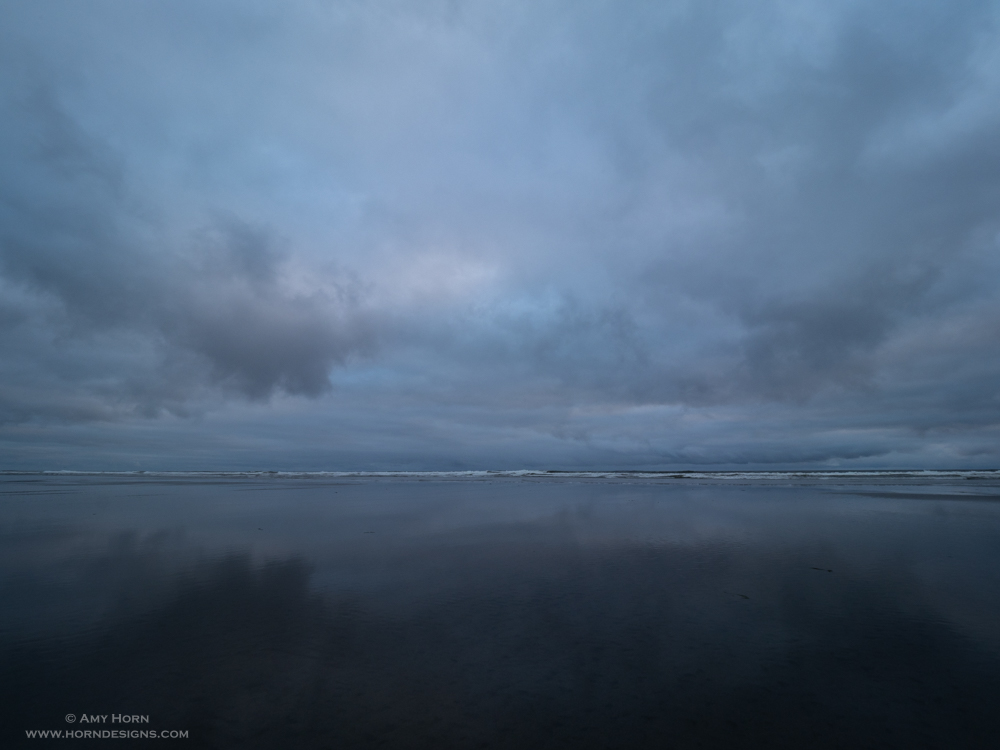
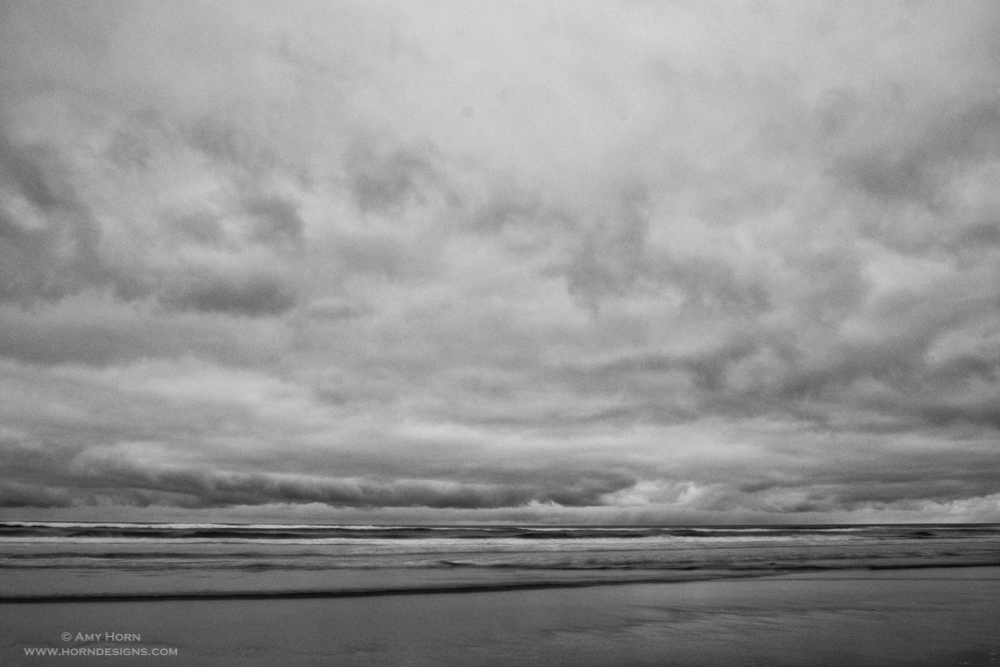
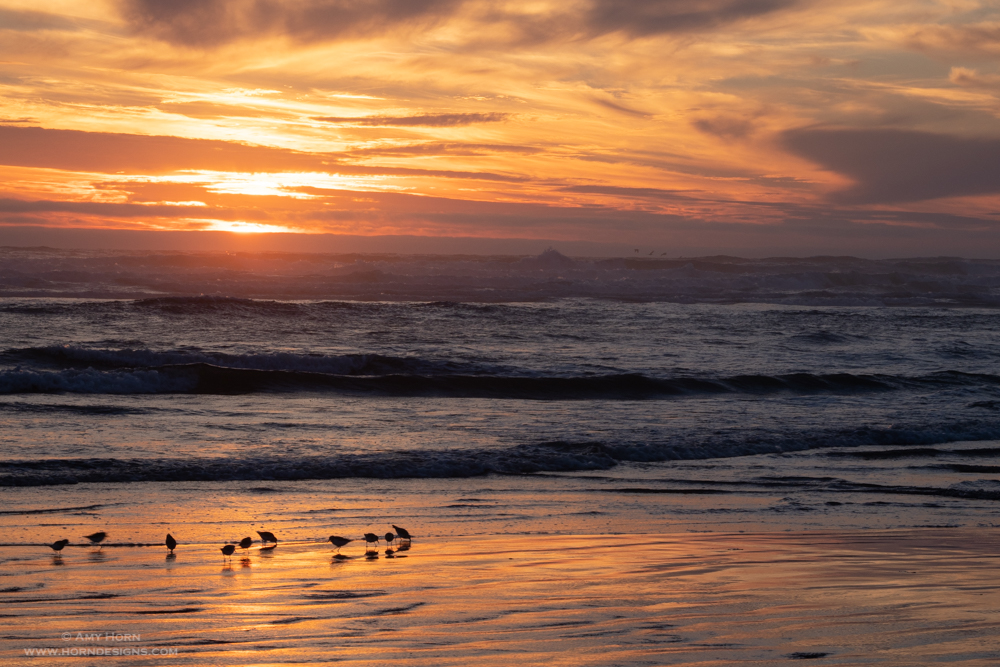
Cloudless Night. Olympus OM-D E-M1 Mark II, 12-100mm, ISO 200, f/20, .8 sec.

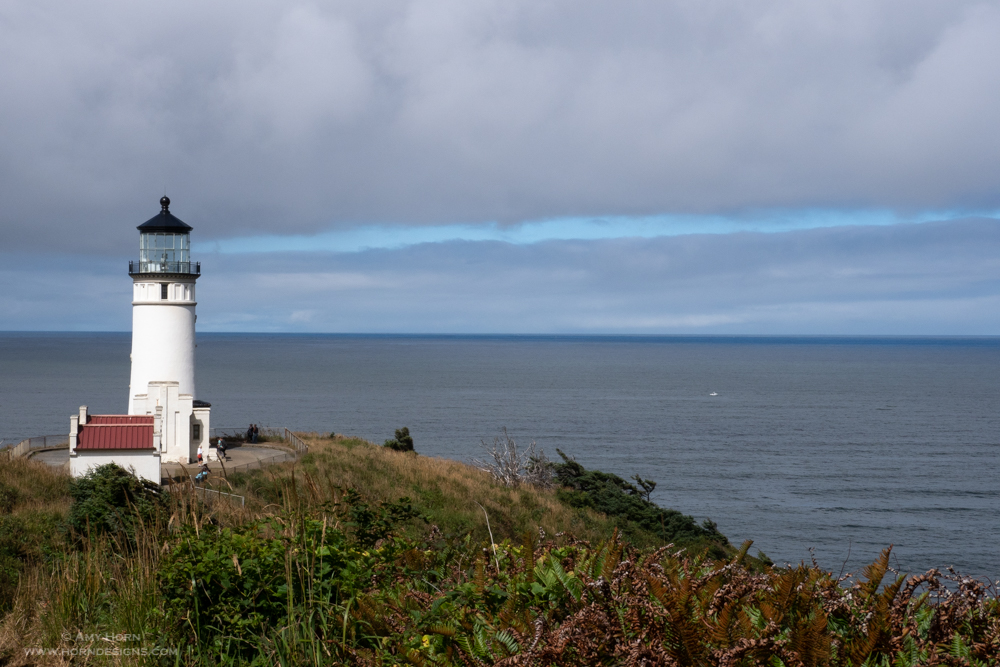
My tarp finally got rained on as I packed to leave Cape Disappointment. On the way to Ocean City, I drove through rain, fog and mist. It was beautiful. In Ocean City, there wasn’t a cloud in the sky and it was only 80 miles from Cape Disappointment. What a difference. After setting up camp, I sat in the sun and read for an hour just to soak up some rays. The Ocean City campground was two blocks from the ocean so I shot sunset for two nights here. The first night without clouds and the last night with excellent clouds.

falls creek falls

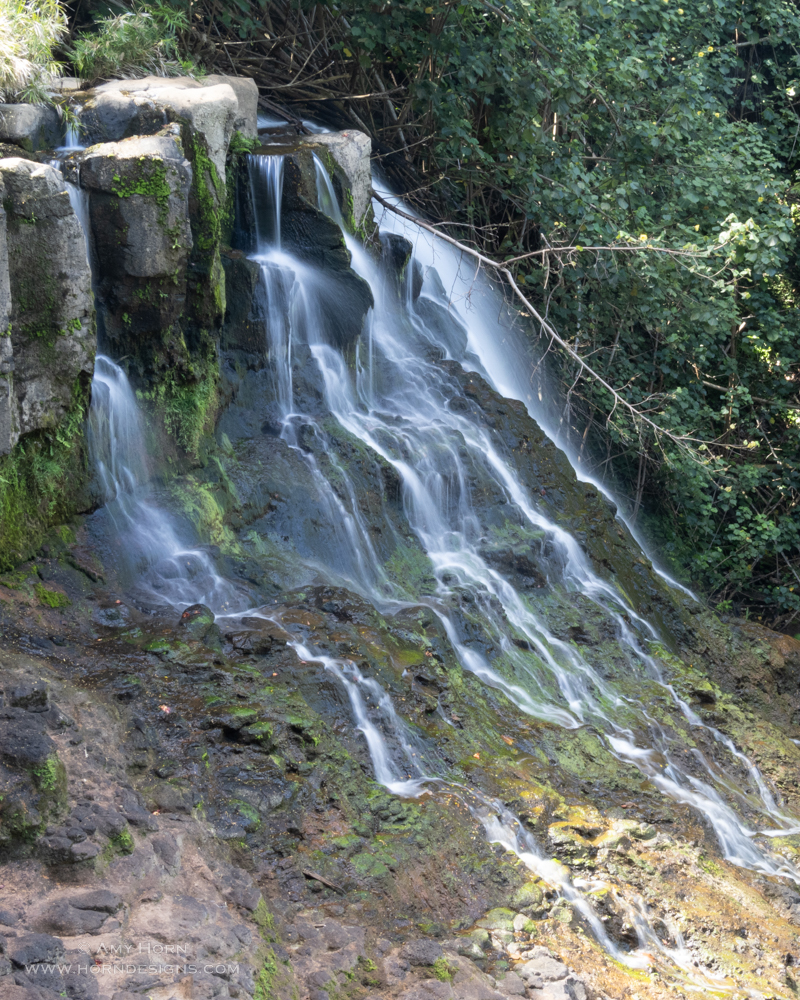
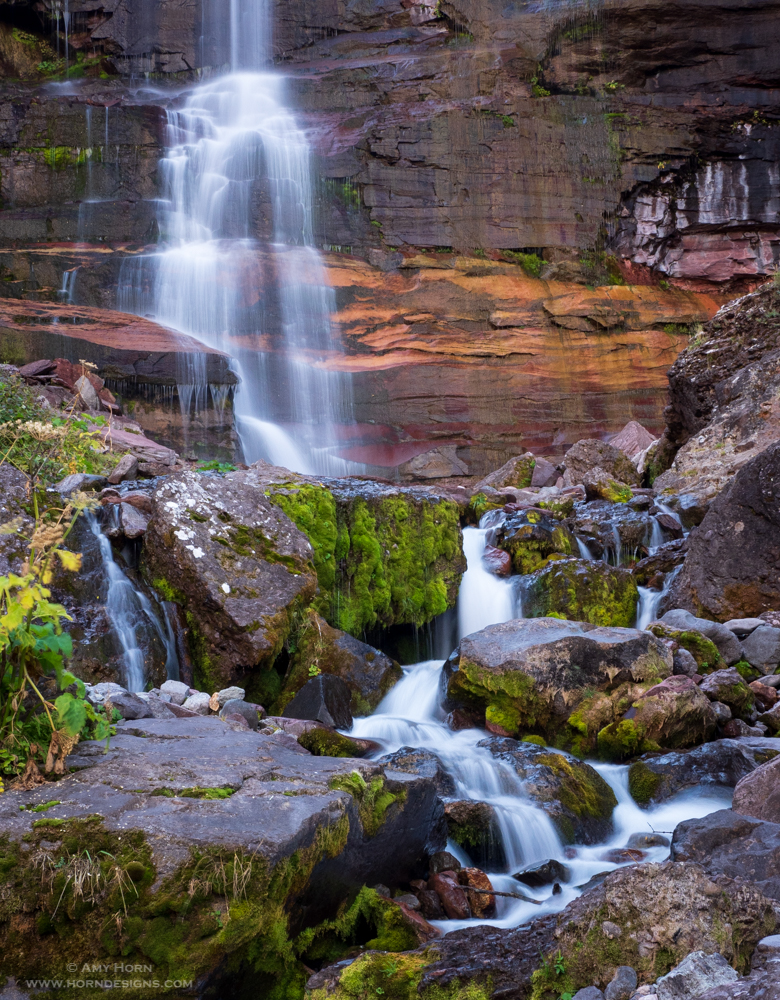
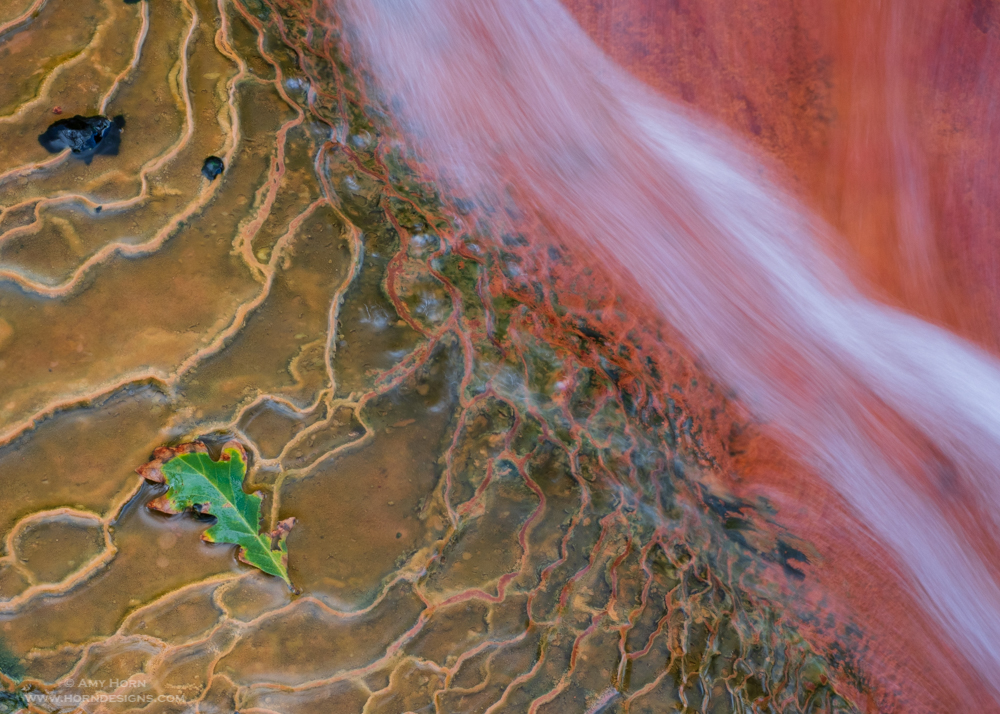
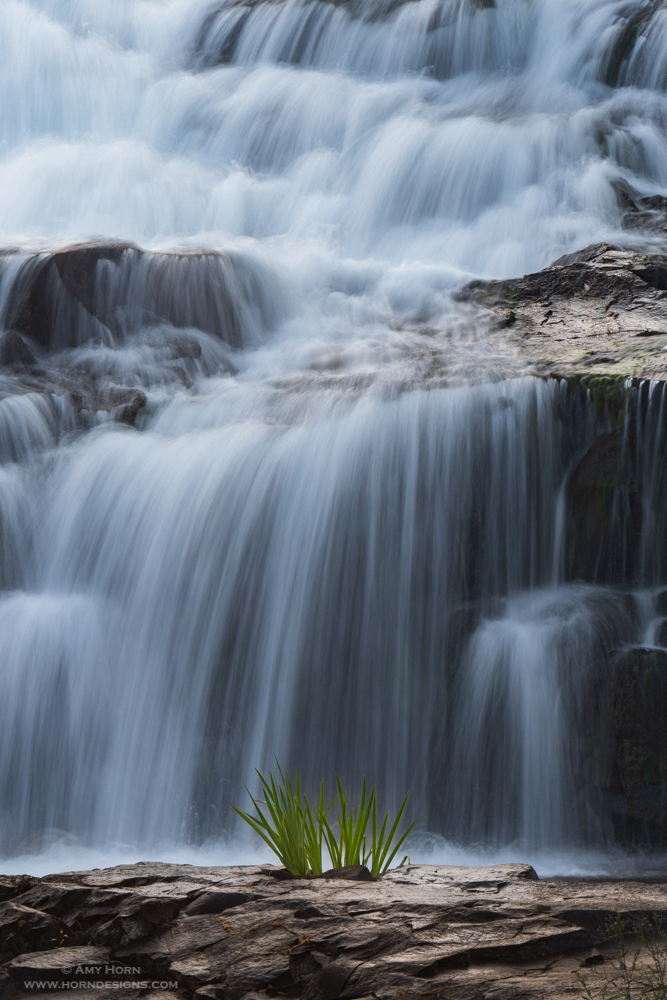
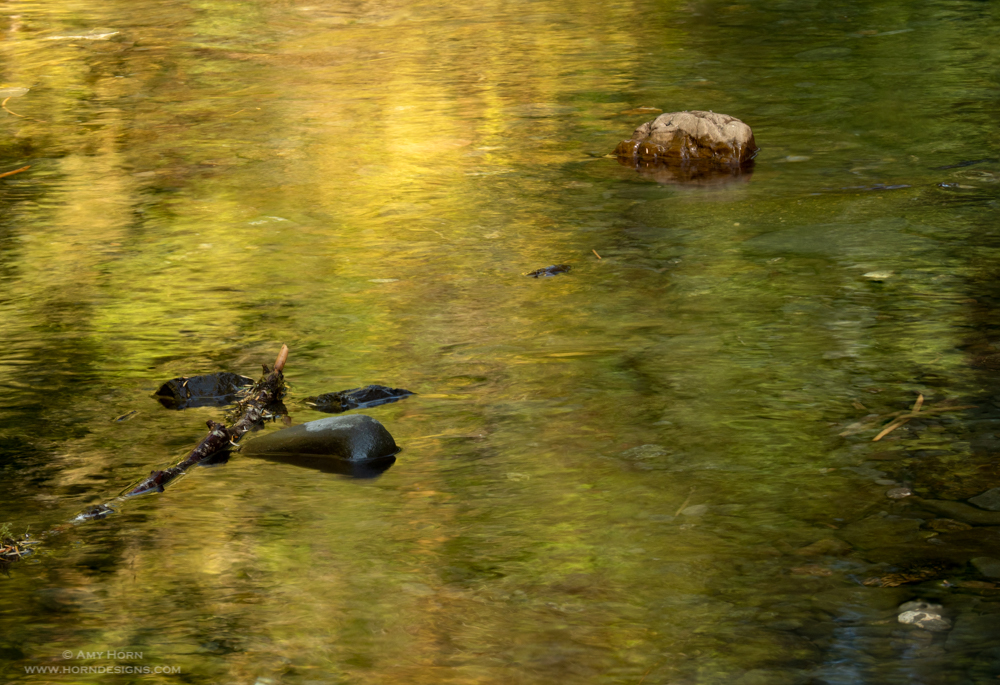
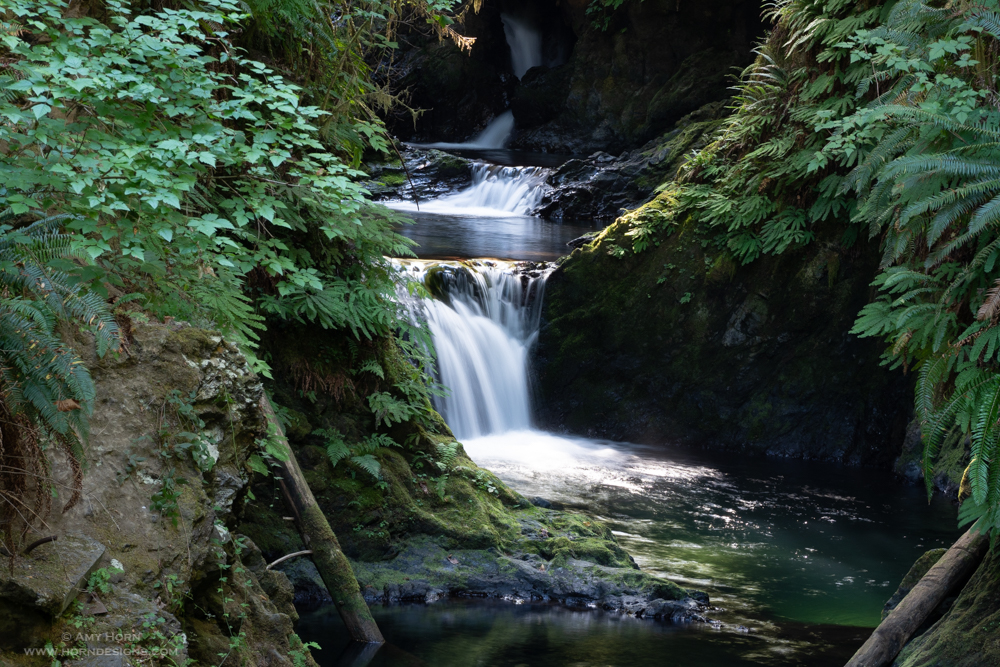
Fall Creek. Olympus OM-D E-M1 Mark II, 12-100mm, ISO 200, f/8, 6 sec., with Bryan Hansel Singh-ray Filter.

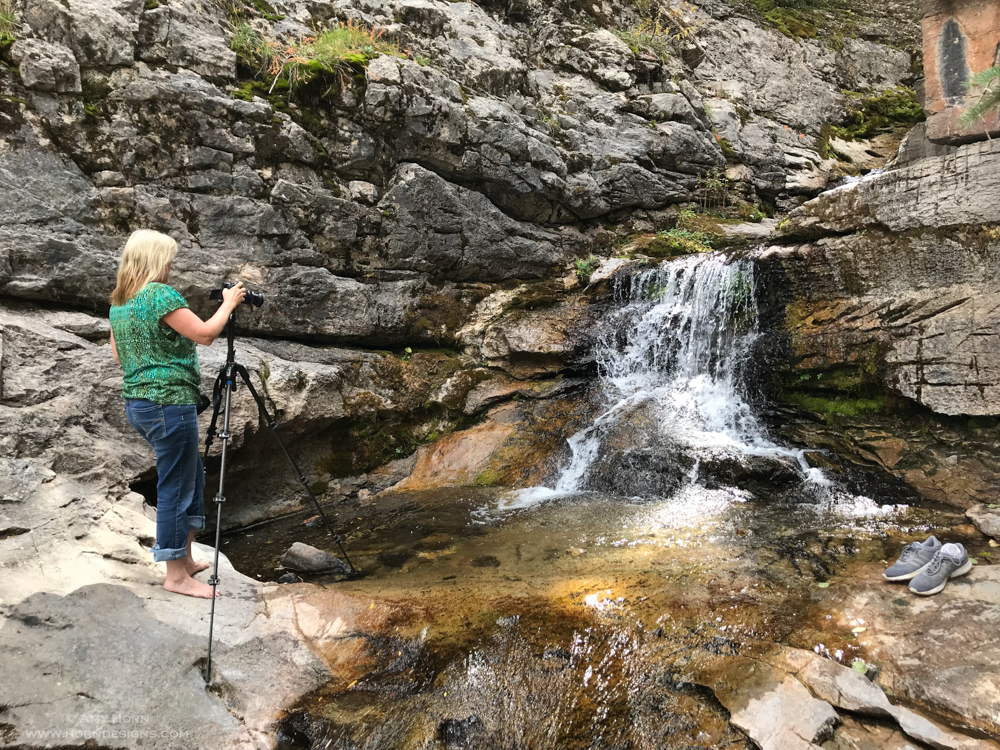
Ocean City is a short drive to Lake Quinault, part of the Olympic National Forest and there are many waterfalls. I was so excited to photograph there, I woke up very early and was on a trail by 7:30am after the 1-hour drive. My first location was Falls Creek which is on the edge of a tent campground and I was very quiet to not wake up any campers. It was a pretty fall, but I struggled getting a composition I liked. So, I hiked to Gatton Creek Falls. It was a mile to the falls and a bridge crossed over the top. The only problem with this tiered fall was access to it. I could not find a trail I was willing to walk down without going swimming so I headed back a little discouraged.

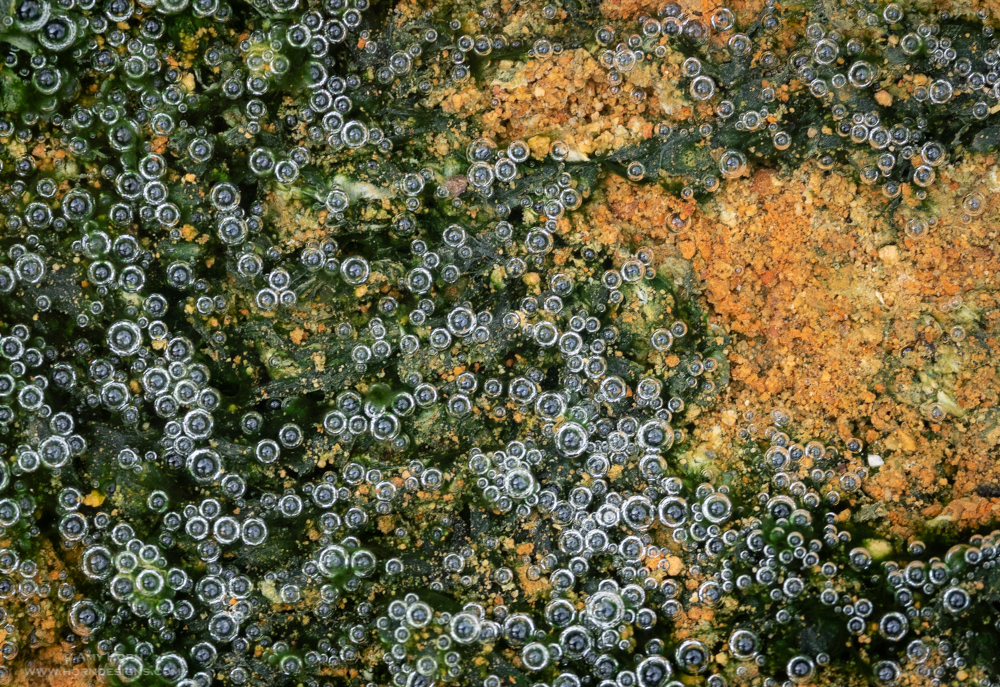
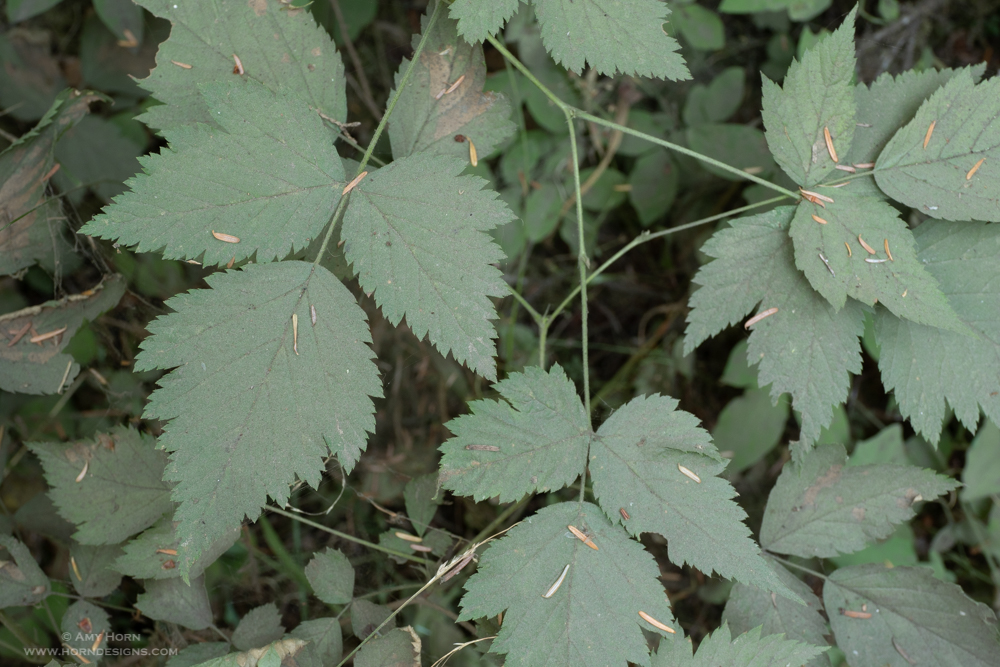
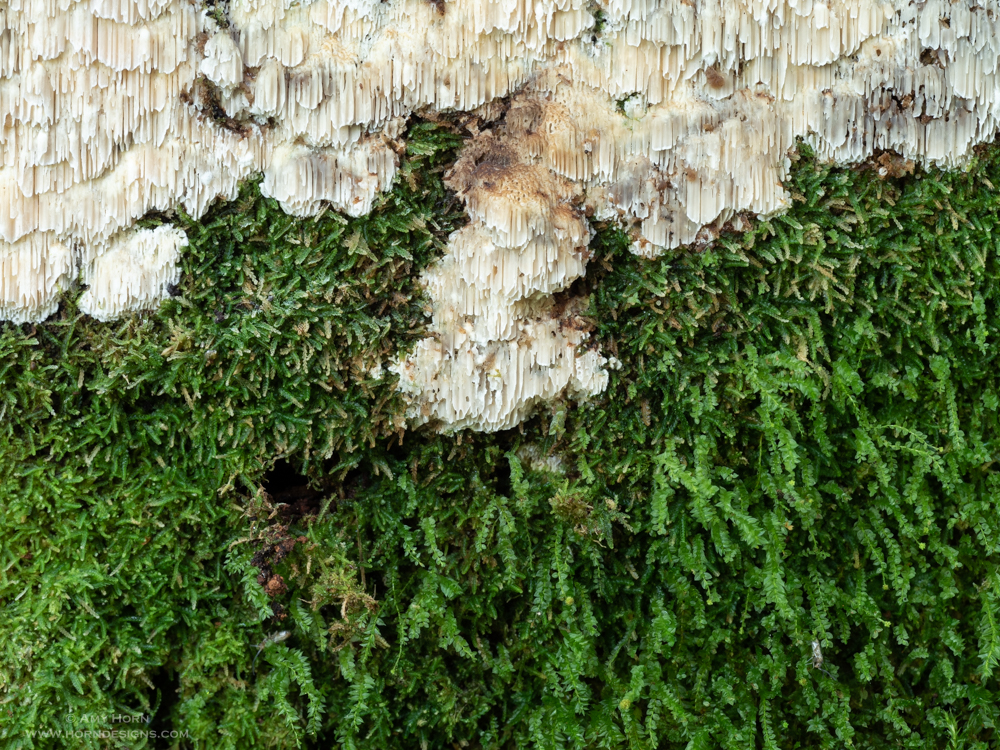
Even though I wanted to photograph waterfalls, I reminded myself how beautiful the trail was and tried to find other things to photograph. I came across chicken mushroom and moss growing on the side of a tree stump and pulled out the macro lens.

chicken mushroom and moss

Chicken Mushroom and moss. Olympus OM-D E-M1 Mark II, 60 mm, ISO 200, f/9, 2.5 sec.

Mosquitos were buzzy around, but my deet must have worked as I survived without a bite. Capturing the macro shots reinforced my thoughts of the beautiful trail and improved my mood. I took off in search of more falls.

Waterfalls

willaby creek falls

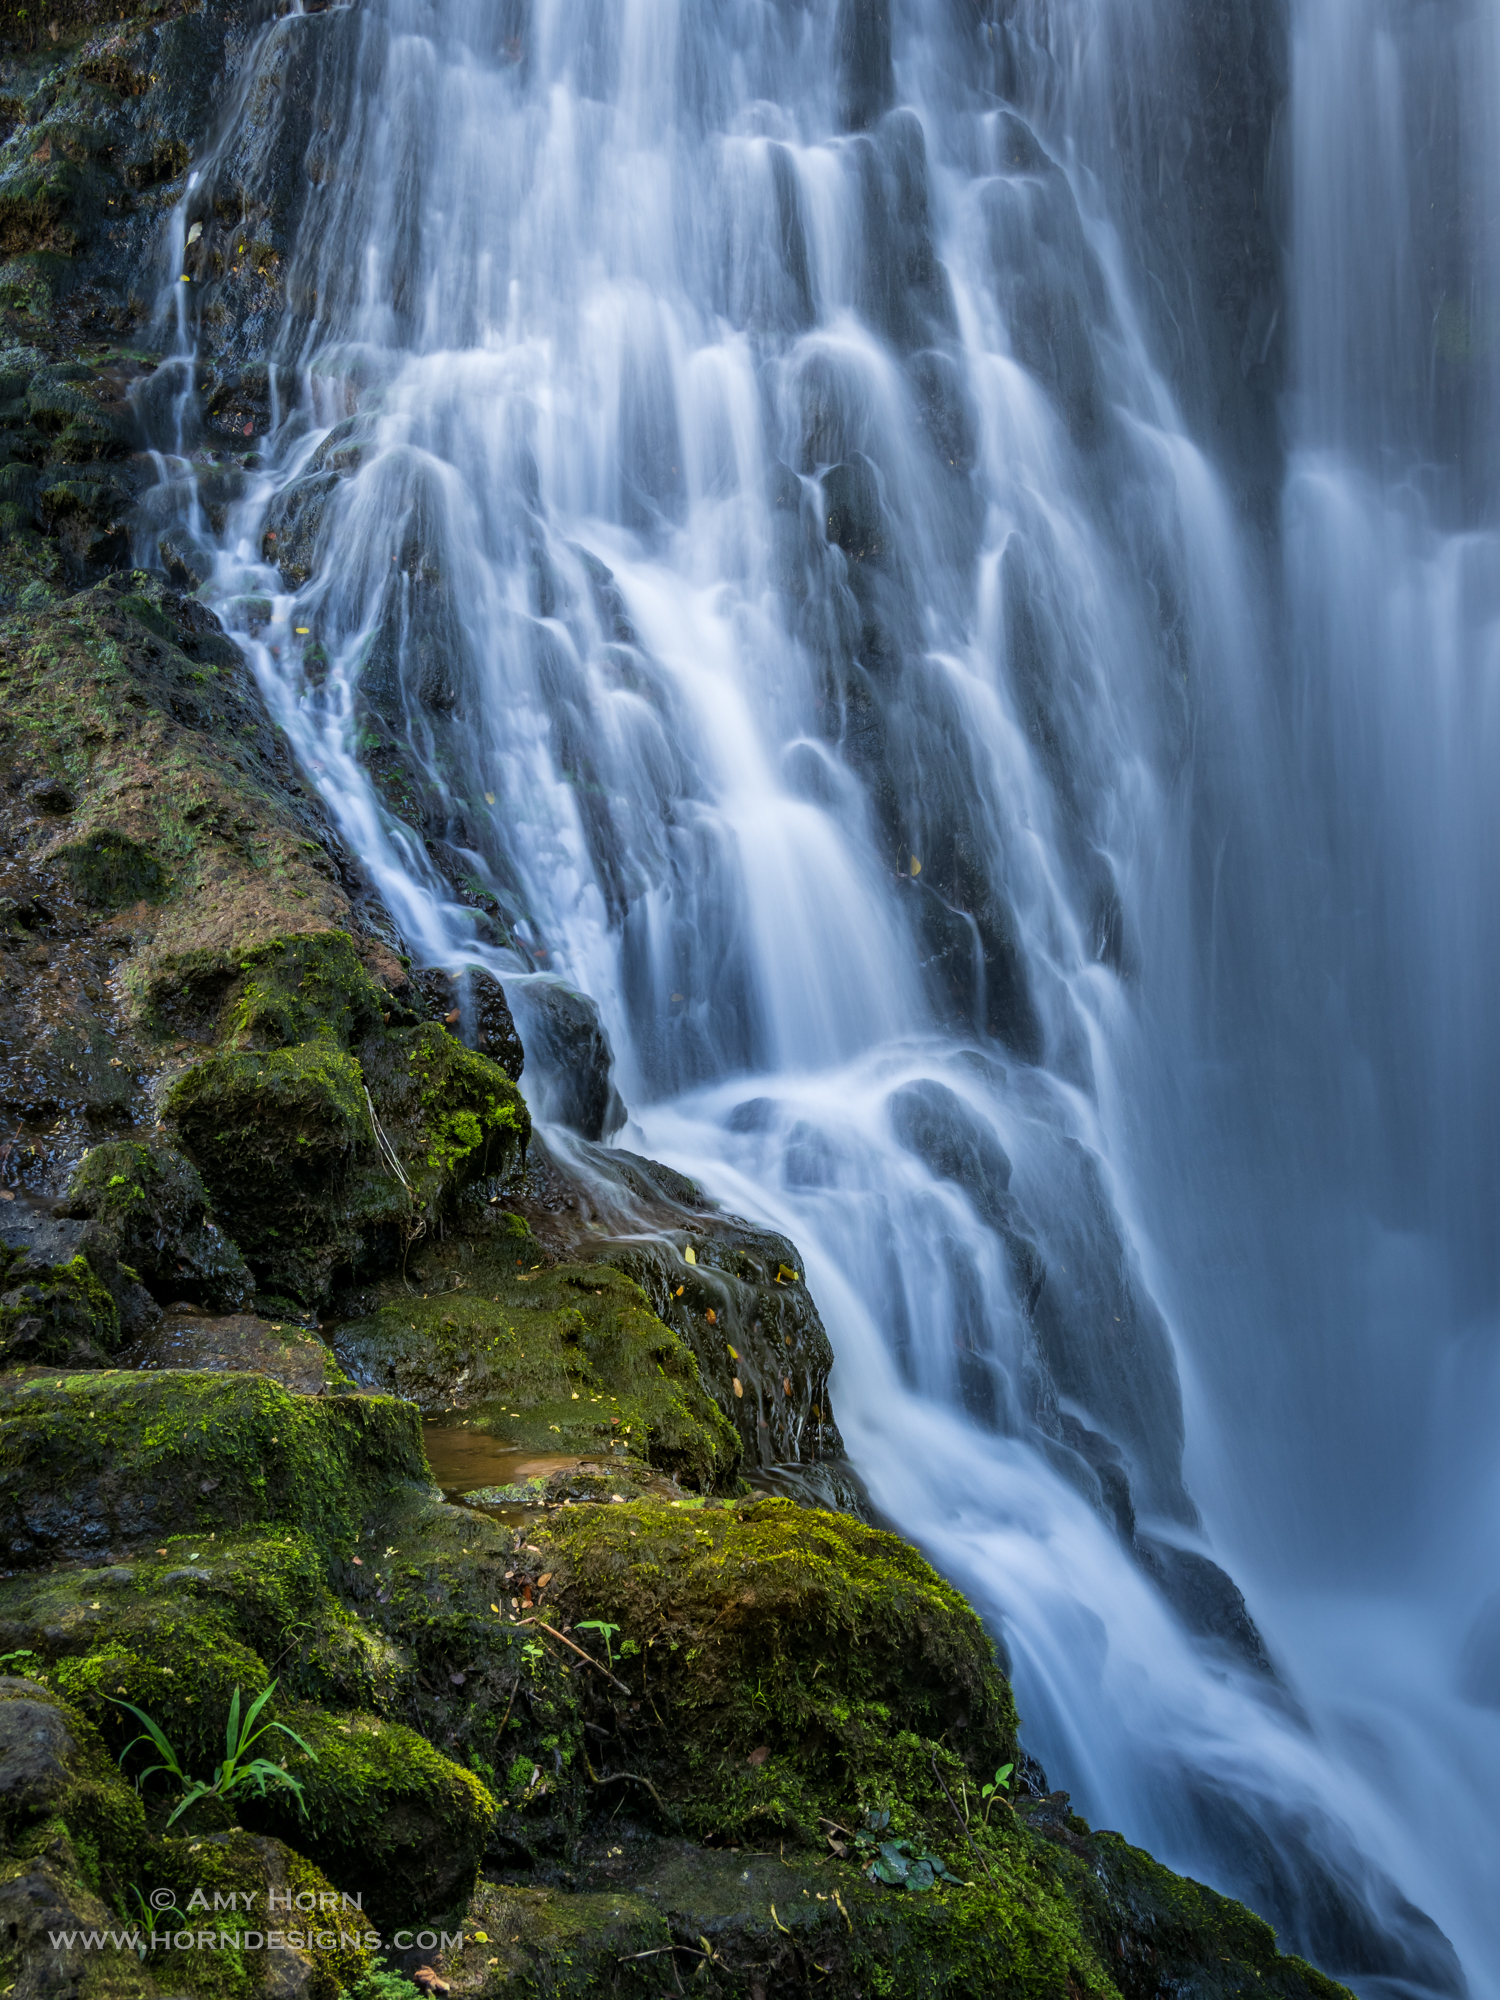
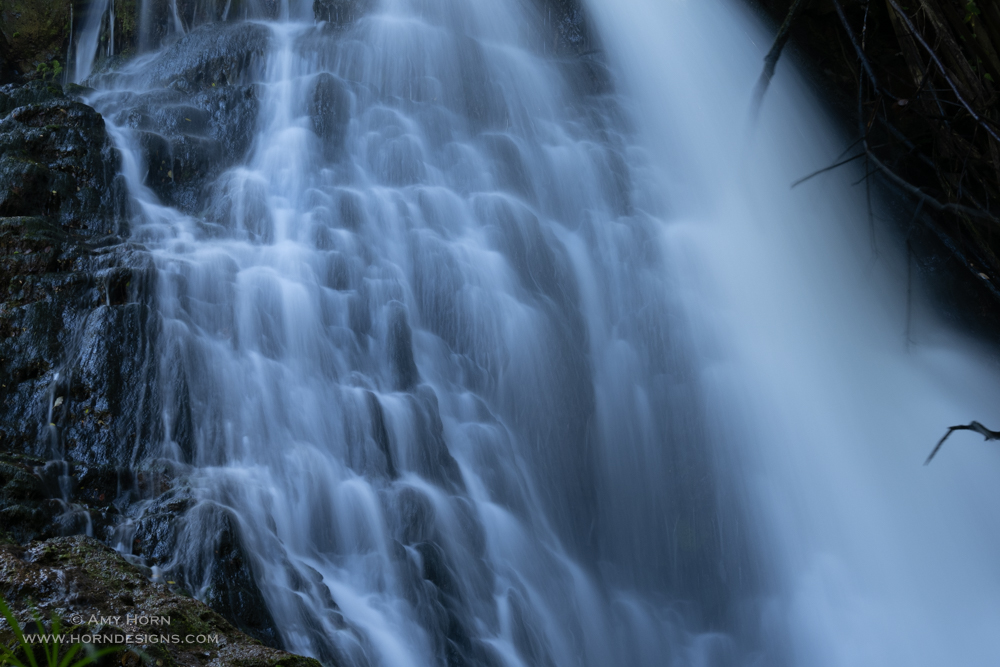
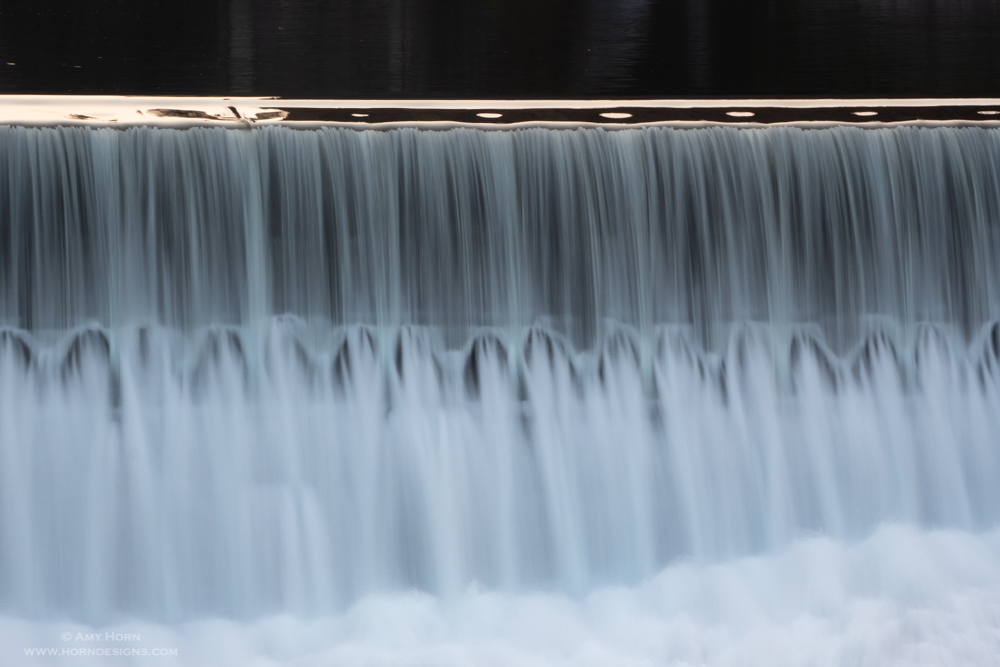
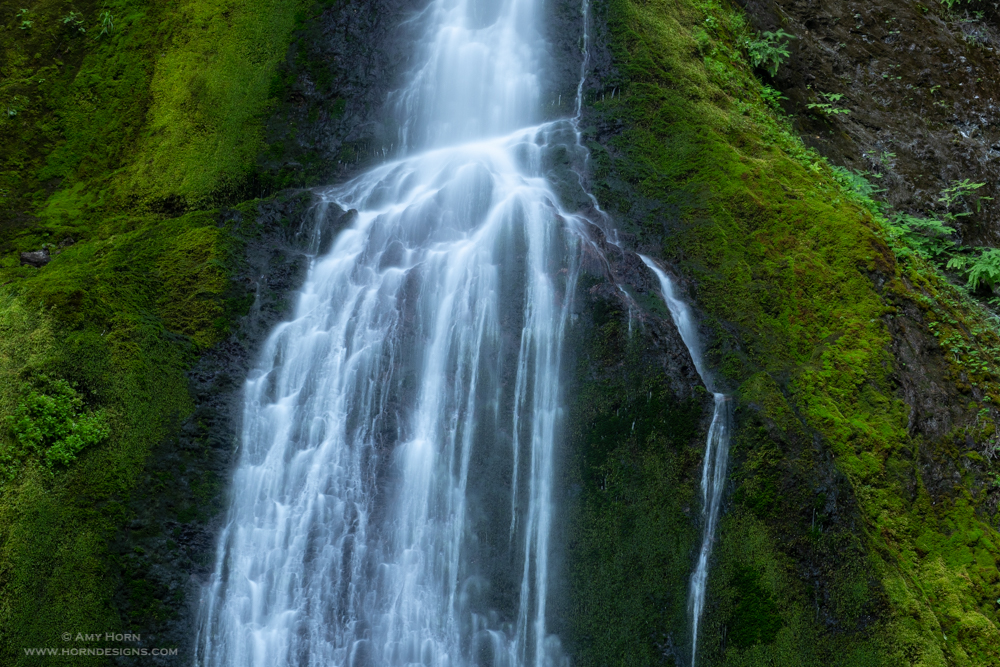
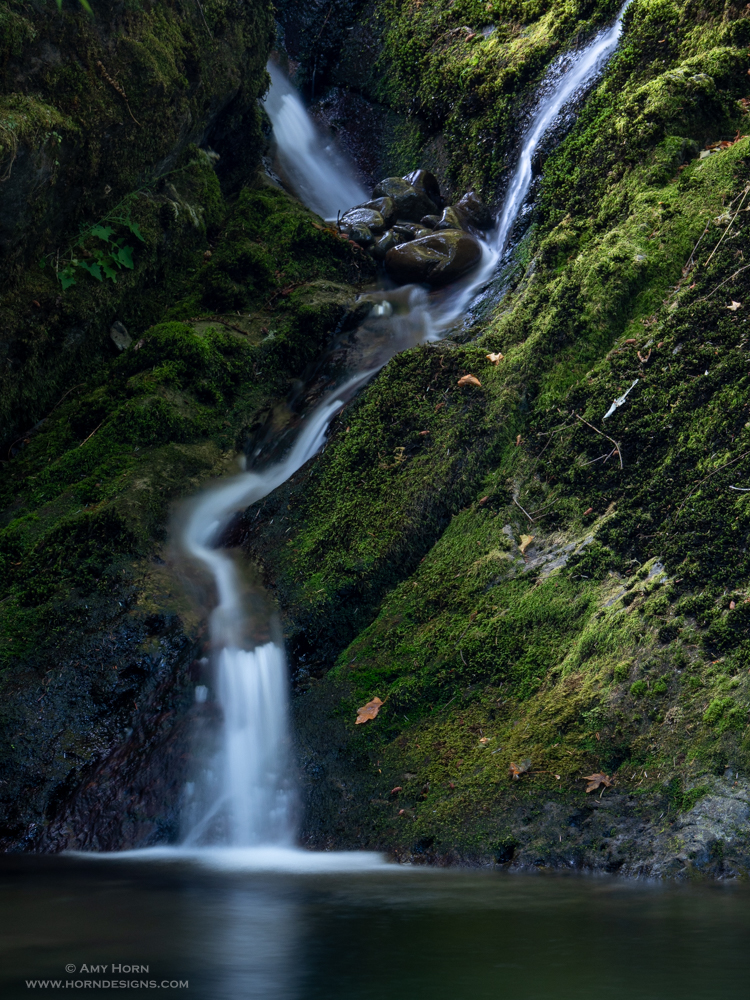
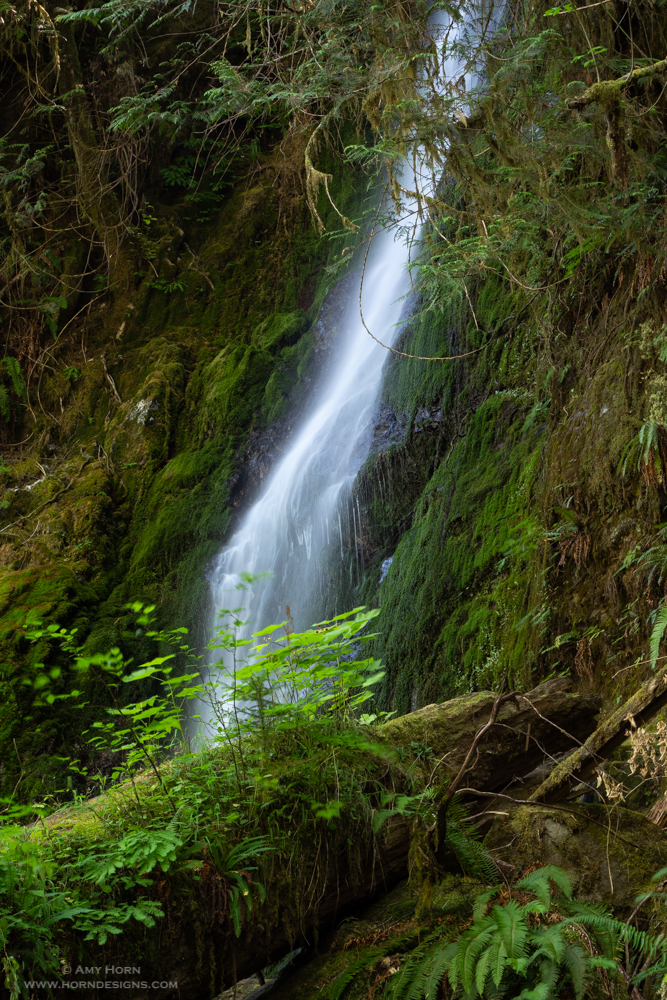
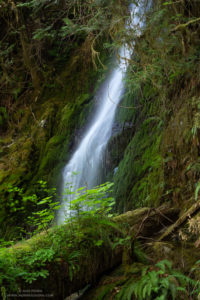
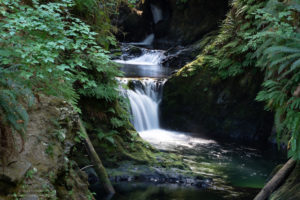
Willaby Creek Falls Final Photo. Olympus OM-D E-M1 Mark II, 12-100mm, ISO 200, f/8, 5 sec., with Bryan Hansel Singh-ray Filter.

The trail to Willaby Falls was non-technical and I didn’t feel that I was going to fall in. I stepped off the trail slightly to get a better angle and had fun capturing images here. In the photog section below, I discuss the first photo upon arriving at the scene to my final photo. When I am photographing beautiful falls like this, I try to remind myself to look not only through the camera but with my eyes as well. So, often I will pause and just admire without looking for a composition or changing an aperture. I just take in the beauty.

merriman falls

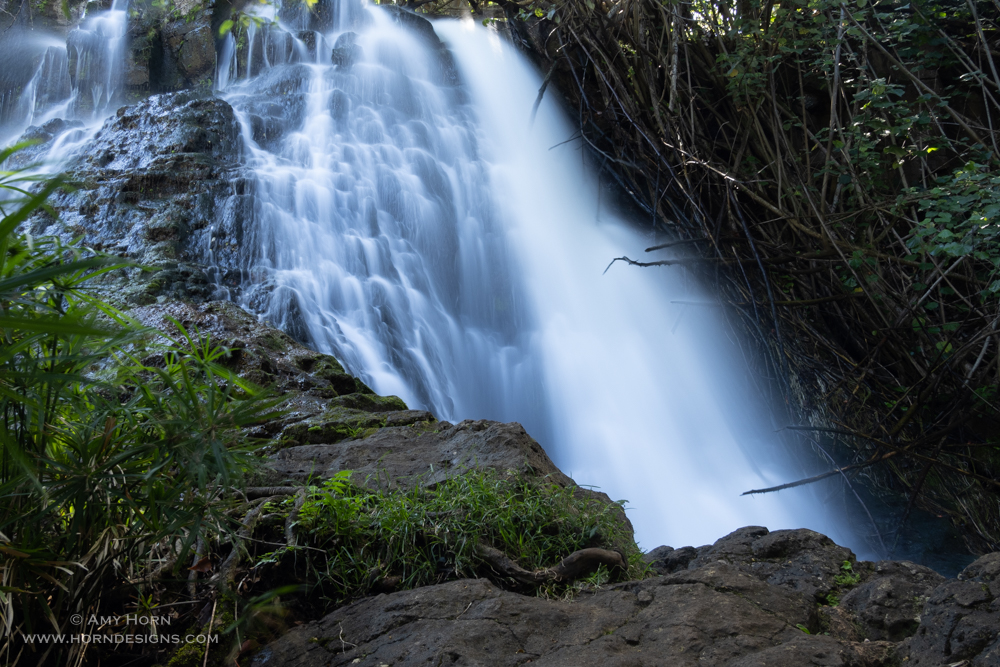
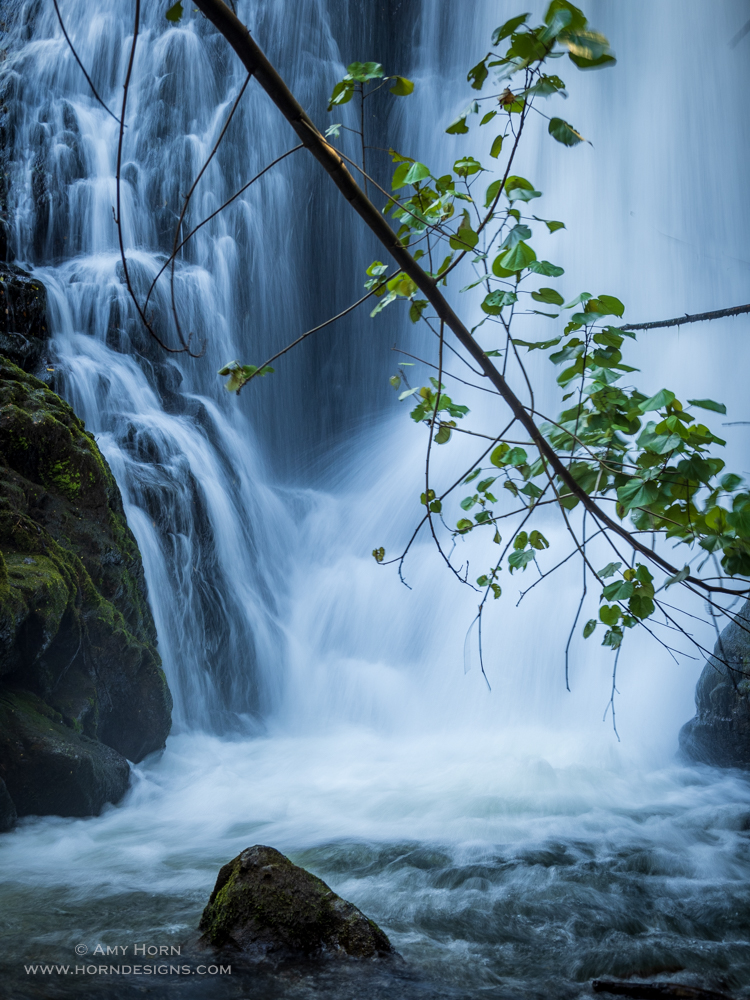
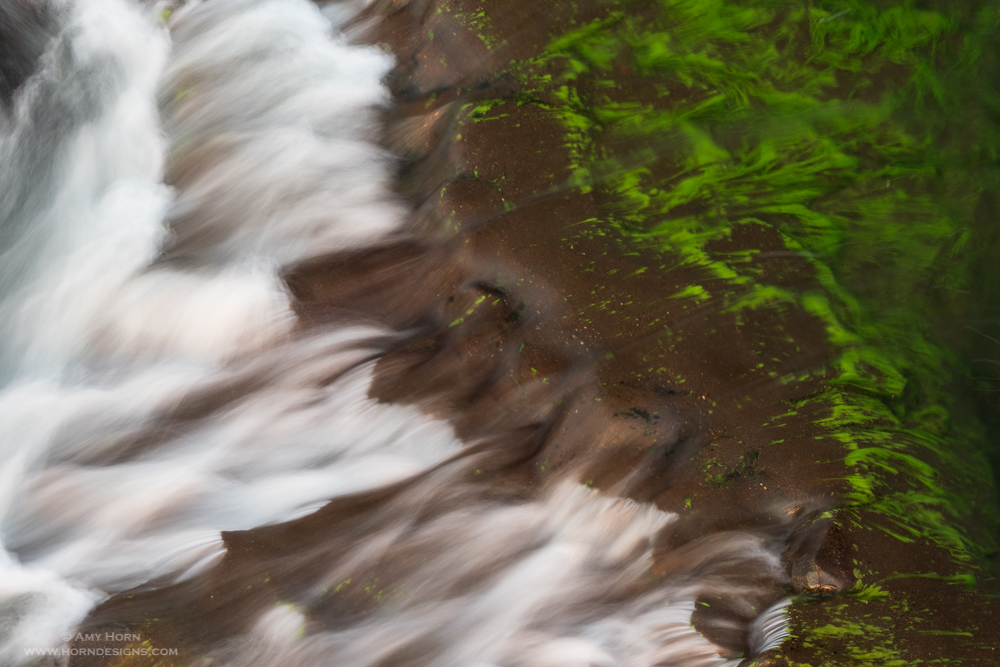
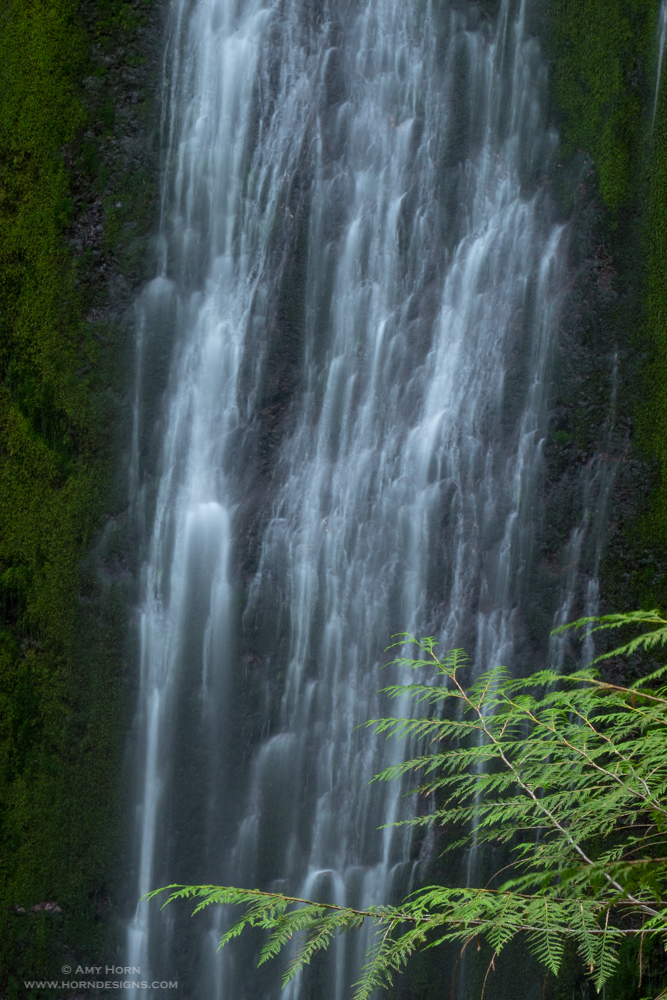
Merriman Falls Olympus OM-D E-M1 Mark II, 12-100mm, ISO 200, f/10, 8 sec., with Bryan Hansel Singh-ray Filter.

Lastly, I drove to Merriman Falls. The 40-foot drop contrasted with Willaby Creek Falls and required a different approach to capture an image. Next to the side of the road with only a pullout (no sign) this waterfall was magnificent. The entire falls were hard to photograph because by this time, other people were around. Another photog was there capturing couple’s photos as well, so I worked around them and captured small scenes of the falls.
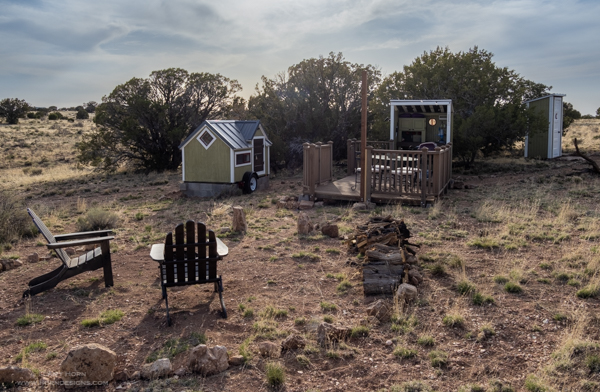
Comforts of Home

Amy selfie

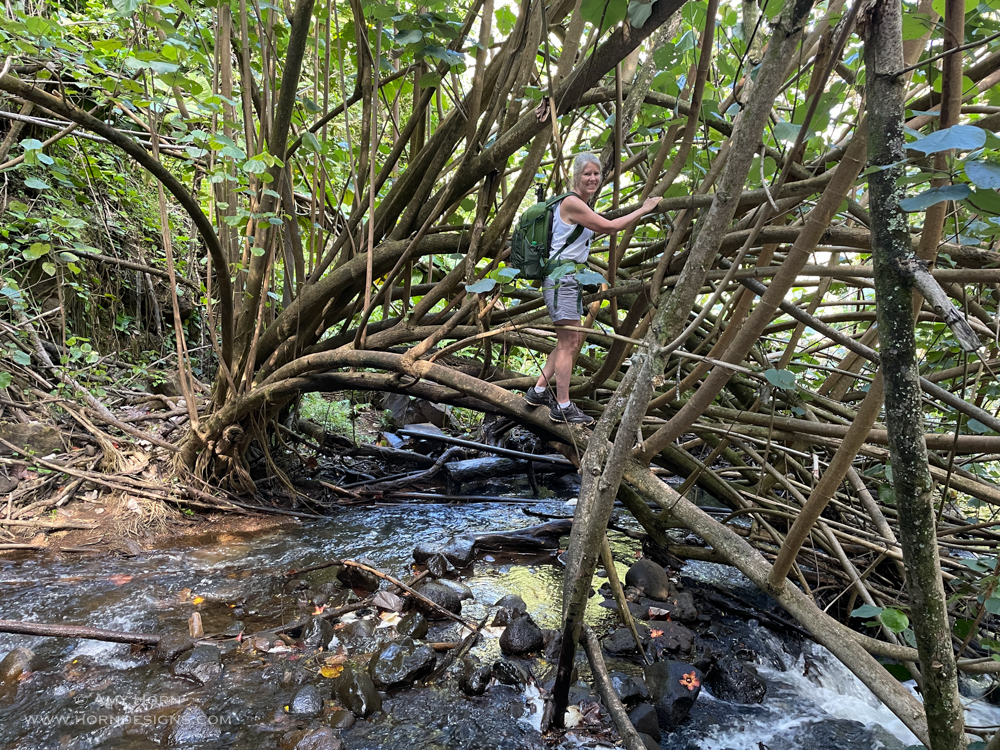
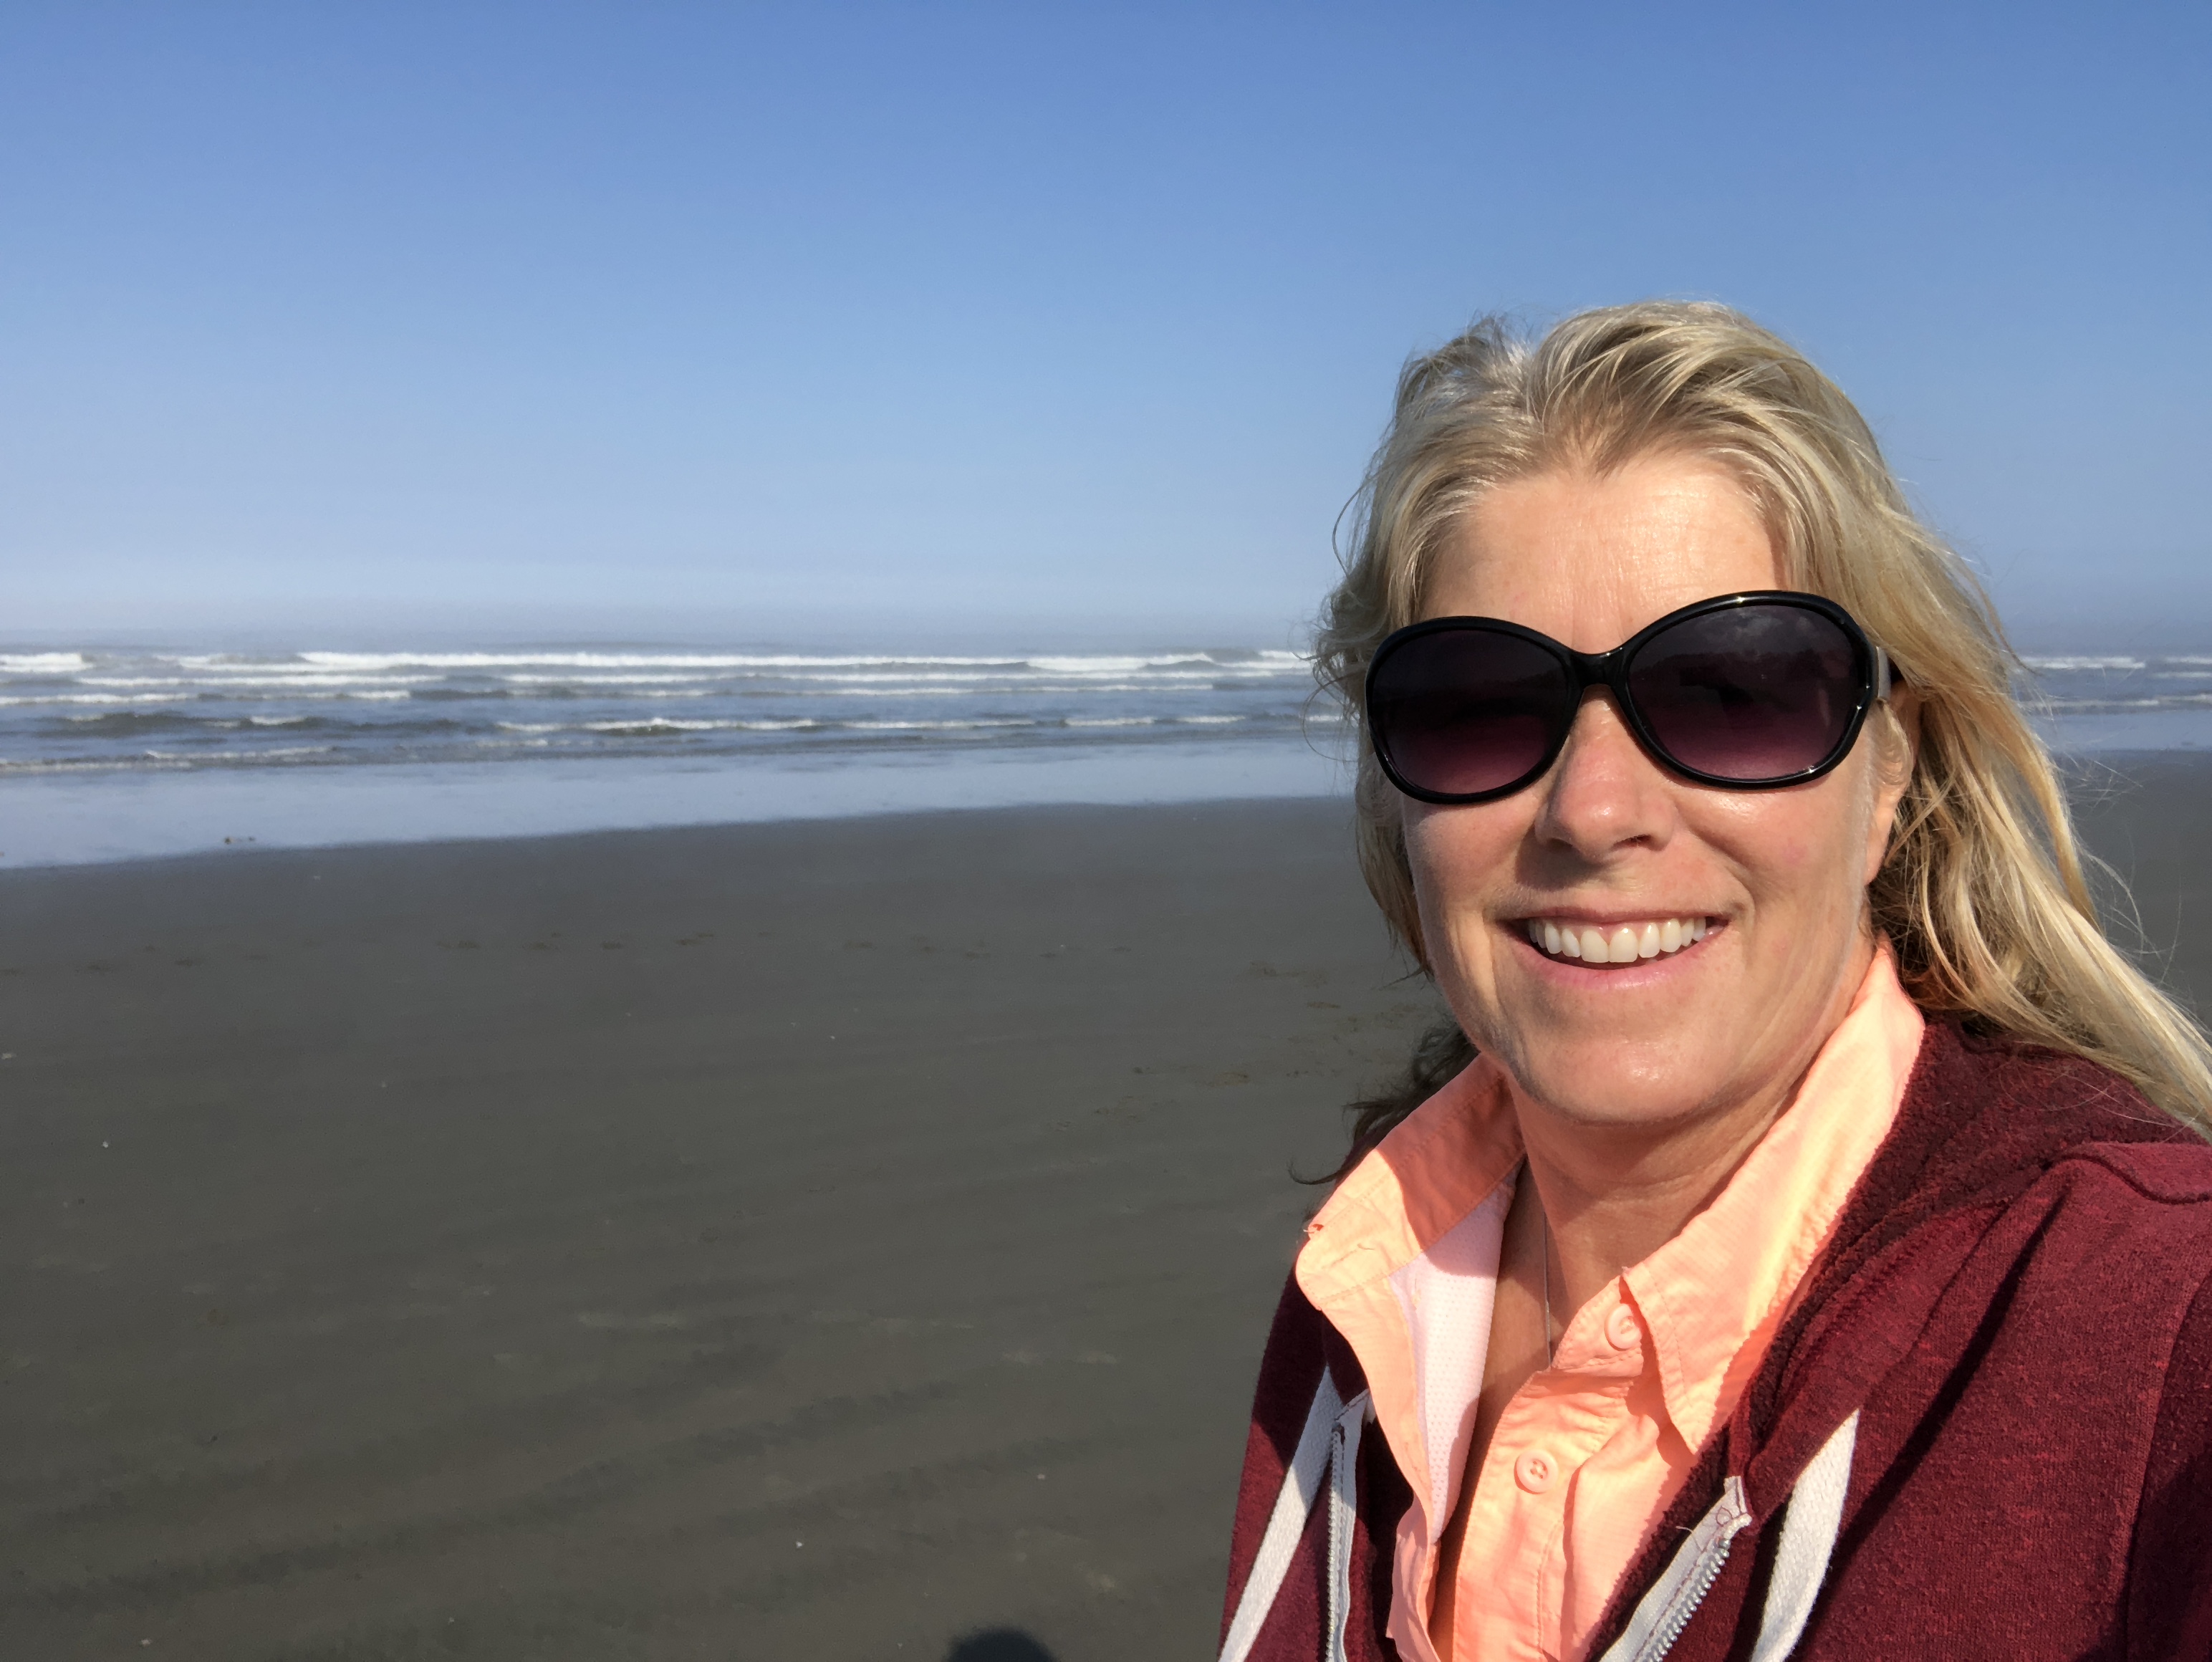
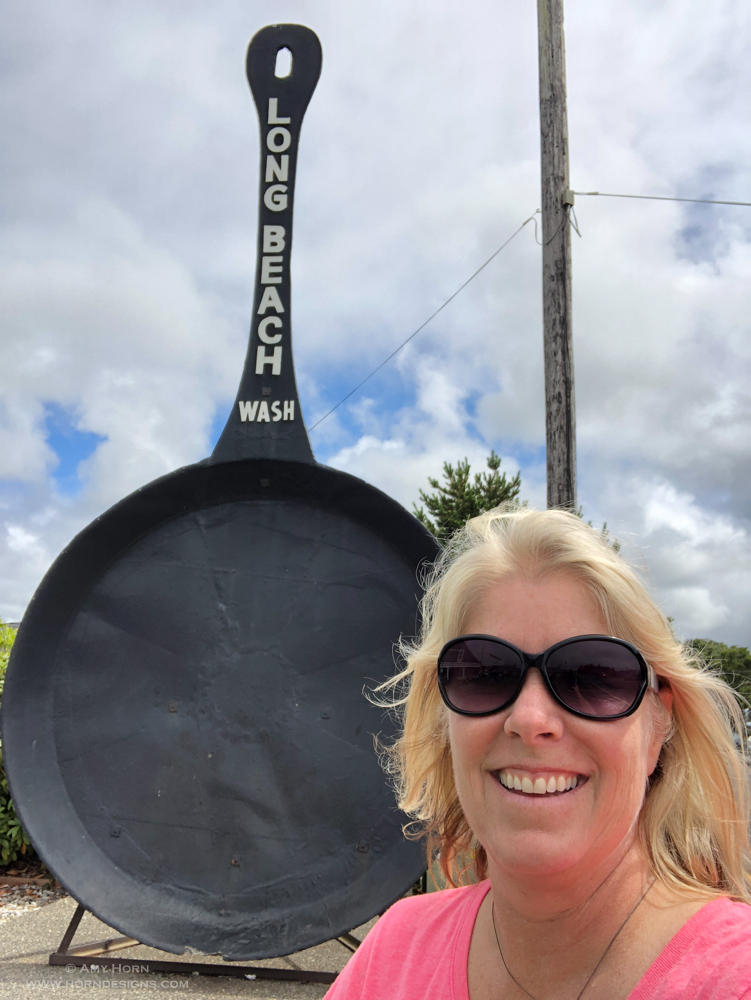
I’m waving hello! iPhone photo.

I watched Neflix! This campground had free wifi and I enjoyed it thoroughly: backed up photos, caught up on email and watched a few movies on Netflix. This was my first TV for almost 6 weeks. After six weeks, my car and trailer are dirty. Even though I was rained on, the dirt roads and sea spray have done a number on my car. It still surprised me when a total stranger said, “That is a dirty car,” to me at the gas station. Peer pressure worked and I drove through a self-serve car wash 15 minutes later. Of course, the sea spray hit again that night shooting sunset. After 4500 miles, what do you expect?

car on sand

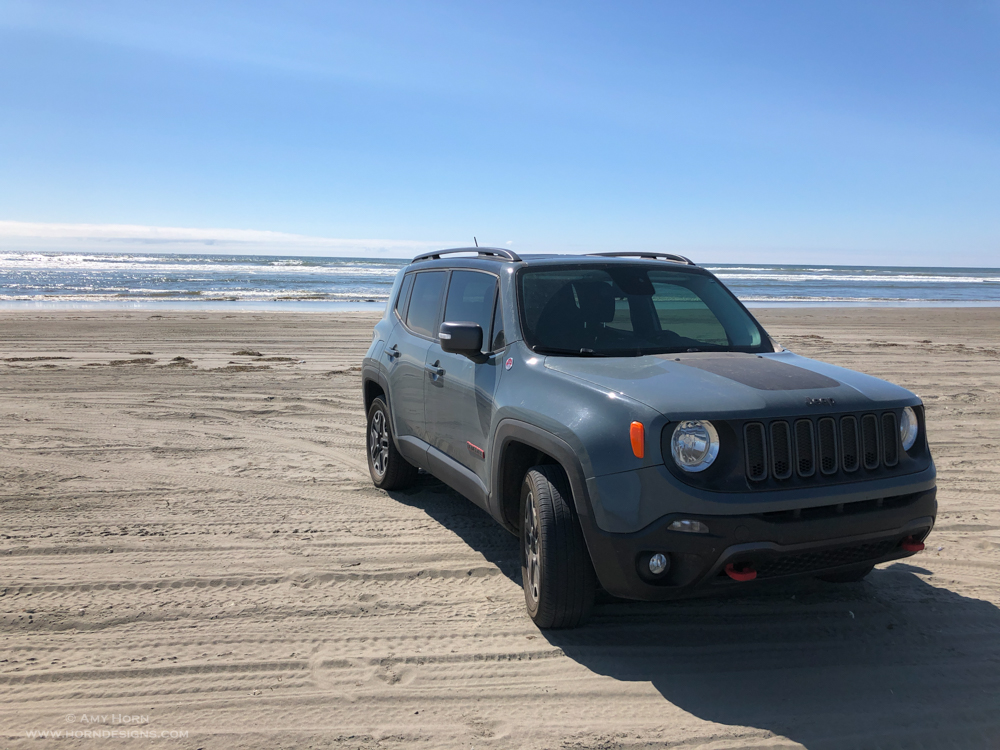
Car on beach, iPhone photo.

Oregon’s beaches are public property and the state owns them. In Washington, it seems similar and they let you drive on the beach! So, I had get my Renegade on the sand. When I sent the photo home to Rod he was concerned that I would get stuck. But, I didn’t.

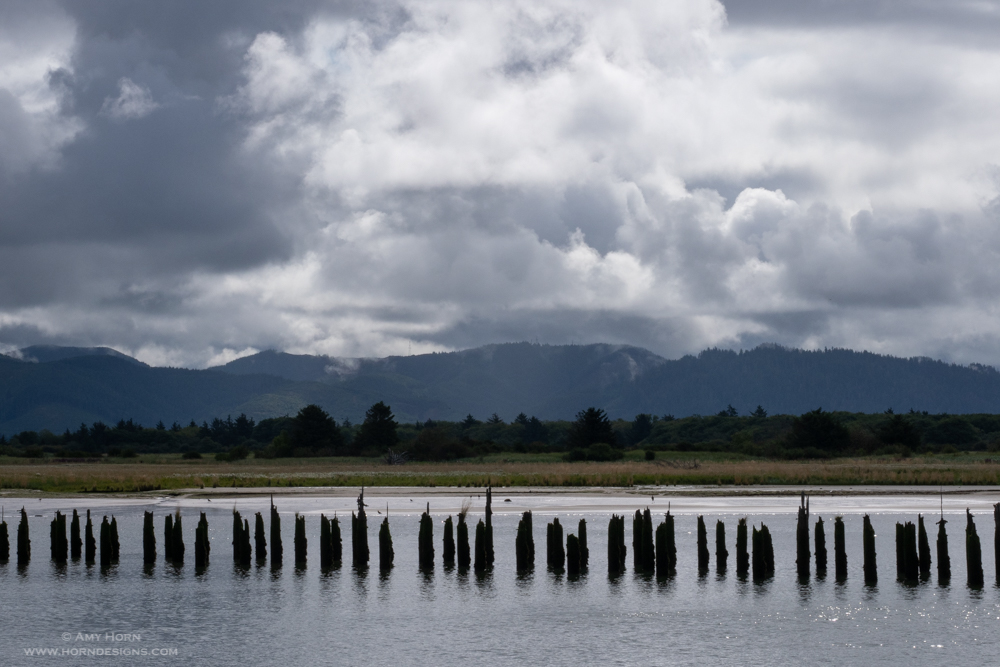
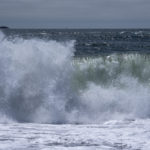
I spent an afternoon in Ocean Shores a few miles away and walked several miles along Damon Point. Damon Point has spectacular crashing waves, agates, shells and driftwood. I even found a marble that I’m taking home for our cats. I grabbed fried oysters in town to complete my west coast seafood checklist and headed back to camp to prepare for sunset.
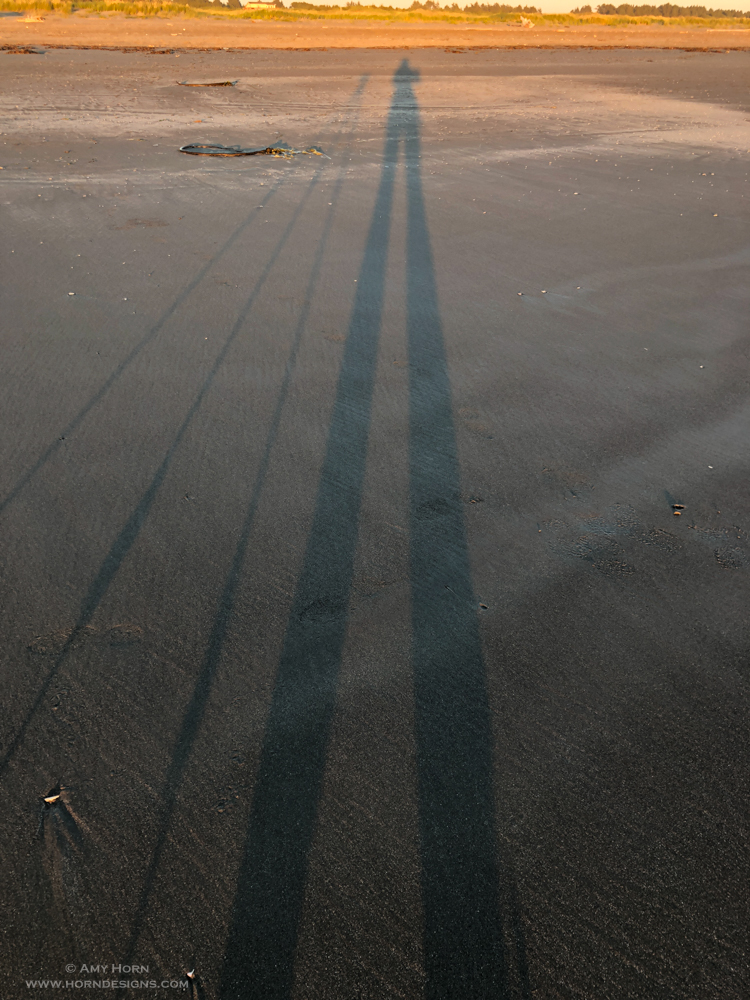
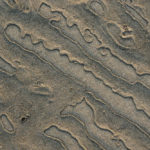
For the Photogs!

willaby creek falls

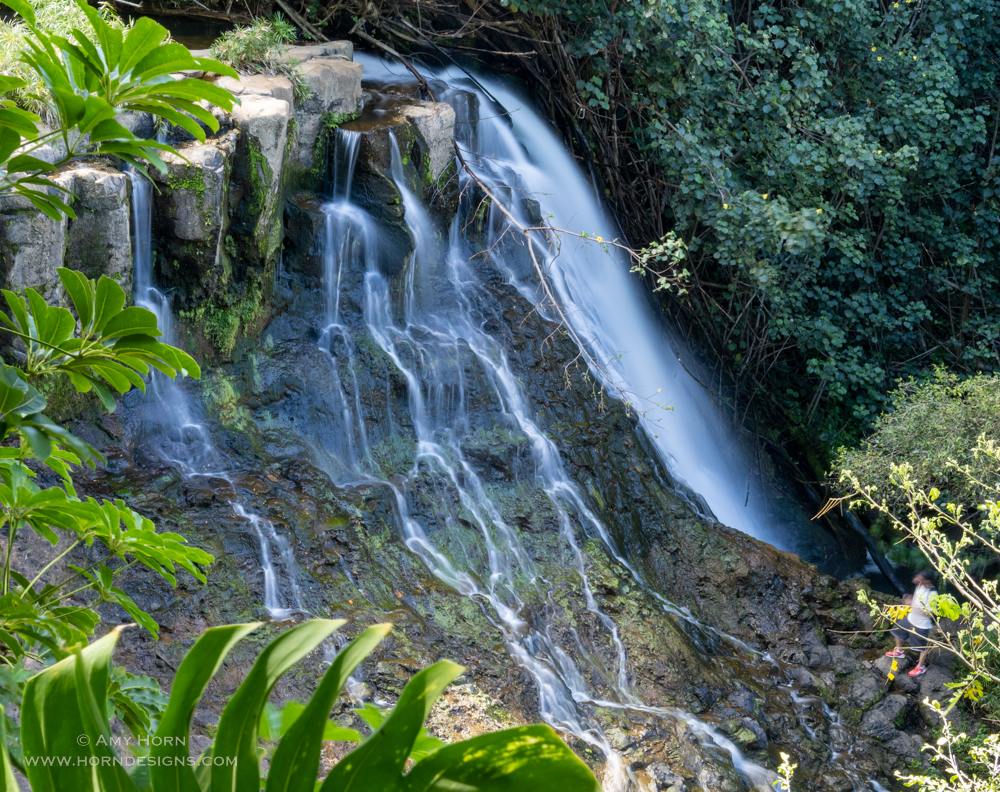
Willaby Creek Falls First Photo. Olympus OM-D E-M1 Mark II, 12-100mm, ISO 200, f/10, .8 sec.

When I photograph waterfalls, I like to start with a sample image once I am setup. I often use aperture priority mode and take a sample shot to help me view the scene. Once I take a shot, I am more successful on composing by analyzing if that is the story I want to capture. I say to myself, “what can I do to make this better.” With the image on the right, there is a lot to do to make it better. At first, I shot from the trail with the tripod above a bush. Then I noticed a dirt path off the trail and I examined what would be the best location to capture the photo. If your tripod isn’t as tall as you, make sure you view the scene the same as your camera. I often pull out my iPhone to “view” the scene at different heights to determine where to setup the tripod. Once I was away from the bush, I put on my Bryan Hansel filter from Singh-ray. Yes, I love this filter! I played with horizontal and vertical orientations until I found just the right composition. I knew before I captured the photo I would crop a small portion from the foreground because there was a distracting reflection that I could not avoid otherwise. View the final Willaby Creek Falls photo above in this post.

Ocean city beach at sunset

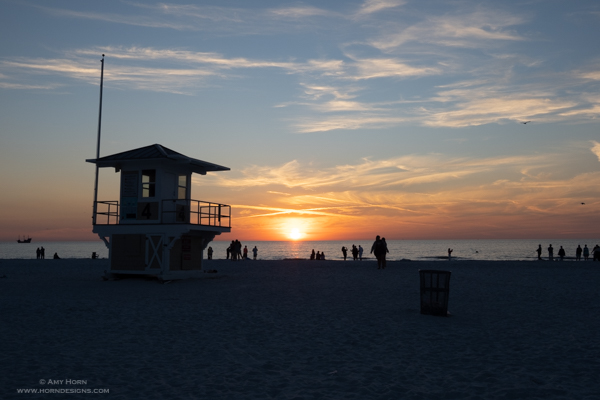
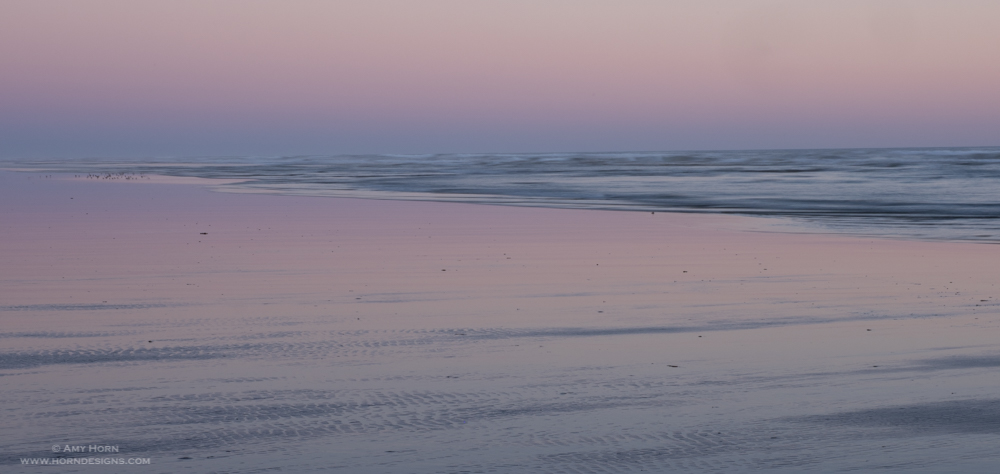
Ocean City Beach. Olympus OM-D E-M1 Mark II, 12-100mm, ISO 200, f/10, 1/80 sec.

Cape Disappointment

Cape Disappointment Boat Launch. Olympus OM-D EM-1 Mark II, 12-100 mm, ISO 400, f/18 @ 1/640 sec.

Cape Disappointment

Light house

North Head Lighthouse. Olympus OM-D EM-1 Mark II, 12-100 mm, ISO 400, f/16 @ 1/500 sec.

It was a relaxing 40-mile drive from Astoria to Cape Disappointment. I ran a few errands on the way out of town (ice, food, gas, etc) and arrived at Cape Disappointment in time to check in and set up my trailer. Fifteen minutes later, I was ready to explore. The ocean was a short walk from my campsite so I checked it out. The view included the North Head Lighthouse but the weather was cloudy, and a lighthouse in the clouds wasn’t working for me, so I drove around the park to scout other areas. Slowly, I sunk back into a discouraged photographer. These clouds were not what I wanted to capture. So, I bailed on photography (sort of). I went to town, sat in a McDonald’s parking lot and streamed my favorite Mirrorless Minutes podcast from the McDonald’s wifi. Normally, I listen to it from iTunes, but this was their 100th episode and I watched it live. Karen, one of my friends from Phoenix was in the podcast chat too. I felt a little more inspired.

After the podcast, I got a text from Karen. Thanks to some fun discussions about photography and what to shoot, I flipped the switch to wanting to take photos and couldn’t wait to get back to the beach. Without phone service at the park, I talked to myself the entire time on the beach. Once I took a shot, I would ask myself how it could be improved. Initially, I thought I would photograph macro subjects that are perfect for cloudy weather. But as I looked at the sky, I noticed clouds with highlights and shadows. I saw definition in the clouds. Maybe it was there all along and I wasn’t noticing…either way, I was ready to capture images. I rotated between wide and long lenses capturing reflections on the wet sand. The tide was heading out, so I continued to creep up on the waves. My final images are abstract and I like them. Thanks Karen for the inspiration. The lesson I learned: there is always a picture to be made.

Cloudy Reflections

Cloudy Reflections. Olympus OM-D EM-1 Mark II, 7-14 mm, ISO 200, f/16 @ 1/10 sec.

World’s Largest Frying Pan!

frying pan photo

Largest Frying Pan! 14 ft tall.

Day two at Cape Disappointment was spent sightseeing. I went to lighthouses, beaches and Long Beach. Long Beach had many unique finds: Cranberry Museum, Marsha’s Free Museum with Jake the Alligator man and the largest frying pan in history! How have I lived almost 50 years and not known where the largest frying pan in history was located? I found a taco bar and had a halibut taco – it was yummy! I took the evening off from photography and read a book. All in all a great day.

Cranberries on the vine. Olympus OM-D EM-1 Mark II, 12-100 mm, ISO 400, f/8 @ 1/200 sec.

My days are relaxing but lonely at times. I don’t over talk to people like I did my first week (good thing) but often want to talk more. Other than my daily conversations with my sister and husband I often don’t speak. Hopefully, this doesn’t have a negative side effect on my vocal chords….otherwise my family won’t recognize me when I get home.

My next stop will be further up the Washington Coast in Ocean City.

For the Photogs!

In case you are looking for a great solution to transfer photos to iPhones or iPads, a workshop participant told me about Sandisk’s iXpand. It is a usb drive with a usb on one end and lightning on the other. So, I save photos to it, put the other end in my phone and transfer images instantly. Works like a charm, thanks Pat!

Clouds with details

Clouds with details. Olympus OM-D EM-1 Mark II, 7-14 mm, ISO 200, f/18 @ 1.6 sec.

When I saw the details in the clouds, I also thought this would make a strong black and white. So, using Nik Silver Efex Pro, I did just that.