One of my favorite techniques to demonstrate on a workshop is the technique of “shooting through.” It’s really very simple. You need a large group of flowers and with a long focal length or macro lens, position flowers very close to your lens. The petals can actually touch your lens. Then, focus on a flower beyond the close petals and capture the shot with a wide aperture. While demonstrating for the group, I captured this image of golden lupine with a 100mm lens, f/4, 1/250 sec.
Finding new ways to photograph paper became easy when we bought a laser cutter. Our years teaching high school taught us the many uses of a laser cutter and now that we have one, my husband, Rod, produced several new “pop-up” patterns for me to photograph. Click here to read my original blog and get caught up to speed. Otherwise, keep reading to view the new images.
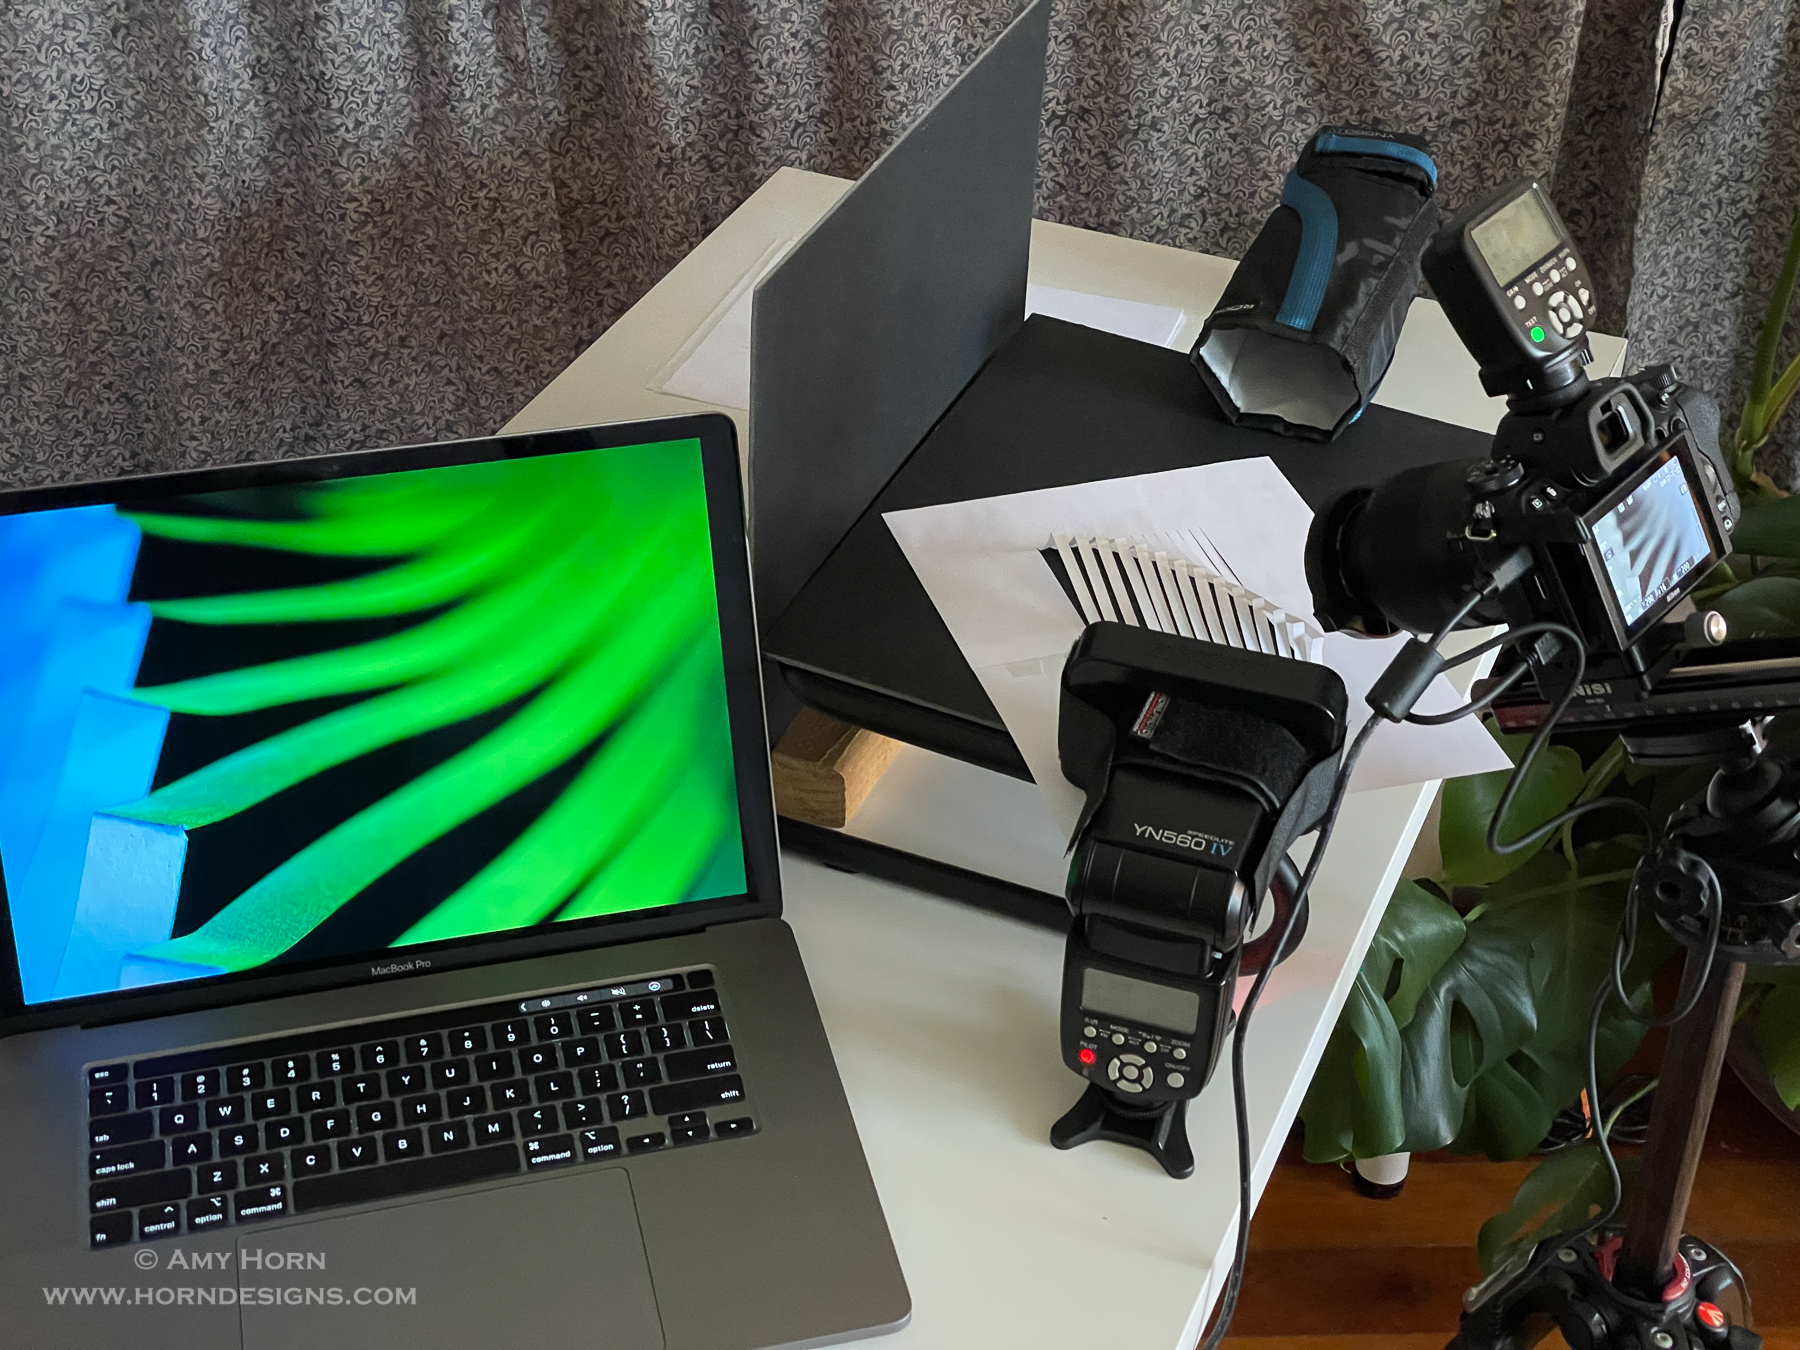
Setup
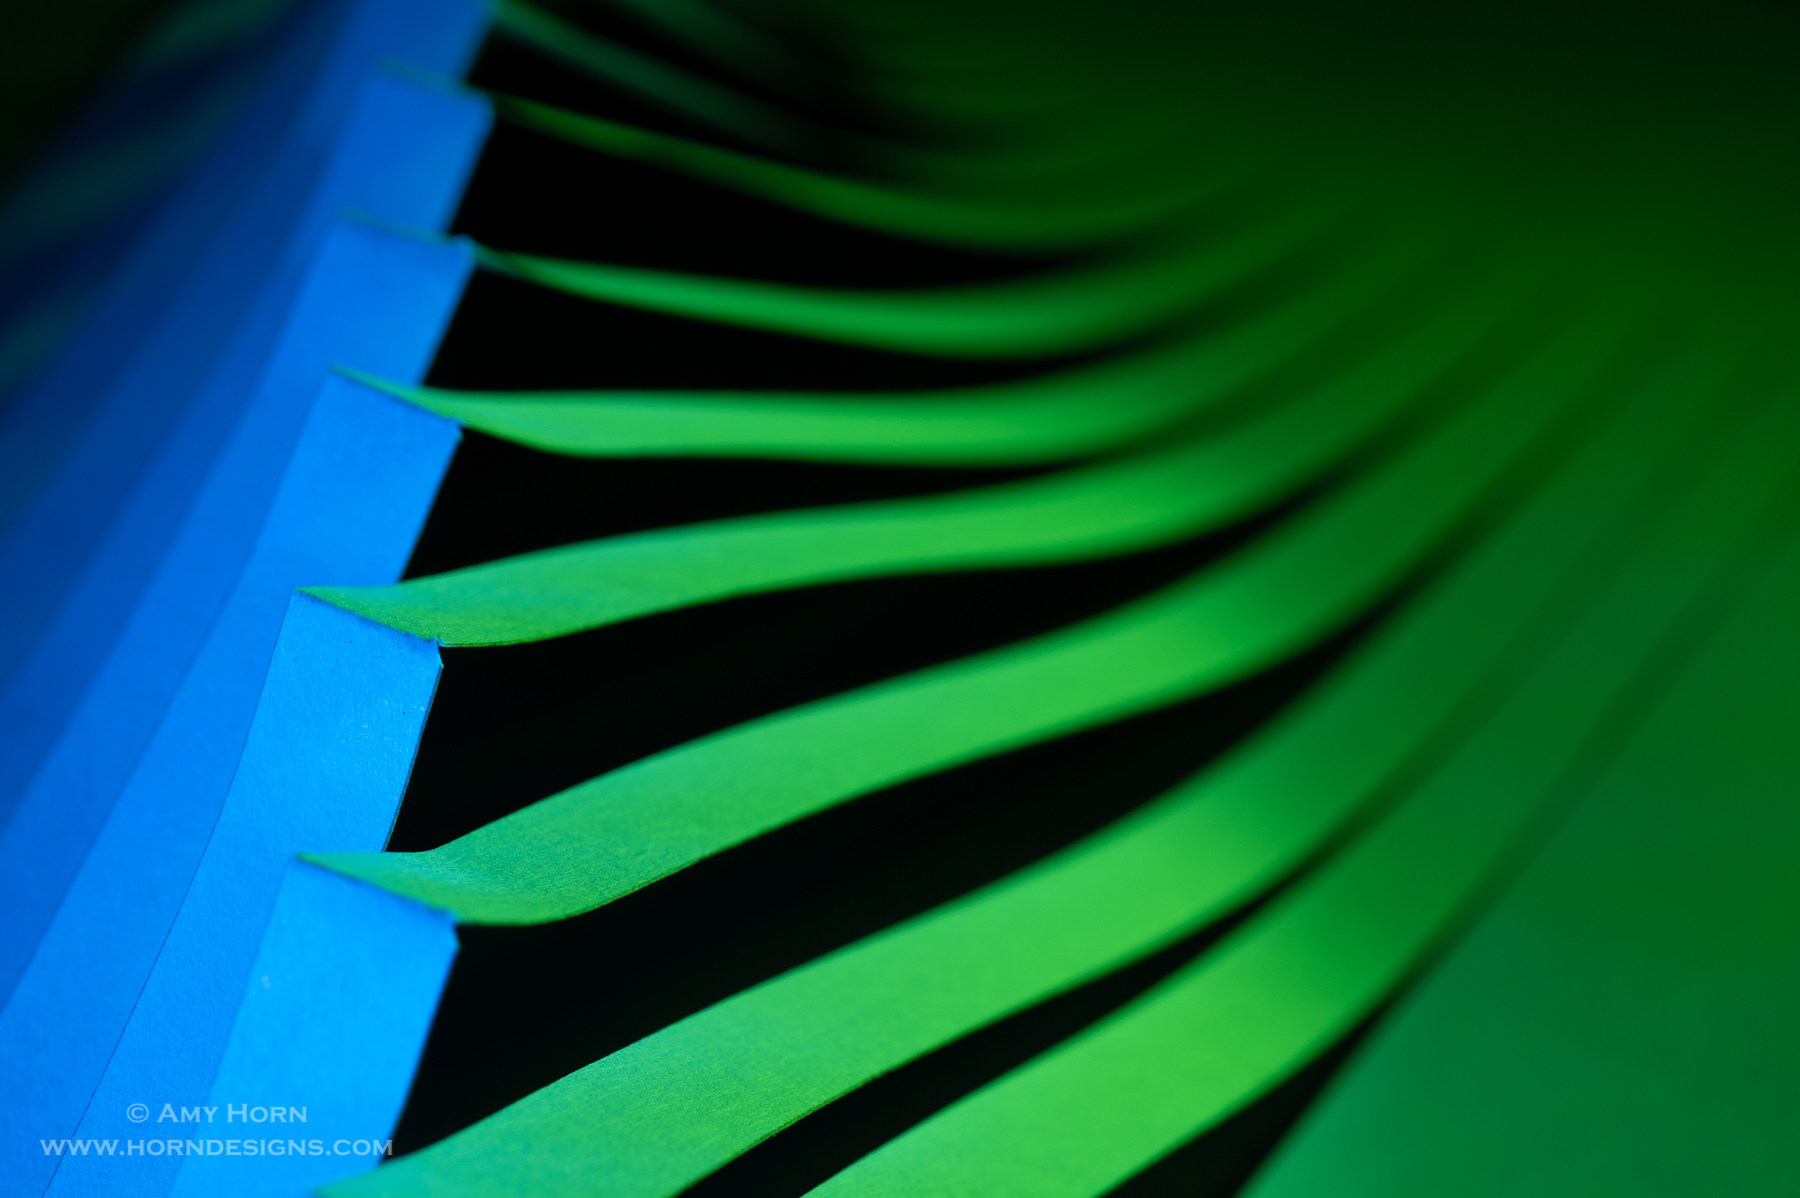
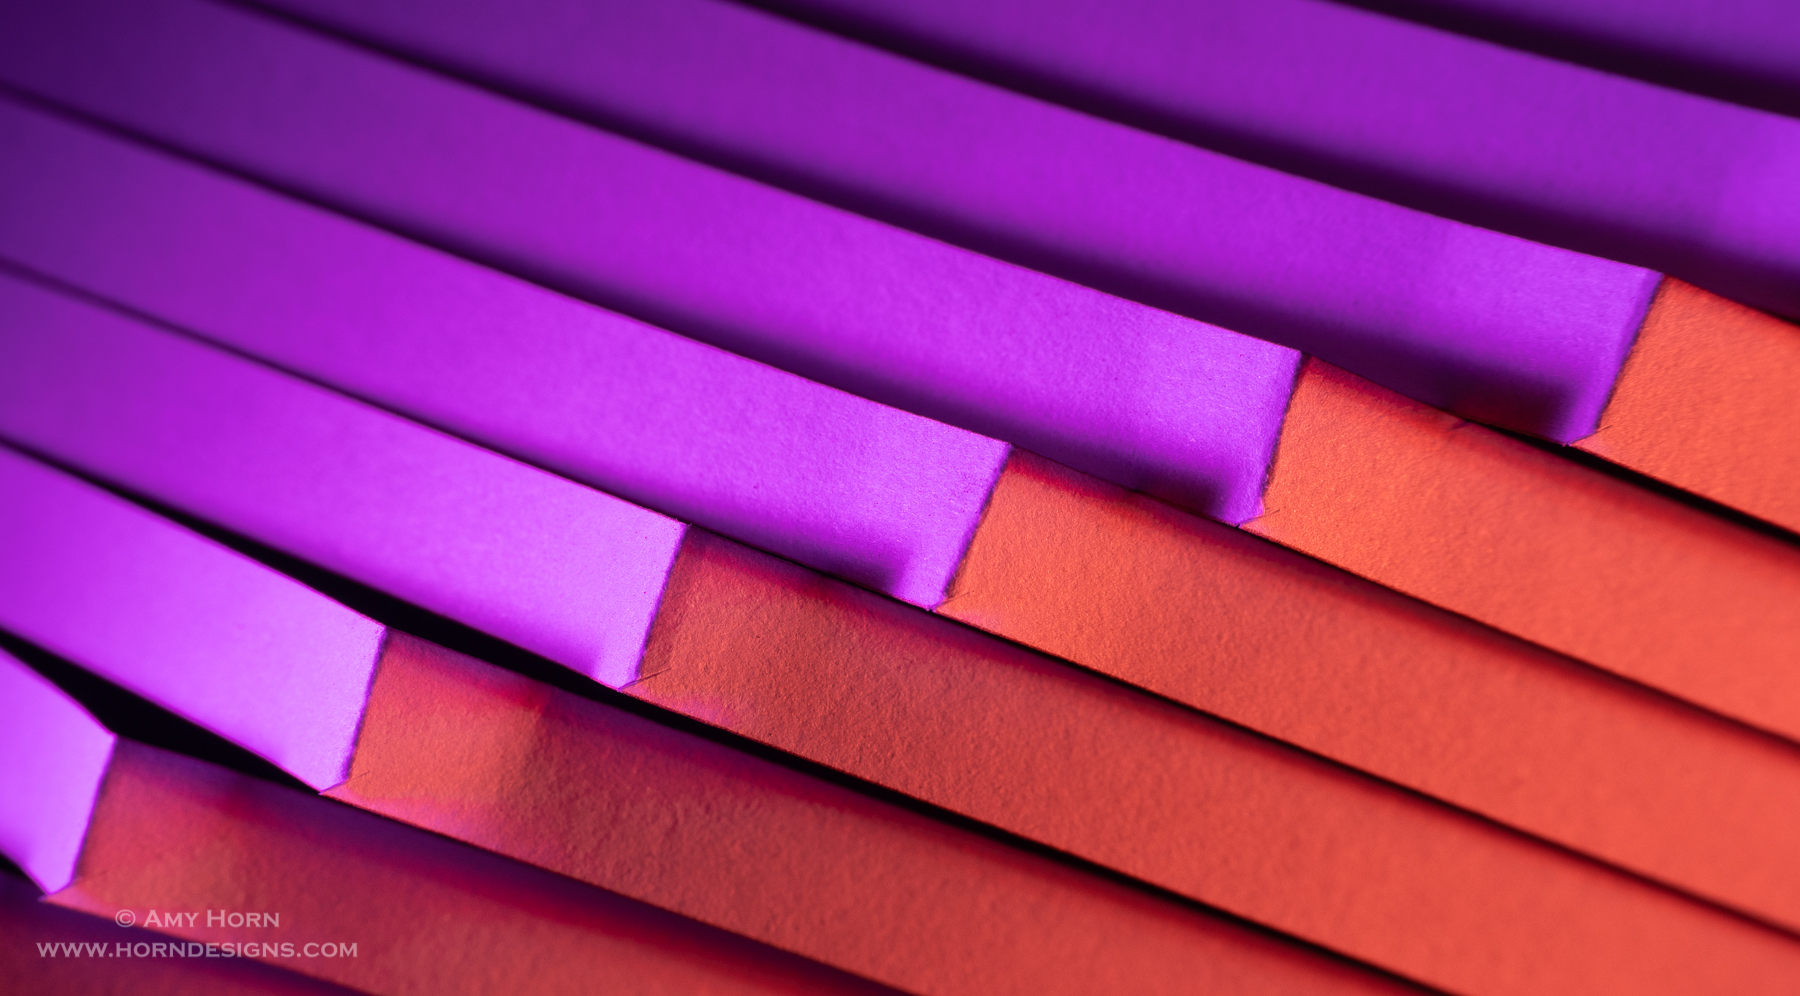
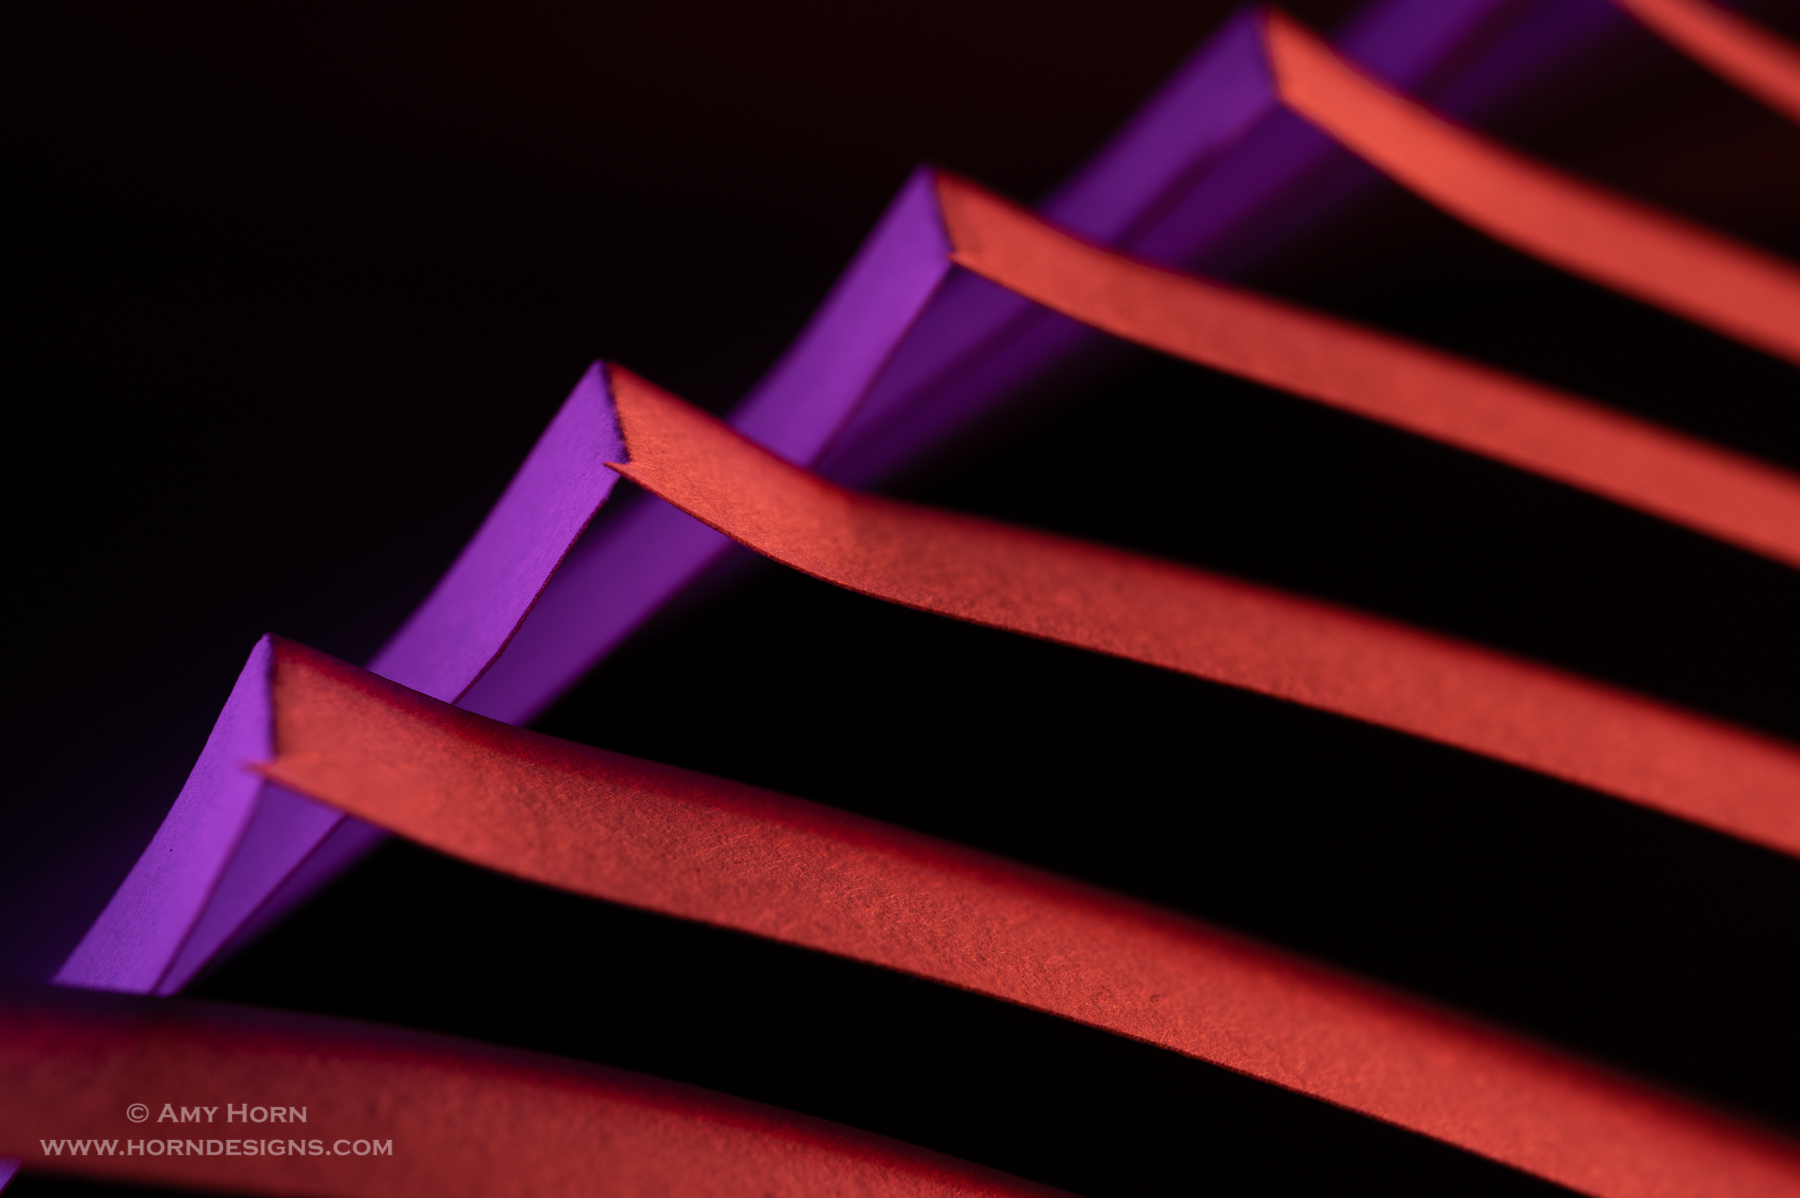
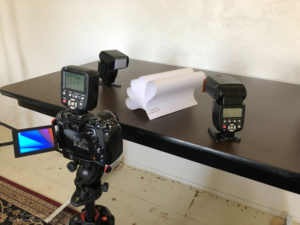
Just like before, I used two off-camera flashes with gels with a snoot on one flash and a grid on the other. I used the snoot and grid to control the flashes from “spilling” light onto the background, leaving me with a rich black background. Flash power was 1/64 power and manual exposure settings were 1/60 sec, f/11, ISO 200. The images below include the paper pattern, shooting setup with two gelled off-camera flashes, and the finished image.
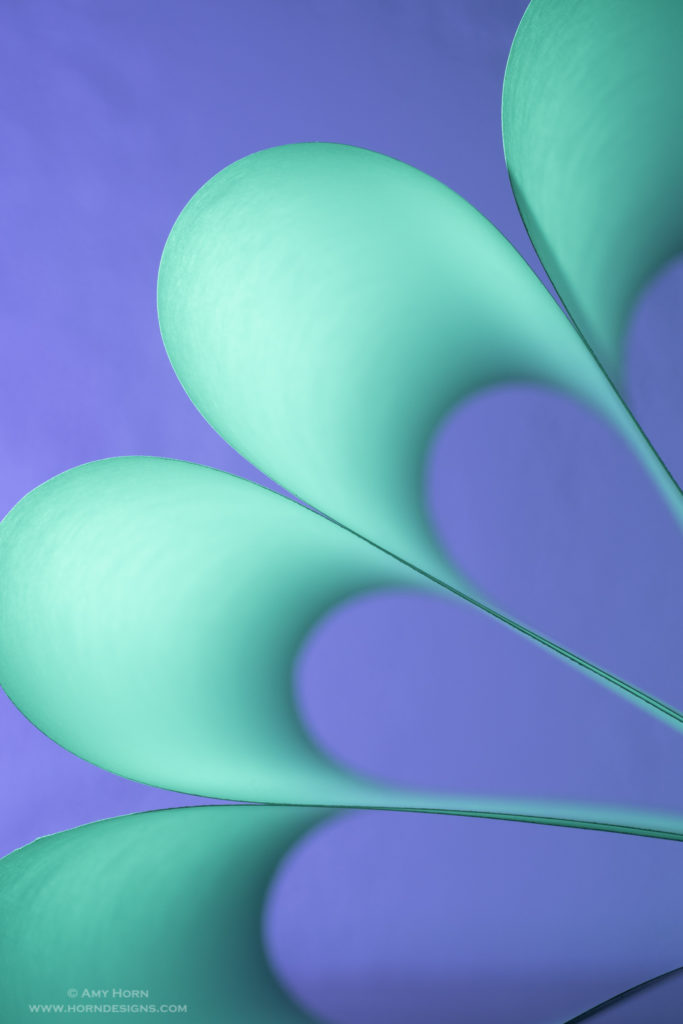
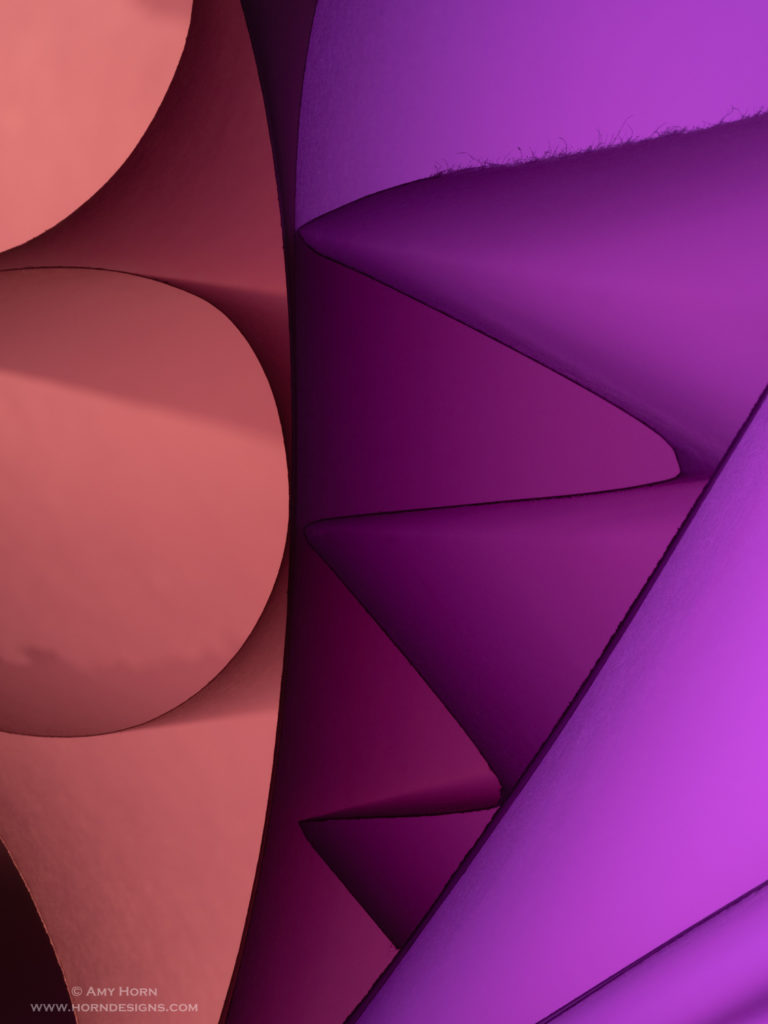
New paper pattern.
Shooting setup with two gelled off-camera flashes.
Paper with green & blue gels.
The new paper patterns are three-dimensional “pop-ups”. The laser cut the lines, then we folded diagonally across the slits, then slid the two ends together to the desired height and taped it down. Once a pattern is ready, I can print as many times as desired.
The images below demonstrate how different perspectives/angles create a completely different photo. Not to mention the gel colors changed too. If you want to see this method demonstrated, here is my YouTube video.
Be watching for more of these images in the future. We have many more pop-up designs to print! And if you want to try it in person, check out our April Macro workshop. Of course, if you need help with your flash, check out my April Flash Fundamentals workshop.
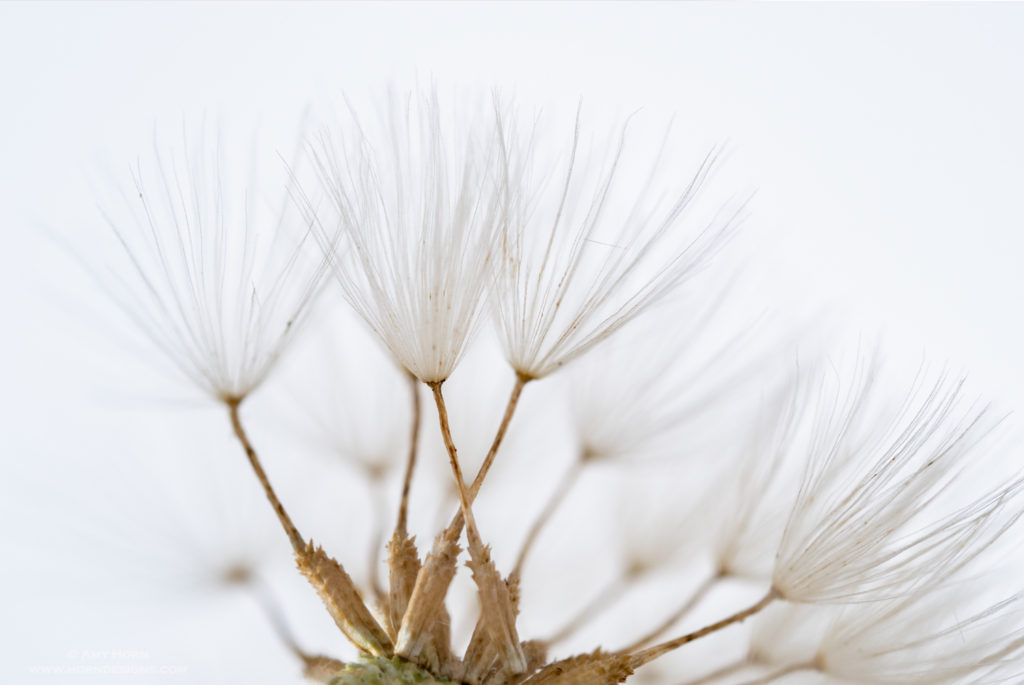
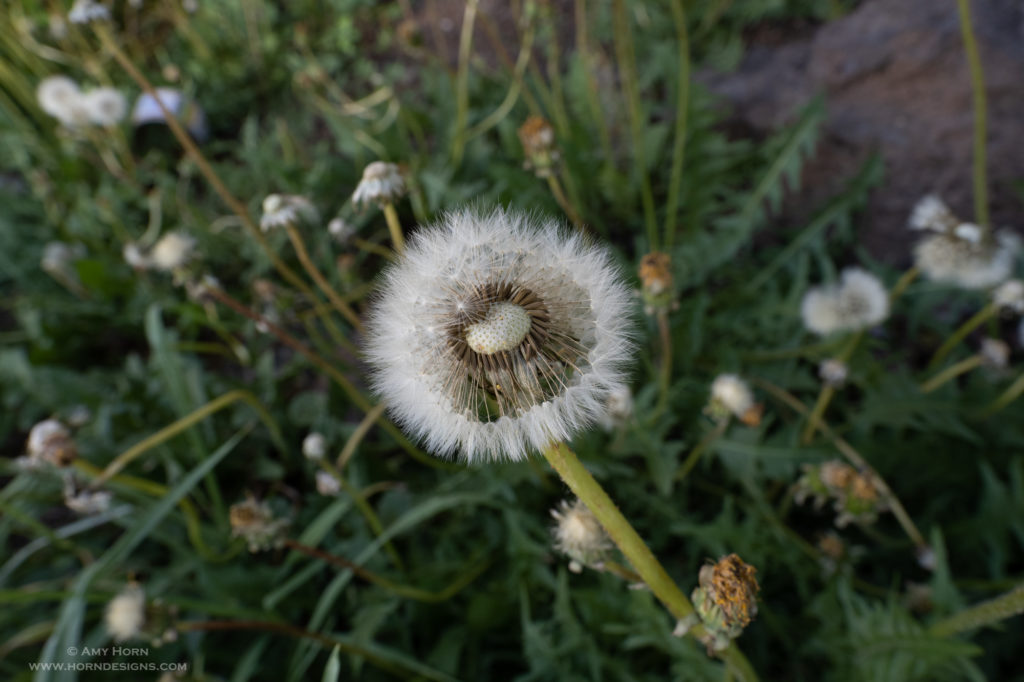
Every spring we remove those pesky dandelions from our yard. This year, before the weed & feed came out, I picked a dandelion to photograph.
As a child, I enjoyed blowing the dandelion seeds everywhere, not grasping why it upset my parents. As an adult, when I look at a dandelion, I imagine myself wandering through those tiny seed pods; maybe it comes from reading The Borrower’s or Dr. Suess’s, Horton Hears a Who. So, I spent a few days photographing dandelions from my yard and I thought I would share my process with you.
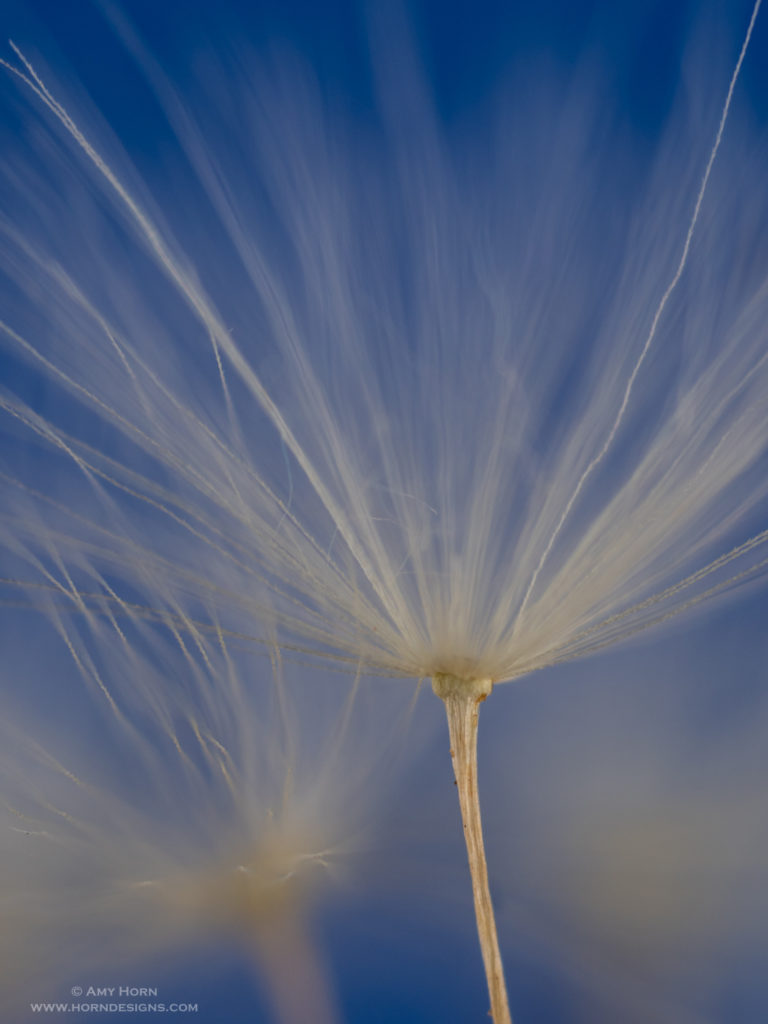
Olympus OMD 1 Mark III, 60 mm macro, with Raynox DCR250 close up lens, 1/200 sec, f/4, ISO 200, two off camera flash, 50 image focus stack.
I started with a perfect, fluffy dandelion. But the image was busy and I struggled seeing into the seed pods, so I removed some of the seeds to gain a better vantage point. Using my macro lens, tripod and a Raynox DCR250 close up lens, I captured the above image at approximately 2.5x magnification. The off camera flash units were at 1/64 power with diffusion (copy paper). At this magnification, I chose to focus stack so that the closest seed pod would be in focus.
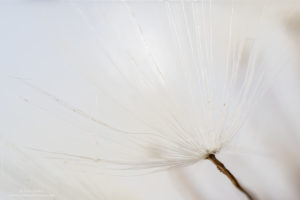
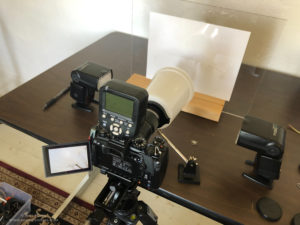
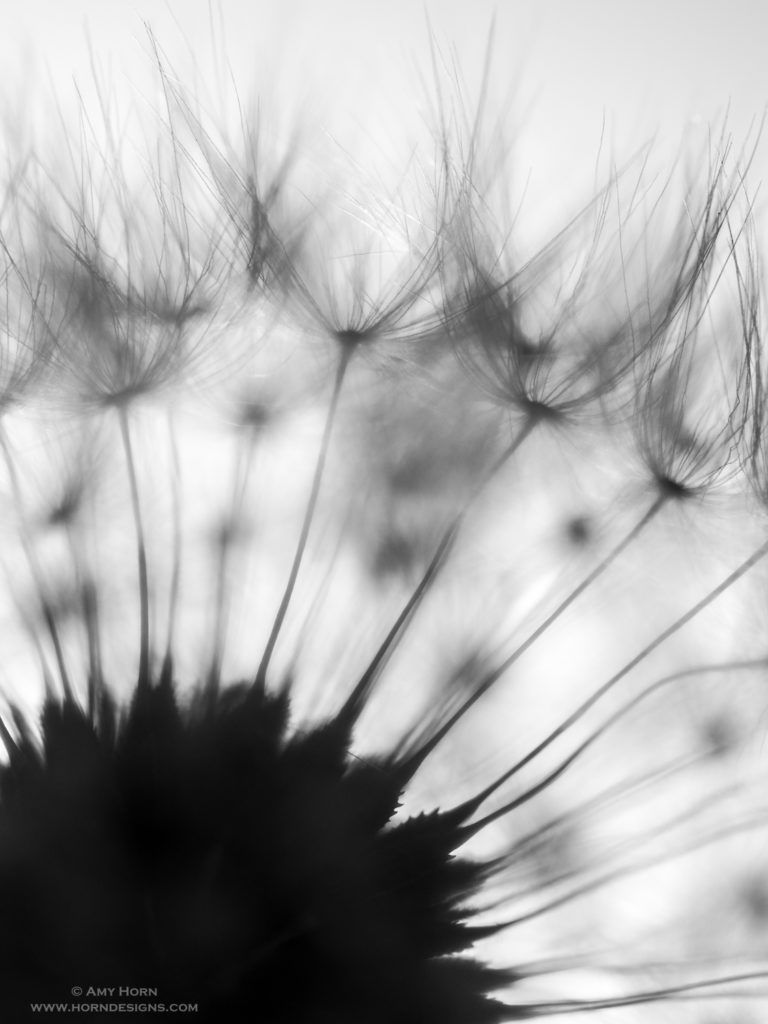
Next, I moved in closer keeping my exposure and flash settings the same. By adding extension tubes to the macro and Raynox lenses, I isolated an individual seed pod achieving almost 4x magnification. When using the Raynox, I use a plastic container on the end of my lens to diffuse the flashes. Anyone that has taken our Arizona Highways PhotoScapes Super Macro workshop (ahps.org) has used this diffusion technique. For these next images, I included my super macro setup and the single seed pod image.
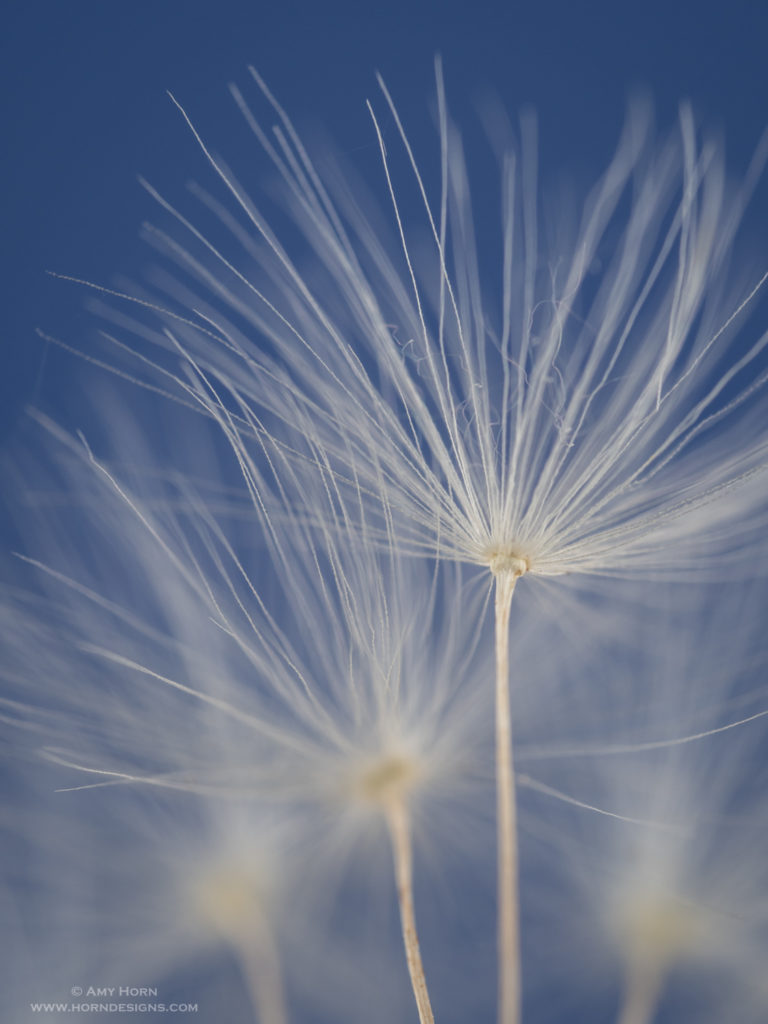
Then, I continued to play with the dandelion seeds, pulling some away to reveal less seed pods drawing me to different compositions. The colored paper background added variety and I chose to capture single images with varying depths of field.
1/50 sec, f/8, ISO 200
1/50 sec, f/5.6, ISO 200
1/100 sec, f/4, ISO 200
No Flash
1/60 sec, f/4, ISO 200
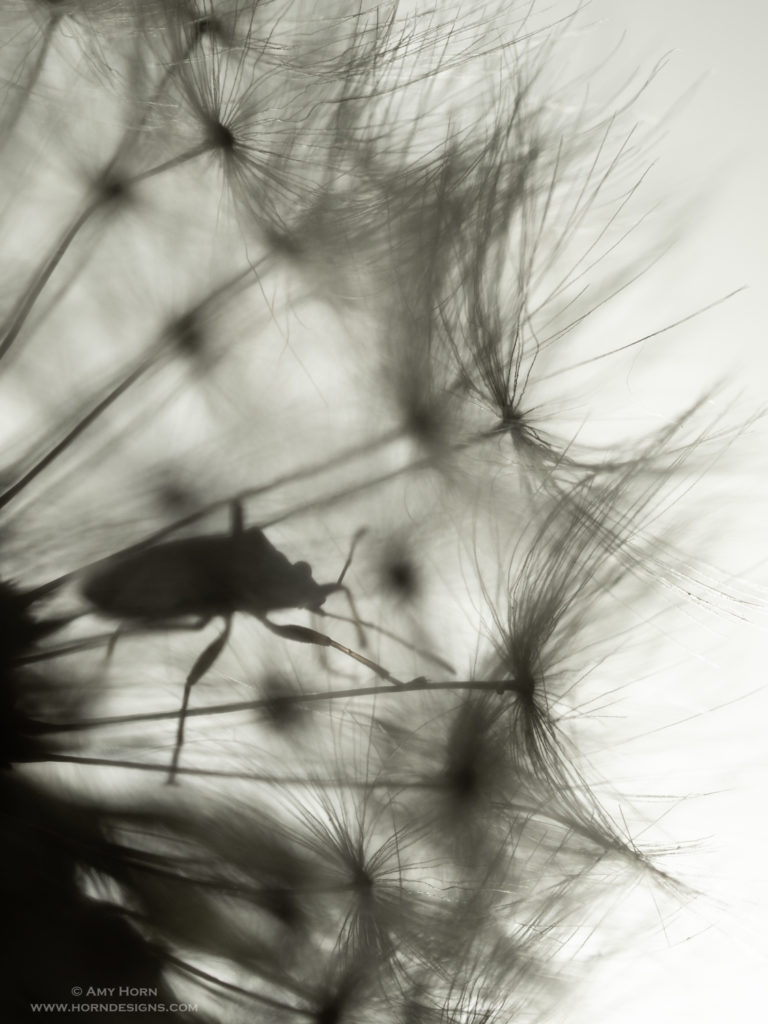
While setting up the next shot, I added a continuous light to the background and loved the silhouetted dandelion. So, I turned off my flashes and captured silhouettes with and without extension tubes. Much to my surprise, I found a bug crawling around in the dandelion. It took a lot of twisting and positioning in front of my lens, but I finally captured the bug in the seeds. The final bug image expressed my original intent – as if I was that bug within the dandelion.
1/30 sec, f/3.2, ISO 200, backlit
1/60 sec, f/4, ISO 200, backlit
So, if you are looking for a project, find something simple around your house and keep “working the subject” by changing settings, lighting, backgrounds, etc until you achieve what you want. These images were captured over the course of three days. When I take on new projects, I like to review, reflect, and then reshoot several times. Regardless, have fun and I hope you enjoyed reading about my process.
Olympus OMD1 Mark III, 60 mm macro, 1/60 sec, F/8, ISO 200, 2 off-camera flash.
Paper – check; off-camera flash – check; flash gels – check; macro lens – check. Grab those supplies and you are ready to capture abstract art. My YouTube video isn’t ready yet, but I couldn’t wait to show you how to capture these images.
Step-by-step
Let me take you step-by-step through capturing these images:
Notice the two flashes facing each other? Each with a different colored gel.
Grab white computer paper and roll or curl it to a desired shape, then either staple or paper clip it so the shape holds in place.
Place two off camera flashes facing each other pointing toward the paper (see image). A good starting point to the flash power is 1/32.
Add a gel to each flash. I used a red and a blue.
Set your camera on a tripod and focus on the front edge of the paper. I used Manual exposure, 1/60 sec, f/5.6 to f/10 and ISO 200.
Take a photo.
Review your image checking the histogram and composition. Adjust camera settings as needed.
Now, modify your shape or change gel colors. The images below represent some of these changes.
Example images
A
B
C
Image A: For this image, placed one flash with blue gel on the background (wall) and a green felled flash on the paper. Olympus OMD1 Mark III, 60 mm macro, 1/60 sec, F/10, ISO 200, 2 off-camera flash.
Image B: This image uses an orange gelled flash from the left and a purple gelled flash on the right. I added small curls of paper in my loops to create different shapes. Olympus OMD1 Mark III, 60 mm macro, 1/60 sec, F/10, ISO 200, 2 off-camera flash.
Image C: Here is the looped paper and added curls to create image B.
Gels are transparent colored material placed on the flash unit. Purchase them where you purchase lighting equipment. If you find the Rosco Swatchbook in stock – buy it! The swatchbook gels are sized perfectly for flash units and includes a variety of colors.
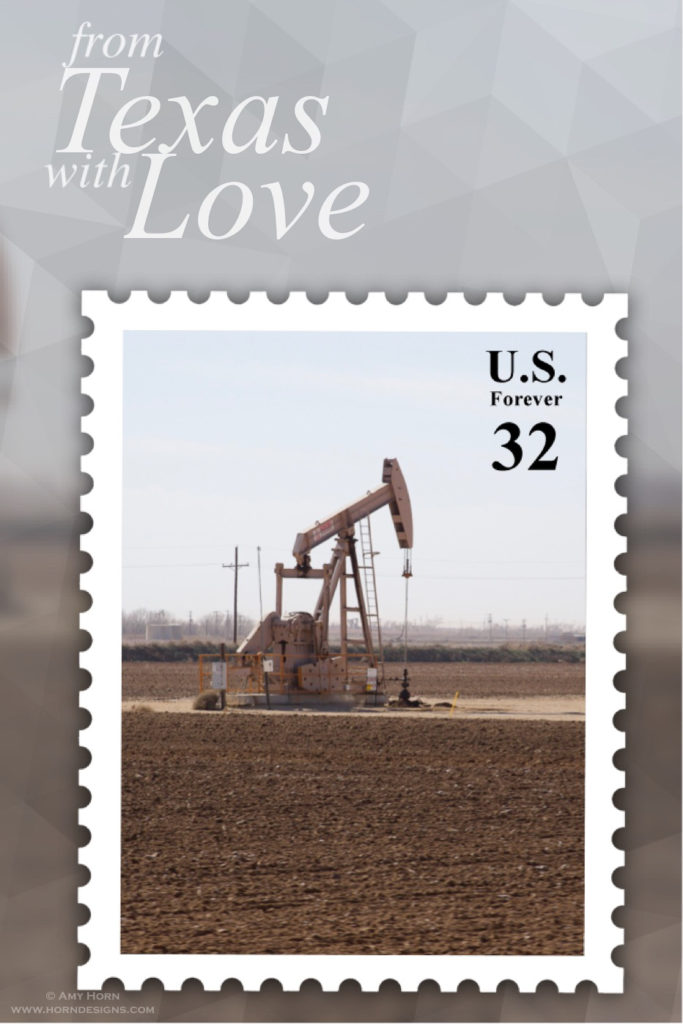
Check out this fun iPhone app – PIP Camera composites images with a postcard/postage stamp feel. Therefore, I used this app during a road trip to send images home. It was fun change to texting normal photos. Give it a try!
The first two images were used to create the composite on the right.
Photoshop is not for every image, but I like to use it for
compositing and making an impact. I decided to create a composite to celebrate
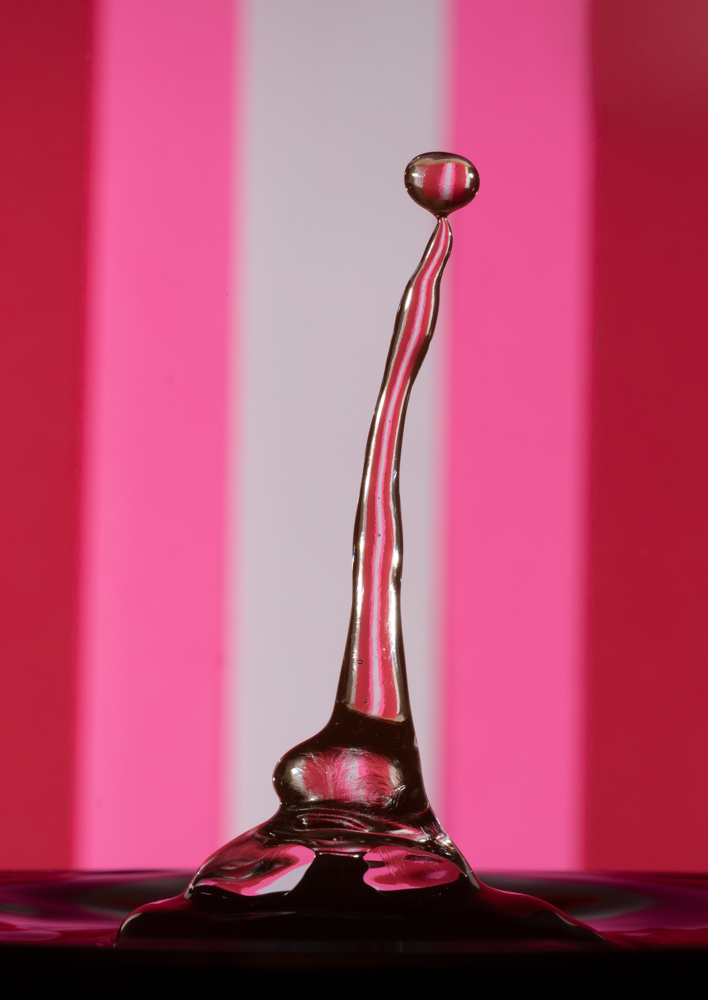
Valentine’s Day. Using my Cognisys StopShot Water Drip Kit, I captured several
drops and drop collisions. After reviewing the images, I noticed two that if
combined would make a fun composite. Since, viewers commented that it looks
like the character, “Tigger”.
Layers
Setting the camera on a tripod (a must with water drop collisions)
gave me several almost identical images, the only difference was in the actual
drops. To create the composite, I would need to utilized layers in Photoshop.
The “Tigger” image was my base image. Then I selected the “tail” from the second
image and brought the tail layer over to my base. Once the “tail” was in place,
I added a mask to erase the part I didn’t need to create a believable Tigger
tail. The final composite included two images and you may notice that I also
erased a few of the extra water drops. The spot healing brush is an easy tool
and blended the area nicely. This took me less than thirty minutes and I have fun
creating it.
Transform Tool
Original Water Drop
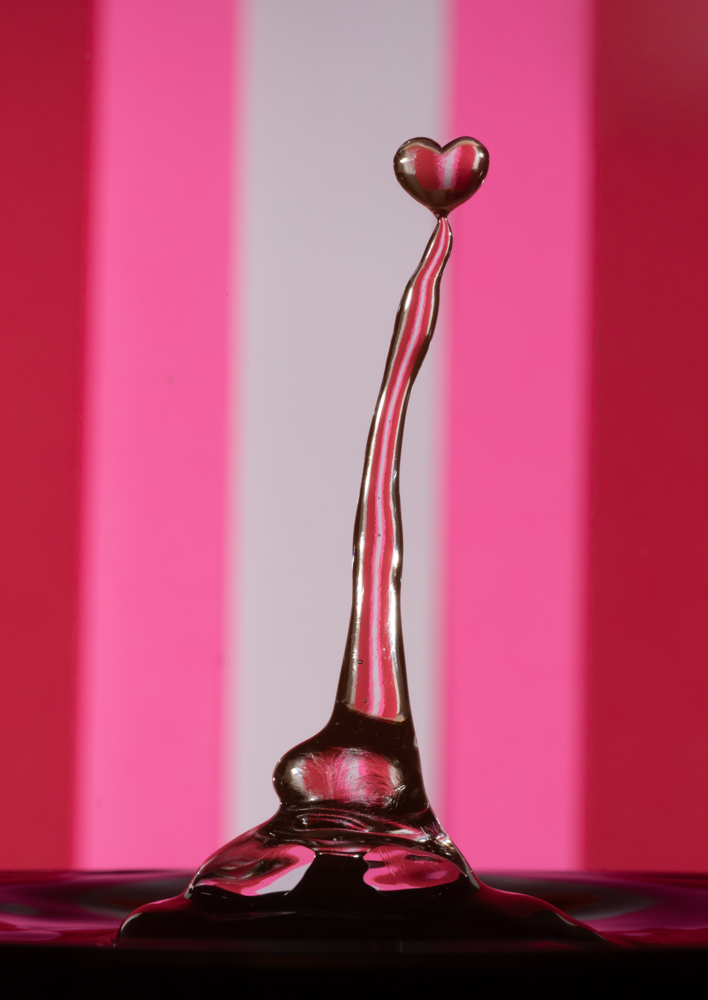
Transformed Heart Drop
On the next image, I envisioned a drop in the shape of a
heart. Well, that would never happen naturally, so I used Photoshop’s transform
Tool to create the heart. First step was to cutout the heart onto its own
layer. Then use transform (Ctrl +T, Cmd +T) to select it. With the transform
tool active, a right click will offer additional transforming options and I
chose warp. After dragging the sizing handles around, I designed a heart. The
last step was to blend this with the original drop. Again, I added a mask to
erase the top portion of the original drop and positioned the new heart shape
to blend properly.
Photoshop isn’t for everyone or every image, but it is fun
to use!
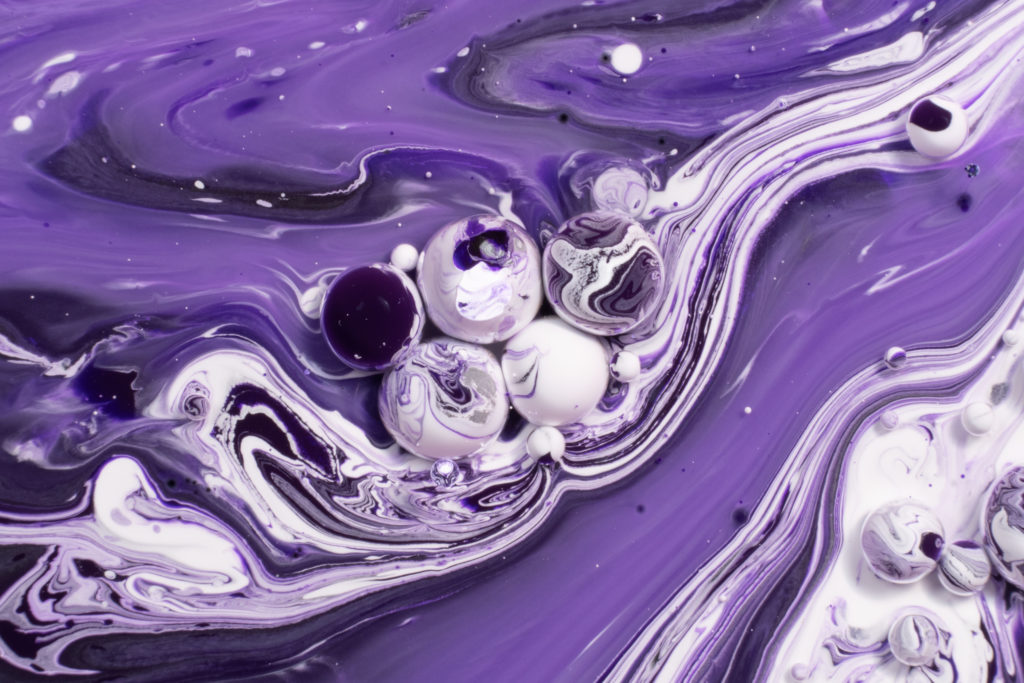
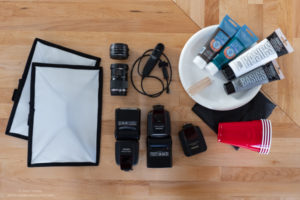
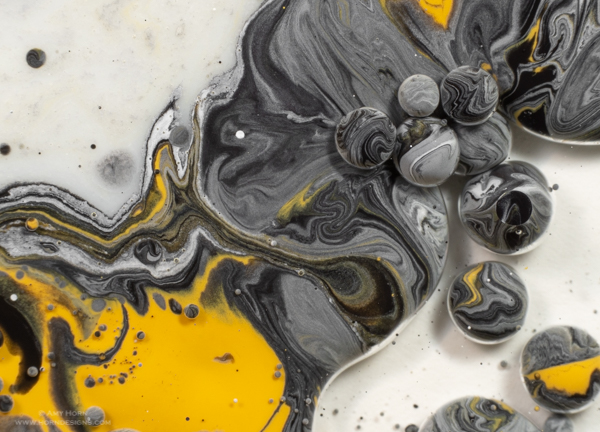
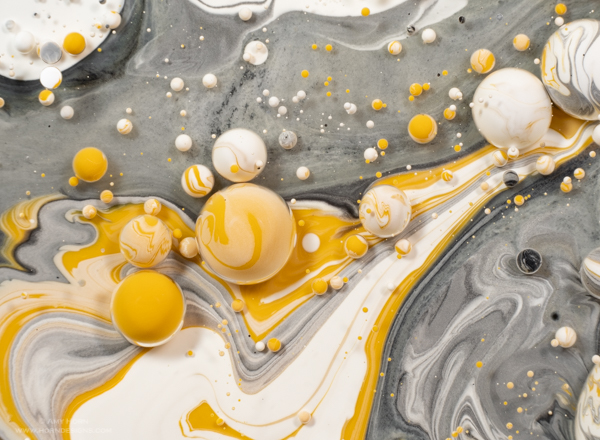
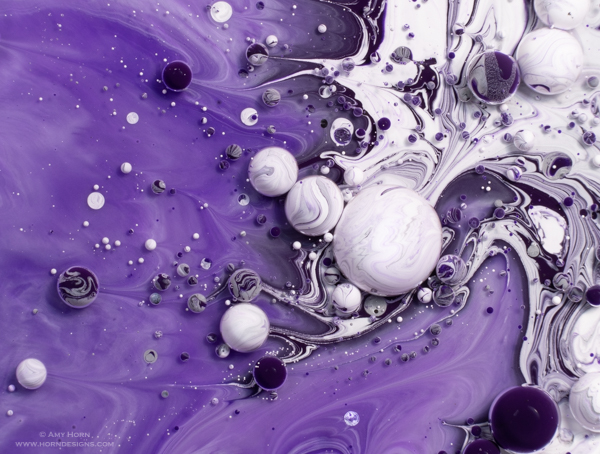
For the past two months I’ve captured studio images of liquids or liquid art. Instead of water drop collisions (I will do more soon) capturing macro images of paint, oil and milk are my new passion thanks to Jason Cummings. Jason shared his setup with me and I couldn’t wait to make it my own. Changing the liquid quantities and thicknesses create very diverse images. The above image followed the steps in this article and the gear used for this project is in the image to the right: two off-camera flash units with diffusers, shutter release cable, macro lens, extension tubes, plastic table cloth, solo cups, paint and a disposable plate. Not pictured: camera and tripod.
Gear used in liquid art photos
Make your own masterpiece
Step One: Water down acrylic paint. Using a disposable cup, water down cheap acrylic paint. The thicker the paint, the longer the paint balls stay intact.
Step Two: Pour milk, half and half, cream, etc into a water resistant or water proof plate/bowl. I prefer using disposable plates or Petri dishes.
Step Three: Pour oil in a new cup and add drops of paint. Use all the colors you want in your image.
Step Four: Pour oil and paint into milk substance. Pour fast, pour slow, make circles/squares, etc; these differences in technique add to the individuality of the final image.
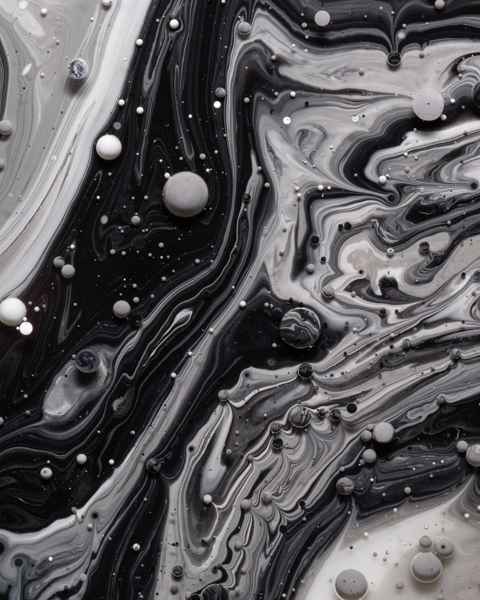
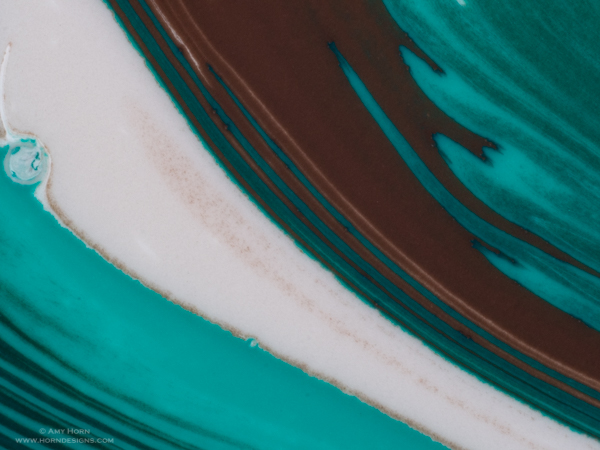
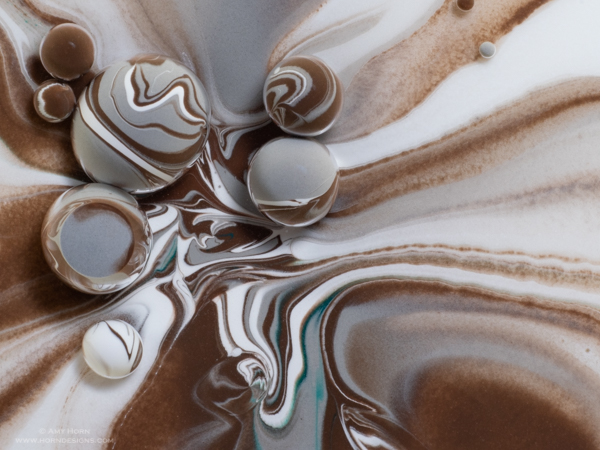
Step Five: Capture images. When setting up your gear, be sure that the macro lens is parallel to the plate of liquid. I use a toothpick on the surface of the liquid to pre-focus. After pouring, I manual focus in live view, at 3x enlargement or more, to fine tune focus. Snap the shutter and rotate the plate for different compositions. The liquid will move on its own as the oil, milk and paint interact. If you have paint “balls” they will burst at some point, so shoot fast. Since the liquid mixture is moving, I recommend using a flash or other strong light source to create sharp images at a fast shutter speed. Here are a few examples from different paint colors. Give it a try, it is a lot of fun.
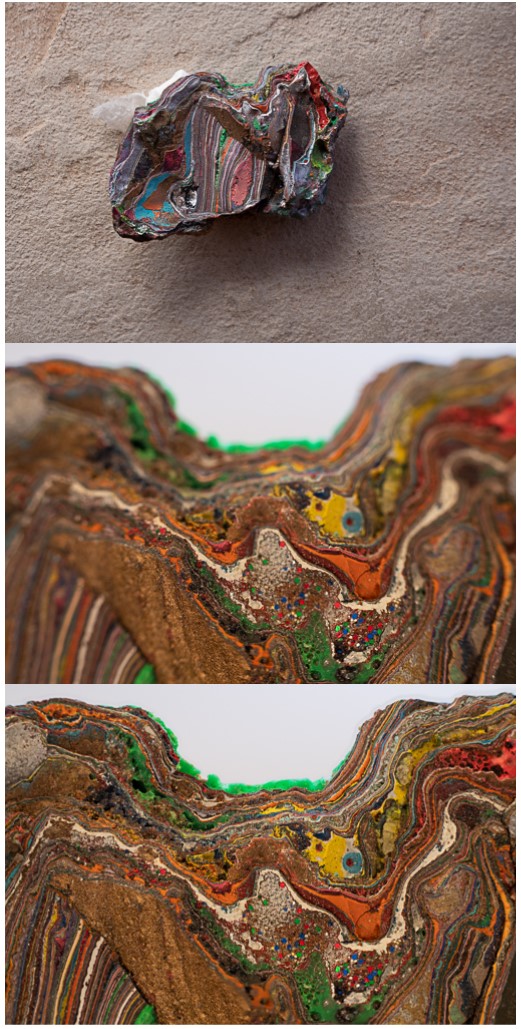
Cropped version of final Focus Stack. Olympus OM-D E-M1 Mark II, 60mm + 26mm extension tubes, ISO 400, f/4, 1/50 sec.
Not all macro subjects are captured sharp in a single image, that makes a great reason to focus stack. In preparing for a camera club presentation, I decided to focus stack a new object. I chose a piece of fordite from Cadillac Ranch. If you aren’t familiar with fordite, just think – layers of paint. The first image (image A) is a close-up image of the piece of fordite that measures 2” x 1”. I used my 12-100mm lens and got as close as I could to capture the image. Then, with my macro lens and extension tubes, I captured image B. A small sliver of the subject is sharp, but not the whole piece of fordite. In order to have sharpness throughout the entire frame, I would need to focus stack.
At first, I tried a stack of 50 images. My Olympus camera has a focus bracketing mode so all I do is focus on the closest part of the fordite and program the camera for 50 images at a small increment of focus bracketing. The camera then captures 50 raw images changing the focus with small increments from front to back. After looking at image 50, the farthest part of the fordite was still blurry, so I needed more photos in my stack. I tried again, this time with 125 focus bracketing images. When I reviewed the photos, at image 118, I had the sharpness I needed. Next step was to focus stack the 118 images in Helicon Focus. Helicon is amazingly easy to use. After selecting the images in Lightroom, I export to Helicon and press the render button. Helicon does the rest. The last image is the final image of 118 focus stacked images.
A few tips on focus stacking:
Mark the start of a focus stack by capturing a single image of your hand, or other random subject otherwise if you capture several stacks, it will be hard to identify the start and stop of the stack otherwise.
Use a tripod and shutter release to minimize camera shake. Photoshop CC offers focus stacking but it is more complicated than Helicon Focus.
Olympus OM-D E-M1 Mark II, 12-100mm, ISO 200, f/14, .5 sec.., Circular Polarizing Filter.
Benefits of Photographing Alone
Olympus OM-D E-M1 Mark II, 12-100mm, ISO 100, f/4, 1/100., 8 image focus stack in-camera.
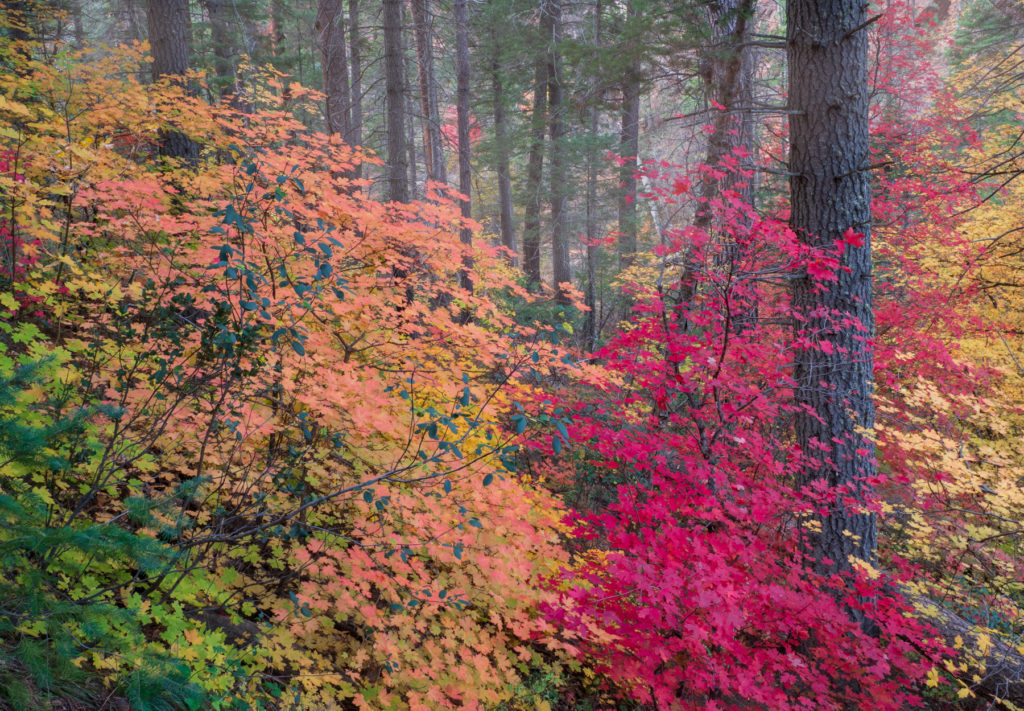
Not long ago, I spent a morning in Sedona photographing fall colors. Whenever I travel alone, I do check in with my husband at the start and end of my trip. Checking in with him is more for my benefit; knowing someone is aware of my location makes me feel better. My husband is very optimistic that I will be safe regardless. Photographing alone does require discipline, after all, hitting snooze on the early alarm is tempting, after all, no one is meeting up with me. But I stayed disciplined and left before dark to drive to Westfork in Oak Creek Canyon.
Olympus OM-D E-M1 Mark II, 12-100mm, ISO 200, f/8, 1/8 sec.., Circular Polarizing Filter.
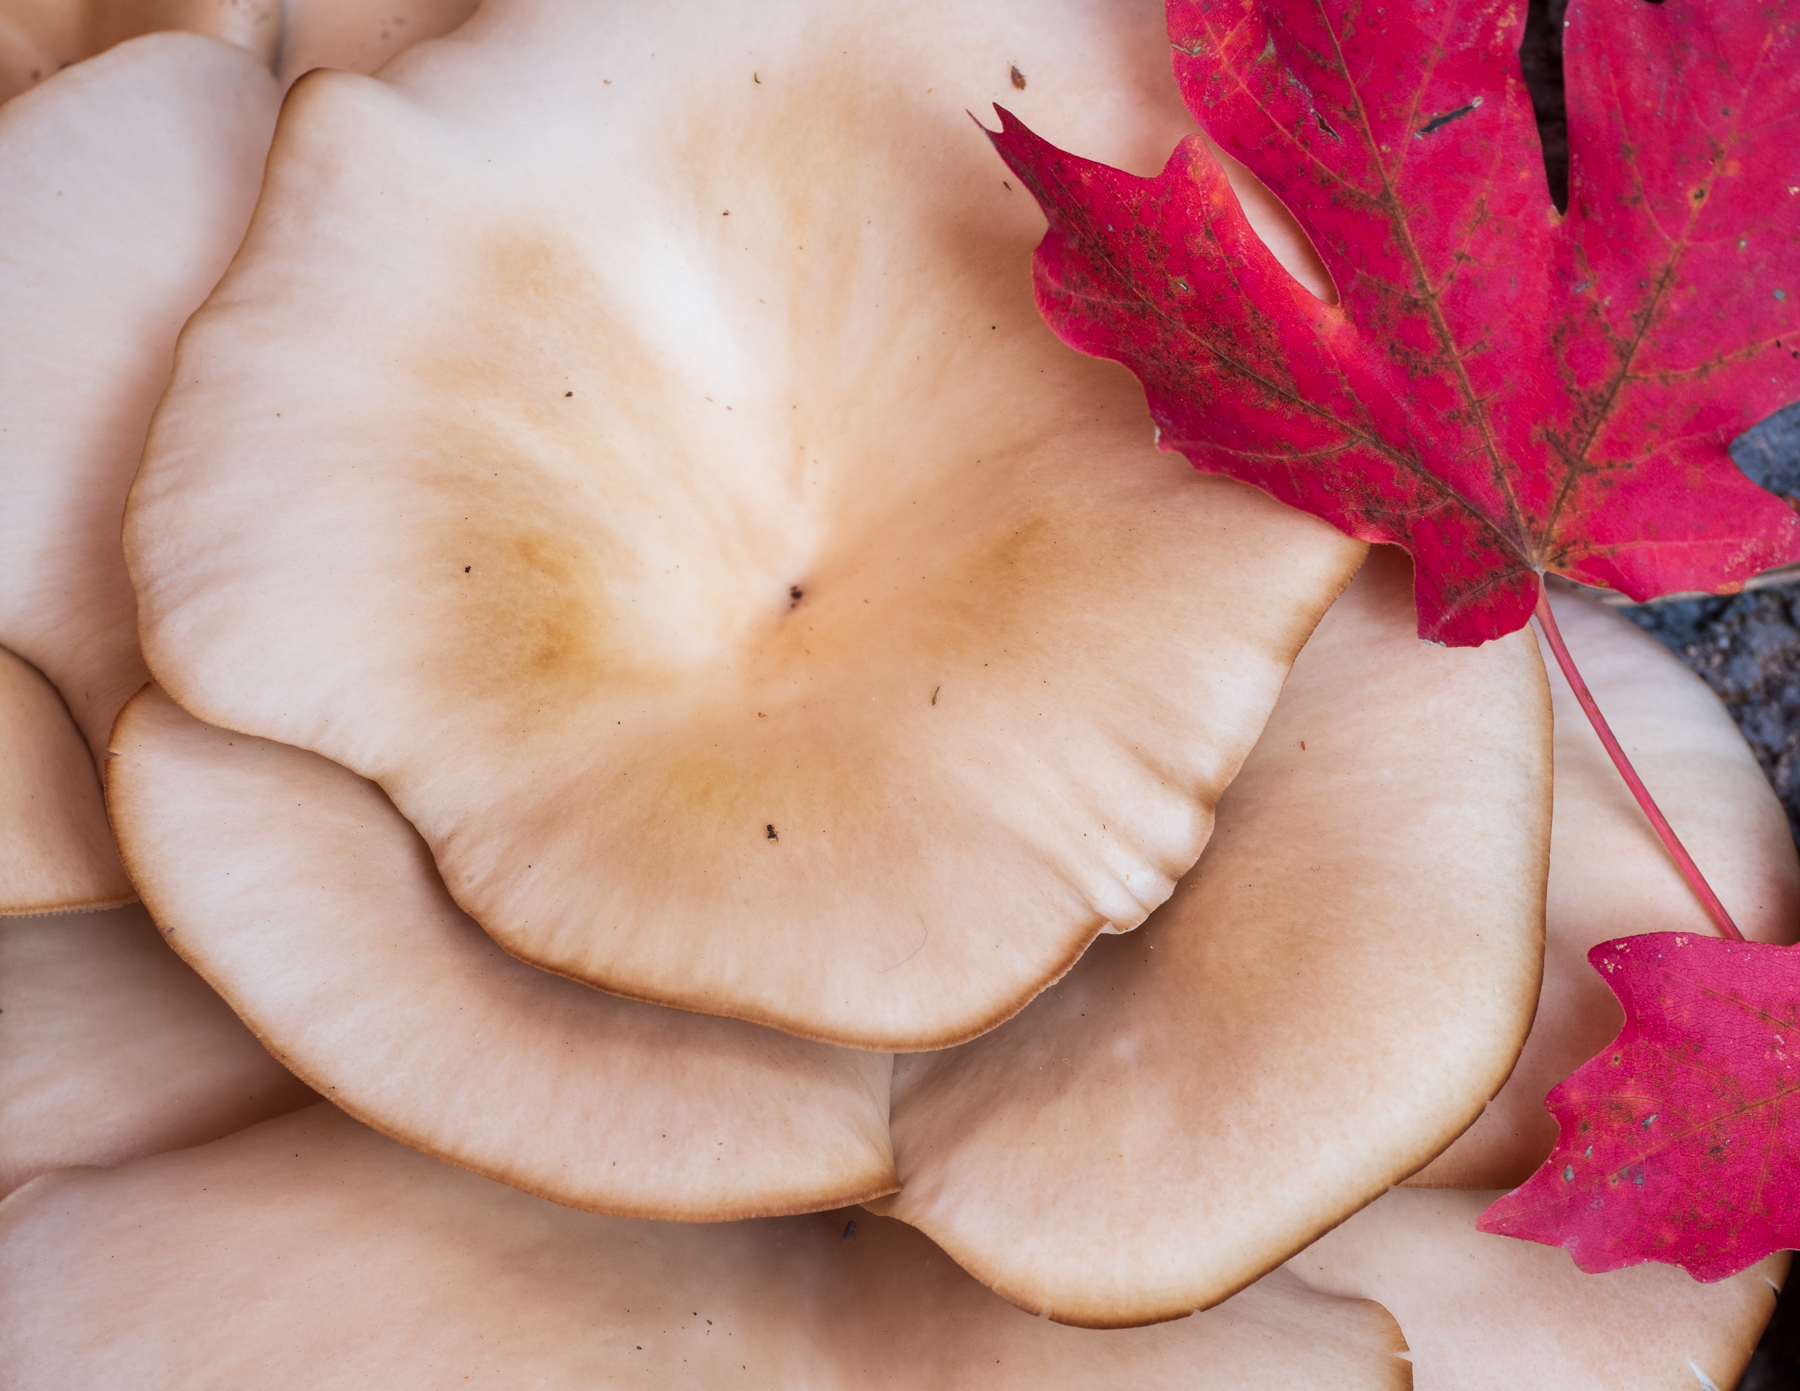
When I find a scene that interests me, I love working the scene for a while. Constantly challenging myself and looking for better angles or compositions. If there were people around me, they would hear me talk to myself saying things like, “what if I used that rock as foreground…” And then adjust my composition. Walking along the quiet path was relaxing and I didn’t feel a pressure in the world. I worked each composition for as long as I wanted with no time restrictions of leaving. I hiked up the side of the canyon along a small trail with awesome fall colors and scrambled down low when I found mushrooms. It was a fun and rewarding day. Sometimes, creativity is sparked just by shooting alone.