One of my favorite techniques to demonstrate on a workshop is the technique of “shooting through.” It’s really very simple. You need a large group of flowers and with a long focal length or macro lens, position flowers very close to your lens. The petals can actually touch your lens. Then, focus on a flower beyond the close petals and capture the shot with a wide aperture. While demonstrating for the group, I captured this image of golden lupine with a 100mm lens, f/4, 1/250 sec.
Have you ever tried narrowing your yearly images to your top 5? That is the theme here, my top images of 2022. I do this every year and it isn’t easy. Do I pick top images from different quarters? trips? genres? Well, this year, they are the top images that stood out based on light, composition, subject matter, and wow factor. I did get a little help from the family. I put the images in grid mode and starting with about a dozen images I kept asking them to remove two that weren’t as strong until I was down to these five.
Olympus OMD1 M3, 12-40mm, 1/640 sec, f/5, ISO 400.
Boundary Water Fog
I captured this image while canoeing in Minnesota’s Boundary Waters in August of 2022. We woke up to a thick fog and thought it had to be captured. So, Gretchen and her brother, Neil paddled and I “duffed” (sat in the middle) taking photos before the fog lifted. This image brings back that peaceful feeling from that morning on the water. Olympus OMD1 M3, 12-40mm, 1/640 sec, f/5, ISO 400.
Olympus OMD1 M3, 35mm, 1/25 sec, f/5.6, ISO 100.
Cape Perpetua Light
While driving along Highway 1 on the Oregon coast in September 2022, I was treated to a spectacular light show at Cape Perpetua. I turned a corner and saw this light coming through the fog on the pullout to a campground. My gut told me to stop, so I turned down the road, stopped and took the shot. Moments later, the fog was gone. My takeaway lesson – don’t ever think you will get the shot later – stop and capture the moment.
Nikon Z, 50mm, 1/00 sec, f/16, ISO 200.
Paper Project
Macro photography is my passion, so this project incorporates uniquely folded sheets of paper and off-camera gelled flashes. When I started this project, my husband decided to purchase a laser cutter so that we can cut our own paper perfectly. As a result, I plan on pursing more of these in 2023.
To celebrate our 30th wedding anniversary, Rod and I spend 10 days in Kauai. We hiked, ran, and photographed waterfalls. What an absolute joy. Getting to this position in the waterfall took some clever walking and handling of gear. Thankfully, Rod is always up to assist!
Olympus OMD1 M3, 12mm, .4 sec, f/10, ISO 200.
Ferguson’s Cafe
If you ever saw the movie “Benny & June,” then Ferguson’s Cafe might look familiar. In Spokane, Washington’s Garland District I walked up and down the street photographing the many neon signs at night. Ferguson’s was by far my favorite.
There you have it, my top five images of 2022. I’m thankful my family offered opinions on these images because sometimes I get stuck on my emotional attachment to the area instead of the quality of the photo. This is a great exercise in evaluating photos, if you haven’t tried it before, give it a try.
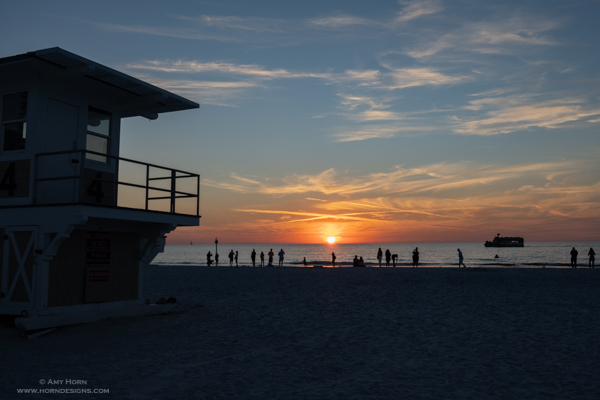
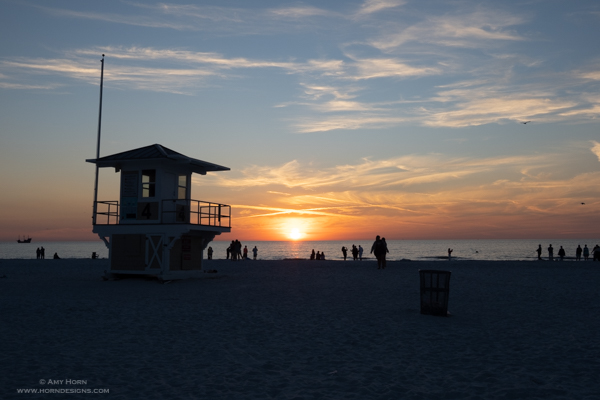
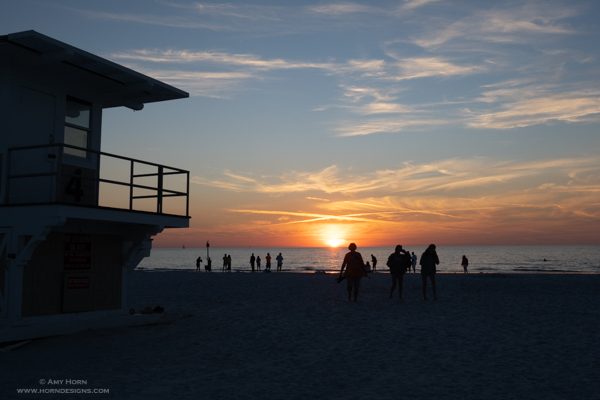
While in Florida this winter visiting family, we stopped for sunset at Clearwater Beach. We were running late, so as soon as we parked, I scanned the area to find a foreground and was pleased to see a lifeguard tower. While walking toward the beach, I extended my tripod legs and checked my camera settings (we were really late for sunset!) I stopped before the lifeguard tower and took a quick shot to test my composition and realized there was a trash can in the photo (see the first image below). So, I moved a bit closer and captured another frame, but the people walking toward me were too close (see the second image below). Then I waited for the ship to enter my frame and got my final shot above. With digital cameras, it is ok to take several images to “build” your photo.
First photo with trash canSecond photo with people too close
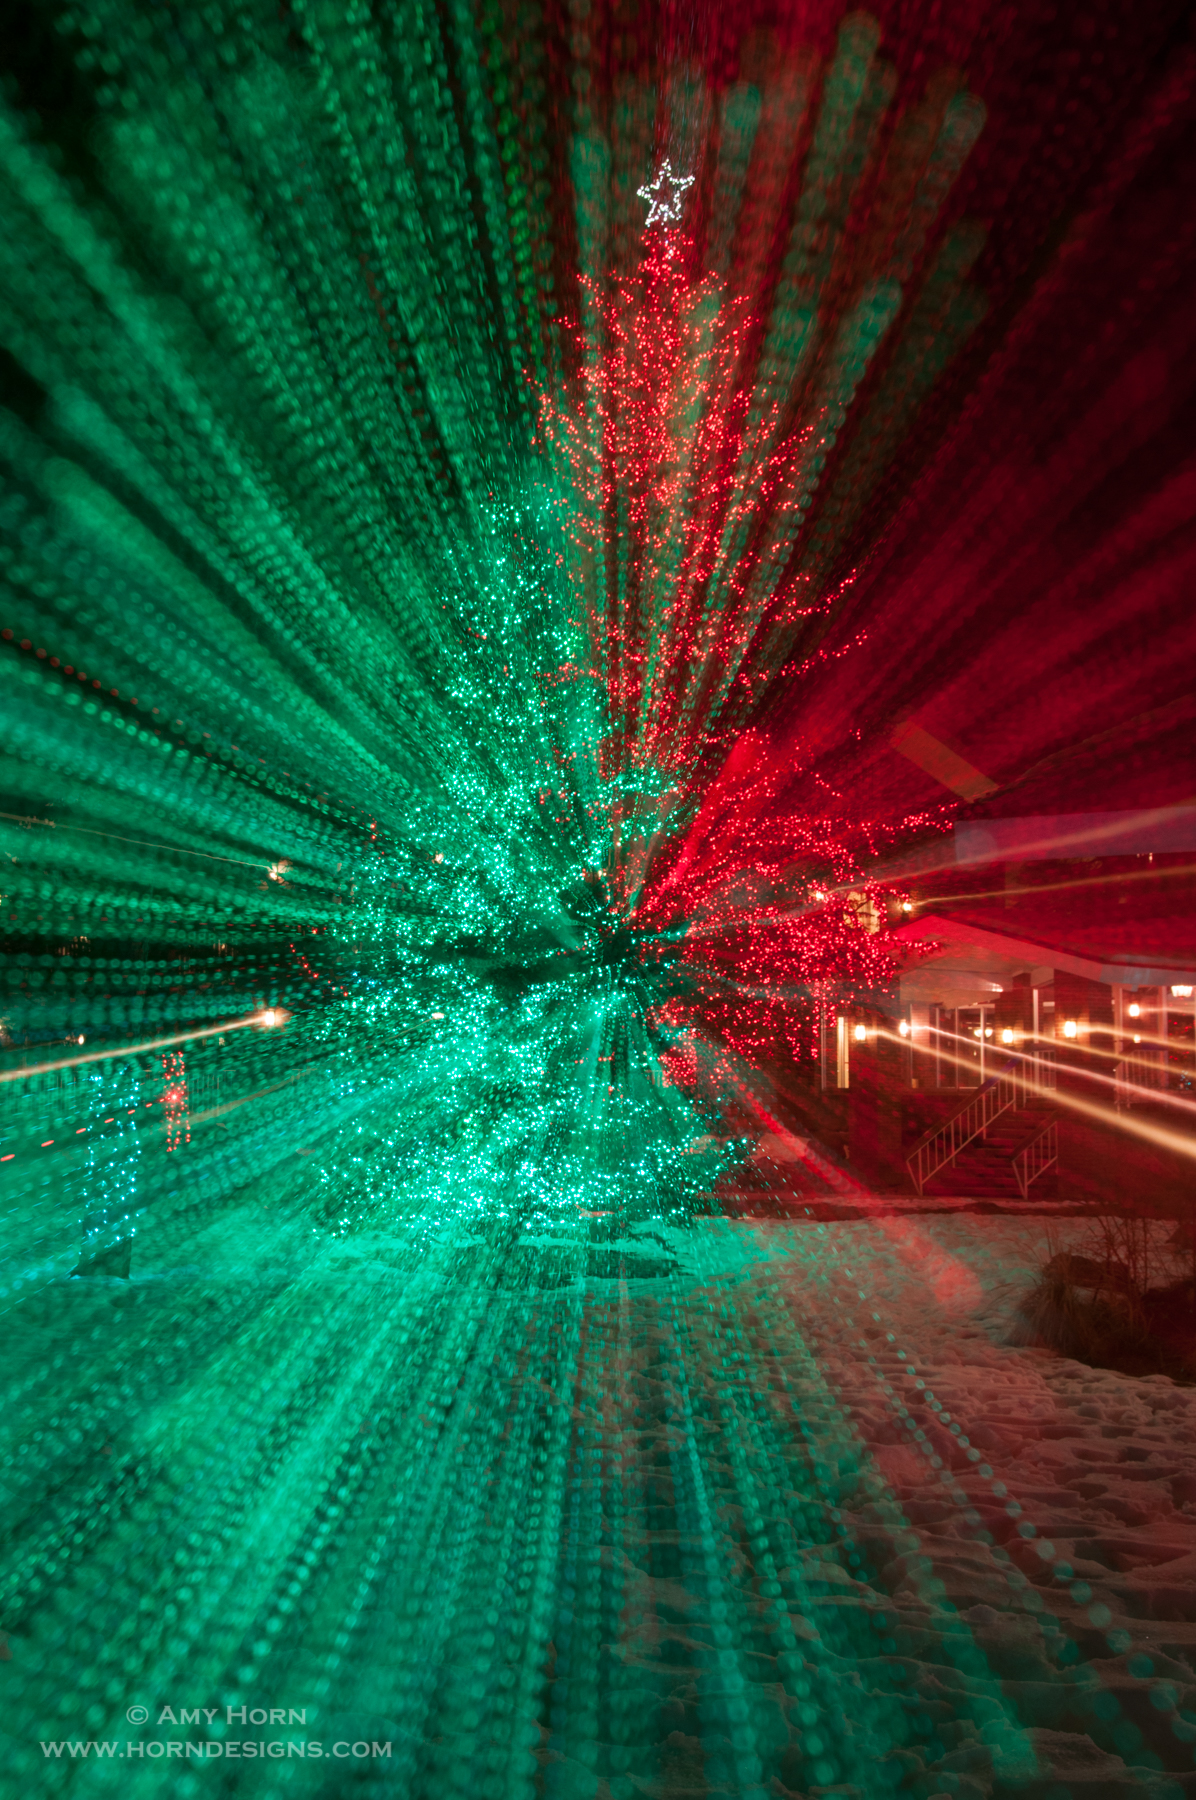
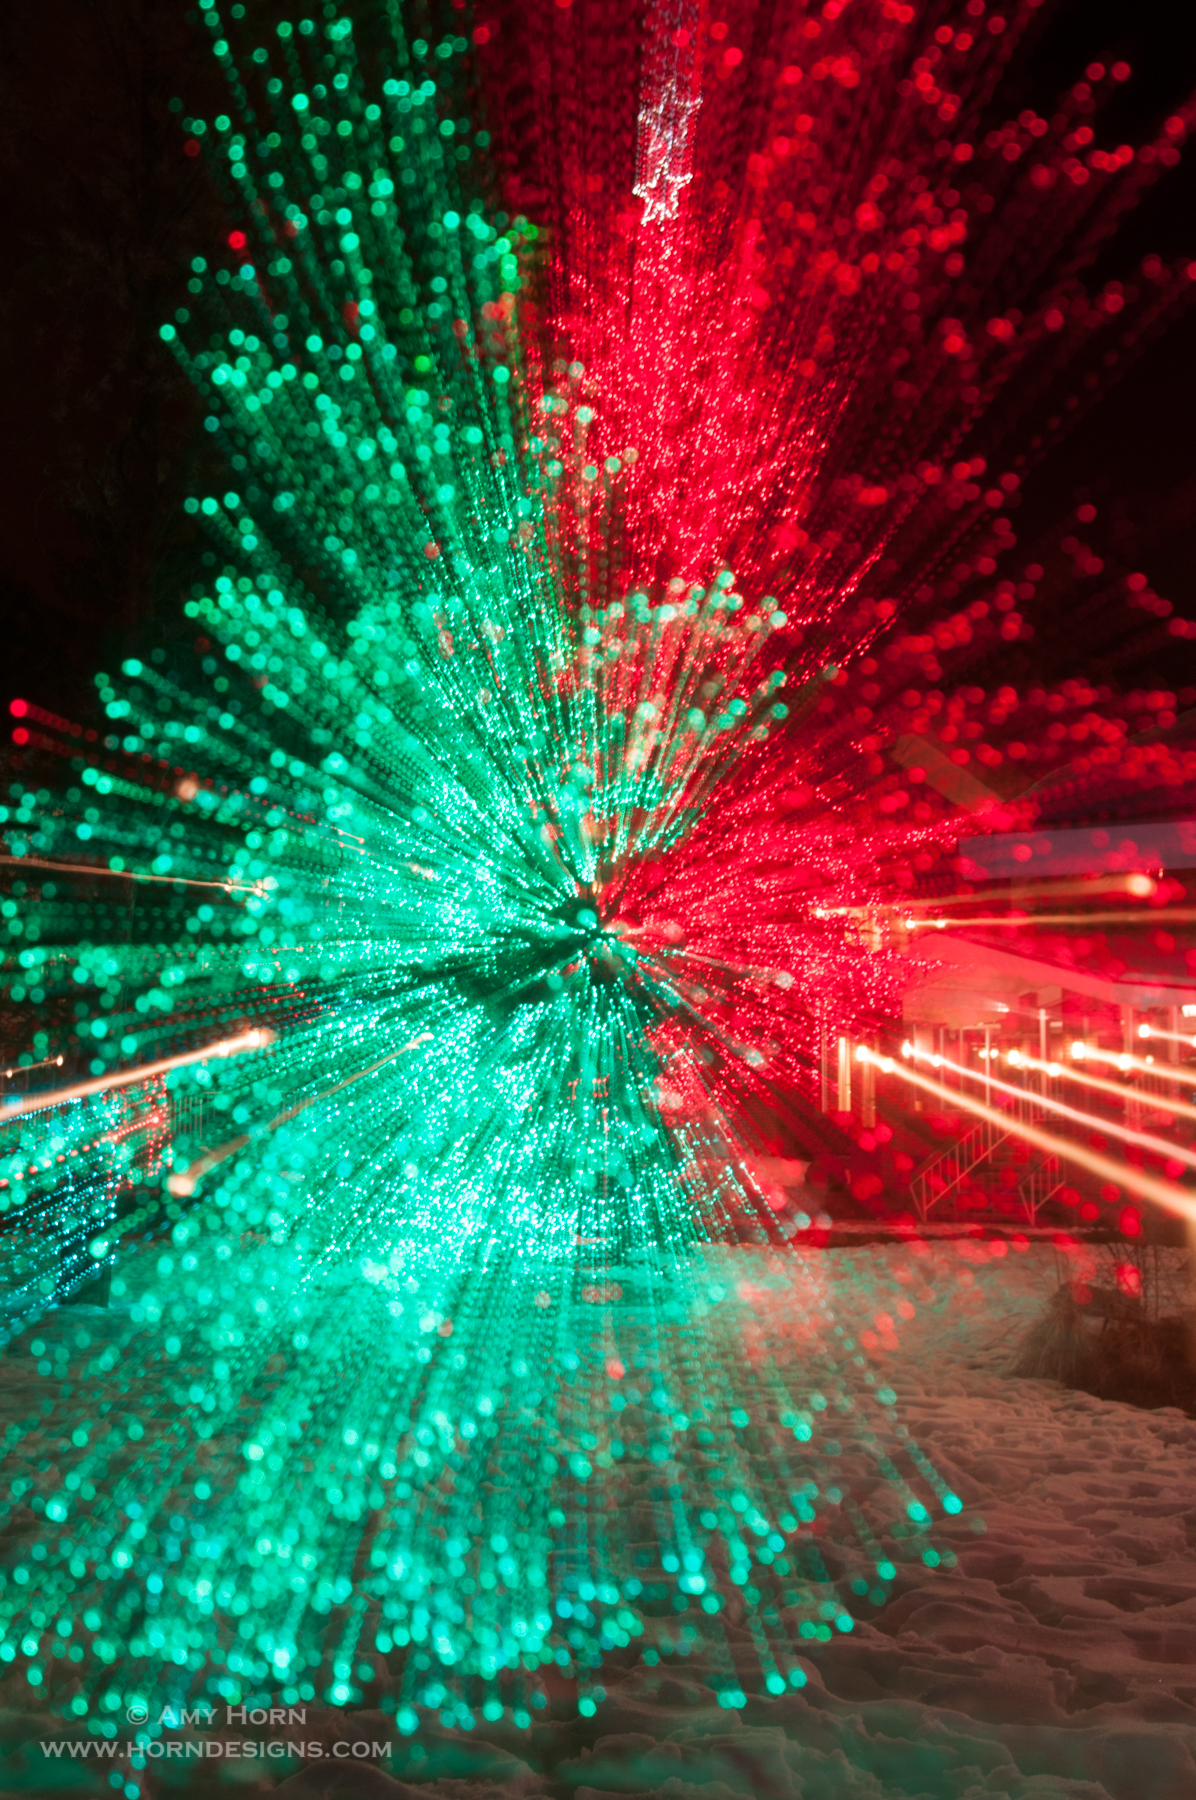
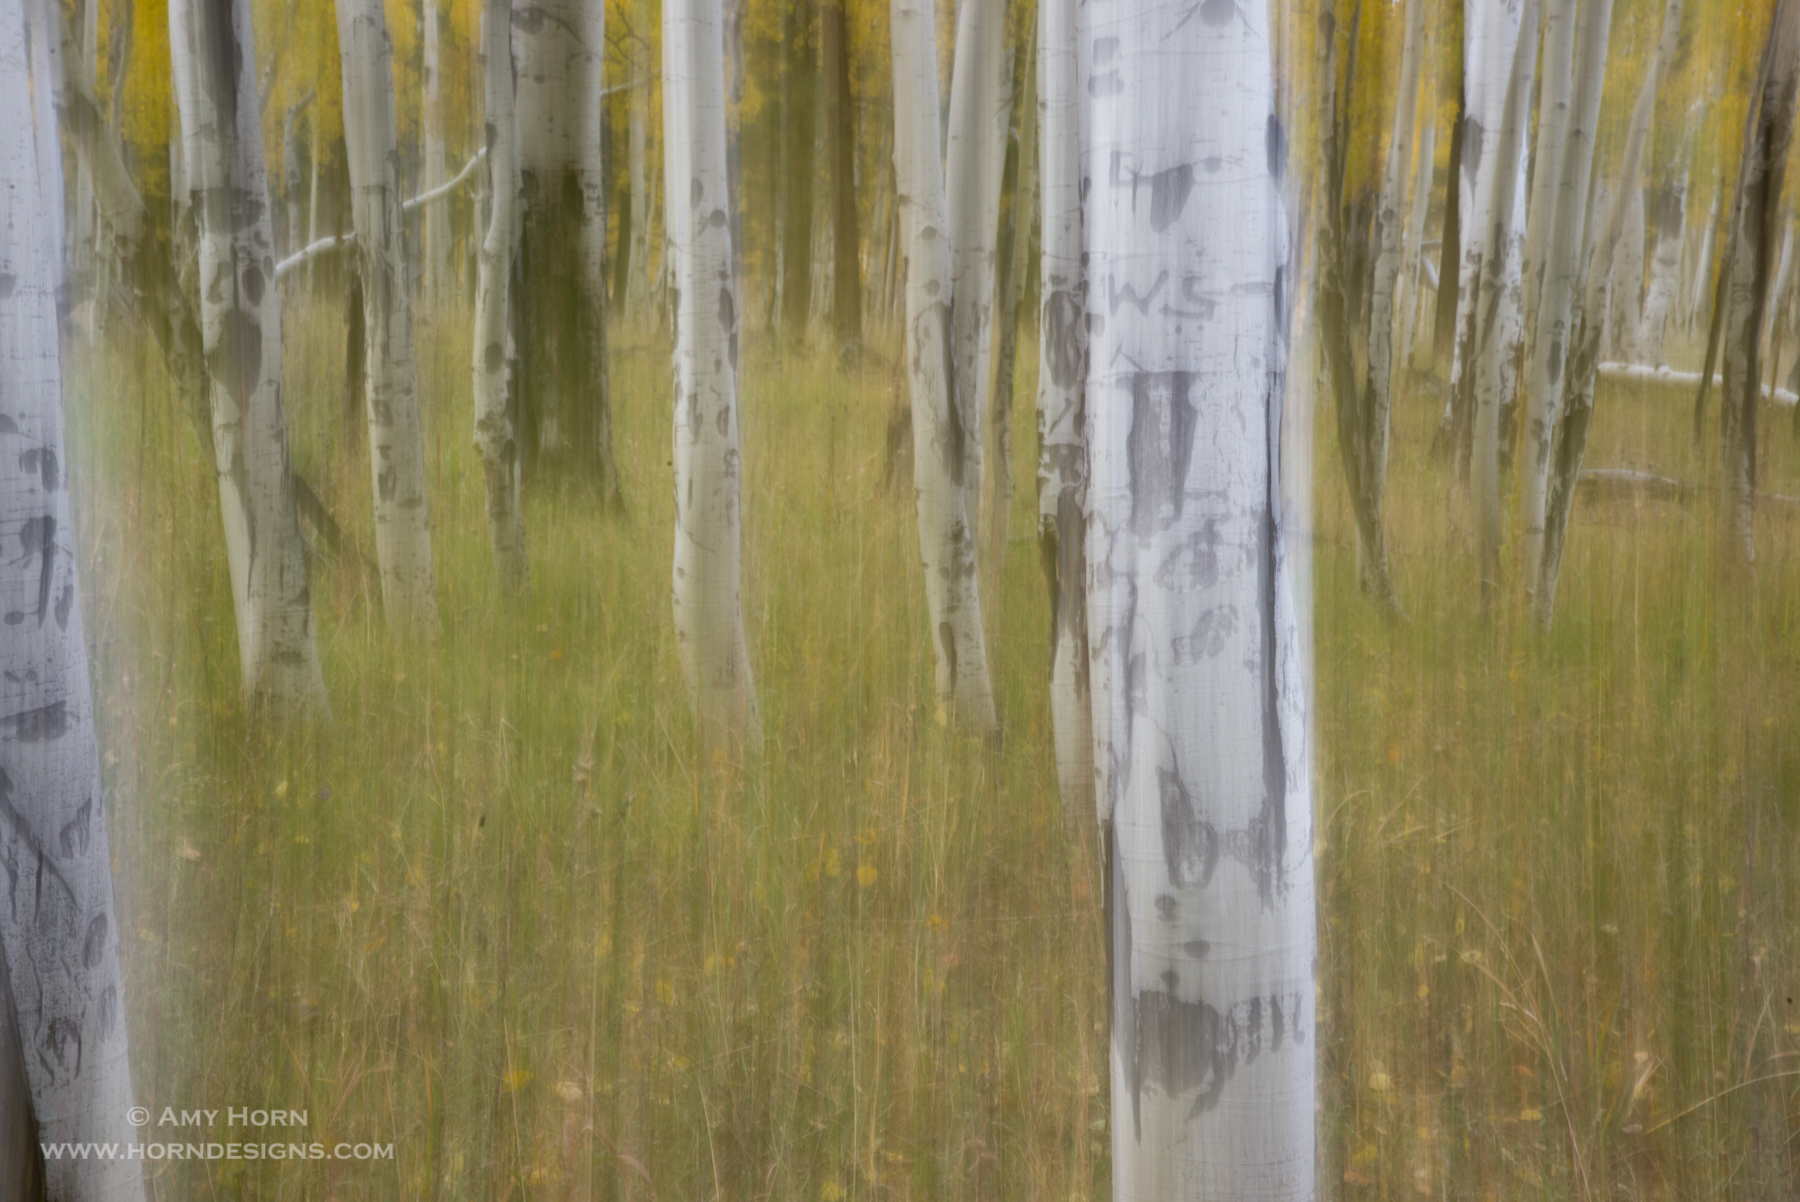
Beauty surrounds us daily but every now and then I still need inspiration. For me, getting creative is the solution. One of my “go to” creative techniques is intentional camera movements. Generally, I put these in three categories: zoom pull, up/down, and spin. One of my favorite times of year to use these techniques is at the end of the year with holiday lights. Let’s look closer at these techniques:
Zoom pulls
Preferably on a tripod, set your camera to a slow shutter speed and after pre-focusing, press down the shutter and zoom your lens. Sounds simple, right? Well, it really is. You can zoom out or in, fast or slow and each option returns a different result. When you find the combination you like, capture a few more shots. Sometimes, I use a shutter release and bulb mode, really mixing up the shutter speeds. Take a look at these examples:
2.5 sec zoom fast and slow
2.5 sec zooming slow
2.5 sec zooming fast
Up/down
For this technique, I prefer to hand hold the camera. My tripod isn’t a gimbal head, so moving the camera up and down isn’t smooth unless I hand hold. Again, with a slow shutter speed tilt the camera up and down. Generally, I use a ¼ sec shutter speed as a starting point and then adjust from there. Like the zoom pulls, move the camera fast or slow until you get the look you desire. Here are a few examples of up/down intentional camera movements:
original image
1/4 sec slow movement
1/4 sec fast movement
Spin
This technique is more complicated and difficult to master. Personally, I don’t try this technique much. The only difference from the previous techniques is the spinning of the camera. But, this time spin the camera in a circle with your subject in the center of the frame. If you really like this technique and have a hard time capturing a photo you like, there is always the radial filter in Photoshop that would create the same effect.
There you have it, several approaches to intentional camera movements. Give it a try!
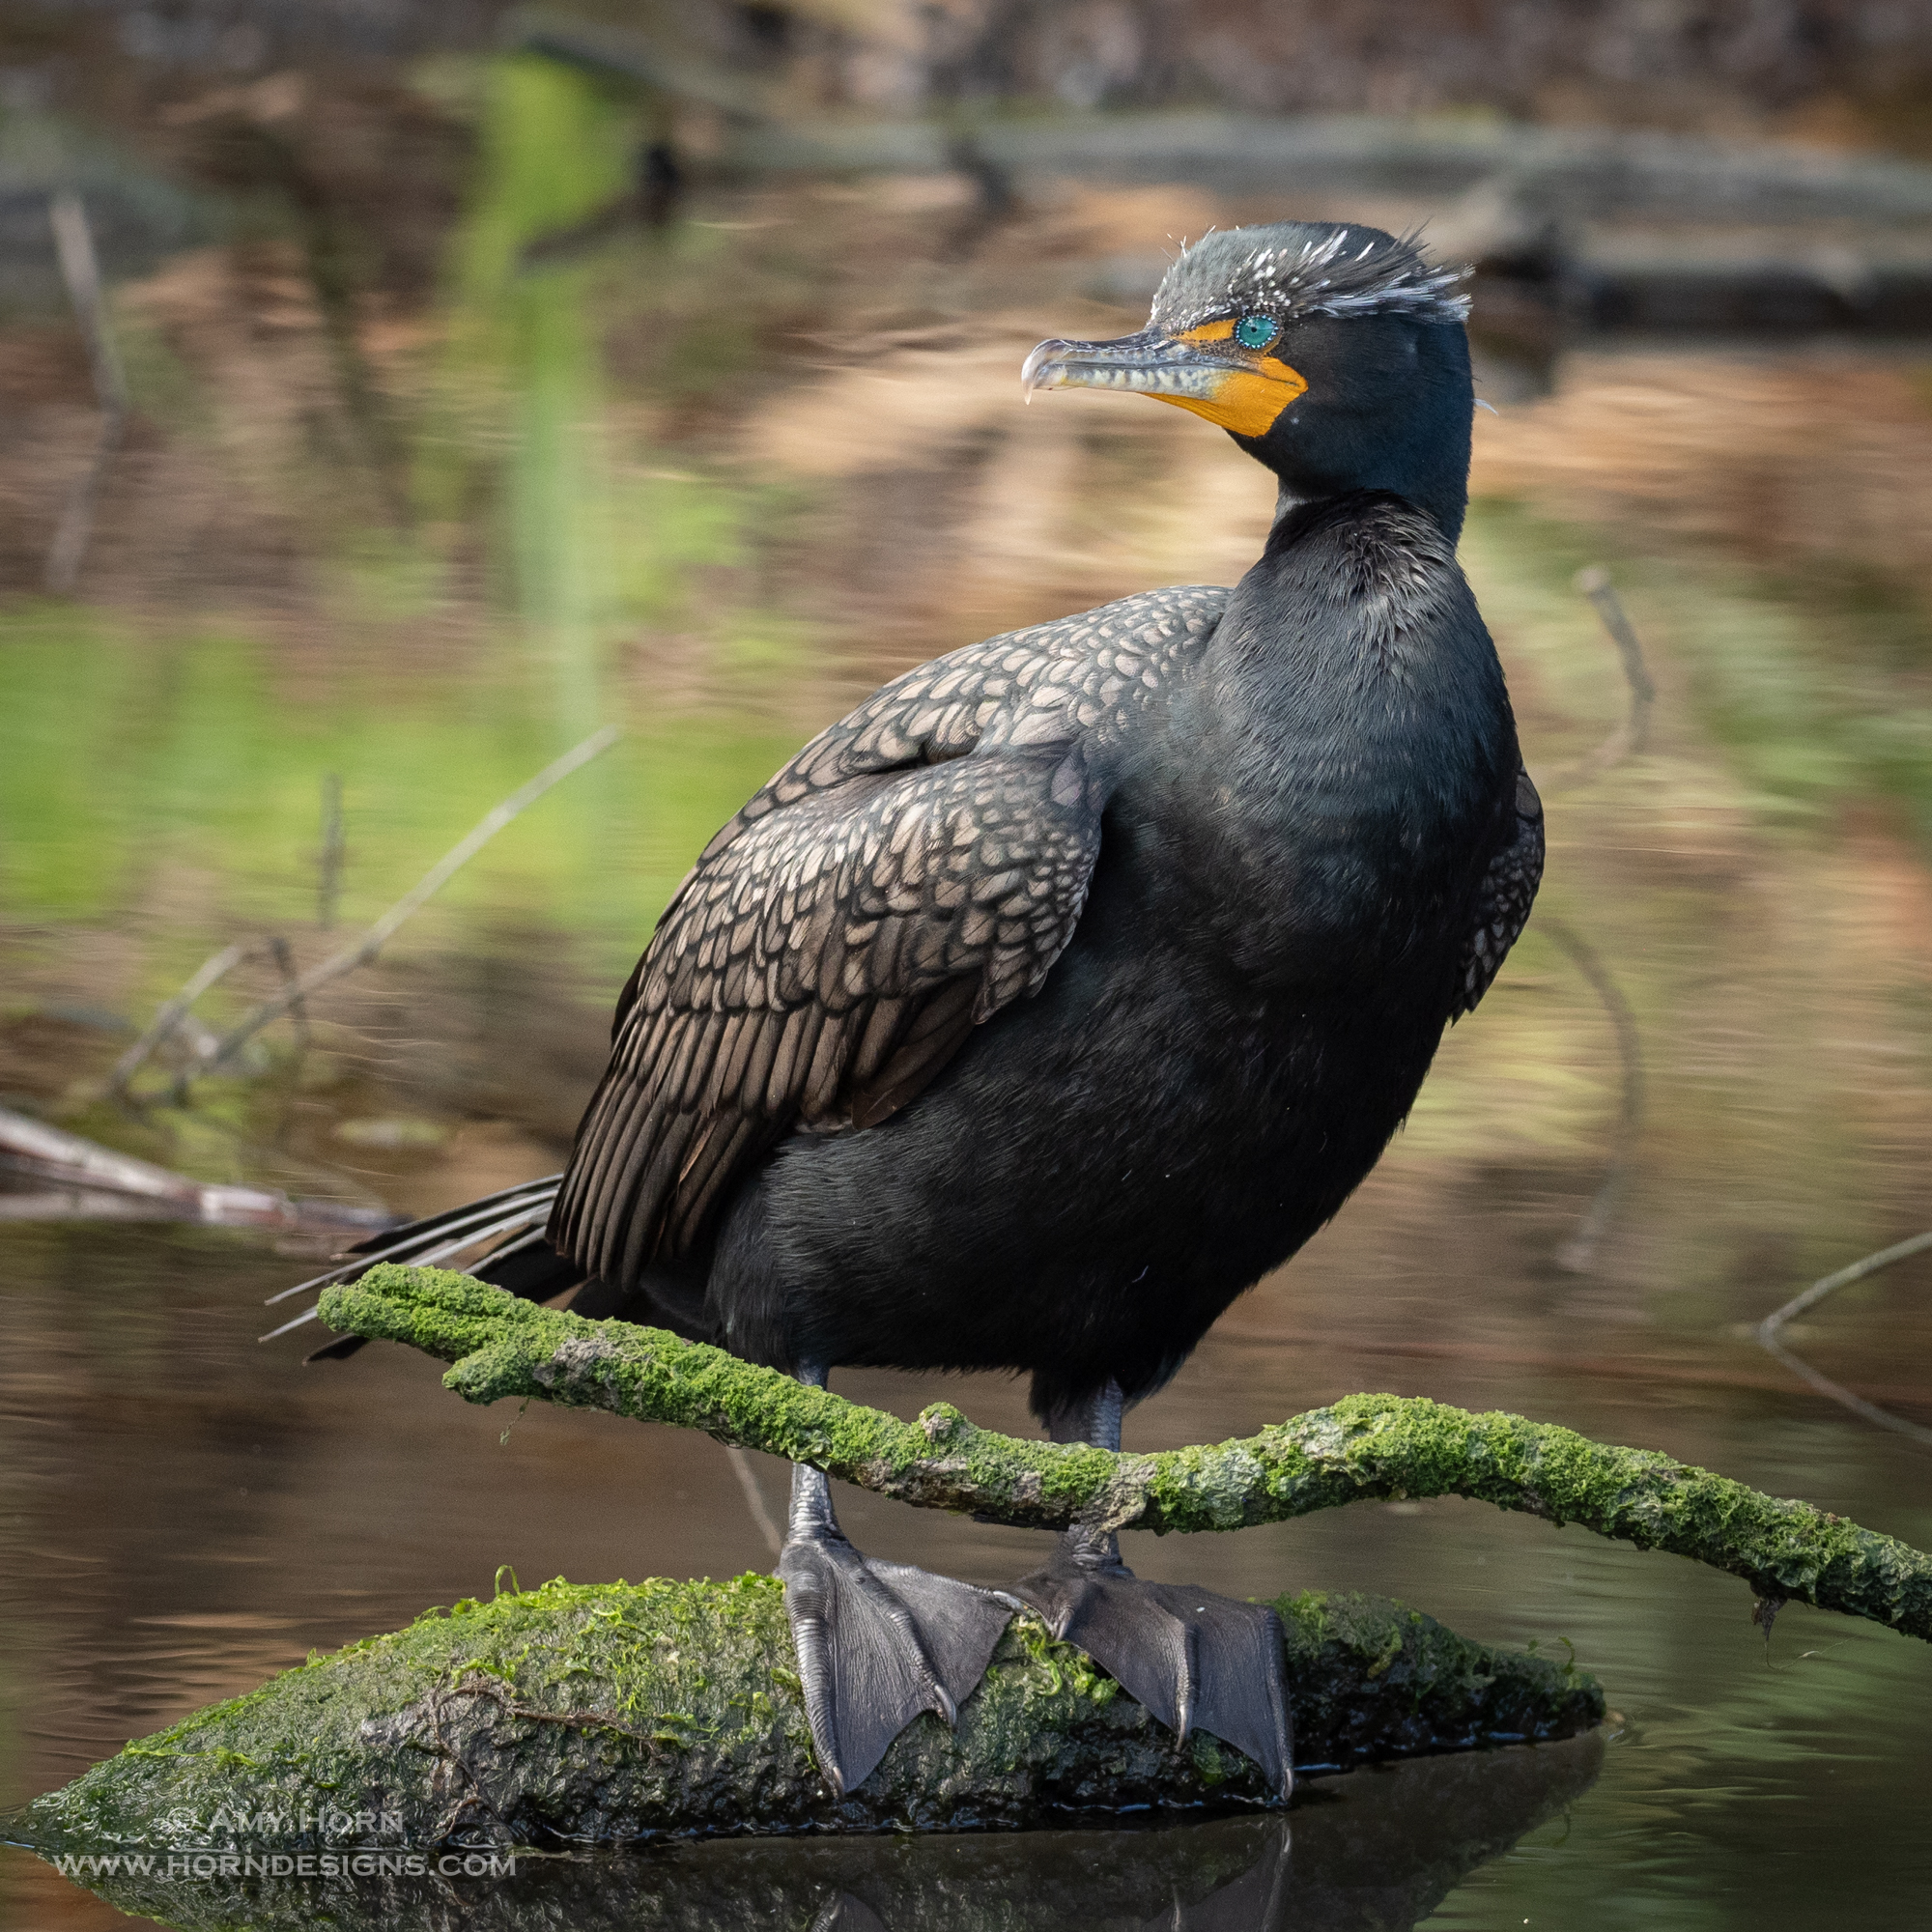
Practicing at local ponds prepare me to capture this Cormorant in Morro Bay, CA.
Photography is like any other hobby – to improve you need to practice and this is especially true with wildlife photography. To practice my wildlife photography, I love to visit local ponds and zoos in my area. After all, I’m not much of a tracker, so I go where it is easy to find the animals. That way I can practice camera settings, technique, and composition to prepare for when I see animals in the wild. Fortunately, there are several ponds near my house with a variety of waterfowl and birds to practice photographing.
My Gear
Along with my camera, I pack a long lens (100-500mm range). My favorite Olympus lenses are the 300mm f/4 and the 40-150mm with a 1.4x extender. If I am photographing at a zoo through fences, I prefer the 300mm. Longer focal lengths eliminate the fence better. My gear is in my hand, or my backpack and I make sure to include extra camera batteries, memory card, water, and snacks. Sometimes I will use a monopod, but not if there are a lot of people around.
My Settings
This lion image was captured through a fence at the Wildlife World Zoo.
Setting the shutter speed correctly is crucial in wildlife photography. Generally, you have two options – a fast shutter to stop the action (like wings in flight) and the shutter speed should be at least 1/2000 sec. The second option is a slower shutter speed for panning shots. Panning requires a little more practice and the shutter speed changes depending on the speed of your subject. For example, 1/30, 1/60, 1/125 sec are shutter speeds I have used on wildlife. So, once you decide on the vision of your photo, set the shutter speed.
Focus is most often in continuous and either a single spot or a small group of spots. Birds flying in the air are easier to focus on using multiple spots. But to focus on a bear’s eye, the single spot is best. Get eye level with the animal to capture the strongest possible image. Below are a few images from zoos, ponds and my backyard.
Next time you have the opportunity – go out and practice!
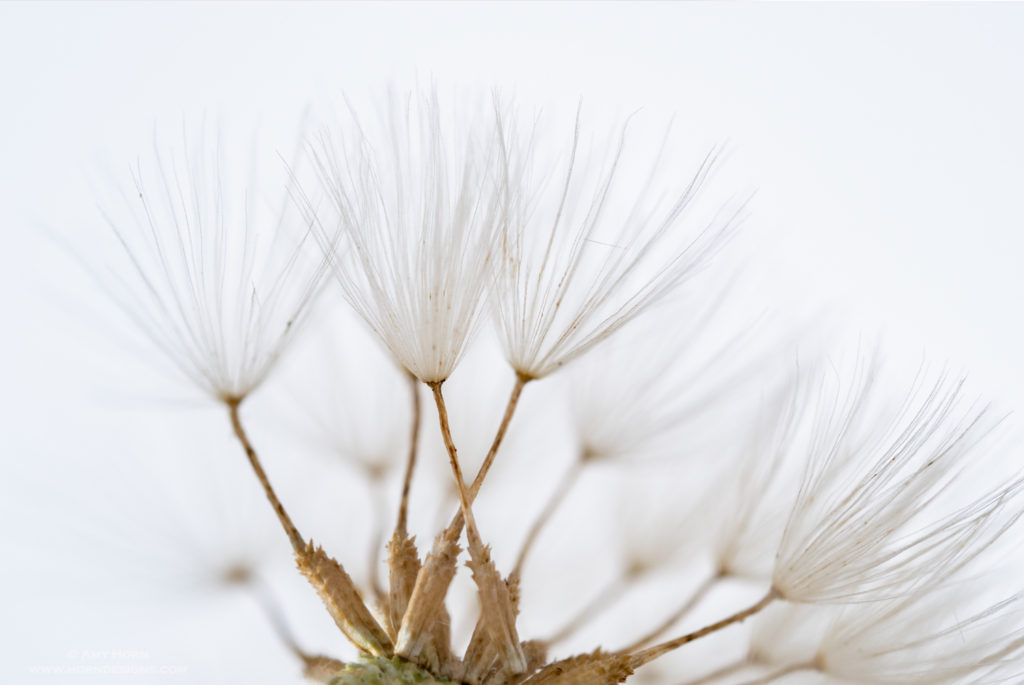
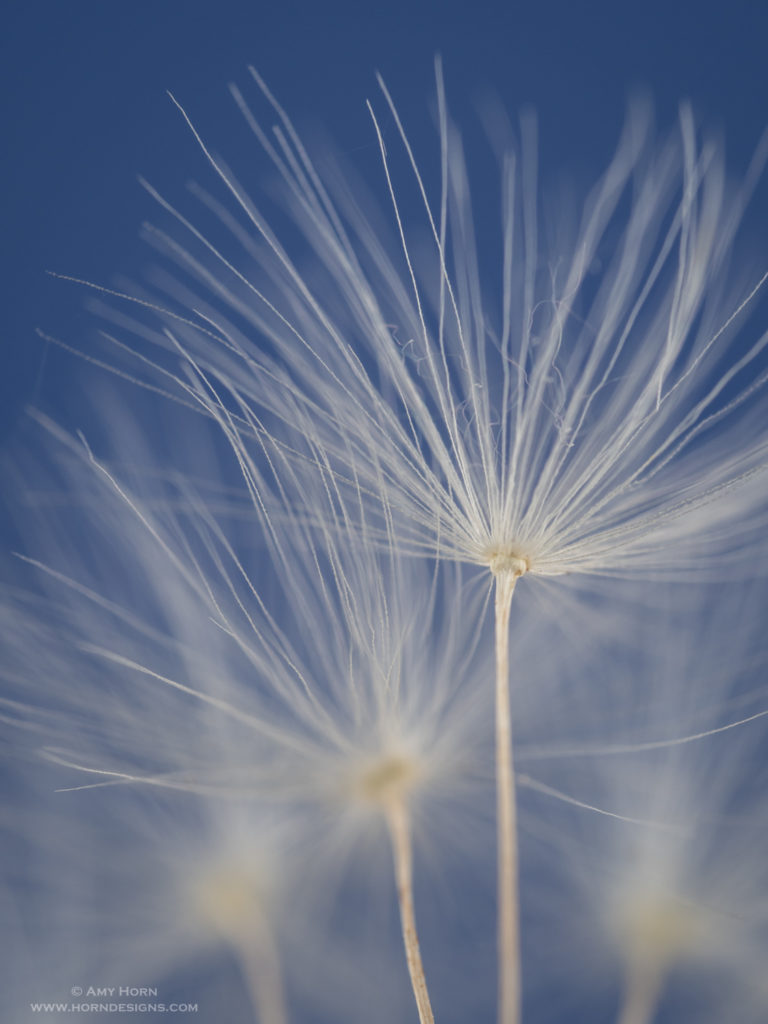
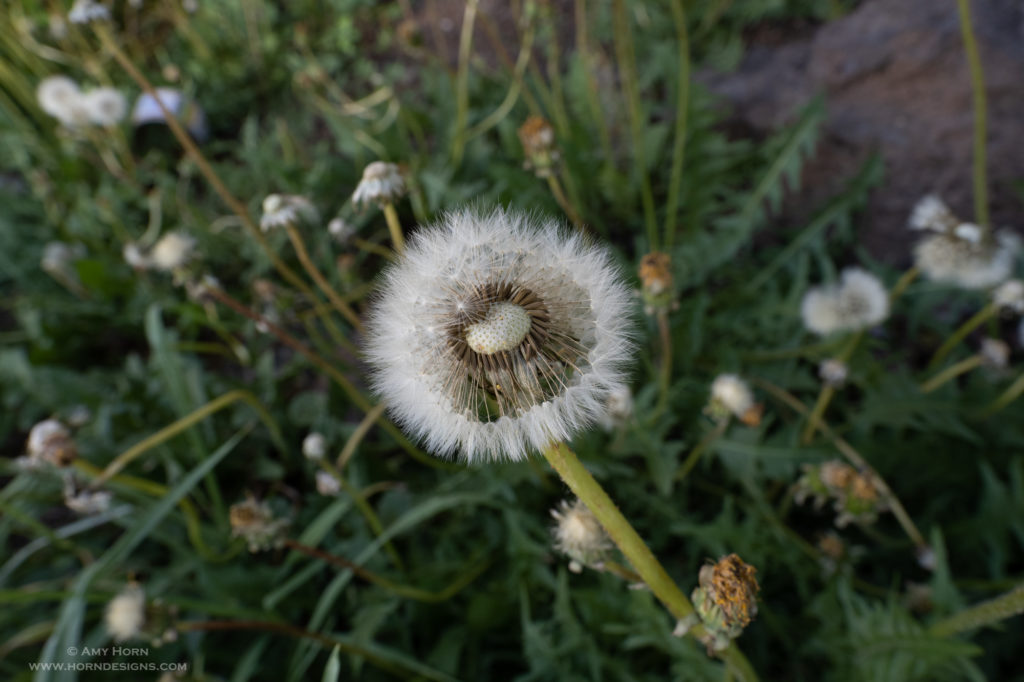
Every spring we remove those pesky dandelions from our yard. This year, before the weed & feed came out, I picked a dandelion to photograph.
As a child, I enjoyed blowing the dandelion seeds everywhere, not grasping why it upset my parents. As an adult, when I look at a dandelion, I imagine myself wandering through those tiny seed pods; maybe it comes from reading The Borrower’s or Dr. Suess’s, Horton Hears a Who. So, I spent a few days photographing dandelions from my yard and I thought I would share my process with you.
Olympus OMD 1 Mark III, 60 mm macro, with Raynox DCR250 close up lens, 1/200 sec, f/4, ISO 200, two off camera flash, 50 image focus stack.
I started with a perfect, fluffy dandelion. But the image was busy and I struggled seeing into the seed pods, so I removed some of the seeds to gain a better vantage point. Using my macro lens, tripod and a Raynox DCR250 close up lens, I captured the above image at approximately 2.5x magnification. The off camera flash units were at 1/64 power with diffusion (copy paper). At this magnification, I chose to focus stack so that the closest seed pod would be in focus.
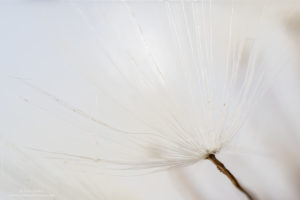
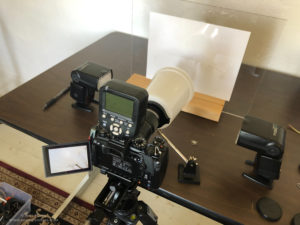
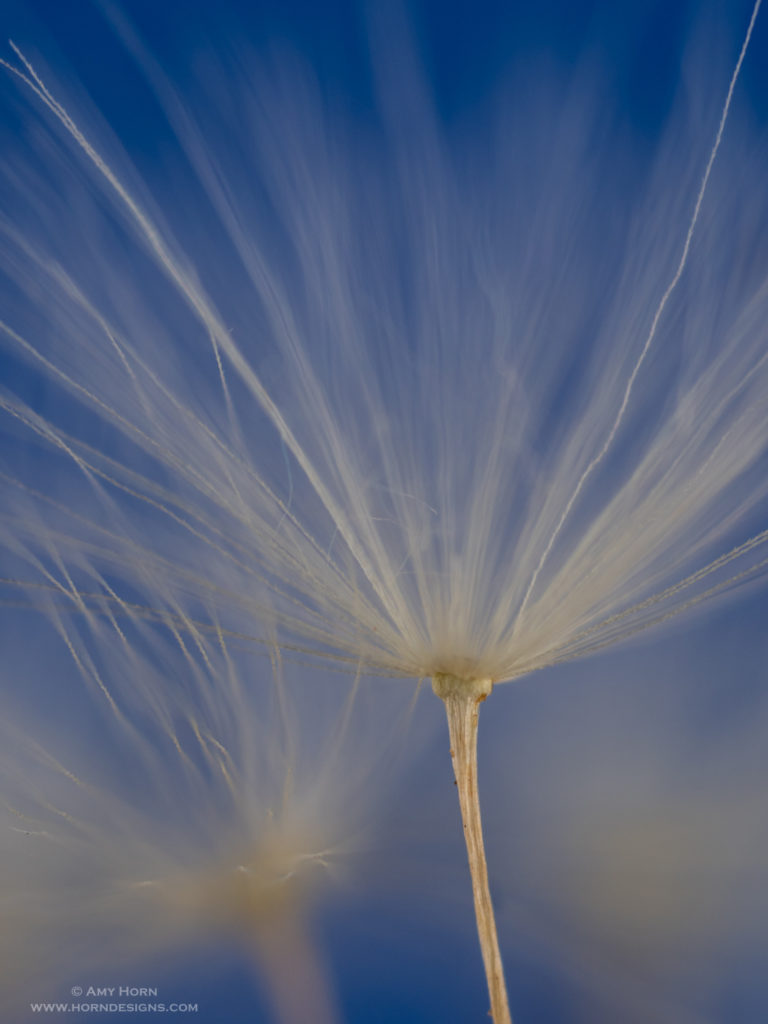
Next, I moved in closer keeping my exposure and flash settings the same. By adding extension tubes to the macro and Raynox lenses, I isolated an individual seed pod achieving almost 4x magnification. When using the Raynox, I use a plastic container on the end of my lens to diffuse the flashes. Anyone that has taken our Arizona Highways PhotoScapes Super Macro workshop (ahps.org) has used this diffusion technique. For these next images, I included my super macro setup and the single seed pod image.
Then, I continued to play with the dandelion seeds, pulling some away to reveal less seed pods drawing me to different compositions. The colored paper background added variety and I chose to capture single images with varying depths of field.
1/50 sec, f/8, ISO 200
1/50 sec, f/5.6, ISO 200
1/100 sec, f/4, ISO 200
No Flash
1/60 sec, f/4, ISO 200
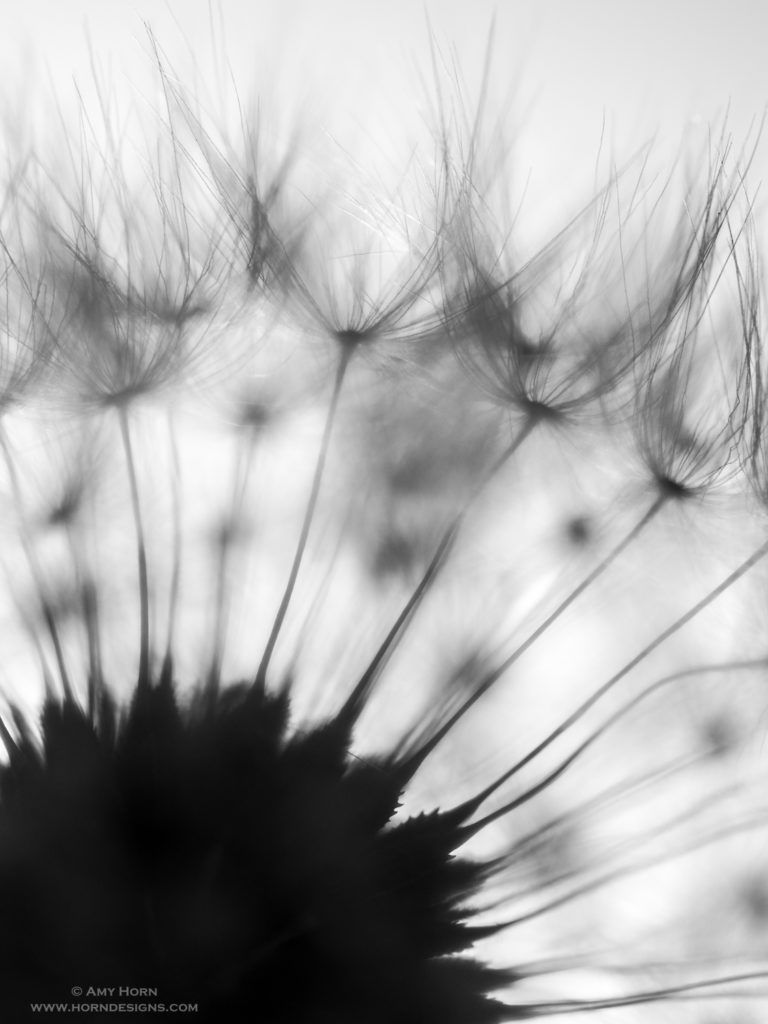
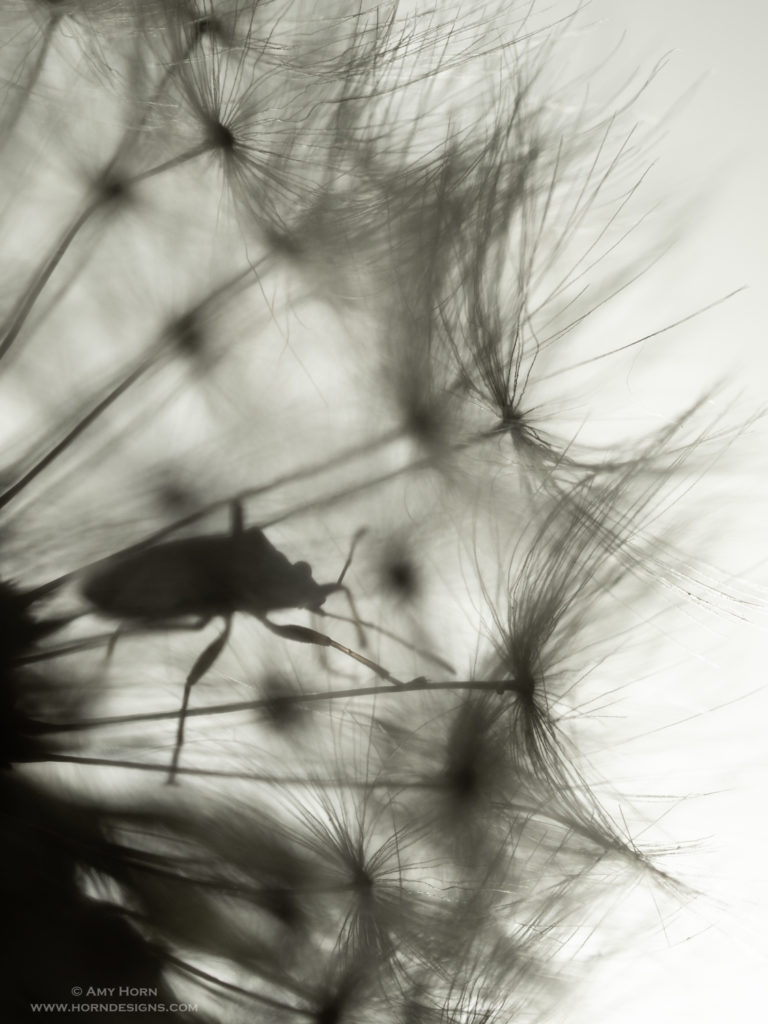
While setting up the next shot, I added a continuous light to the background and loved the silhouetted dandelion. So, I turned off my flashes and captured silhouettes with and without extension tubes. Much to my surprise, I found a bug crawling around in the dandelion. It took a lot of twisting and positioning in front of my lens, but I finally captured the bug in the seeds. The final bug image expressed my original intent – as if I was that bug within the dandelion.
1/30 sec, f/3.2, ISO 200, backlit
1/60 sec, f/4, ISO 200, backlit
So, if you are looking for a project, find something simple around your house and keep “working the subject” by changing settings, lighting, backgrounds, etc until you achieve what you want. These images were captured over the course of three days. When I take on new projects, I like to review, reflect, and then reshoot several times. Regardless, have fun and I hope you enjoyed reading about my process.
Some days, I just need to play in Photoshop. After spending a couple of hours at Lake Mary with my son and his new dog, Ryder, I had many fun images, but, the lighting was harsh. We went in the middle of the day and to compensate for the harsh light, I used center weighted metering to expose for the shadows. The images were okay, but I decided it would be challenging and different to create a high key image.
After making basic adjustments in Lightroom, I pulled the image into Photoshop. Here I opened the Silver Efex Pro plugin and chose the high key preset. That gave me the basic look but I felt it needed a few finishing touches. So, I added a dodge/burn layer to lighten and darken areas at whim. If you haven’t created a dodge/burn layer, it is very easy.
Hold down the Alt/Opt key while adding a new layer in Photoshop. change the blend mode to Overlay and then check the box to fill the layer with gray. Now, use a white brush to dodge and a black brush to burn in details. You will want to drop the opacity of your brush to 10-15% so that your dodging/burning is subtle.
That’s all it takes to dodge and burn in Photoshop. Next time you are working on images, take a few minutes to try something different – maybe you will like it?
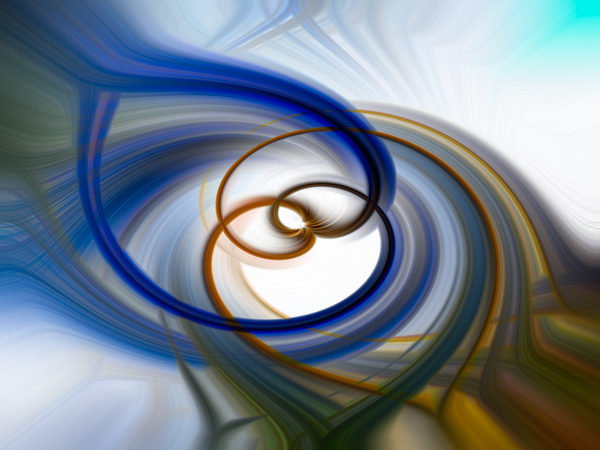
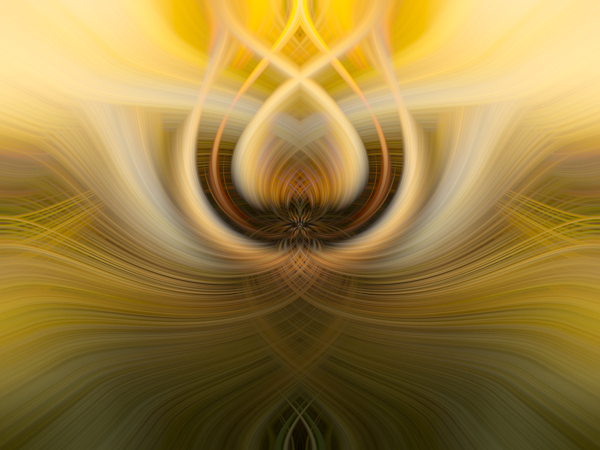
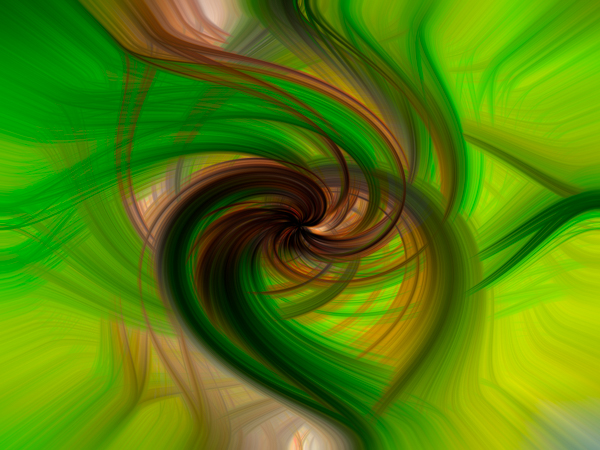
Several photographers I follow post “twirling” images. It is a different look, but since I love abstract photography it was worth an afternoon of watching YouTube videos and playing in Photoshop. I won’t say I am a pro at this effect, but I will say it was fun. Below you will see several images, before and after applying the twirl effect. If you are interested in this, I recommend following the tutorial I followed: https://www.youtube.com/watch?v=pwsjgqI4eaY&list=LLUutBD_IesM1vaEiZiWQmgw&index=8&t=0s
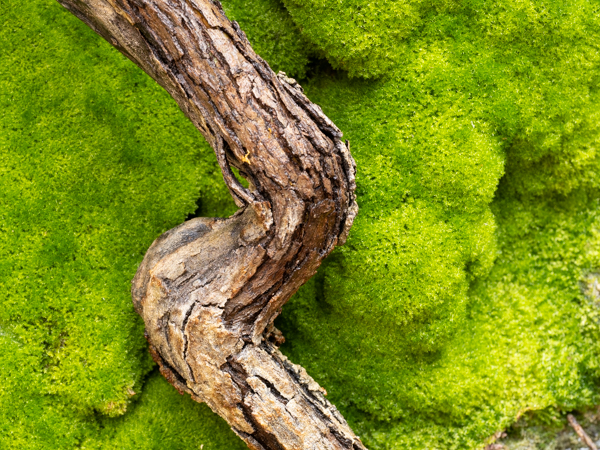
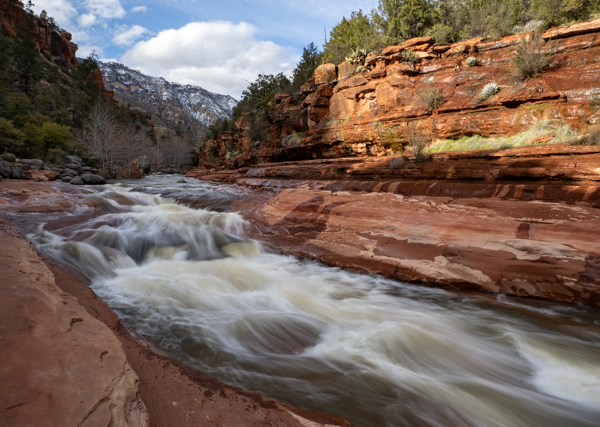
Spring Break started with the announcement of a pandemic and the cancellation of, well, everything. What was a week of photography, workshops, and relaxation became stressful, instantly. My husband saw my stress and suggested a road trip through Oak Creek Canyon to Slide Rock State Park. Water in nature always calms me and the brisk March afternoon meant we had the place to ourselves.
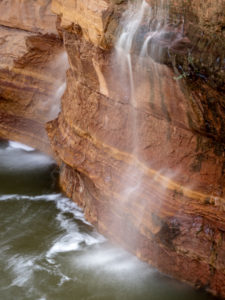
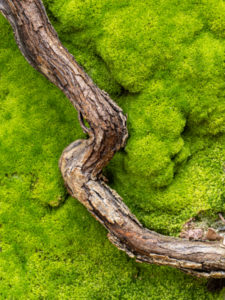
We hiked down to the creek noticing a waterfall we didn’t remember on our last visit in October. Since it was a cloudy afternoon, I used the Singh-Ray Bryan Hansel Waterfall Polarizer to blur the water. Next, we found moss under the bridge too. The contrasting textures from the exposed tree root and bright green moss drew me in. Therefore, it was time for the macro lens. After several different compositions, I used the 60 mm macro lens for a close-up image instead of capturing a 1:1 macro image.
Olympus OMD1 MII, 60mm, .6 sec, F/10, ISO 200
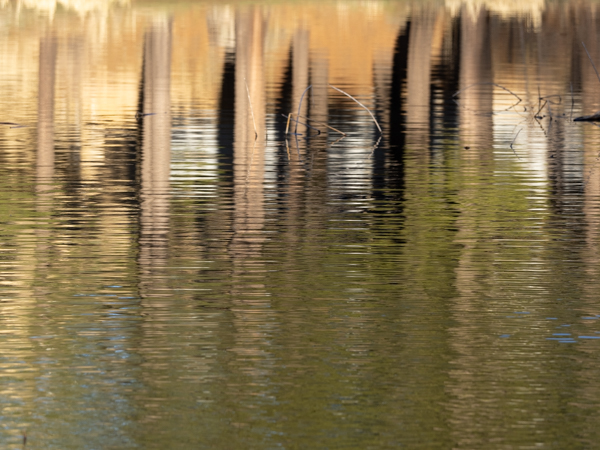
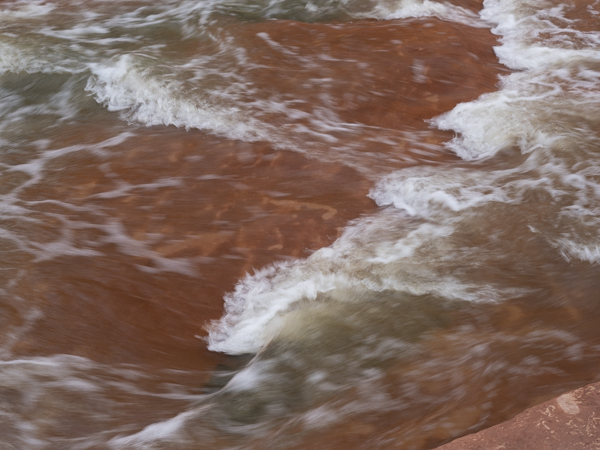
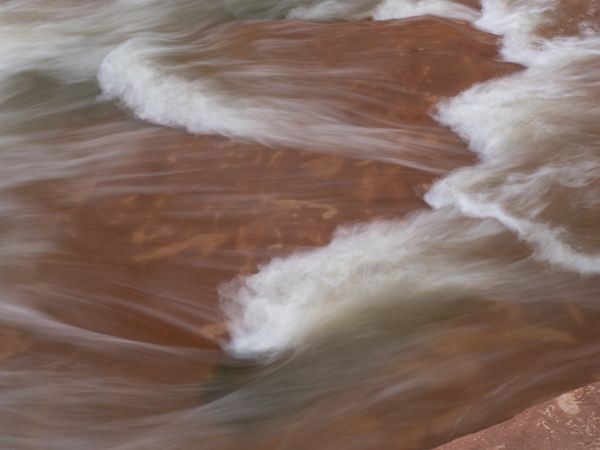
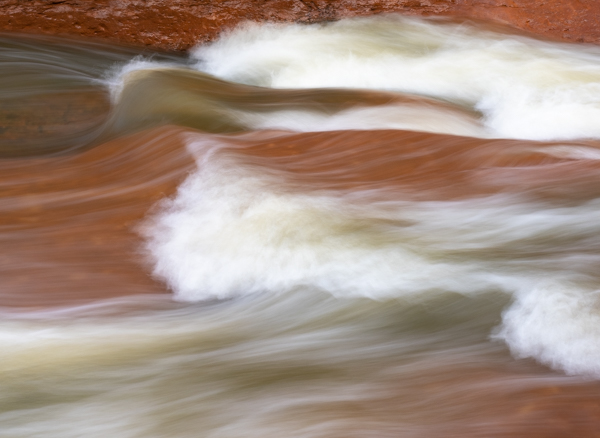
Next, we walked down the west side of the creek and I noticed the ripples in the water. When photographing patterns like these, it takes me a few attempts to find the right shutter speed. Let me take you through my process. In the images below, number one is with a shutter speed of 1/30 sec., just slow enough to look blurry. Image number two used a shutter speed of 1/3 sec. creating an abstract image about the ripples. That was what I wanted: the right shutter speed to tell my story. Lastly, I adjusted the composition. Image number three used a shutter speed of .4 sec. and the blurred water ripples lead the eye through the frame.
1) 1/30 sec.
2) 1/3 sec.
3) final image – .4 sec.
Our short trip to Slide Rock State Park was a success. I walked away with a two photos I loved and two more that I really enjoy. That’s a successful shoot to me and to think the day started out stressful.