Tag Archives: #artofmacrophotography

Macro Wildflower Tips

It is an amazing wildflower season in Arizona this spring. These five tips will improve your success in capturing macro wildflower images.

  1. Light. Great photos have great light. Arrive at your destination before the sun comes up to catch the soft light. Scout the day before so you know where the great flowers are located otherwise you might miss the great light.
  2. Tripod & shutter release.  Use a tripod and shutter release to avoid camera shake. Macro photography requires sharp focus and the slightest movement from no tripod or pressing the shutter can result in a blurred image. If you don’t have a shutter release, place the camera on a 2-second timer to avoid touching the camera during the exposure.
  3. Blur the background. Open your aperture as much as your lens will allow (f/2.8 – f/5.6) to blur the background. Long focal length lenses (100+mm) have a similar effect. If you don’t own a macro lens then use the longest focal length lens you own and capture a “close-up” image. See the samples below.
  4. Diffuse the light. So, you like to sleep in and won’t photograph flowers until daylight. Then, take a diffuser or scrim (basically a sheet on a frame). Place the diffusion material between the sun and the flower to soften the light. See the samples below.
  5. Have fun. If all this is too much for you, then go straight to step 5! After all, it is about being out in nature and having fun.

I hope you make use of these macro wildflower tips and enjoy this amazing season! It will be gone before we know it.

Valentine’s Composite

The first two images were used to create the composite on the right.

Photoshop is not for every image, but I like to use it for compositing and making an impact. I decided to create a composite to celebrate Valentine’s Day. Using my Cognisys StopShot Water Drip Kit, I captured several drops and drop collisions. After reviewing the images, I noticed two that if combined would make a fun composite. Since, viewers commented that it looks like the character, “Tigger”.

Layers

Setting the camera on a tripod (a must with water drop collisions) gave me several almost identical images, the only difference was in the actual drops. To create the composite, I would need to utilized layers in Photoshop. The “Tigger” image was my base image. Then I selected the “tail” from the second image and brought the tail layer over to my base. Once the “tail” was in place, I added a mask to erase the part I didn’t need to create a believable Tigger tail. The final composite included two images and you may notice that I also erased a few of the extra water drops. The spot healing brush is an easy tool and blended the area nicely. This took me less than thirty minutes and I have fun creating it.

Transform Tool

On the next image, I envisioned a drop in the shape of a heart. Well, that would never happen naturally, so I used Photoshop’s transform Tool to create the heart. First step was to cutout the heart onto its own layer. Then use transform (Ctrl +T, Cmd +T) to select it. With the transform tool active, a right click will offer additional transforming options and I chose warp. After dragging the sizing handles around, I designed a heart. The last step was to blend this with the original drop. Again, I added a mask to erase the top portion of the original drop and positioned the new heart shape to blend properly.

Photoshop isn’t for everyone or every image, but it is fun to use!

Olympus Focus Stacking

Olympus OM-D E-M1 Mark II, 60mm, ISO 400, f/3.5, 1/40 sec., Olympus in-camera focus stacking.

After my past workshop at Watson Lake, Prescott, Arizona, a participant asked me to explain the Olympus focus stacking process in a macro setting. Since I use the focus bracketing modes almost daily in my macro photos, it made sense. So, follow along to explore capturing focus bracketed images using an Olympus OMD1 Mark II.

First, Olympus offers two different focus bracketing modes – focus stacking and focus bracketing. Focus stacking is a capture of eight images at different focus depths stacked into one JPG within the camera. The original RAW images write to the memory card as well as the finished JPG stack. Focus Bracketing is a capture of up to 999 images at different focus depths and all RAW images write to the memory card for the photographer to stack using other stacking software (Helicon, PhotoShop, etc). This article discusses focus bracketing mode specifically. However, the focus stacking mode is almost identical.

Capture

Olympus focus stacked image of ice and moss
Ice and moss at Watson Lake. Olympus OM-D E-M1 Mark II, 60mm, ISO 400, f/5, 1/8 sec., 30-images focus stacked and circular polarizing filter.

With your camera on a tripod and a lens capable of focus stacking (Olympus 60mm, 12-100mm, etc) frame your shot. I prefer the 60mm and place it as close to the subject as possible. Next, toggle the 1:1 switch on the side of the macro lens and position the camera/tripod to achieve focus. Now, switch to manual focus and focus back and forth to find the part of the image that is closest to the lens. With live view and zooming, manually focus the nearest part of the image.

Olympus Menu

Now you are ready to activate the focus bracketing function. Using the menu, locate Camera 2> bracketing >on >focus bkt >on. At this point, you are given a choice between focus stacking or focus bracketing. With the focus stacking option set to off, set the number of shots and focus differential for focus bracketing. (With focus stacking ON, these other options are grayed out). In the images below, I demonstrate the difference of a focus stacked image (left) and a single image (right).

Number of shots: I am often asked how to decide the number of images to capture in a stack. That is hard to describe. The more intricate and larger depth of field requires more images. Generally, I start with 50. If there are more than I need meaning some are out of focus because it went beyond my subject, I don’t use those images in post-processing.

Differential: The differential is the distance between each bracketed image and more complicated to calculate. I tend to use a small differential of 1-2 with my macro lens and extension tubes. With more practice you will see different results and learn to adjust according to your subject.

With focus bracketing activated, press the shutter using a cable release. A cable release is crucial to avoid camera movement from pressing the shutter with a finger. The camera captures the images using Silent sequential high-speed shutter and they are viewable on my LCD screen at the same time. If I watch closely, I can see the focus move from the front to the back of the frame. It really is that easy! Now, it is all up to post-processing. My preference is using Helicon Focus, but PhotoShop and other software can stack images as well.

View my camera setup in the video to the left. Notice the camera is upside down on the tripod to achieve the lowest perspective.

Tips

If you create more than one stack, you will want to capture a random photo in between each stack. For example, I take a photo of my hand in between each stack. Then when I download, I know where each stack starts and stops.

To learn more about macro photography, check out our book, The Art of Macro Photography. Also available on Amazon.

Liquid Art

Liquid Art – paint, oil and milk

For the past two months I’ve captured studio images of liquids or liquid art. Instead of water drop collisions (I will do more soon) capturing macro images of paint, oil and milk are my new passion thanks to Jason Cummings. Jason shared his setup with me and I couldn’t wait to make it my own. Changing the liquid quantities and thicknesses create very diverse images. The above image followed the steps in this article and the gear used for this project is in the image to the right: two off-camera flash units with diffusers, shutter release cable, macro lens, extension tubes, plastic table cloth, solo cups, paint and a disposable plate. Not pictured: camera and tripod.

Gear used in liquid art photos

Make your own masterpiece

Step One:  Water down acrylic paint. Using a disposable cup, water down cheap acrylic paint. The thicker the paint, the longer the paint balls stay intact.

Step Two:  Pour milk, half and half, cream, etc into a water resistant or water proof plate/bowl. I prefer using disposable plates or Petri dishes.

Step Three:  Pour oil in a new cup and add drops of paint. Use all the colors you want in your image.

Step Four:  Pour oil and paint into milk substance. Pour fast, pour slow, make circles/squares, etc; these differences in technique add to the individuality of the final image.

Step Five: Capture images. When setting up your gear, be sure that the macro lens is parallel to the plate of liquid. I use a toothpick on the surface of the liquid to pre-focus. After pouring, I manual focus in live view, at 3x enlargement or more, to fine tune focus. Snap the shutter and rotate the plate for different compositions. The liquid will move on its own as the oil, milk and paint interact. If you have paint “balls” they will burst at some point, so shoot fast. Since the liquid mixture is moving, I recommend using a flash or other strong light source to create sharp images at a fast shutter speed. Here are a few examples from different paint colors. Give it a try, it is a lot of fun.

Why Focus Stack

focus stack of fordite

Cropped version of final Focus Stack. Olympus OM-D E-M1 Mark II, 60mm + 26mm extension tubes, ISO 400, f/4, 1/50 sec.

Not all macro subjects are captured sharp in a single image, that makes a great reason to focus stack. In preparing for a camera club presentation, I decided to focus stack a new object. I chose a piece of fordite from Cadillac Ranch. If you aren’t familiar with fordite, just think – layers of paint. The first image (image A) is a close-up image of the piece of fordite that measures 2” x 1”. I used my 12-100mm lens and got as close as I could to capture the image. Then, with my macro lens and extension tubes, I captured image B. A small sliver of the subject is sharp, but not the whole piece of fordite. In order to have sharpness throughout the entire frame, I would need to focus stack.


At first, I tried a stack of 50 images. My Olympus camera has a focus bracketing mode so all I do is focus on the closest part of the fordite and program the camera for 50 images at a small increment of focus bracketing. The camera then captures 50 raw images changing the focus with small increments from front to back. After looking at image 50, the farthest part of the fordite was still blurry, so I needed more photos in my stack. I tried again, this time with 125 focus bracketing images. When I reviewed the photos, at image 118, I had the sharpness I needed. Next step was to focus stack the 118 images in Helicon Focus. Helicon is amazingly easy to use. After selecting the images in Lightroom, I export to Helicon and press the render button. Helicon does the rest. The last image is the final image of 118 focus stacked images.

A few tips on focus stacking:

  • Mark the start of a focus stack by capturing a single image of your hand, or other random subject otherwise if you capture several stacks, it will be hard to identify the start and stop of the stack otherwise.
  • Use a tripod and shutter release to minimize camera shake. Photoshop CC offers focus stacking but it is more complicated than Helicon Focus.

Water Drop Collisions

Creating water drop collisions keeps me entertained for hours. For the last year, I have been very busy completing and publishing the book, The Art of Macro Photography and my drip kit was neglected. So, I blocked a few hours and went to work in my make shift studio (spare bedroom). I kept the setup simple and started with single drops of water. I didn’t use any additives, just wanted to practice making drops and fine tune the timing of the flashes. After a successful single drop, I added the second drop.

Olympus OM-D E-M1 Mark II, 60mm, ISO 400, f/16, .5 sec.

In all the time I have been shooting water drop collisions, I’ve never seen the second drop hit next to the original drop as you can see in the image to the right. After several minutes problem solving, I tapped the valve and all subsequent drops collided. Why does this entertain me for hours? I love the challenge of focusing sharp and the varied final images. With a small change on timing of the flashes, I can achieve several different looks. The last image is of my setup for this series.

Stay tuned for more images next week!


Michigan, Week 2

Manistee Beach

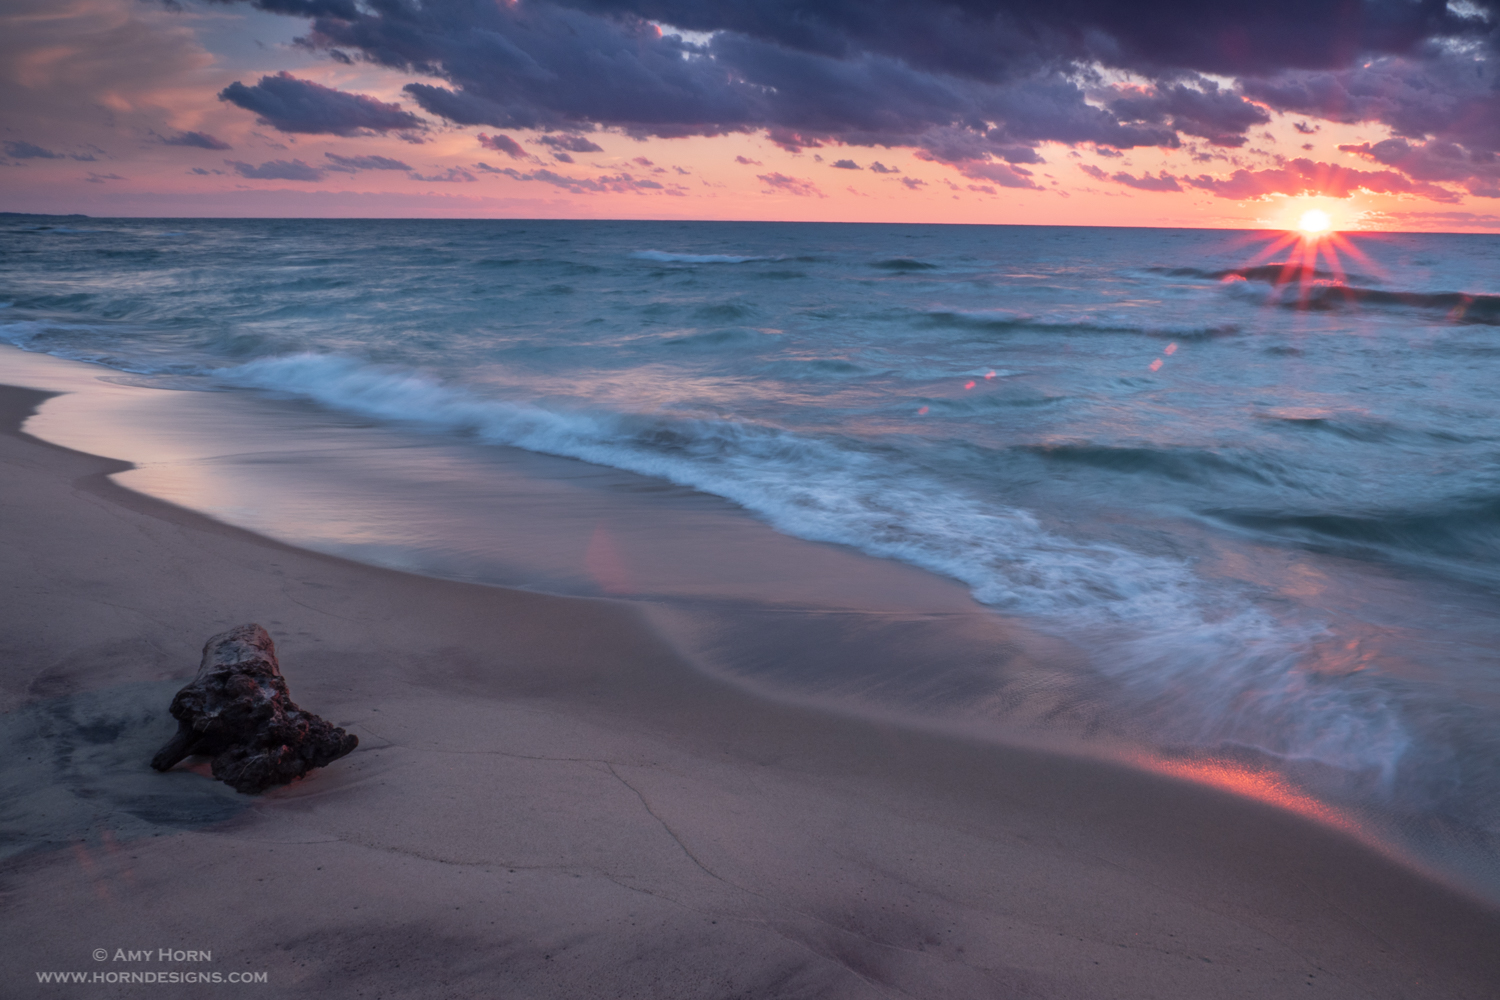
Manistee Beach. Olympus OM-D E-M1 Mark II, 12-100mm, ISO 200, f/22, .5 sec., Singh-Ray 3-stop GND filter.

I’ll be honest, my trip to Michigan didn’t go exactly as planned. At the last minute, Rod had to cancel and I was ill prepared for a 2-week solo trip. You would think after a solo 10-week trip on the Pacific Coast, 2-weeks would be a cinch. It wasn’t. The Pacific Coast trip was planned out months in advance with extensive research and plotting of locations. For this trip, I scrambled to research all I could the night before each destination with limited phone service or Wi-Fi. After my first week in Munising photographing waterfalls and attending a workshop, I drove east to Grand Marais and then spent five days at a cabin in Manistee, Michigan. I learned to enjoy time alone and struggled a bit too.

Agate Beach rocks.

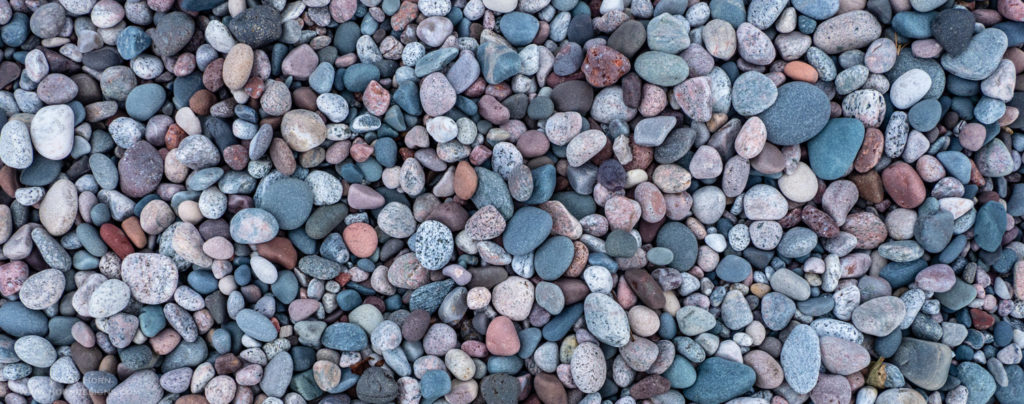
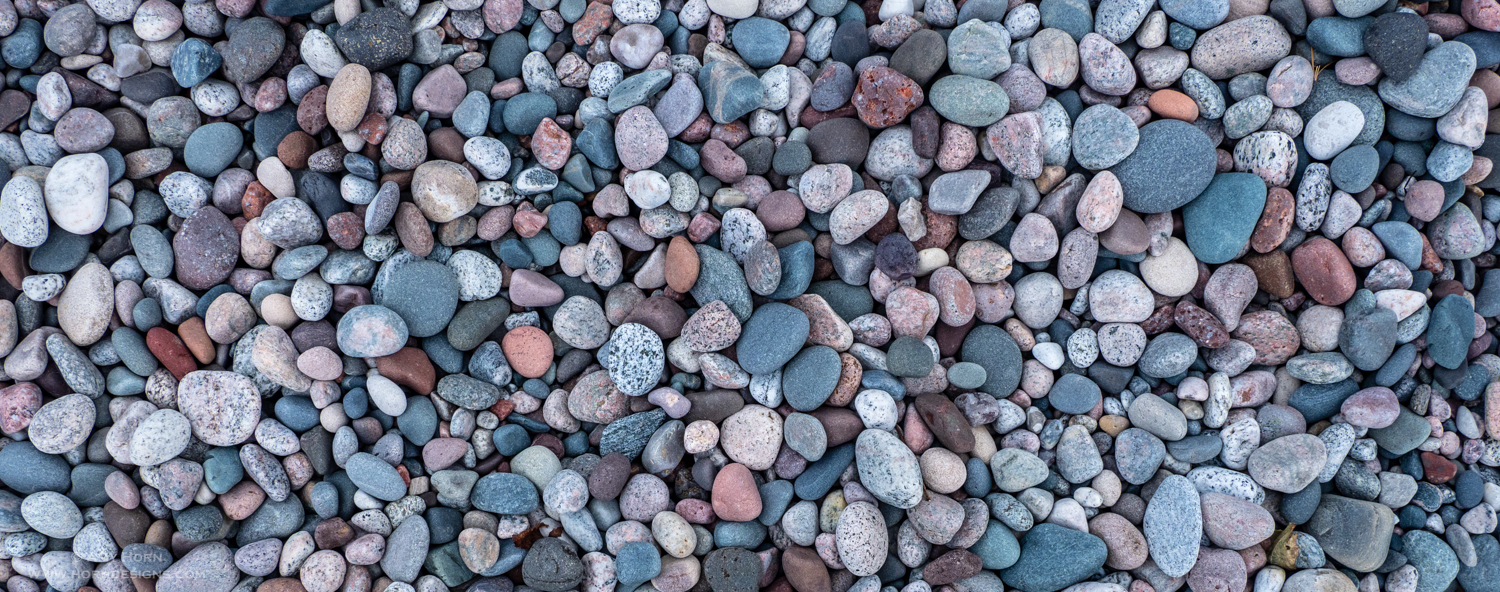
Agate Beach. Olympus OM-D E-M1 Mark II, 12-100mm, ISO 400, f/8, 1/100 sec.

Grand Marais

Sable Falls

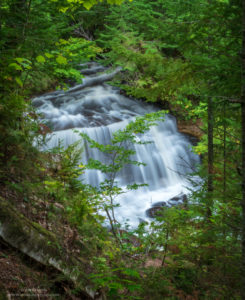
Sable Falls. Olympus OM-D E-M1 Mark II, 12-100mm, ISO 400, f/22, 2.5 sec., Singh-Ray Bryan Hansel Waterfall Polarizer.

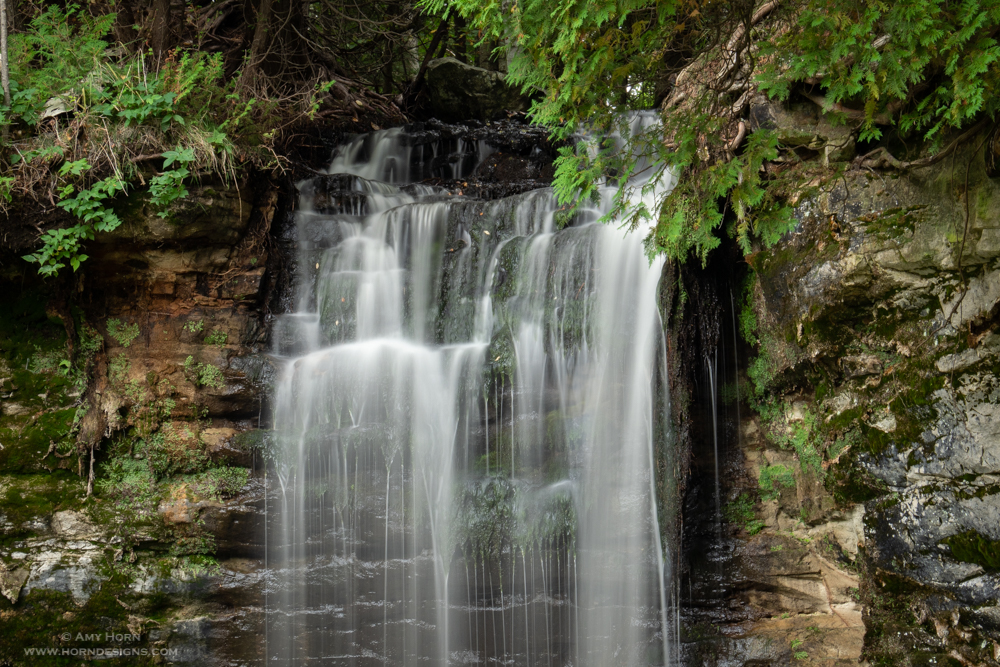
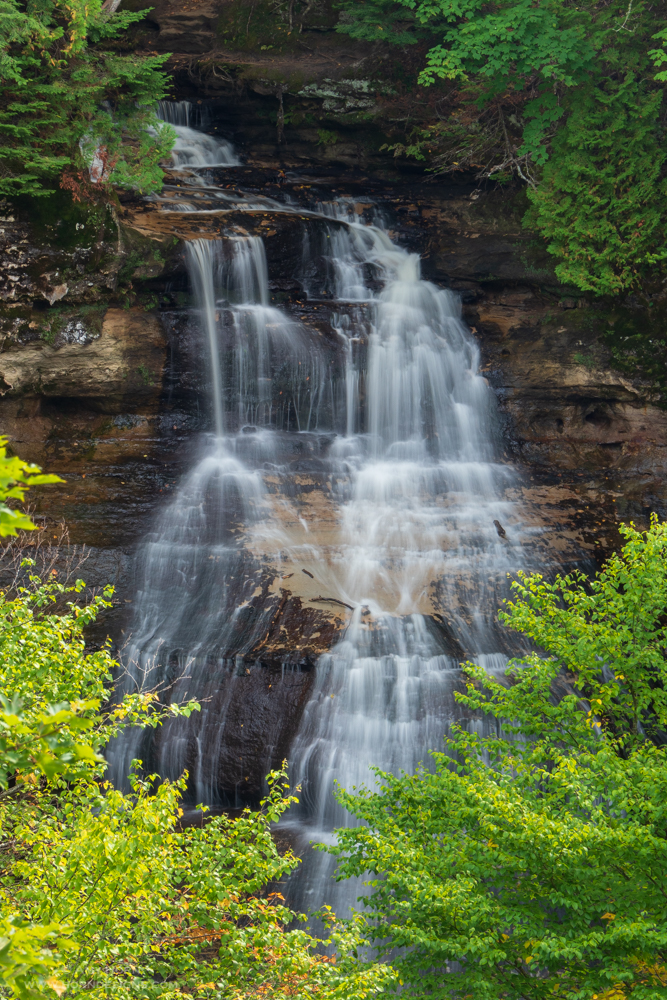
Grand Marais is a small community of about 400 residents and the only place to eat dinner after Labor Day was at the local Brewery. I dined on their famous whitefish dinner and chatted with a few locals. This Lake Superior town was cold, with a high in the 50’s and strong winds. I walked along Agate Beach looking for agates until my hands froze from the moist air and wind. With my pretty rocks, I returned to my B&B to research the next day’s photo destinations. In the morning, the B&B provided a family style breakfast with all the guests and I really enjoyed conversing with someone other than myself. I spent the morning photographing Sable Falls, Sable Dunes and hiking to a beach on Lake Superior before leaving the Grand Marais area for Manistee.

Manistee

Sand dune

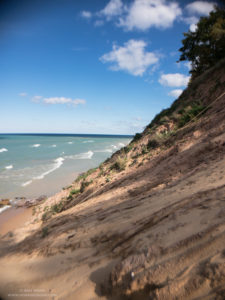
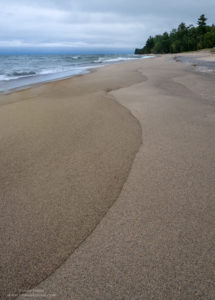
iPhone photo of the sand dunes 1/2 down.

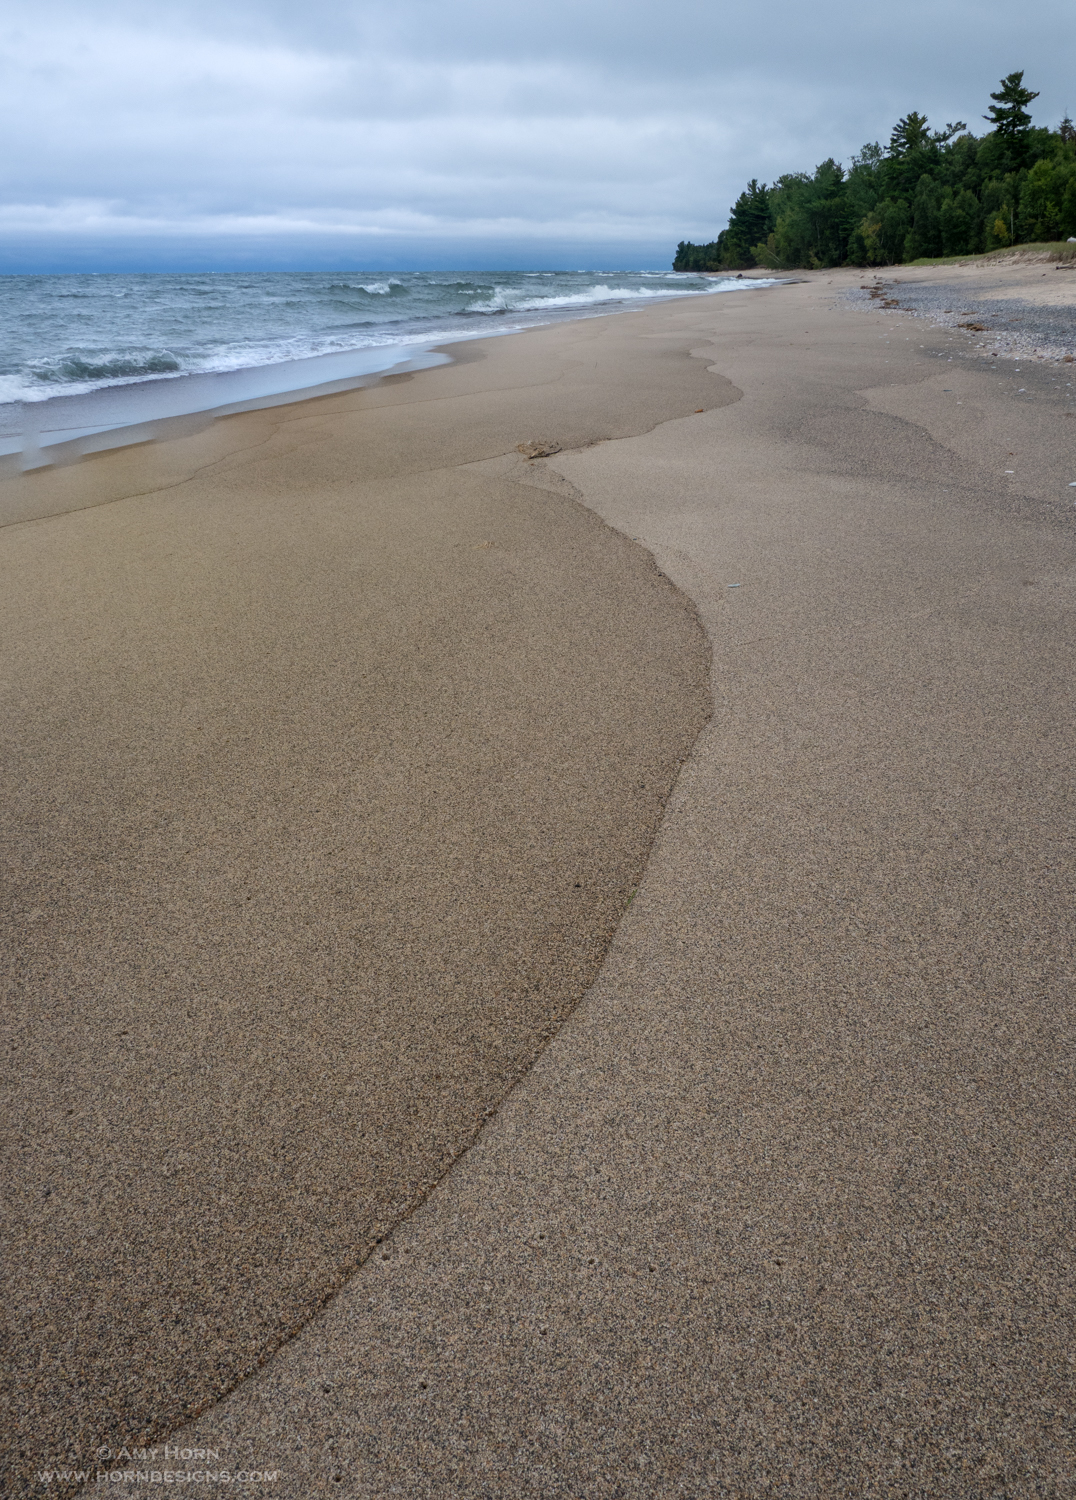
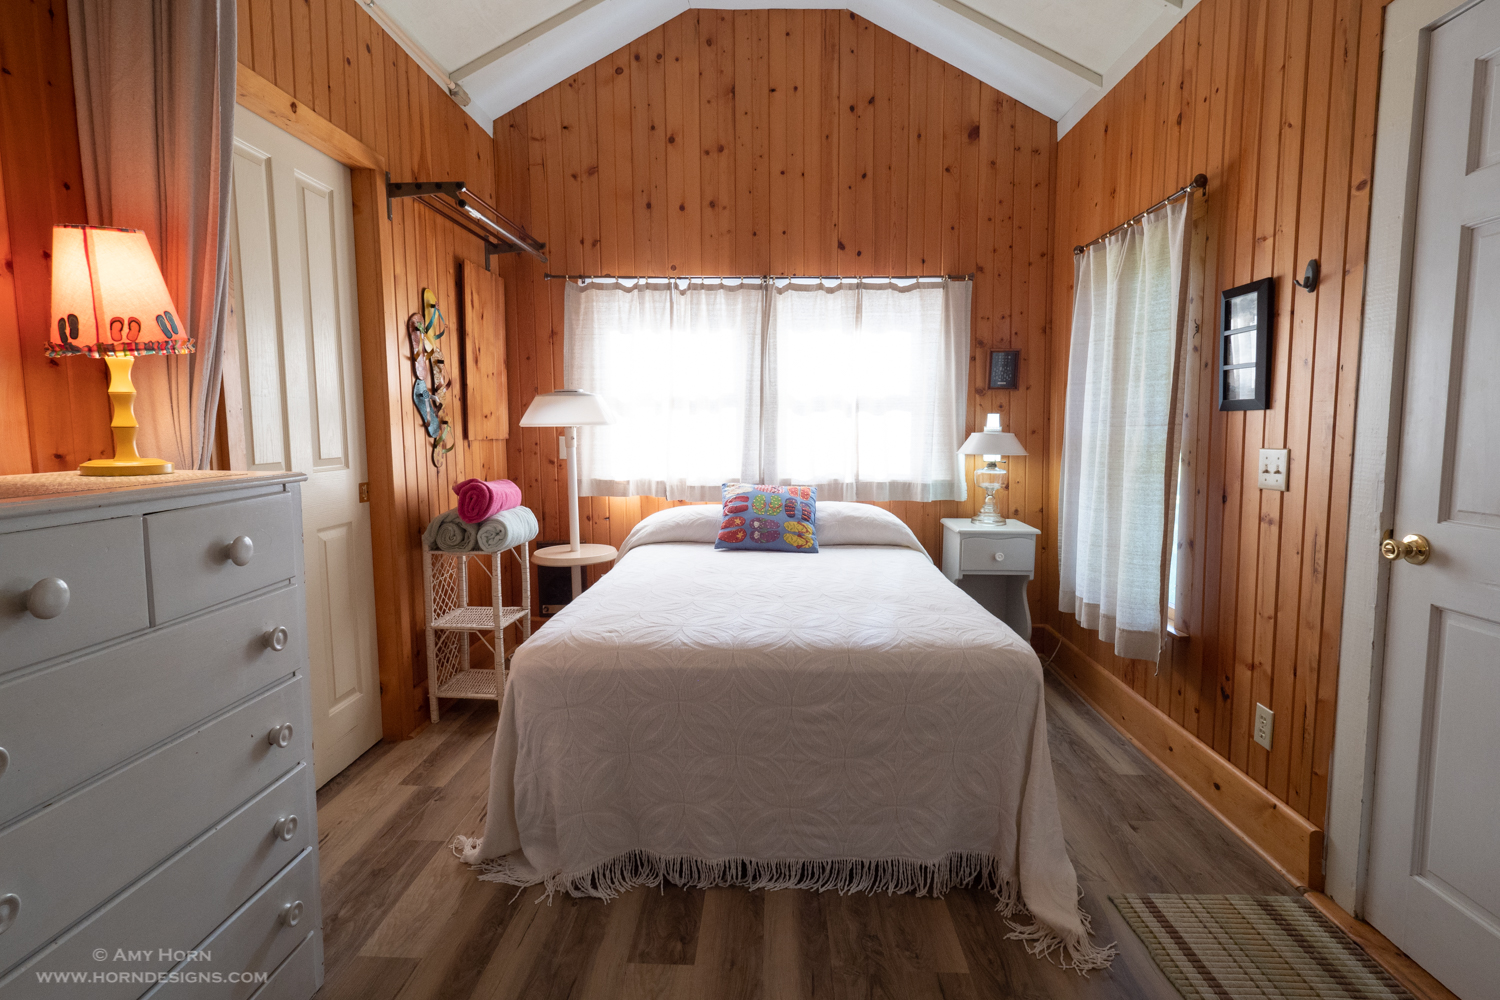
Lucky for me, my cousin Andy has a cabin in Manistee overlooking Lake Michigan. The five days in this small community with beautiful beach views and a historic downtown was peaceful. The cabin is a 15-minute drive south of Manistee in a small neighborhood of mostly summer residences and is a bit secluded, so it took me a few days to feel comfortable returning after dark. The highlight of his cabin is the view of Lake Michigan. The lake is a 100-foot drop from the cabin down a steep sand dune. I attempted many times to get to his beach, but only made it ½ way. I feared I wouldn’t be able to make it back up and was afraid of being stuck down there. The view was great from halfway down too!

Vogue Theater

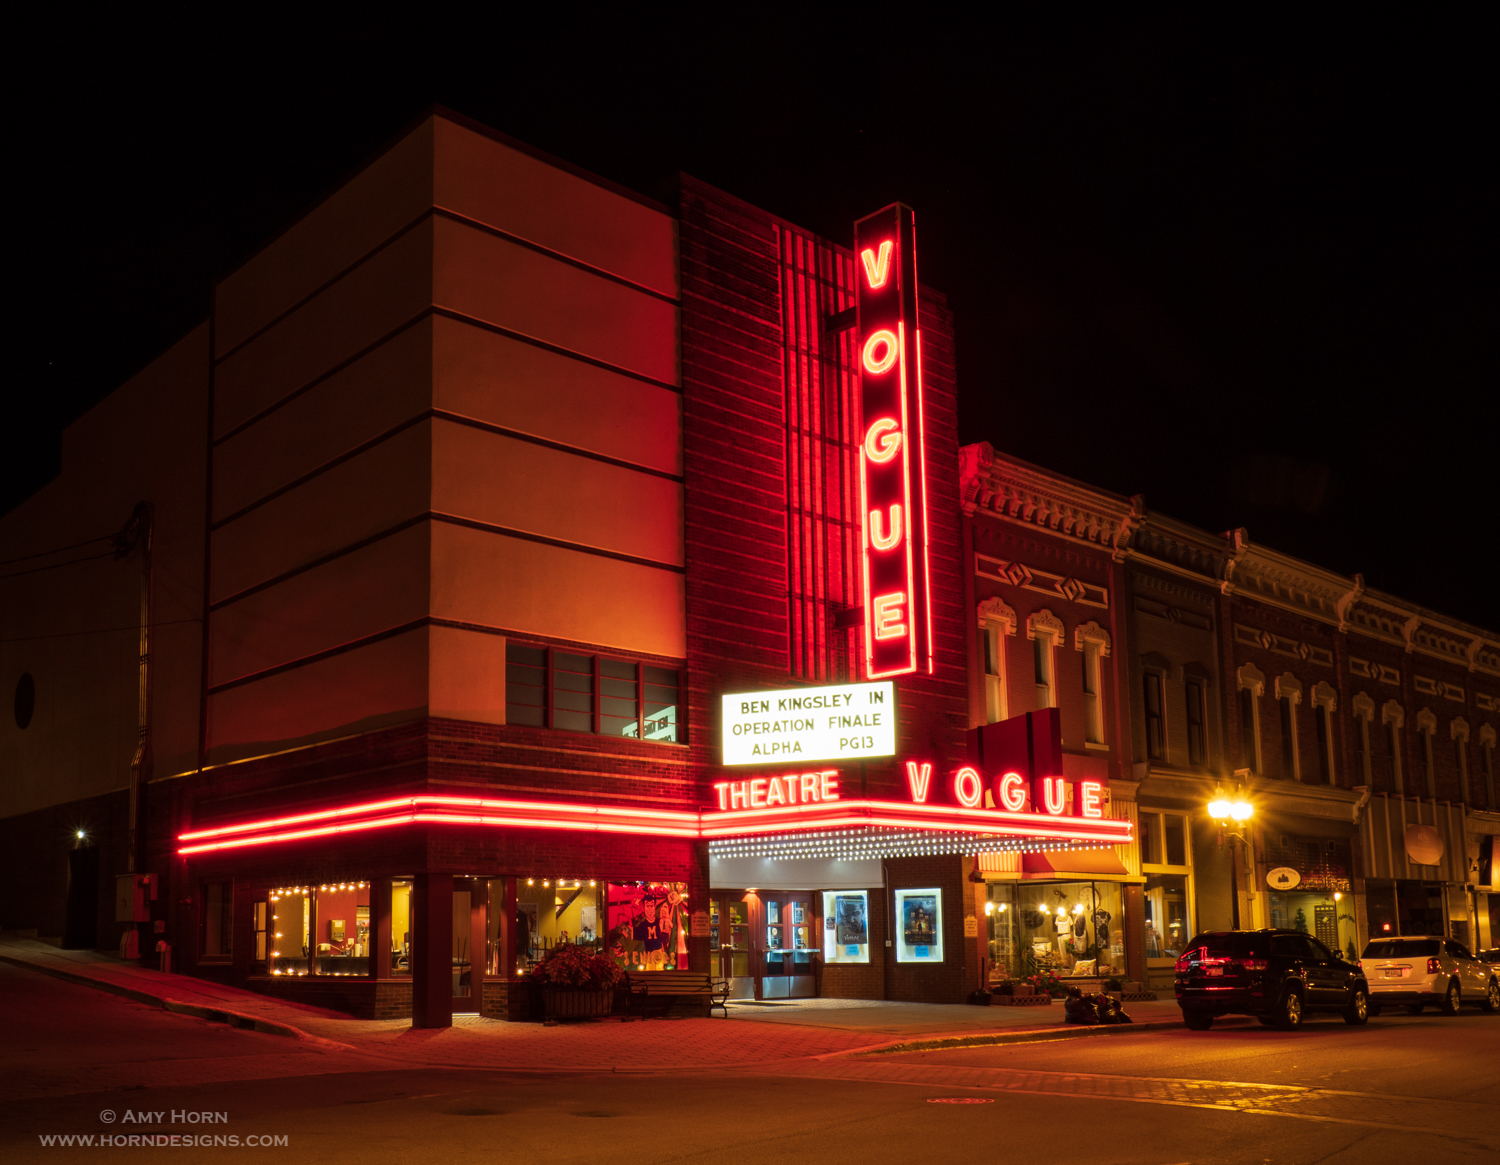
Manistee’s Vogue Theater. Olympus OM-D E-M1 Mark II, 12-100mm, ISO 200, f/14, 3.2 sec.

One evening the clouds broke so I drove to the 5th Avenue Beach to capture sunset. I barely made it. I ran along the beach with my tripod looking for foreground subjects. After sunset, I sat in the parking lot to watch the bi-monthly Mirrorless Minutes Podcast on YouTube. The host, Jamie MacDonald is entertaining and after spending a few days on his Meetup in Munising, MI, I enjoyed the image share of our workshop. After dark, I went downtown to photograph Manistee’s historic buildings including the Vogue Theatre. It was quiet and dark and I took joy in capturing the brilliant lights of the theatre.

Ludington

Ludington Lighthouse

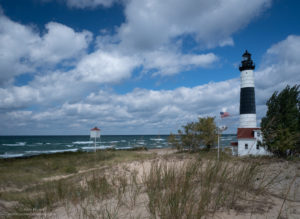
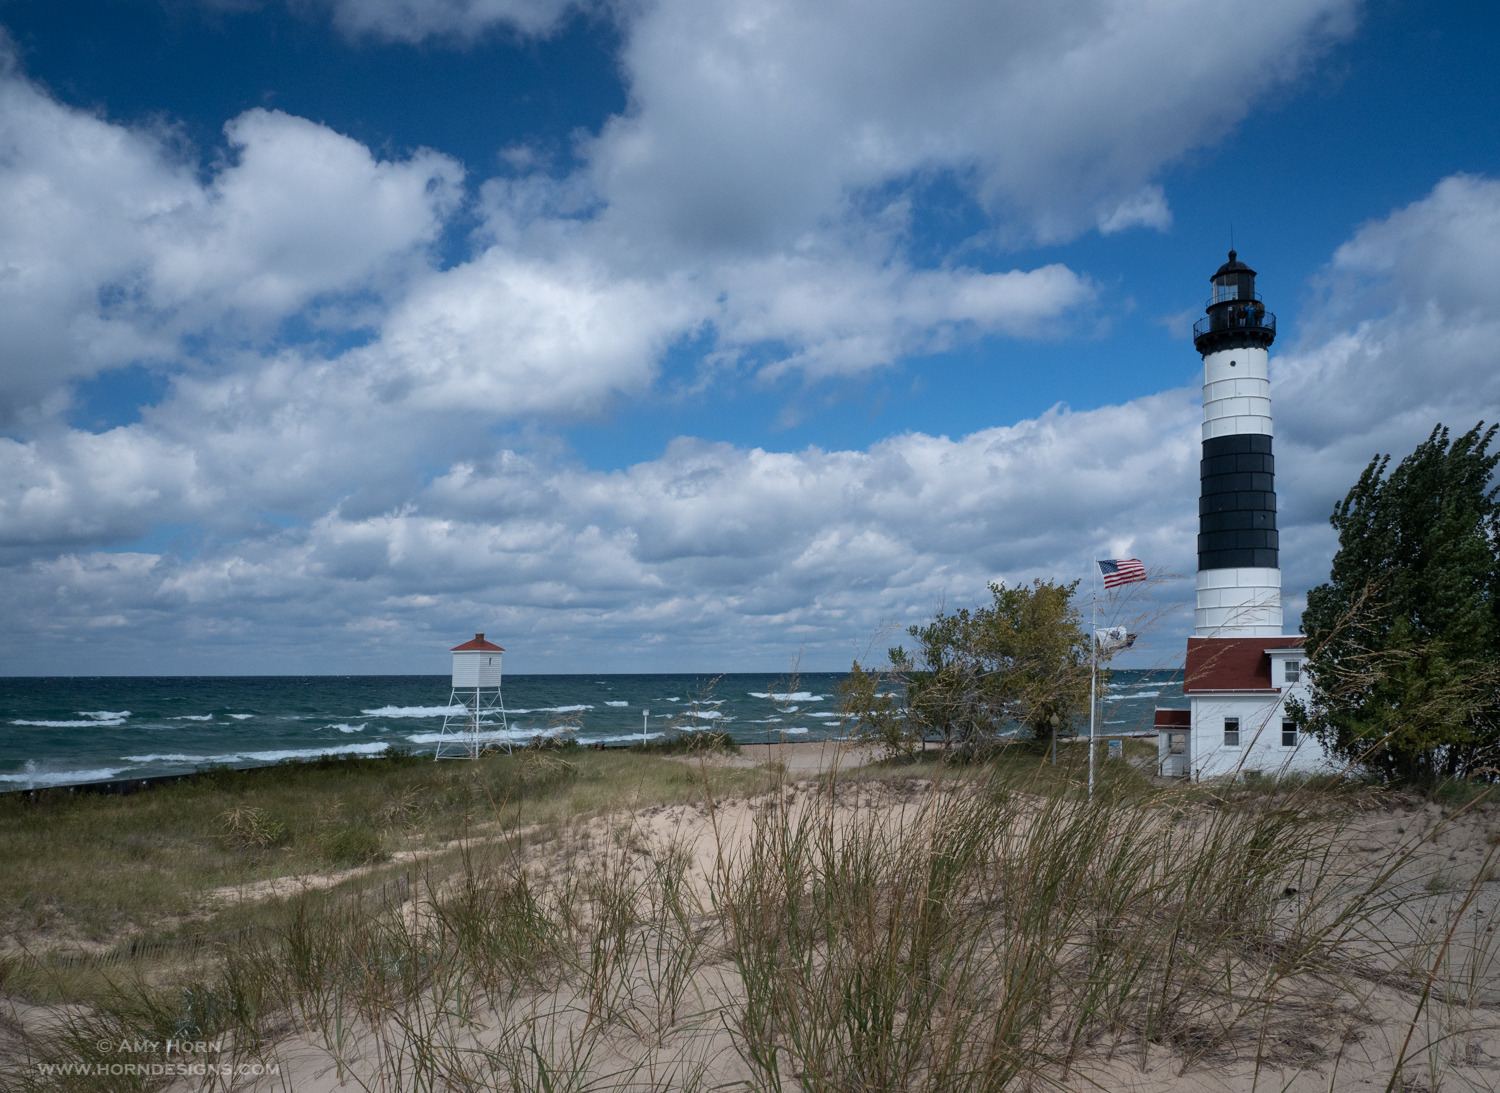
Big Sable Lighthouse. Olympus OM-D E-M1 Mark II, 12-100mm, ISO 400, f7.1, 1/800 sec.

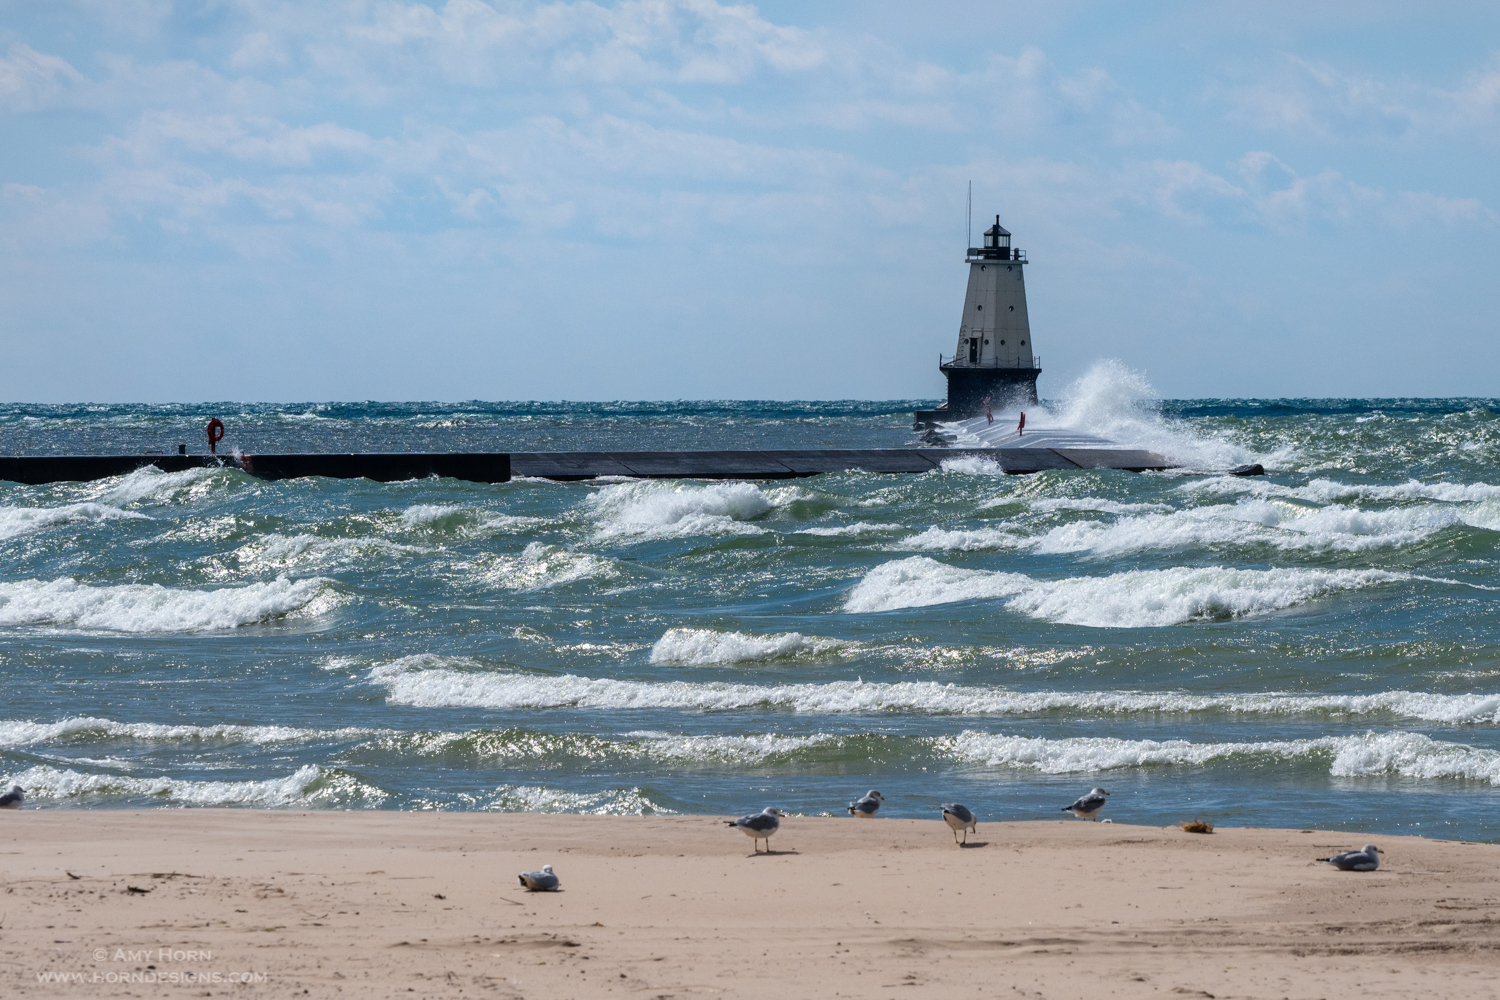
Ludington is a town south of Manistee with a large state park and Big Sable Point Lighthouse.  Getting to the lighthouse required a 4-mile round trip hike that was relatively flat until I climbed a sand dune to capture a better angle of the lighthouse. Before I returned to my car the winds picked up. So, I made my next stop Stearns Park in Ludington to photograph choppy waves hitting the pier and river light.

Crashing waves

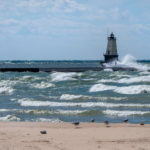
Crashing Waves. Olympus OM-D E-M1 Mark II, 40-150mm, ISO 400, f8, 1/3200 sec.

It was easy to keep myself entertained during the day, but at night the woods around the cabin were dark and I felt very isolated. I spent more time than normal on the computer processing photos and reading a book I purchased in town. At the end of the 5 days, I headed south to South Haven to visit family.

South Haven

Lake Superior

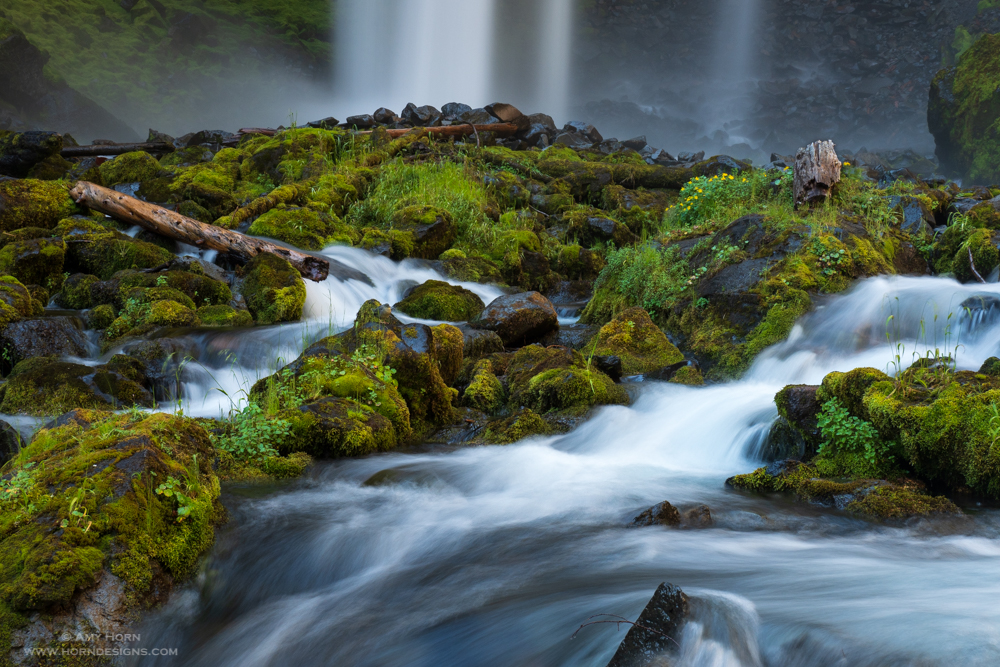
Lake Superior. Olympus OM-D E-M1 Mark II, 12-100mm, ISO 400, f/10, 1/500 sec.

Several of my family members live in South Haven. Visiting this town where my parents went to high school has always been a special place. Now overrun by the tourism industry, it doesn’t hold the same memories for my parents, but I enjoy it nonetheless. Normally, I visit Sherman Dairy and Crane’s Orchard but I spent more time relaxing with my Aunt Lee instead. I did have the opportunity to visit Fenn Valley Vineyards with my cousins though! The only photos I captured in South Haven were for my aunt. She owns a rental cottage and needed a few new images. It was fun watching her straighten every crease in the curtains and fluff every pillow to capture the perfect image.

Olympus OM-D E-M1 Mark II, 12-100mm, ISO 800, f/8, 1/20 sec.

Before I left, we placed the new images in her brochure too. If you find yourself travelling to South Haven, check out The Retreat at Belvedere Beach!  https://www.retreatatbelvederebeach.com/
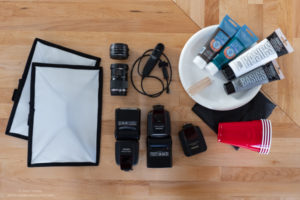
For the Photogs!

mushroom

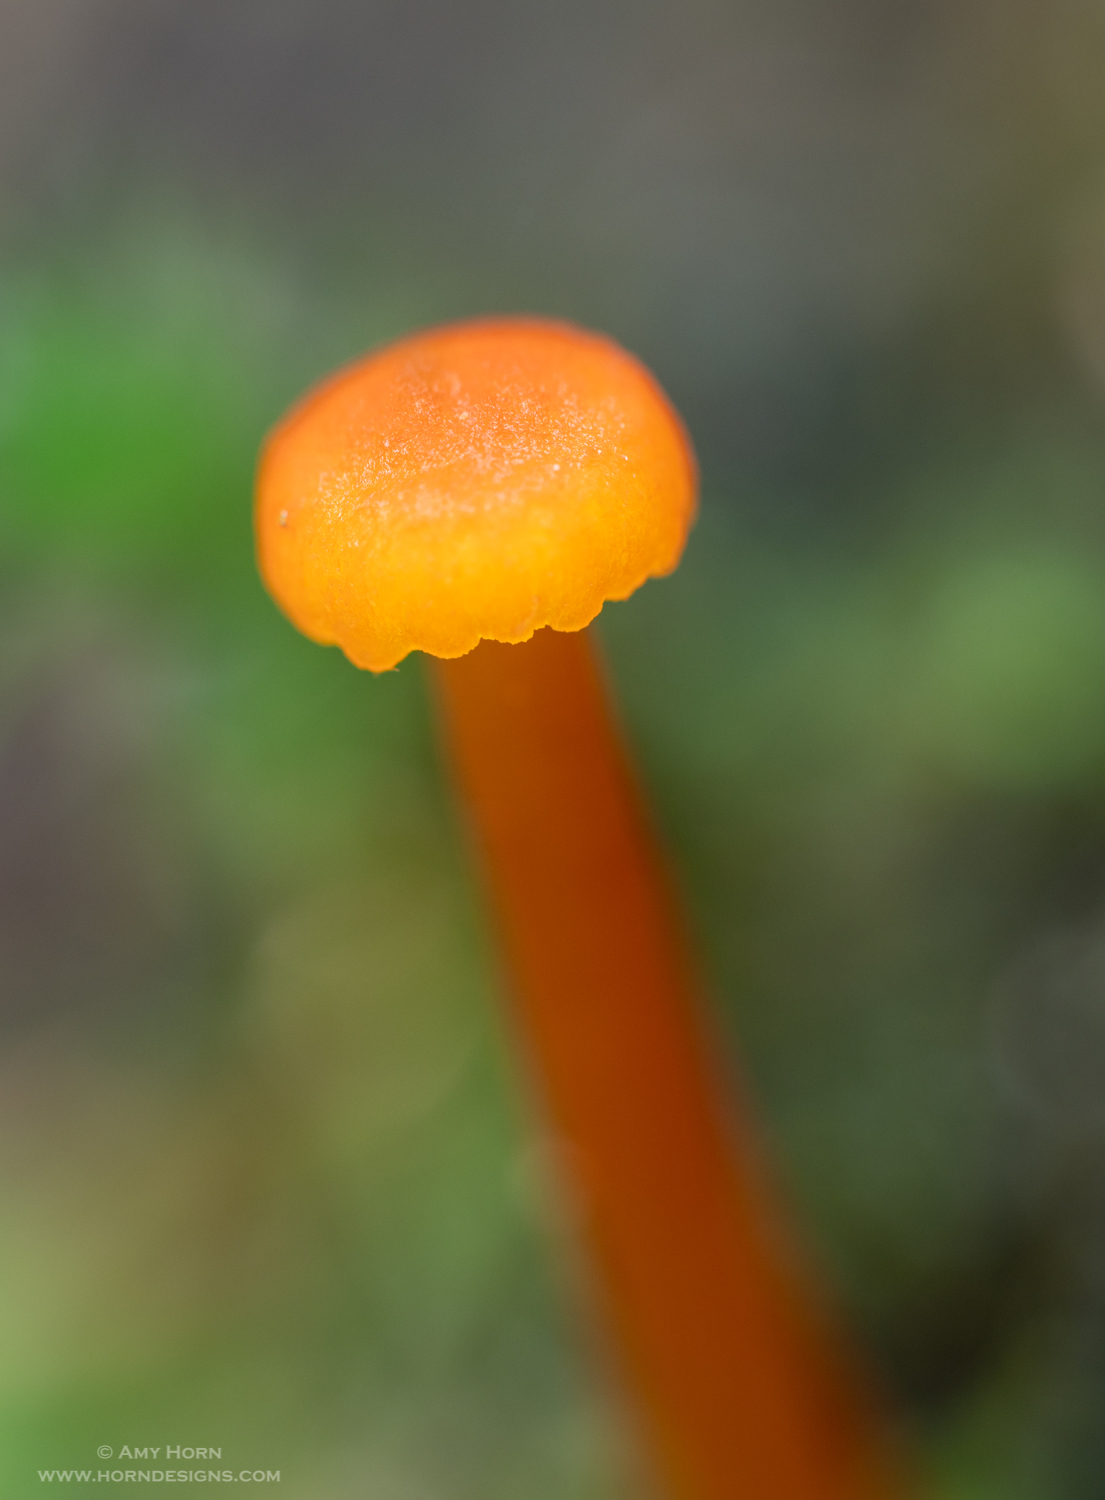
Olympus OM-D E-M1 Mark II, 60mm, 16mm extension tubes, ISO 200, f/2.8, 1.6 sec.

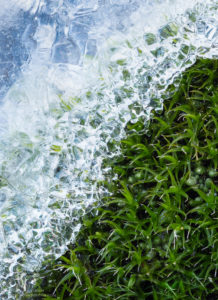
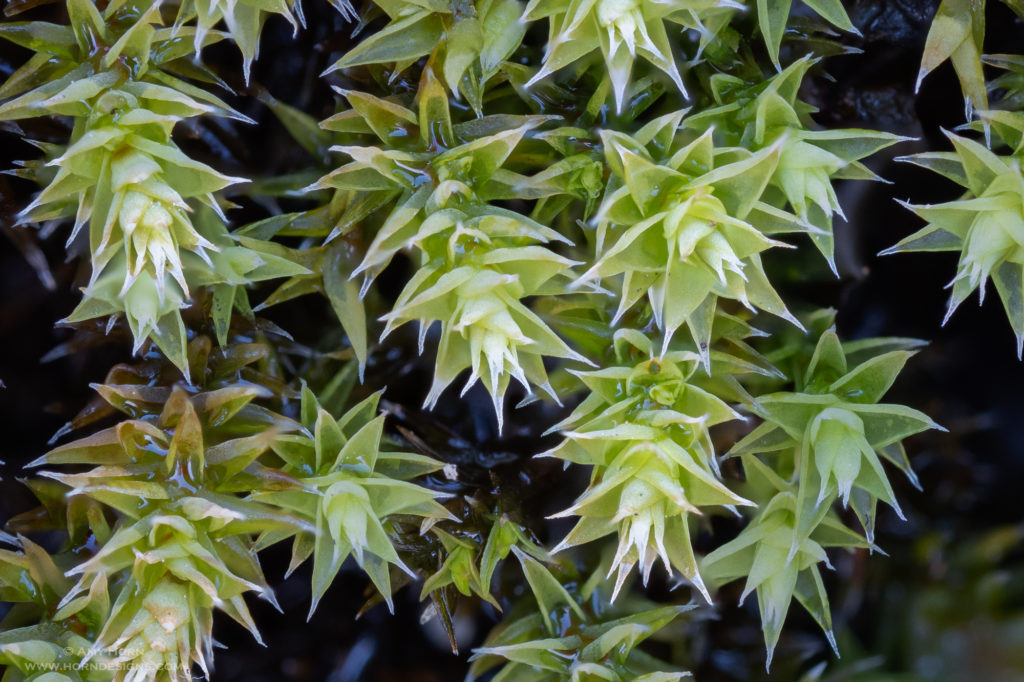
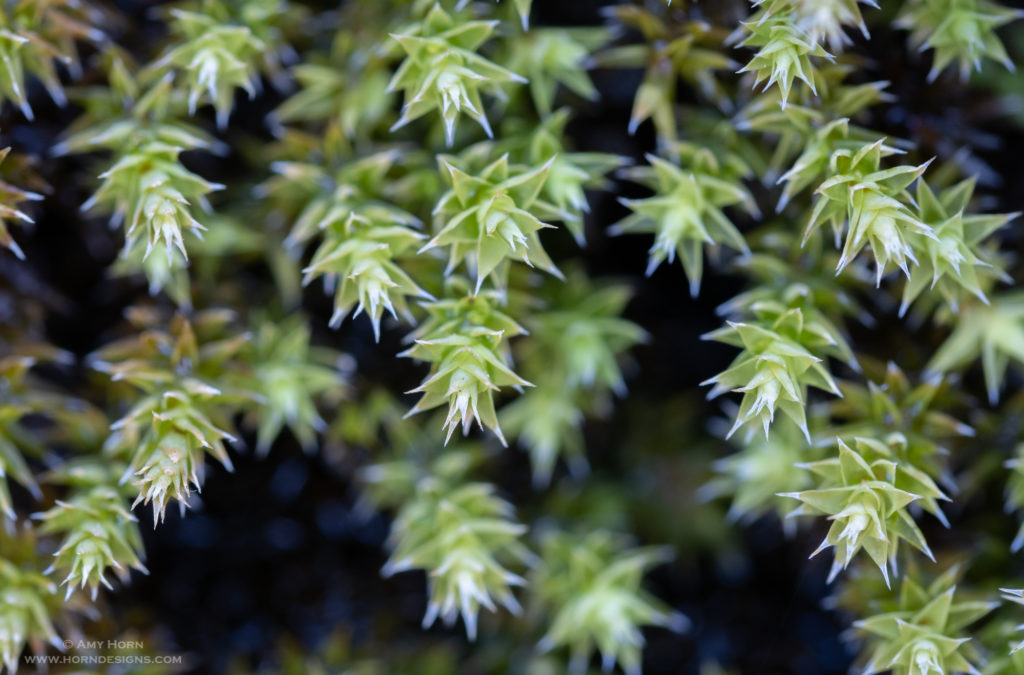
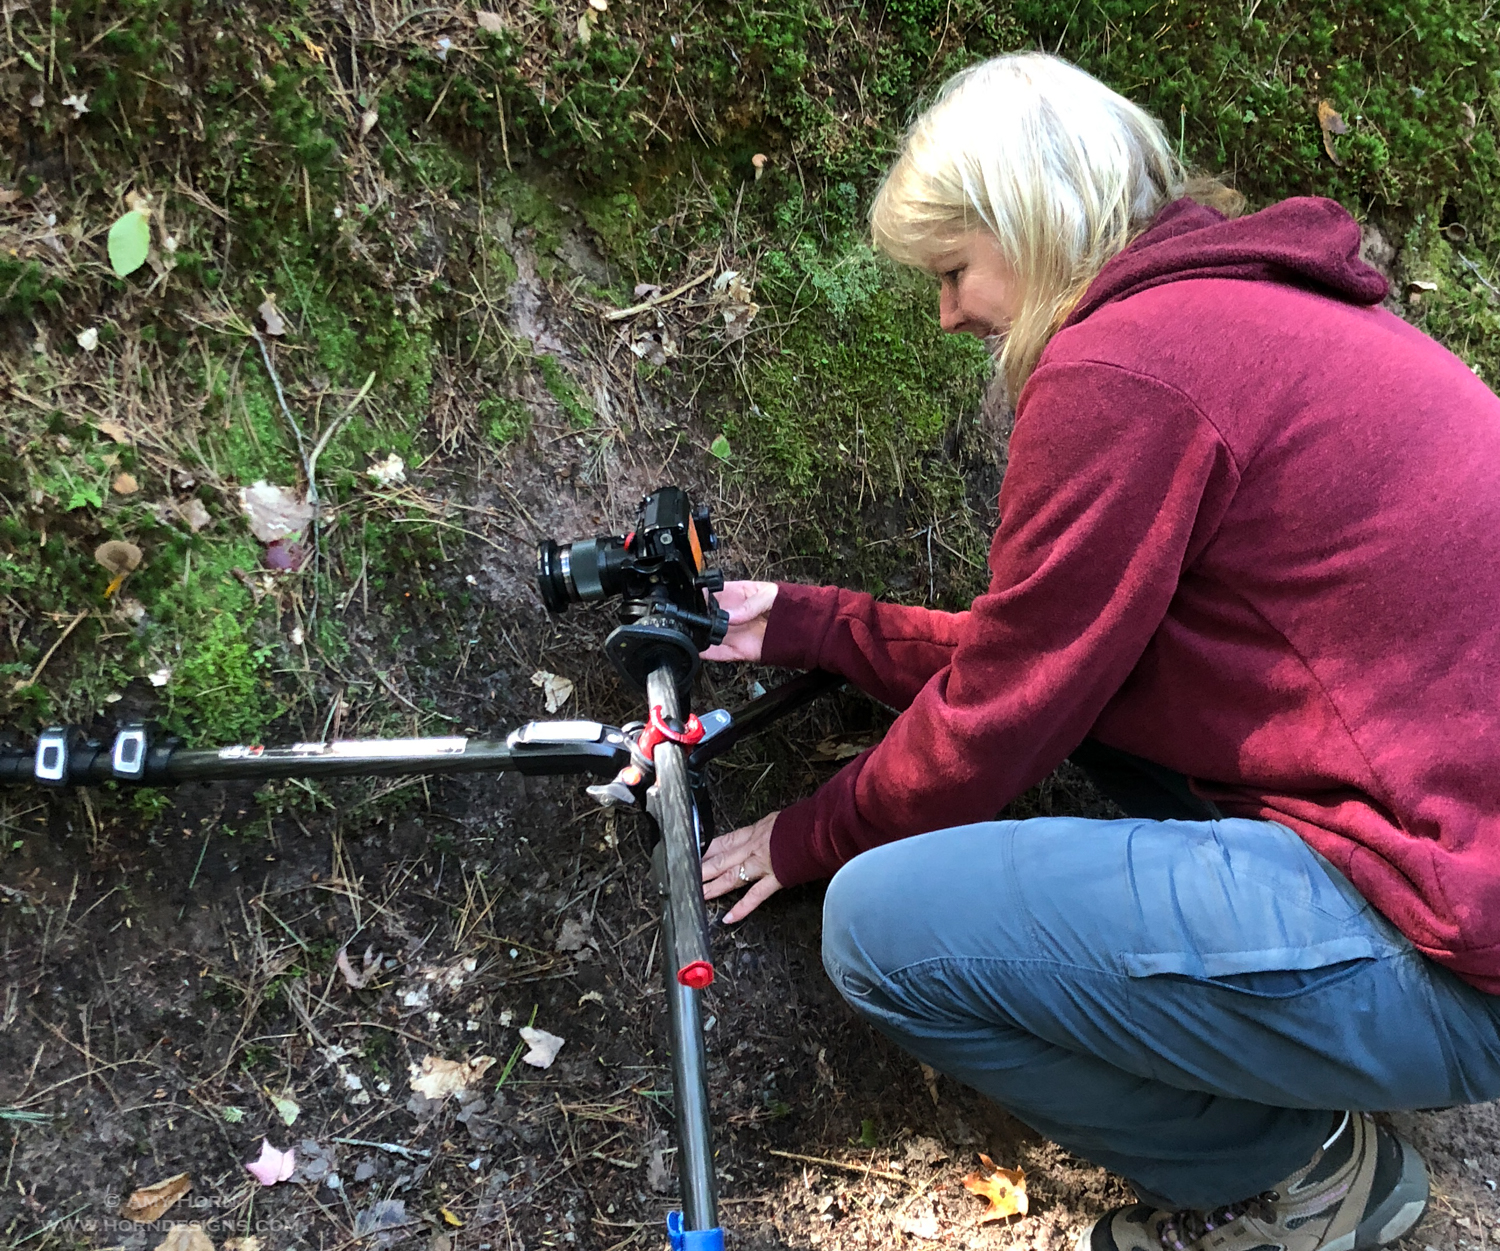
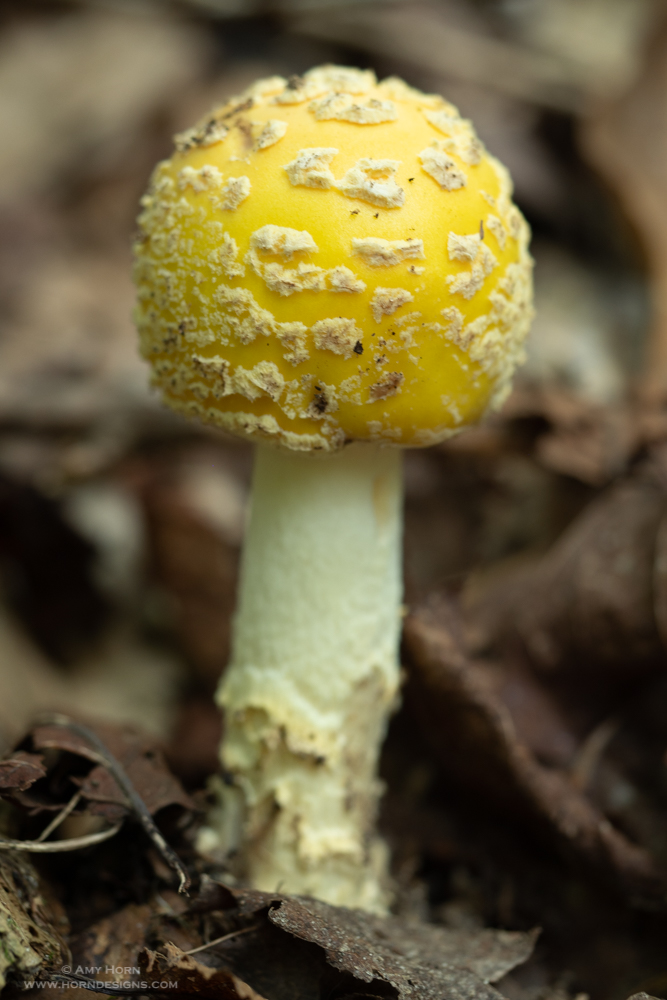
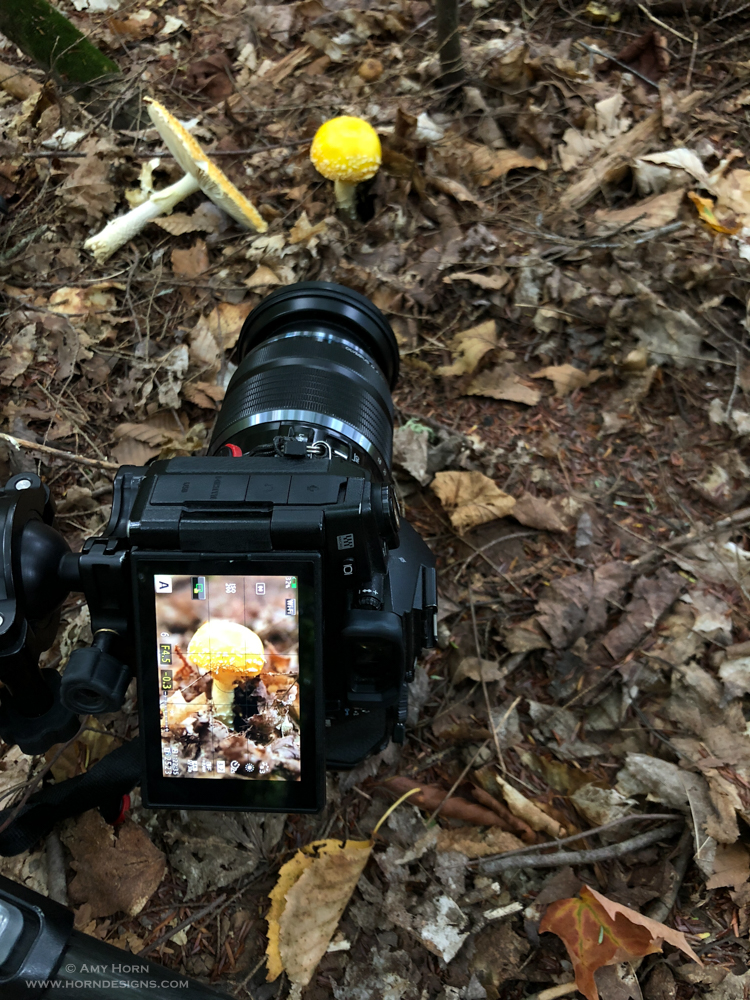
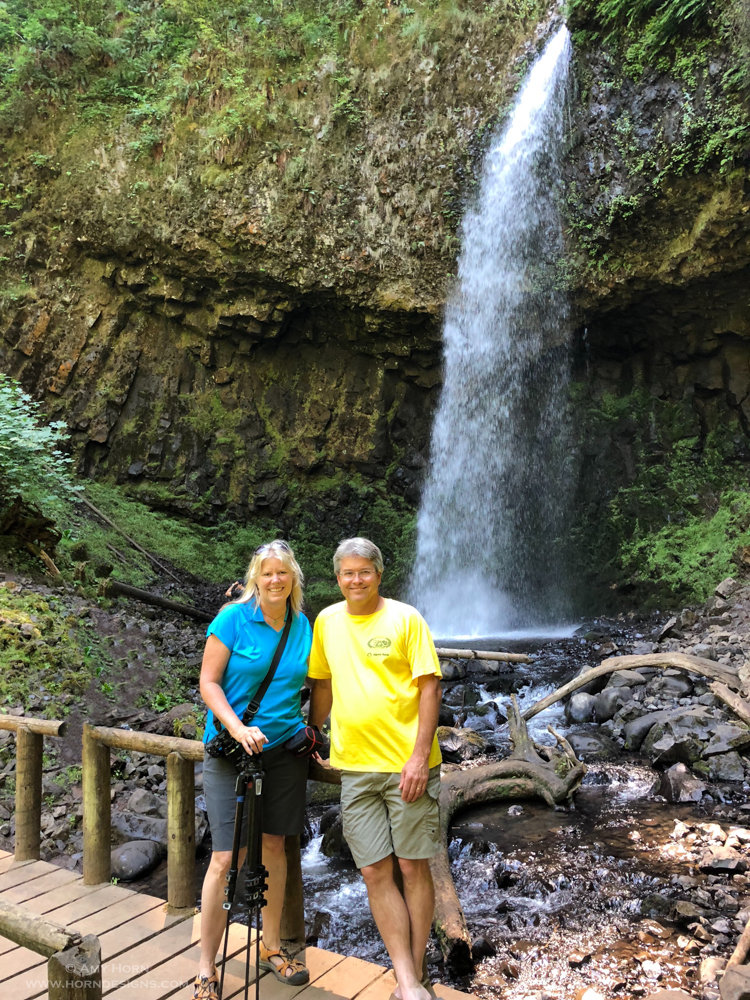
Mushrooms are everywhere in the Upper Peninsula. I see some varieties in Flagstaff, but we don’t have the same moisture as Michigan, so there are far more mushrooms and fungi everywhere. While at Wagner Falls, I spotted this mushroom. I enjoyed photographing it so much, I went back on day two to perfect my composition. Here is an image of the shooting scenario and the finished image.

Me capturing the orange mushroom. PC: John Thomas

Waterfalls of Michigan

Munising Falls. Olympus OM-D E-M1 Mark II, 12-100mm, ISO 200, f/14, 6 sec., Singh Ray Bryan Hansell Waterfall Filter

Waterfalls of Michigan

Munising Falls. Olympus OM-D E-M1 Mark II, 12-100mm, ISO 200, f/14, 5 sec., Singh Ray Bryan Hansell Waterfall Filter

Three days into my Michigan trip, I received a FedEx package from a good friend with a Waterfalls of Michigan book. A guide to more than 130 waterfalls in the Great Lake State. Of these 130 waterfalls in the Upper Peninsula of Michigan there is only one in the lower peninsula, how will I photograph them all? Well, I am sure I won’t, but I will enjoy the ones I get to. For my two weeks in Michigan, I am spending a week in the Upper Peninsula, this is new territory for me and I love it. I rented a small AirBnB apartment in Munising and have six waterfalls within five miles! Originally, this trip was designed to be with my husband but last-minute changes didn’t allow it. So, I am off solo again travelling through the state where I was born in search of water images. I selected two waterfalls a day to

Chapel Falls. Olympus OM-D E-M1 Mark II, 12-100mm, ISO 200, f/11, .8 sec., Singh-Ray Waterfall Filter

photograph.

At Munising Falls yesterday, a sweet retired man said, “You look like a professional, can you help me? When I view my photos, how do I delete one?” Not that he really needs a professional photographer to answer that question, but I helped him with that and a few more questions on his digital camera. Then, I hiked 2.5 miles round trip to Chapel Falls. I think I stopped every 50 yards to photograph all forms of fungi. My macro lens got a great workout. Even other hikers stopped me and said, “I saw you photographing fungi on the way to the falls. Did you see these yellow mushrooms?” Michiganders are such nice people! He directed me to the yellow mushrooms and I spent 30-minutes capturing images with my tripod up as low to the ground as possible.

Yellow Mushroom. Olympus OM-D E-M1 Mark II, 60mm, ISO 200, f/2.8, 1/3 sec.

Today I drove to Wagner Falls, two miles from my apartment. There was one car when I arrived and they left soon thereafter. I scooted under the deck to get a few images from the rivers edge as well. Although it was raining, it is more on the misty spectrum than pouring; much preferred for photography. Tomorrow, I start a meetup through Olympus Mirrorless Adventures and we will photograph six more waterfalls in the area. I can’t wait!

iPhone capture of my setup.

For the Photogs:

So, what does it take to capture a “milky water” waterfall photo? Here are a few pointers:

  1. Do your research. Find out the direction the waterfall faces. If it is in direct sunlight, go early or late in the day so the sun won’t be on the waterfall. In Northern Michigan, the sky is graced with clouds frequently, so sun is not an issue.

    Chapel Falls. Olympus OM-D E-M1 Mark II, 12-100mm, ISO 200, f/6.3, 1 sec., Singh-Ray Waterfall Filter.

  2. Gear. In addition to your camera and len(s), don’t forget a tripod. The milky water is captured by using slow shutter speeds and a sturdy tripod is a must. Last, bring a circular polarizing filter and neutral density filter or get a Singh-Ray Bryan Hansel Waterfall Polarizer (combines polarization with neutral density in one filter).
  3. Try all angles. Some waterfalls have viewing decks, others are best viewed at the river’s edge. Regardless, look at all the angles. When I went to Munising Falls, there was the main accessible path then two paths that branched off. The path to the left stepped up 30 stairs and only 1/3 of the viewers when up to see that angle. The path to the right stepped up 100 stairs and had the best view of all! I had this view to myself for a long time, most visitors did not climb these stairs. Be careful if you are on a viewing deck any foot traffic on the deck will result in vibrations that move your camera.
  4. Take your time. When other visitors are at waterfalls also, I make a point of setting up my camera, tripod and filters in the background. When the crowd thins down, I step forward, reframe my shot and capture several images at different focal lengths and different orientations (horizontal & vertical). Then I step back again and review. I make sure all the other visitors have a chance at a good image too. I often take a moment and think to myself on what else I can do to make a better image. Then do that something different. I just keep shooting. That is the advantage of travelling alone.

Columbia River Gorge

Tamanawas Falls

Tamanawas Falls. Olympus OM-D EM-1 Mark II, 12-100 mm, ISO 200, f/9 @ .6 sec., Bryan Hansel ND/CPL filter.

Columbia River Gorge

Teardrop blocks

Teardrop blocks

It doesn’t seem possible, but I am at the halfway point of my solo journey. Rod flew into Portland, so I drove inland and we spent four days in the Columbia River Gorge. Hauling the teardrop through the Portland Airport worked better than I expected and when we made it to the campground, I was anxious to show Rod how well I setup camp. Of course, this campsite was VERY unlevel so I enlisted his help to use the risers that were unused so far. Rod showed me the trailer had feet stabilizers on the back end too. Hmm… I did fine without them so far, I will probably continue without them.

Art of Macro Photography book

Amy and the book sample

With camp settled we drove 30 miles to Hood River to meet a friend and fellow photog, Sharon, who graciously accepted delivery of the final bound pages of our Macro Book. The printer overnighted (from China) two sample books for us to confirm the page order. Mail is not easy to receive when on the road, so Sharon agreed to sign for it and we met her in town to get the box. Book looks great and is in binding now ready to put on a boat August 7th. Our mid-September distribution is still on target. If you want to reserve your autographed copy for the first shipment, order it here: https://www.horndesigns.com/Books

Waterfall Alley…or Not

Tamanawas Falls trail

Cold Creek. Olympus OM-D EM-1 Mark II, 12-100 mm, ISO 200, f11 @ 4 sec., CPL filter.

What should have been waterfall alley, wasn’t.  Don’t get me wrong, we found many waterfalls, but since the Eagle fire last summer, most of the gorge is off limits. Including 2 feet outside our campground. We had to pass security every time we drove to our campsite. I know it was for safety, but this communication was lacking on the website or I would have booked a different campsite.

Our first morning in the Gorge, we drove an hour to Tamanawas Falls near Mt Hood, Oregon to capture images before the sun beat down on the creek and waterfall. The two-mile hike was beautiful and we stopped several times on our way to the falls. At the second stop along the creek, I realized I forgot something.

Rod and Amy by waterfall

Rod and Amy in front of Latourell Falls

Luckily, Rod was up for a run and he ran back to the car to get my new filter adding an extra 1.5-2 miles to his hike. In the past few weeks, I discovered the Bryan Hansel Waterfall Polarizer filter by Singh-Ray Filters. It shipped to the house and Rod brought it but I forgot to put it in my camera bag that morning. This filter combines a polarizer and a solid ND filter giving 3 to 5 stops of neutral density with a polarizing benefit too. I love it. We stopped many times on the two-mile trail capturing images along the way. When we arrived at the falls, there were only 3 other people there so capturing images was pleasant. I enjoy having a nimble non-photographer with me (Rod) because he helps me get to places I might not carry my gear by myself. When we headed out, the crowds came. It really pays off to wake up early for the best light and avoid people in your landscape image. We had a lovely dinner in White Salmon at Sharon’s house with wood fired pizza and wine. It was great swapping stories with her and Steve and enjoyed their beautiful view.

Crown Point State Scenic Corridor in the Gorge was open to vehicles, so we spent a day checking out those waterfalls and short hikes. I didn’t worry about getting images, just enjoyed my time with Rod. After all our hiking, we had lunch at White House Gorge Winery where Rod sampled ciders and I sampled wines. Very relaxing, but hot with temperatures in the mid 90’s.

Starvation Creek falls

Starvation Creek Falls. Olympus OM-D EM-1 Mark II, 12-100 mm, ISO 200, f/10 @ 1 sec., Bryan Hansel ND/CPL filter.

Umbrella Creek Falls

Umbrella Falls. Olympus OM-D EM-1 Mark II, 12-100 mm, ISO 400, f14 @ .4 sec., Bryan Hansel Filter

We spent another day hiking around Umbrella falls and Starvation Creek Falls. We thought we were hiking 2 miles to Umbrella Falls, but somehow, it was only .25 miles which gave us plenty of time to view both. Umbrella falls were very exposed to sunlight, so I concentrated on small trickles of water instead of the big falls. Starvation Creek was a great location: large falls, small falls and most of it in the shade. Of course, I am still waiting to see if the poison oak I brushed against breaks out on my skin! I could spend more time in the gorge capturing images of waterfalls, but I would prefer to go in the spring when it isn’t so hot.

Margaritas & Ukuleles

Rod with his ukelele

Rod on our last night

Rod brought his ukulele so each evening, we had a ukulele jam session! During the past weeks, I would practice during the day after my camping neighbors checked out and less people were around. But with Rod, it was more fun and I wasn’t so worried about what the neighbors thought (probably because he plays much better than me!) We ate Tillamook cheese, local smoked salmon and drank 24oz margarita cans! It doesn’t get much better than that. Although I am enjoying my solo trip, it is much more fun sharing it with others. Before he flew out, we spent the day in Portland at the Japanese Gardens and Powell’s Bookstore. Now, back to the ocean!

For the Photogs!

When photographing waterfalls, keep the lens cap handy and a dry lens cloth. In between shots, wipe the lens and put the cover back on to minimize spray.

If you are curious about the difference in what filters can do for a waterfall image, here are four examples. I kept the aperture and ISO the same in each photo, notice the difference in shutter speeds and the reflection on the leaves.

Gorge Filter Samples