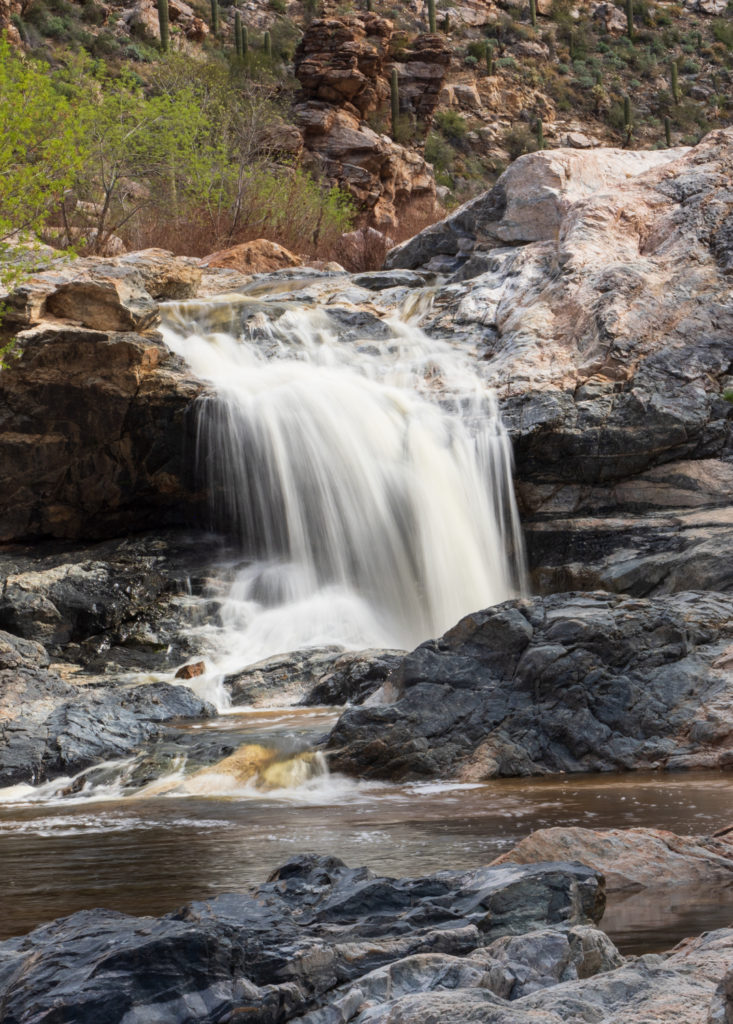
My college years were spent in Tucson studying at the UofA. Now, many years later I returned for 1.5 weeks to take a workshop, teach a workshop and enjoy all Tucson has to offer. Now, I’m a hiker so I discovered many new places one of them being Tanque Verde Falls. Fortunately, another workshop attendee and local Tucsonan joined me for the morning. After a short hike and scrambling over boulders we arrived at the lower falls. Luckily, clouds were intermittent providing softer and more even light. We ran short on time, so we didn’t scramble to the upper falls but it sure was great scouting a new location. Notice in the images below the difference of cloud cover versus direct sunlight?
Tanque Verde Falls in cloud cover. Olympus OM-D EM-1 Mark II, 12-100mm, f/16, .5 sec, ISO 200, Singh-Ray Waterfall Polarizer.
Tanque Verde Falls in sunlight. Olympus OM-D EM-1 Mark II, 12-100mm, f/16, 1/4sec, ISO 200, Singh-Ray Waterfall Polarizer.
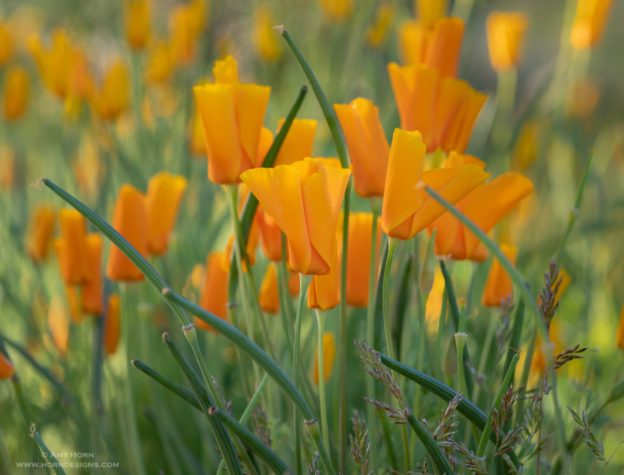
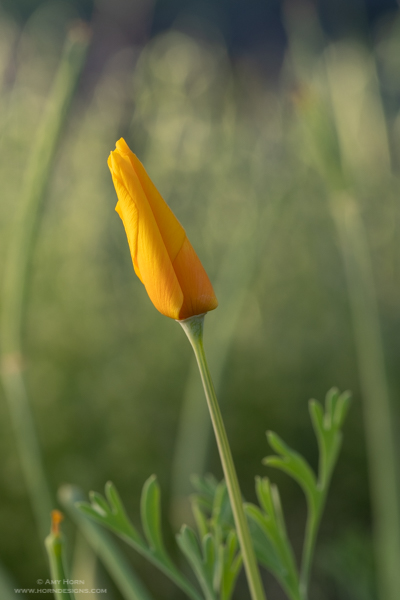
It is an amazing wildflower season in Arizona this spring. These five tips will improve your success in capturing macro wildflower images.
Light. Great photos have great light. Arrive at your destination before the sun comes up to catch the soft light. Scout the day before so you know where the great flowers are located otherwise you might miss the great light.
Tripod & shutter release. Use a tripod and shutter release to avoid camera shake. Macro photography requires sharp focus and the slightest movement from no tripod or pressing the shutter can result in a blurred image. If you don’t have a shutter release, place the camera on a 2-second timer to avoid touching the camera during the exposure.
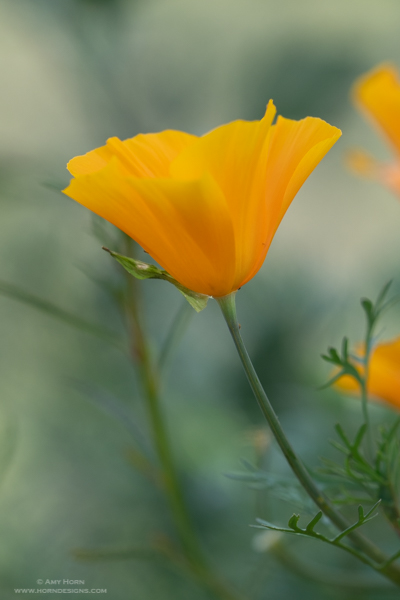
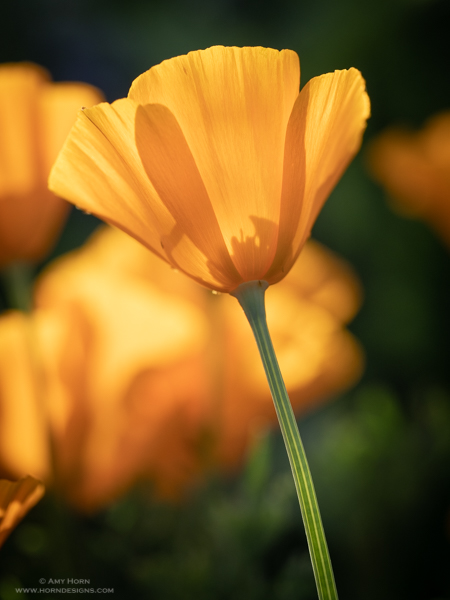
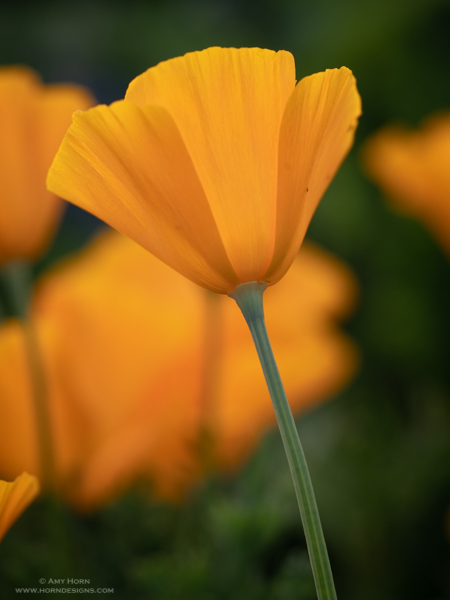
Blur the background. Open your aperture as much as your lens will allow (f/2.8 – f/5.6) to blur the background. Long focal length lenses (100+mm) have a similar effect. If you don’t own a macro lens then use the longest focal length lens you own and capture a “close-up” image. See the samples below.
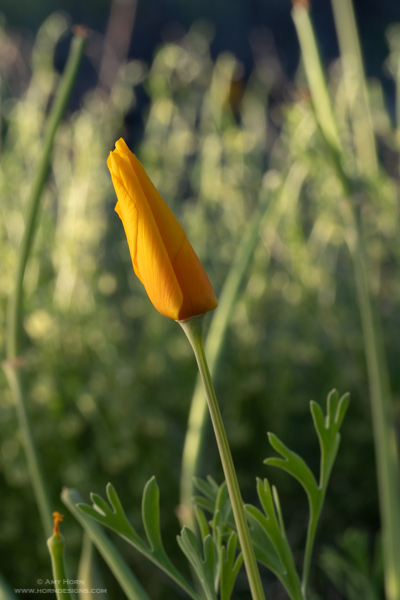
Diffuse the light. So, you like to sleep in and won’t photograph flowers until daylight. Then, take a diffuser or scrim (basically a sheet on a frame). Place the diffusion material between the sun and the flower to soften the light. See the samples below.
Have fun. If all this is too much for you, then go straight to step 5! After all, it is about being out in nature and having fun.
Captured with Olympus OM-D EM-1 Mark II, 40-150mm lens, f/3.5, 1/100 sec, ISO 200. This lens is equivalent to a 300mm on a full frame camera. Captured in shade.
Notice the distracting background from using aperture f/10
Notice the blurred background from using aperture f/4.5
Not diffused
Diffused
I hope you make use of these macro wildflower tips and enjoy this amazing season! It will be gone before we know it.
The first two images were used to create the composite on the right.
Photoshop is not for every image, but I like to use it for
compositing and making an impact. I decided to create a composite to celebrate
Valentine’s Day. Using my Cognisys StopShot Water Drip Kit, I captured several
drops and drop collisions. After reviewing the images, I noticed two that if
combined would make a fun composite. Since, viewers commented that it looks
like the character, “Tigger”.
Layers
Setting the camera on a tripod (a must with water drop collisions)
gave me several almost identical images, the only difference was in the actual
drops. To create the composite, I would need to utilized layers in Photoshop.
The “Tigger” image was my base image. Then I selected the “tail” from the second
image and brought the tail layer over to my base. Once the “tail” was in place,
I added a mask to erase the part I didn’t need to create a believable Tigger
tail. The final composite included two images and you may notice that I also
erased a few of the extra water drops. The spot healing brush is an easy tool
and blended the area nicely. This took me less than thirty minutes and I have fun
creating it.
Transform Tool
Original Water Drop
Transformed Heart Drop
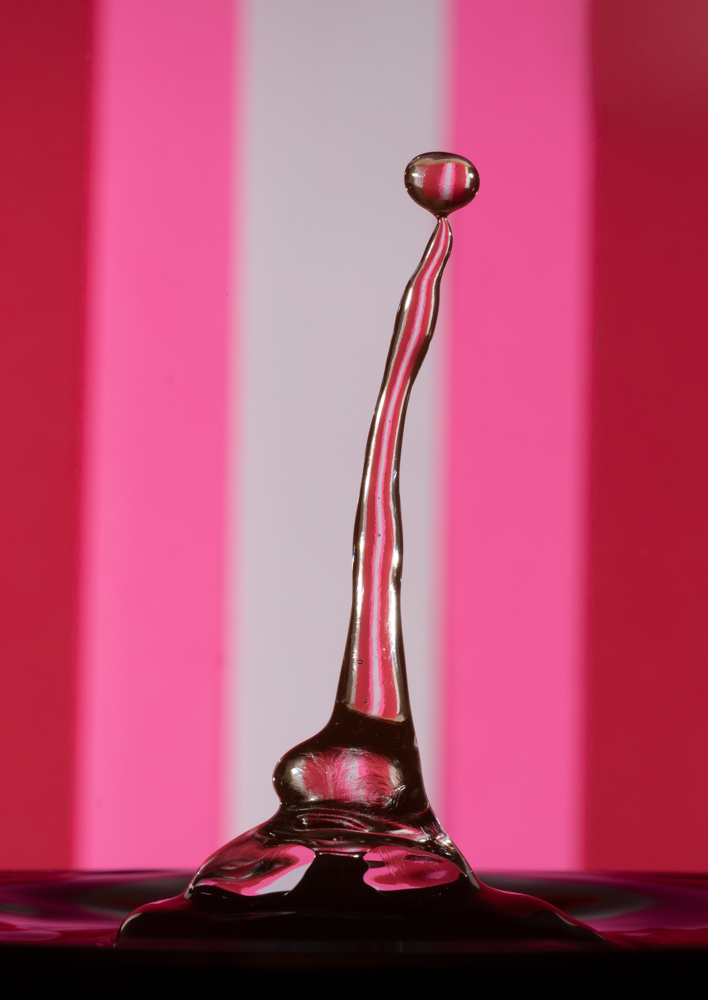
On the next image, I envisioned a drop in the shape of a
heart. Well, that would never happen naturally, so I used Photoshop’s transform
Tool to create the heart. First step was to cutout the heart onto its own
layer. Then use transform (Ctrl +T, Cmd +T) to select it. With the transform
tool active, a right click will offer additional transforming options and I
chose warp. After dragging the sizing handles around, I designed a heart. The
last step was to blend this with the original drop. Again, I added a mask to
erase the top portion of the original drop and positioned the new heart shape
to blend properly.
Photoshop isn’t for everyone or every image, but it is fun
to use!