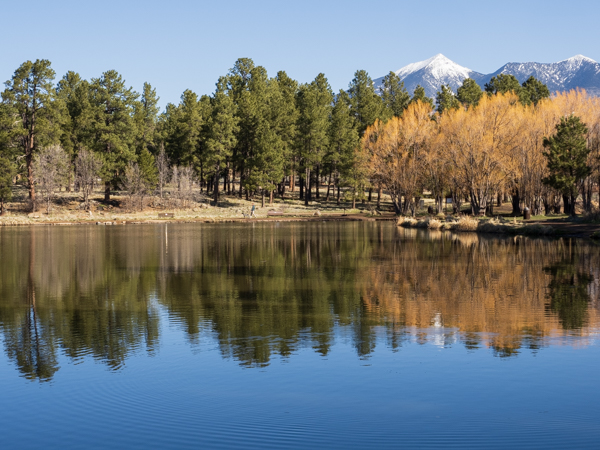
Francis Short Pond with the San Francisco Peaks in the background. Olympus OMD1 MIII, 31mm, 1/160 sec, F/10, ISO 200
Our son, Austin adopted a dog last month. Ryder (dog) is a
great addition to our home and we walked him day and night for the first few
weeks. Most of these walks were to Francis Short Pond, a ½ mile from our house
and easy to maintain social distancing. Here are several photos from these
walks.
An early Flagstaff morning in March with a thin layer of ice on Francis Short Pond. Olympus OMD1 MIII, 150mm, 1/3200 sec, F/2.8, ISO 200
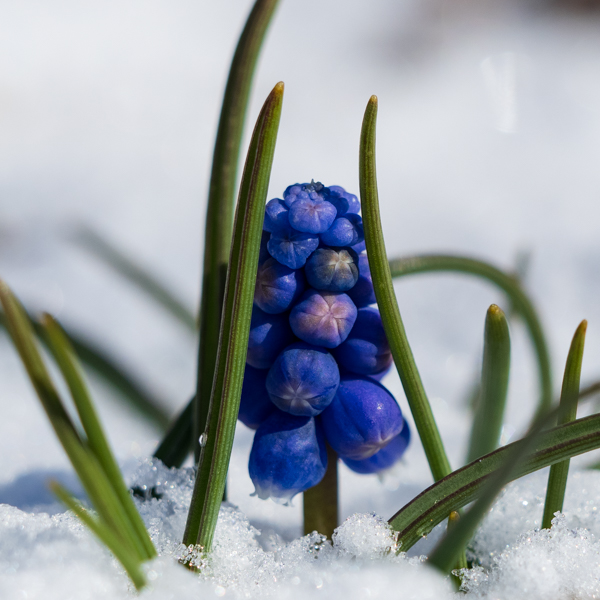
Blue grape hyacinth poking through the fresh snow. Olympus OMD1 MIII, 150mm, 1/2000 sec, F/4, ISO 200
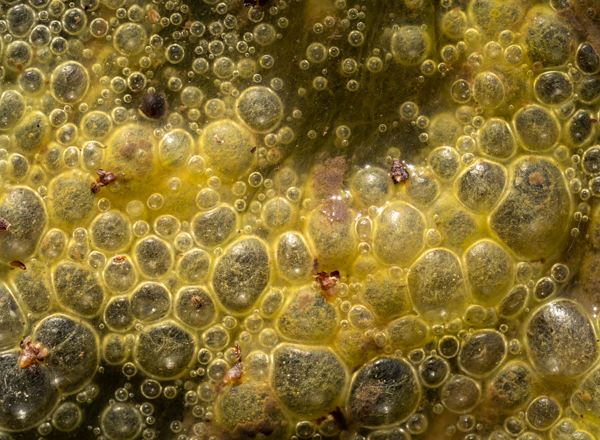
Algae. Olympus OMD1 MIII, 60mm, 1/40 sec, F/6.3, ISO 200
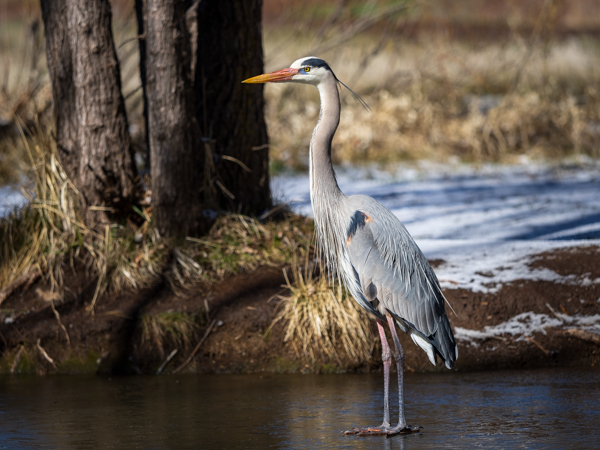
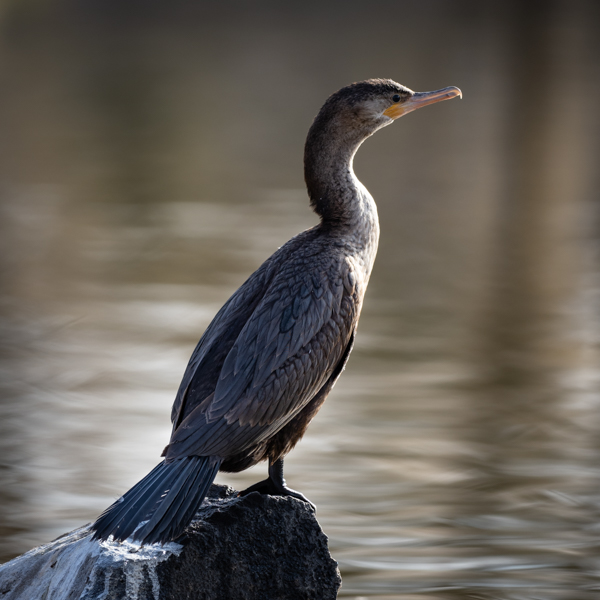
Cormorant at Francis Short Pond. Olympus OMD1 MIII, 300mm, 1/640 sec, F/4, ISO 200
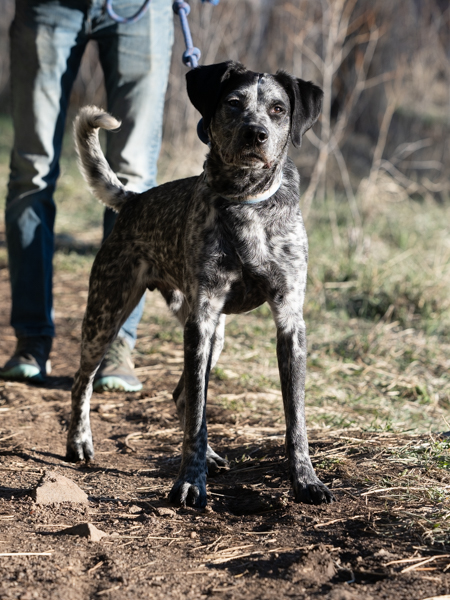
Ryder on his daily walk. Olympus OMD1 MIII, 95mm, 1/500 sec, F/4, ISO 200
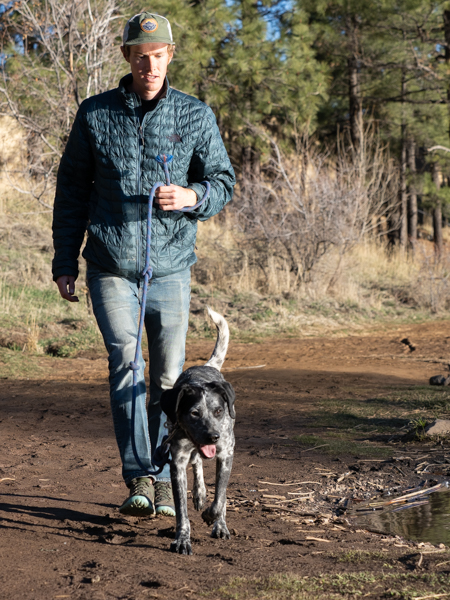
Austin walking his dog, Ryder. Olympus OMD1 MIII, 46mm, 1/640 sec, F/4, ISO 200
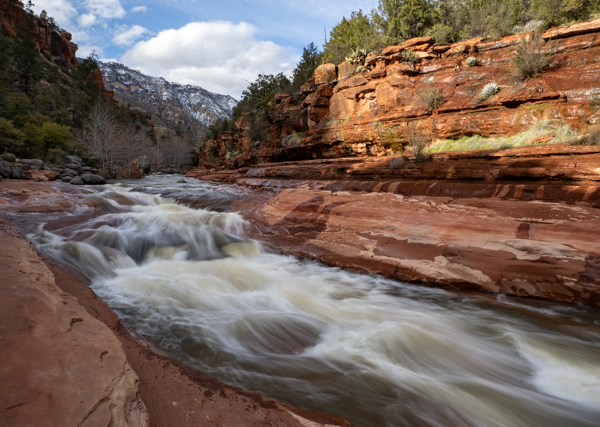
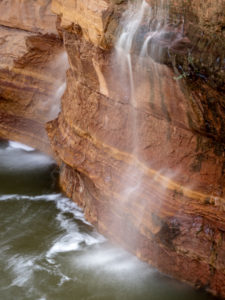
Spring Break started with the announcement of a pandemic and the cancellation of, well, everything. What was a week of photography, workshops, and relaxation became stressful, instantly. My husband saw my stress and suggested a road trip through Oak Creek Canyon to Slide Rock State Park. Water in nature always calms me and the brisk March afternoon meant we had the place to ourselves.
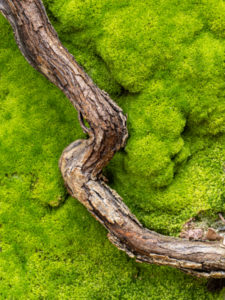
We hiked down to the creek noticing a waterfall we didn’t remember on our last visit in October. Since it was a cloudy afternoon, I used the Singh-Ray Bryan Hansel Waterfall Polarizer to blur the water. Next, we found moss under the bridge too. The contrasting textures from the exposed tree root and bright green moss drew me in. Therefore, it was time for the macro lens. After several different compositions, I used the 60 mm macro lens for a close-up image instead of capturing a 1:1 macro image.
Olympus OMD1 MII, 60mm, .6 sec, F/10, ISO 200
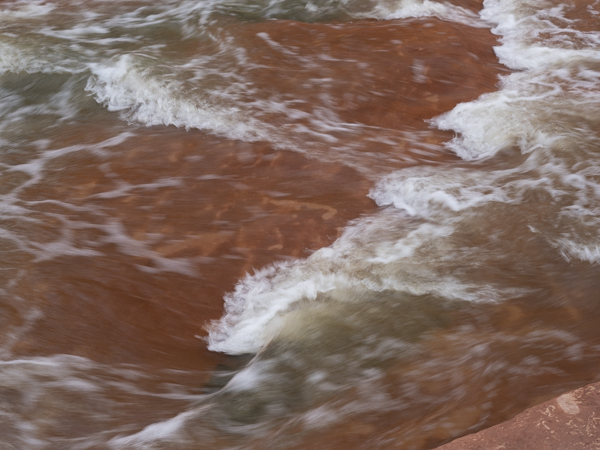
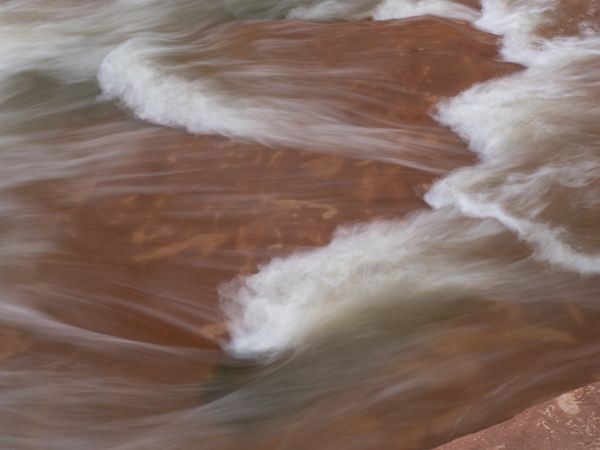
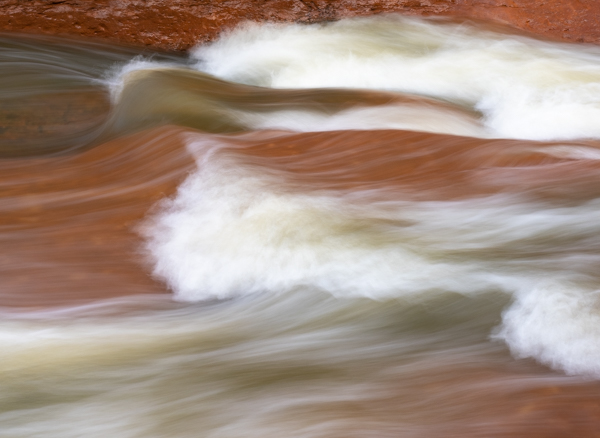
Next, we walked down the west side of the creek and I noticed the ripples in the water. When photographing patterns like these, it takes me a few attempts to find the right shutter speed. Let me take you through my process. In the images below, number one is with a shutter speed of 1/30 sec., just slow enough to look blurry. Image number two used a shutter speed of 1/3 sec. creating an abstract image about the ripples. That was what I wanted: the right shutter speed to tell my story. Lastly, I adjusted the composition. Image number three used a shutter speed of .4 sec. and the blurred water ripples lead the eye through the frame.
1) 1/30 sec.
2) 1/3 sec.
3) final image – .4 sec.
Our short trip to Slide Rock State Park was a success. I walked away with a two photos I loved and two more that I really enjoy. That’s a successful shoot to me and to think the day started out stressful.
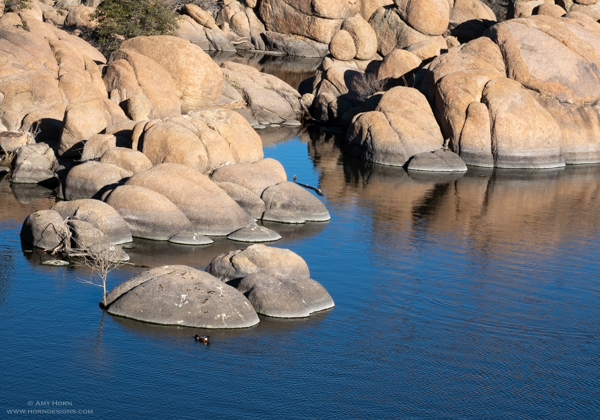
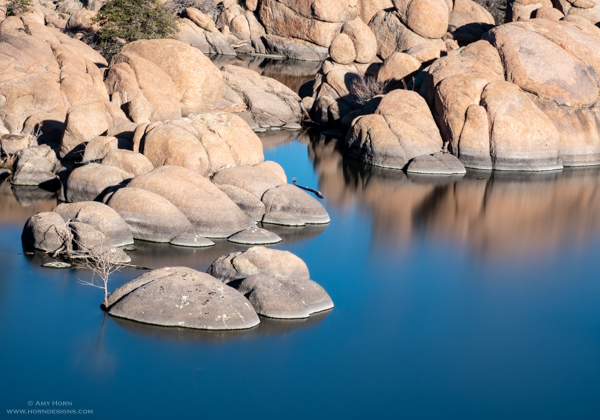
After my sabbatical studying water, I spent many days using my variable ND filter. ND filters, otherwise known as “neutral density” filters attach to the front of your lens and darken the exposure. So, on bright days, slowing the shutter to capture “milky” water is possible. My first ND filter was a variable ND filter, allowing 1-5 stops darkening. Recently, I purchased the Singh-Ray Mor-Slo ND filter with 15-stop darkening and love it. These filters do require a little practice since focusing is done before you screw on the filter. Otherwise, the learning curve is short and here are a few examples from my recent Watson Lake workshop.
Image Left: In mid-day light without any filters with exposure f/16, 1/125 sec and ISO 200. Image Right: With the same light, I put on my Singh-Ray Mor-Slo 15-stop filter with exposure f/16, 8 minutes and ISO 200.
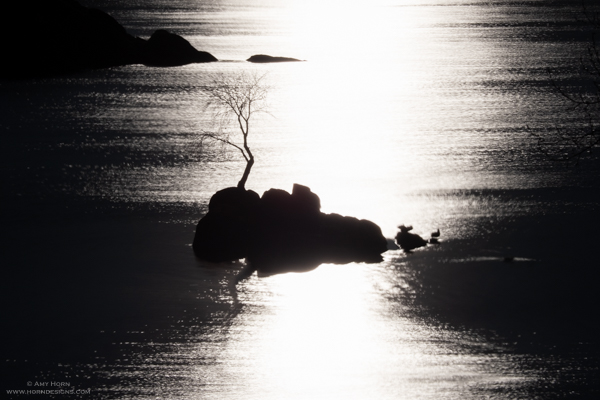
Something to try: capture images in black and white to add drama to an image. Check out these two images shooting straight into the sun.
Image Left: In morning light without any filters with exposure f/16, 1/8000 sec and ISO 200. Image Right: With the same light, I put on my Singh-Ray Mor-Slo 15-stop filter with exposure f/16, 8 seconds and ISO 200.
If you are looking for a change with your water photography, consider a neutral density filter, but most importantly, have fun. And, if you are interested in a Singh-Ray ND filter (or any filters), use code Amy10 for 10% off their filters at https://singh-ray.com/.
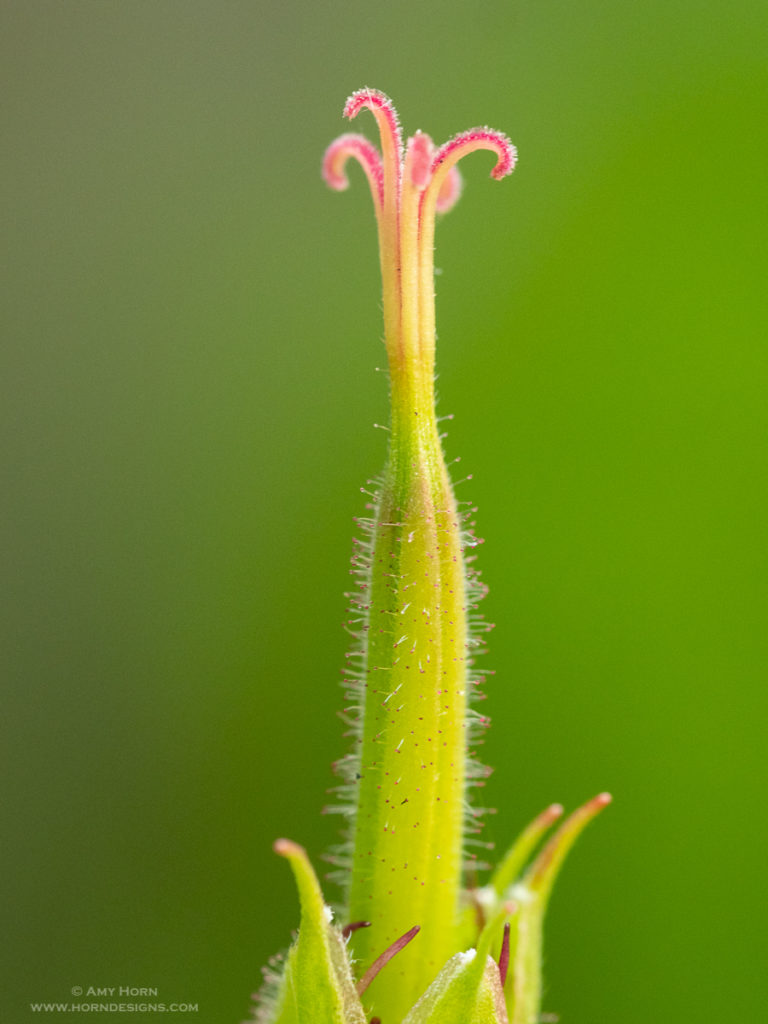
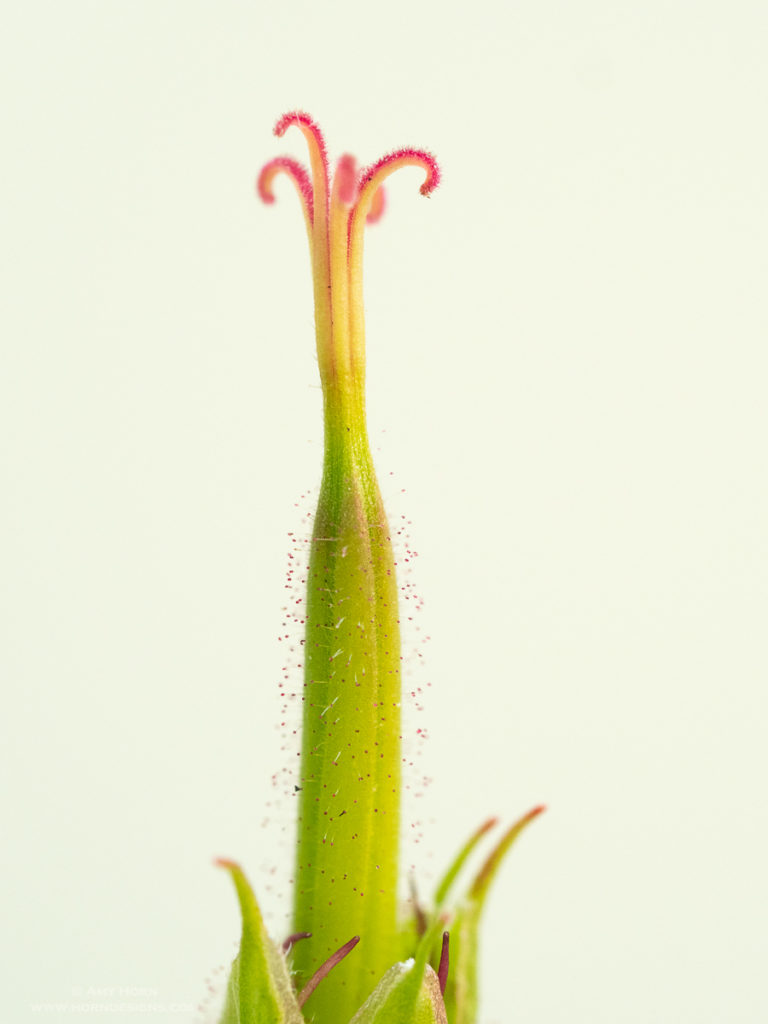
A clean background can make or break an image. While walking near a waterfall outside of Ouray, CO, I spotted a Richardson’s Geranium with buds just beginning to open. So, I set up my tripod and grabbed my macro lens. After capturing the image on the left with the natural green background, I placed my diffuser behind the bud to block the wind. Then I noticed I could capture an image with a white background as well. Both backgrounds are clean and simple, but express the buds differently.
The image on the left has noticeable backlight on the buds but the image on the right highlights the red balls on the hair of the stem. Which do you prefer? The Olympus OM-D EM-1 Mark II, 60mm macro lens and settings: Left image: f/4.5, 1/180 sec, ISO 1600. Right image: f/4.5, 1/60 sec, ISO 1600 (notice the faster shutter speed due to the white background.)
Olympus OMD1 Mark II, 60mm macro, 15-image focus stack. F/4.5, 1/80 sec, ISO 1600, Manfrotto tripod.
Olympus OMD1 Mark II, 60mm macro, 15-image focus stack. F/4.5, 1/160 sec, ISO 1600, Manfrotto tripod.
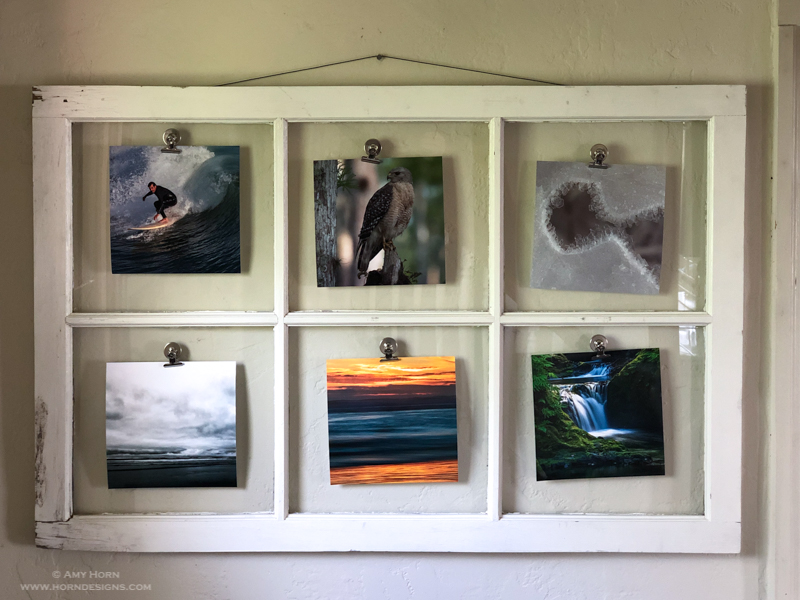
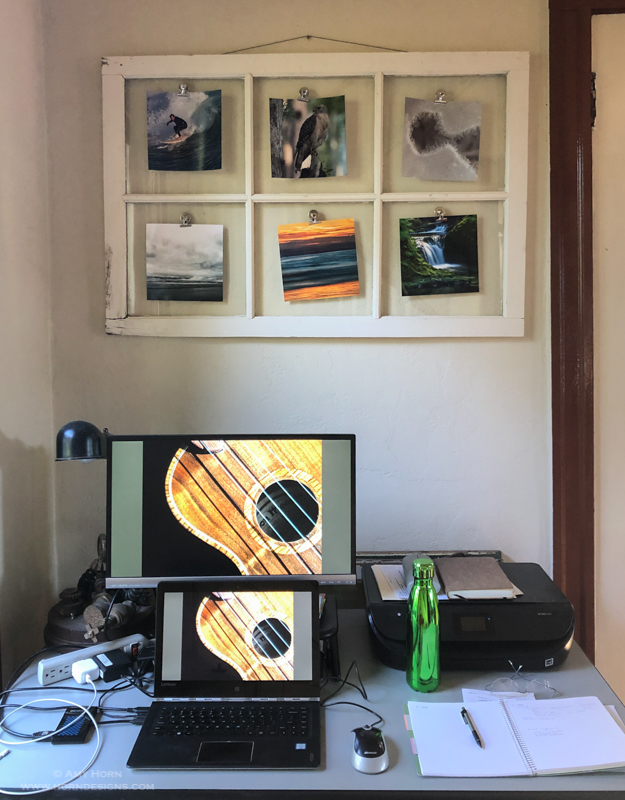
An old 6-panel window repurposed to display my photos.
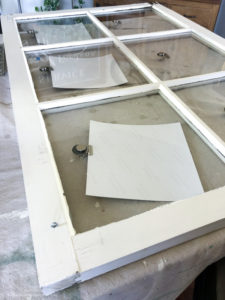
Notice the magnets on one side of the glass with the clips and images on the other.
Finding recycled or repurposed items is my kind of fun, whether I am traveling or searching on online for creative ideas. We repurpose many antiques for modern uses, so finding a use for the old windows left in our 1892 Carriage House felt natural. The windows in our Carriage House aren’t from this house, but from another old building in Flagstaff. For several months, I searched for a creative way to use these windows for my photos and found it on Pinterest. Here is the completed project.
Using a 6-panel window, I spent several hours cleaning the
glass and the frame from years of gunk. I purchased strong magnetic clips
(Staples) and Neodymium magnets (Home Depot) that would hold magnetically with the
glass in between. Since my window panels are square I printed (Walgreens) 8”x8”
images to hang in the panels. I liked the empty space around each image as opposed
to printing 10”x 10” images. My last task was to add wire to the back of the
frame and hang it. Now, above my computer workstation, I have a photo display
that is easy to change. I enjoy looking at printed photos to assess if I still
like them. So, I’m sure in a few weeks, I will try a few new photos. I also have
another window project in process…come back here for an update.
My new photo frame above my computer work station.
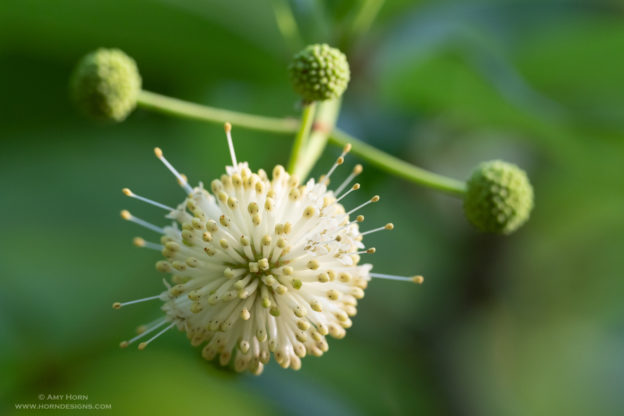
When we saw the “Corkscrew Swamp Sanctuary” on our Google search, we knew it was a must visit location. The name is almost as good as the Great Dismal Swamp (we’ve been there too!) It is located in Southwestern Florida and is known for alligators, waterfowl and other swampy visitors. We arrived shortly after they opened to capture wildlife in soft light. What we didn’t expect to see was a buttonbush shrub (Cephalanthus occidentalis). Resembling a Dr. Seuss tree, this unique bush caught our attention quickly. I used my 300mm lens (it was attached) and focused on the button closest to me. Although I had my macro lens, I really like how the buttons fill the frame from using the 300mm lens. Buttonbush plants are found from Mexico to the Artic and mostly in wetland areas.
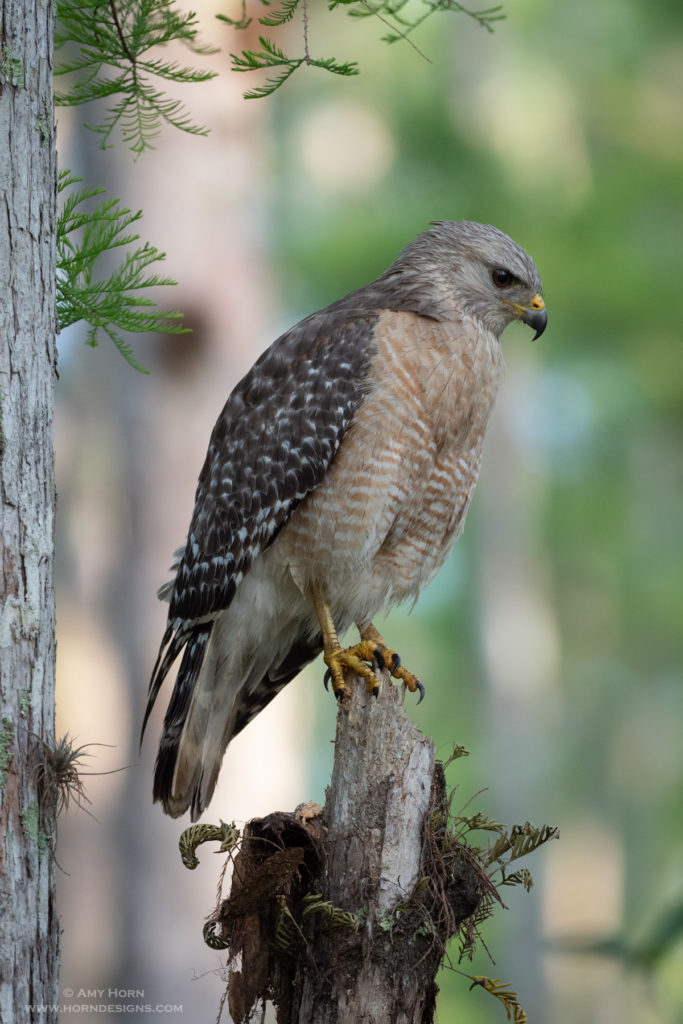
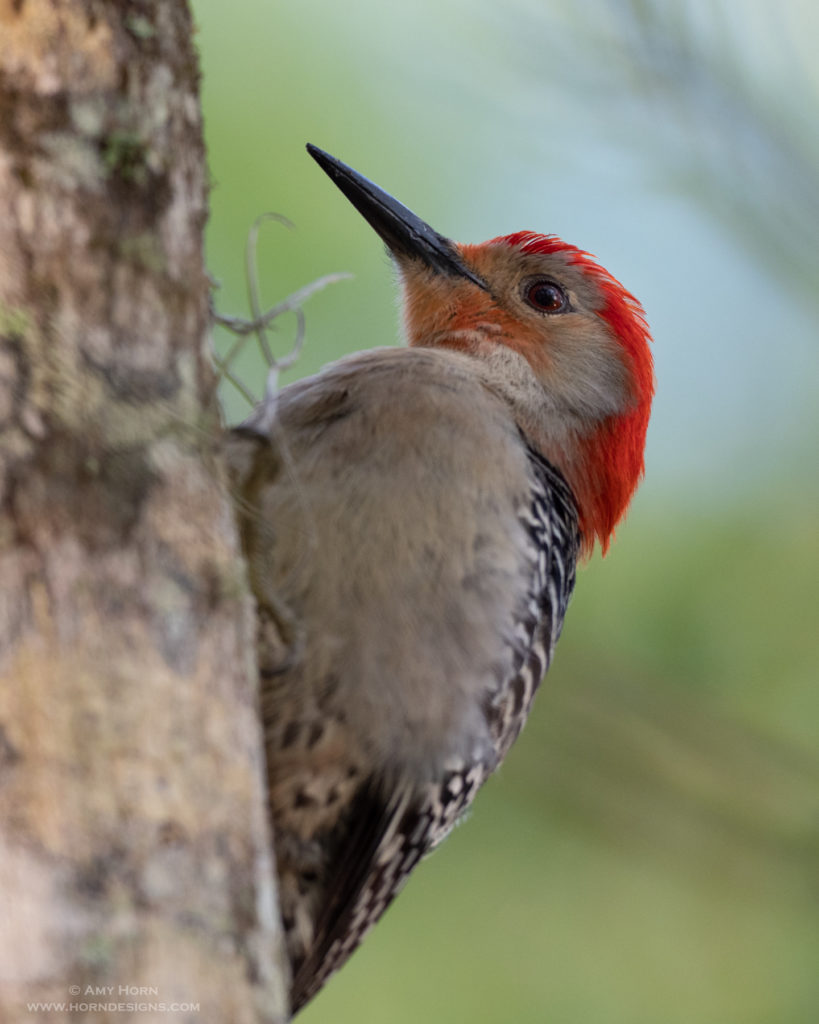
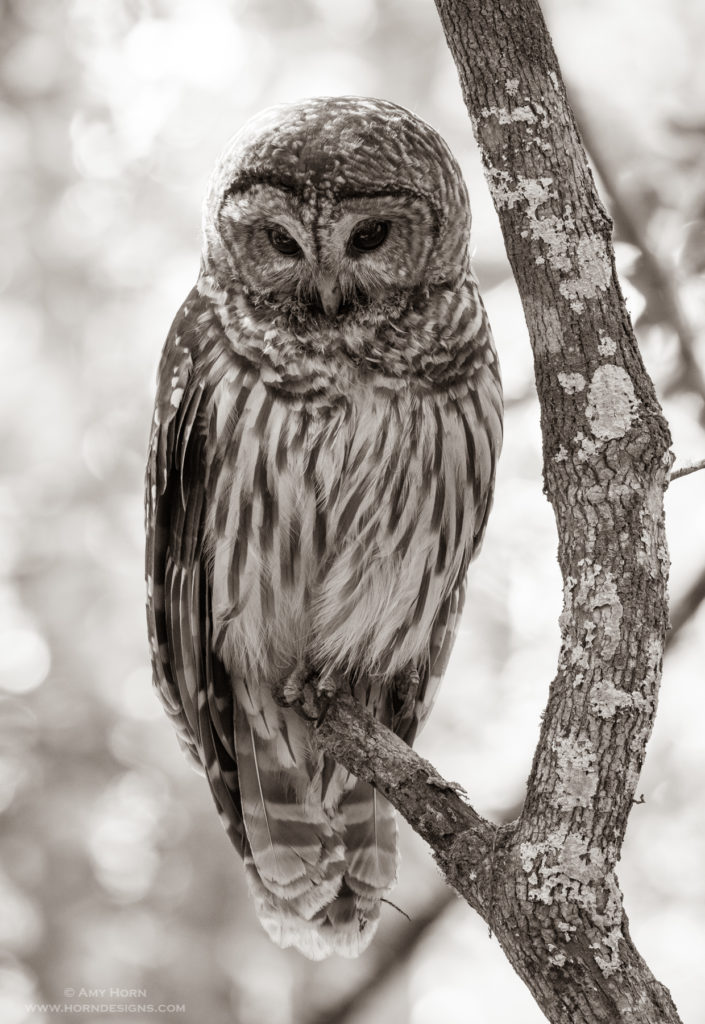
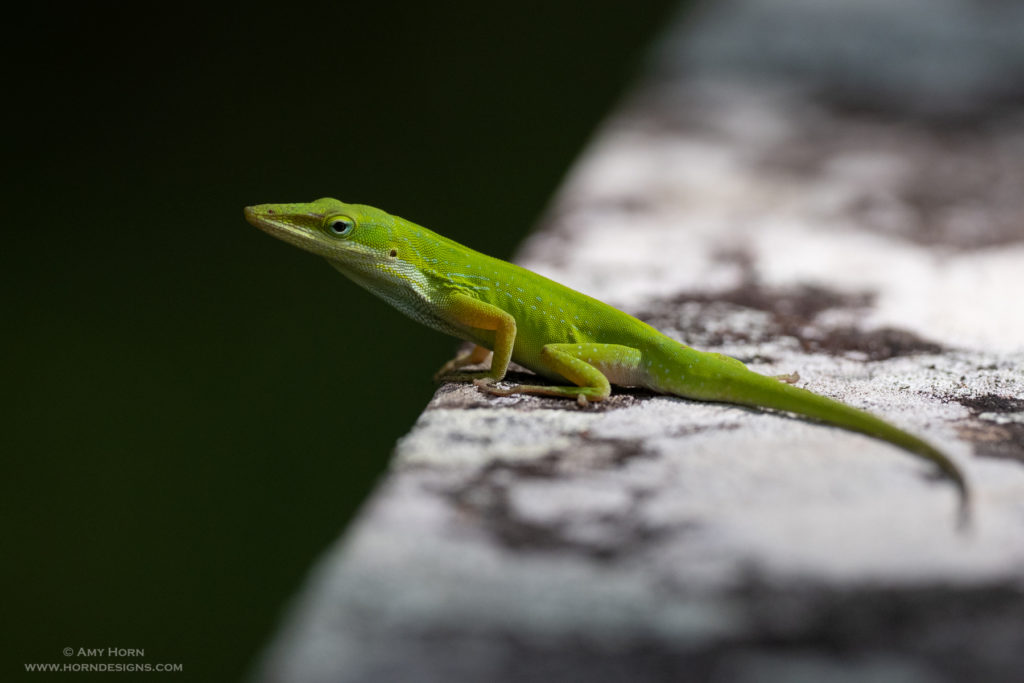
The Corkscrew Swamp Sanctuary didn’t disappoint. In addition to the buttonbush, we saw a red-shouldered hawk, barred owl, woodpeckers, and a green anole. Next time you are in Southwestern Florida stop in to the swamp!
Olympus OMD1 Mark II, 300mm, F/4, 1/400 sec, ISO 800
Olympus OMD1 Mark II, 300mm, F/4, 1/400 sec, ISO 800, tripod
Olympus OMD1 Mark II, 300mm, F/5.6, 1/80 sec, ISO 1600, tripod
Olympus OMD1 Mark II, 300mm, F/4, 1/4000 sec, ISO 800, tripod
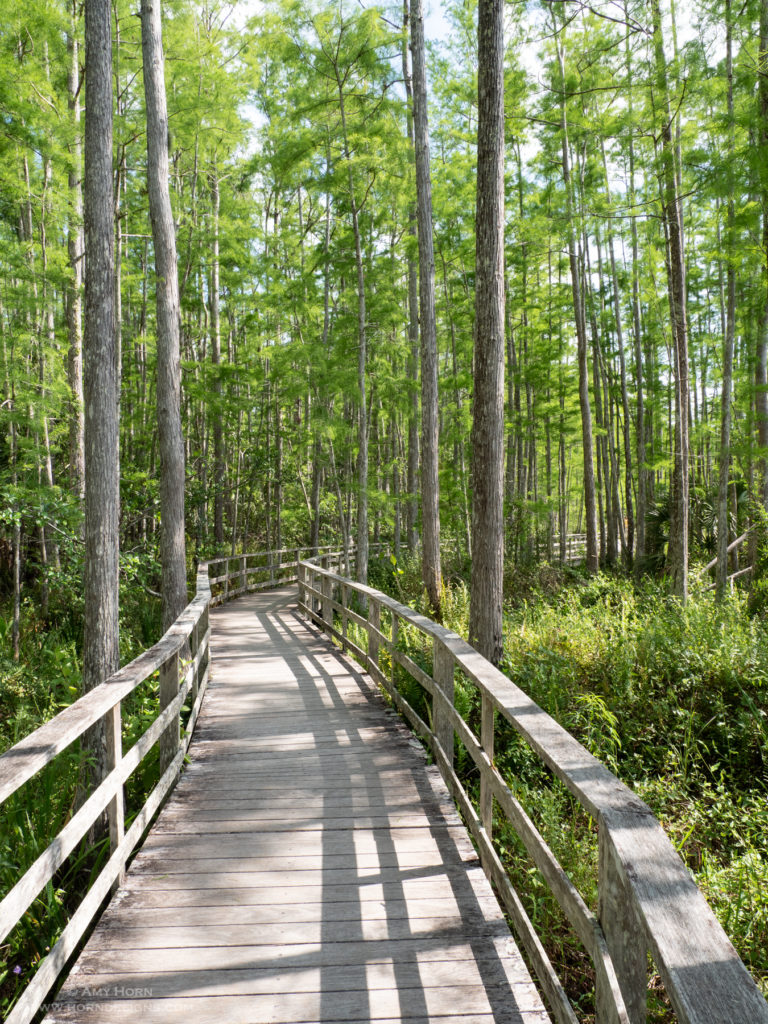
Boardwalk at Corkscrew Swamp Sanctuary
Olympus OMD1 Mark II, 300mm, F/5.6, 1/500 sec, ISO 250, tripod
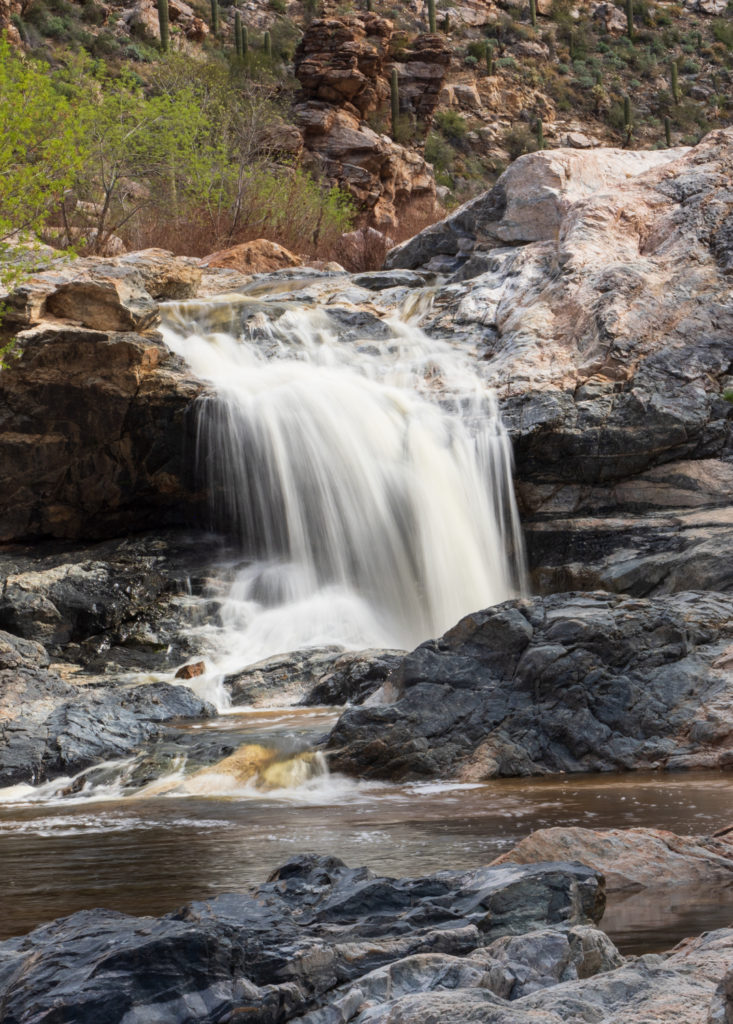
My college years were spent in Tucson studying at the UofA. Now, many years later I returned for 1.5 weeks to take a workshop, teach a workshop and enjoy all Tucson has to offer. Now, I’m a hiker so I discovered many new places one of them being Tanque Verde Falls. Fortunately, another workshop attendee and local Tucsonan joined me for the morning. After a short hike and scrambling over boulders we arrived at the lower falls. Luckily, clouds were intermittent providing softer and more even light. We ran short on time, so we didn’t scramble to the upper falls but it sure was great scouting a new location. Notice in the images below the difference of cloud cover versus direct sunlight?
Tanque Verde Falls in cloud cover. Olympus OM-D EM-1 Mark II, 12-100mm, f/16, .5 sec, ISO 200, Singh-Ray Waterfall Polarizer.
Tanque Verde Falls in sunlight. Olympus OM-D EM-1 Mark II, 12-100mm, f/16, 1/4sec, ISO 200, Singh-Ray Waterfall Polarizer.
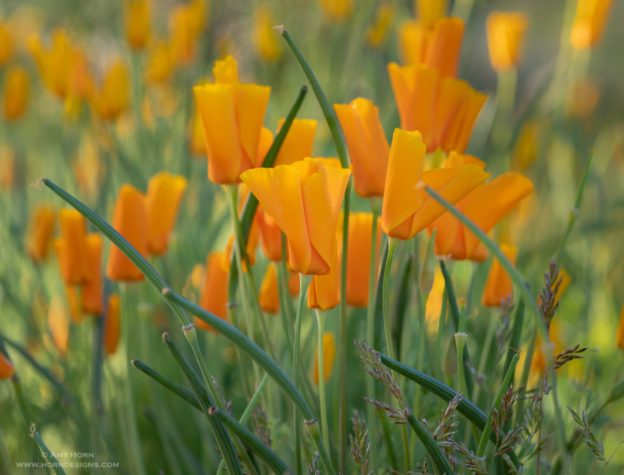
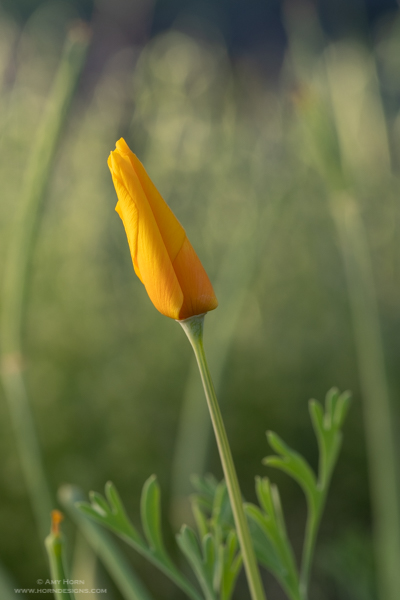
It is an amazing wildflower season in Arizona this spring. These five tips will improve your success in capturing macro wildflower images.
Light. Great photos have great light. Arrive at your destination before the sun comes up to catch the soft light. Scout the day before so you know where the great flowers are located otherwise you might miss the great light.
Tripod & shutter release. Use a tripod and shutter release to avoid camera shake. Macro photography requires sharp focus and the slightest movement from no tripod or pressing the shutter can result in a blurred image. If you don’t have a shutter release, place the camera on a 2-second timer to avoid touching the camera during the exposure.
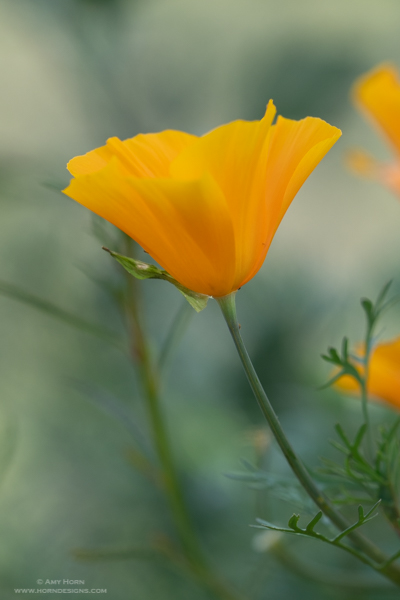
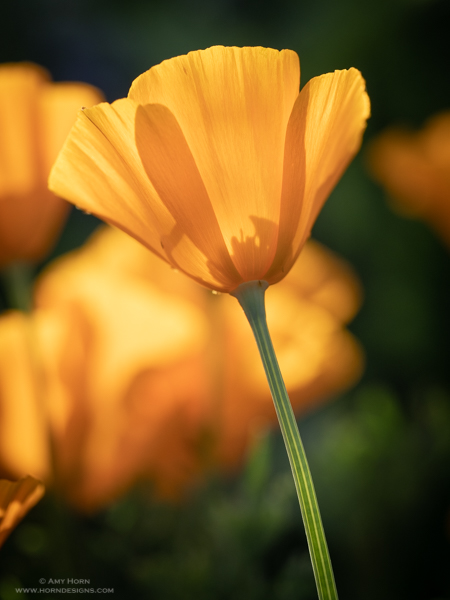
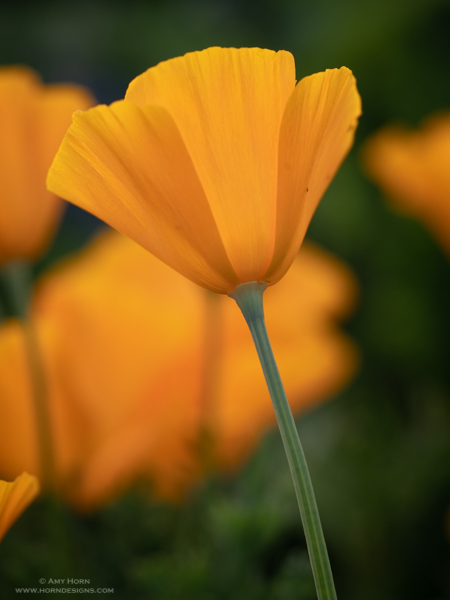
Blur the background. Open your aperture as much as your lens will allow (f/2.8 – f/5.6) to blur the background. Long focal length lenses (100+mm) have a similar effect. If you don’t own a macro lens then use the longest focal length lens you own and capture a “close-up” image. See the samples below.
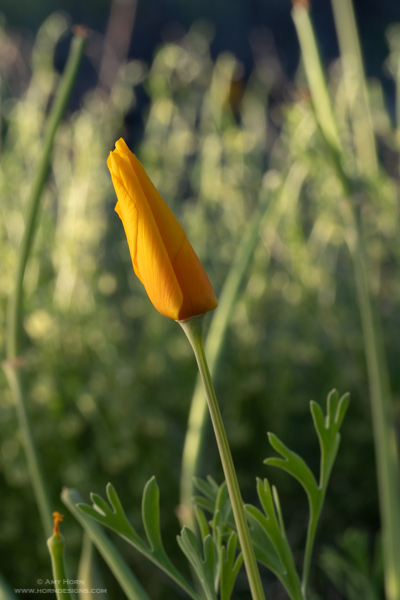
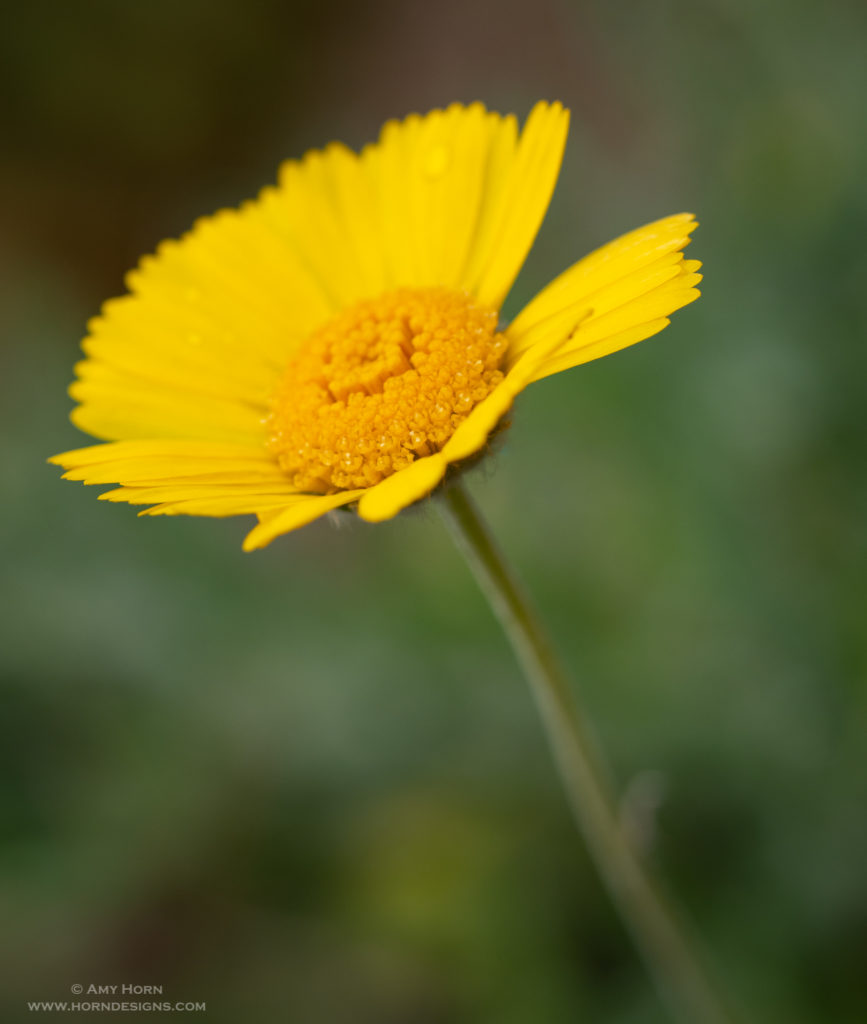
Diffuse the light. So, you like to sleep in and won’t photograph flowers until daylight. Then, take a diffuser or scrim (basically a sheet on a frame). Place the diffusion material between the sun and the flower to soften the light. See the samples below.
Have fun. If all this is too much for you, then go straight to step 5! After all, it is about being out in nature and having fun.
Captured with Olympus OM-D EM-1 Mark II, 40-150mm lens, f/3.5, 1/100 sec, ISO 200. This lens is equivalent to a 300mm on a full frame camera. Captured in shade.
Notice the distracting background from using aperture f/10
Notice the blurred background from using aperture f/4.5
Not diffused
Diffused
I hope you make use of these macro wildflower tips and enjoy this amazing season! It will be gone before we know it.
Olympus OM-D E-M1 Mark II, 60mm, ISO 200, f/3.5, 1/640 sec.
Before talking about how to keyword, I should discuss photography
workflow which is the process a photographer uses for their images from capture
to output. This includes culling, developing and posting images. Although there
are many differences from photog to photog, there are also many similarities. Many
photogs include keywording as part of their workflow, as do I. I am not always
the best at it, so I have spent the last month applying more discipline to
keywording.
Why keyword?
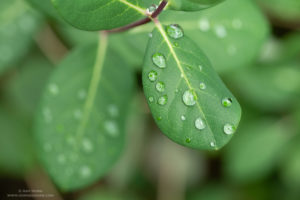
Potential keywords: leaf, raindrop, cloudy, green, etc.
When images have a keyword attached it becomes searchable.
Imagine searching your images by your child’s name, a color, location, or specific
lighting situation. If you take the time to add keywords, it is that easy. I use
Lightroom to catalog my images, so to search for a macro image, I type “macro” into
the search box and tada, all my macro photos appear. That is, if I added the keyword
to each image. If you have not been keywording, don’t fret, just start now.
Someday, you can go back and tackle past images but for now, start with today.
When to keyword?
A better question is “when not to keyword”! Don’t wait to
keyword! Adding keyworks when you download or very soon afterward helps you to
remember the details of the shoot. For
instance, I went to Boyce Thompson Arboretum in January after a rainstorm and
captured a few hundred images (many were focus stacked). When I downloaded, I
immediately added keywords that applied to all images such as: Arizona, Boyce
Thompson Arboretum, desert, raindrops, cloudy, etc. Then after culling my photos
and removing obvious images to delete, I added specific keywords such as: focus
stacking, cactus, specific plant varieties, etc. To remember the plant
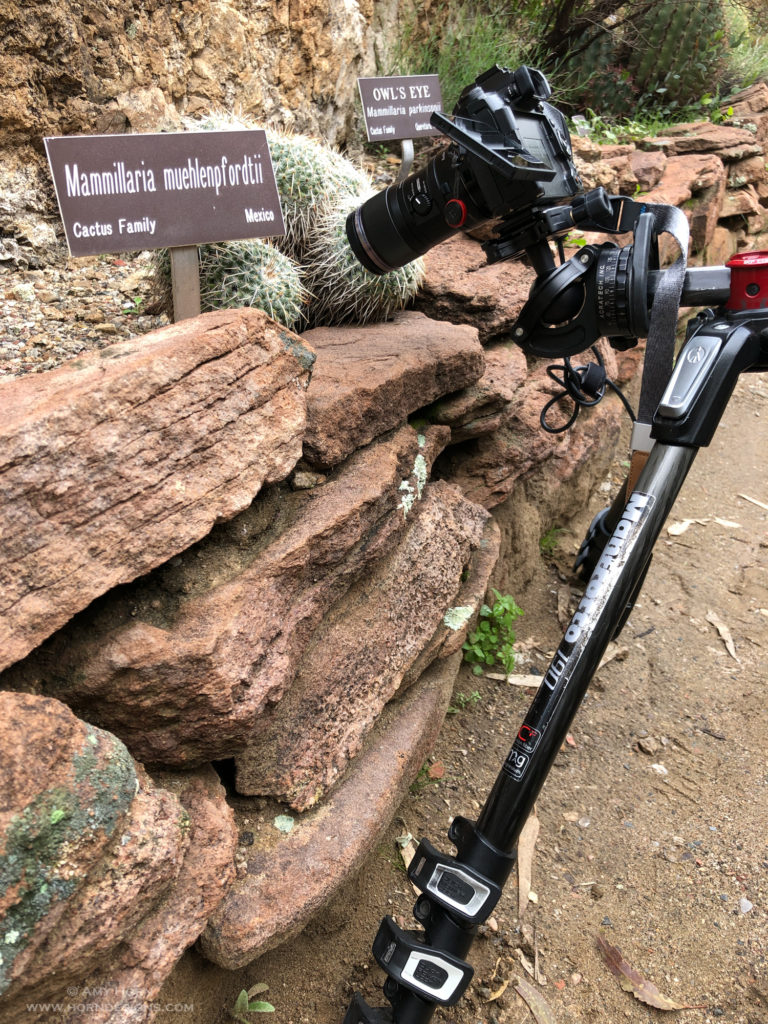
varieties, I take a reference photo on my iPhone of my setup with the plant label
so I can add the keyword later.
iPhone capture of my setup and the cactus label.
Olympus OM-D E-M1 Mark II, 60mm, 26mm extension, ISO 400, f/3.5, 1/50 sec., Olympus in-camera focus stacking.
How to keyword?
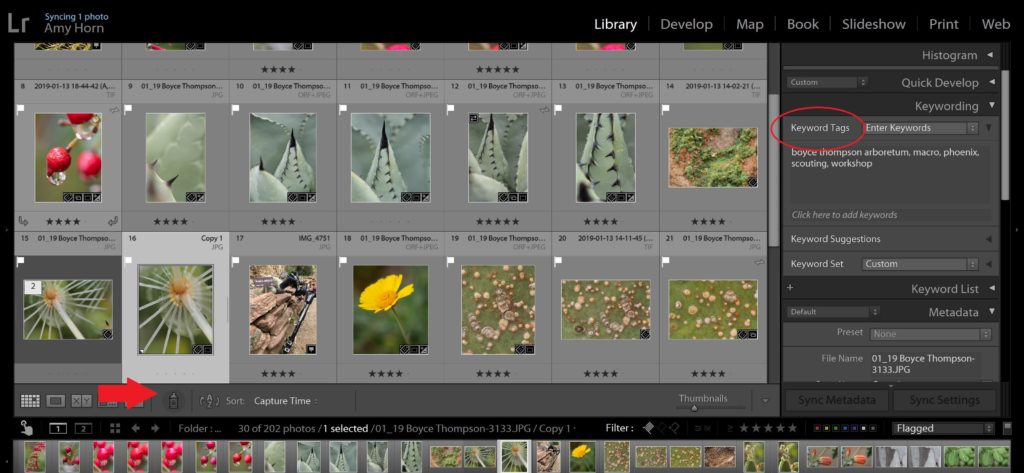
Adding keywords in Lightroom is very easy. Upon import,
scroll down the righthand bar to the keyword tab and start adding words to
describe your photos (separate with commas). Remember, these keywords will
apply to all images being imported, so start generic first. Then, to add
additional keywords once the images are imported, switch to grid view (G) and
locate the spray can on the tool bar at the bottom of the page. Once the spray
can is selected a text box becomes available to add keywords. Add several
keywords with commas in between and “spray” them on to the respective photos.
Change the keywords as needed and respray. When you are done, tap the spray can
back to its spot and you are finished.
Lightroom screen capture with spray can and keyword tags highlighted.
It really is that easy. The hardest part is taking the extra
few seconds/minutes to add the keywords. But for searching after the fact it is
a blessing in my opinion.